Planting From Seeds: A Beginner’s Guide to Timing
Match the crop to the method: sow hardy, fast growers outside, and start slower, frost-tender crops indoors several weeks before your last frost date under bright light. Get that call wrong, and seedlings turn leggy, stall in cold soil, or miss the season entirely. I use this same sequence every season in my own shelving setup with LED bars, 72-cell trays, and bottom trays in a cool basement room: pick the crop, choose indoor or outdoor sowing, then set up depth, moisture, container size, and light around that choice.
Author note: I’m Lena Hart, a home gardener and seed-starting writer for Inside Grown. I test these recommendations each spring in a small indoor seed-starting area with timed lights, open trays, and side-by-side sowings in both cell packs and small pots so I can compare legginess, moisture swing, and transplant stress under real beginner-style conditions. Where I mention frost dates, hardiness zones, sowing depth, seed storage, and light distance, I am grounding those points in USDA, NOAA, and university or Extension guidance listed in Sources at the end.
Start with the five decisions that matter most



Beginners usually reach for a calendar first. I would make five setup decisions before picking a date, because those choices decide root room, airflow, moisture, sowing depth, and light from the first day.
The main decisions are whether to sow indoors or direct sow, whether to use a tray or a larger pot, how deep to plant based on seed size, how to keep moisture in a workable range, and how to provide enough light. USDA hardiness zone and frost dates still matter, but they work better after the crop and setup match the job. That order also lines up with Extension guidance: seed method first, timing second, then management details like depth, moisture, and light.
Decision 1: indoors or direct sow
Direct sowing fits root crops and many fast growers because they dislike root disturbance or catch up quickly outside. Indoor sowing fits crops that need a longer head start, especially warm-season plants that must wait for safe transplant weather.
I make this call before I even open the packet. Carrots, radishes, beets, and many beans usually do better when sown where they will finish. Tomatoes, peppers, basil, and similar tender crops are usually better started indoors because frost can damage them, and that basic warm-season versus cool-season split is consistent with Extension seed-starting calendars and crop guides.
Decision 2: tray, cell flat, or pot
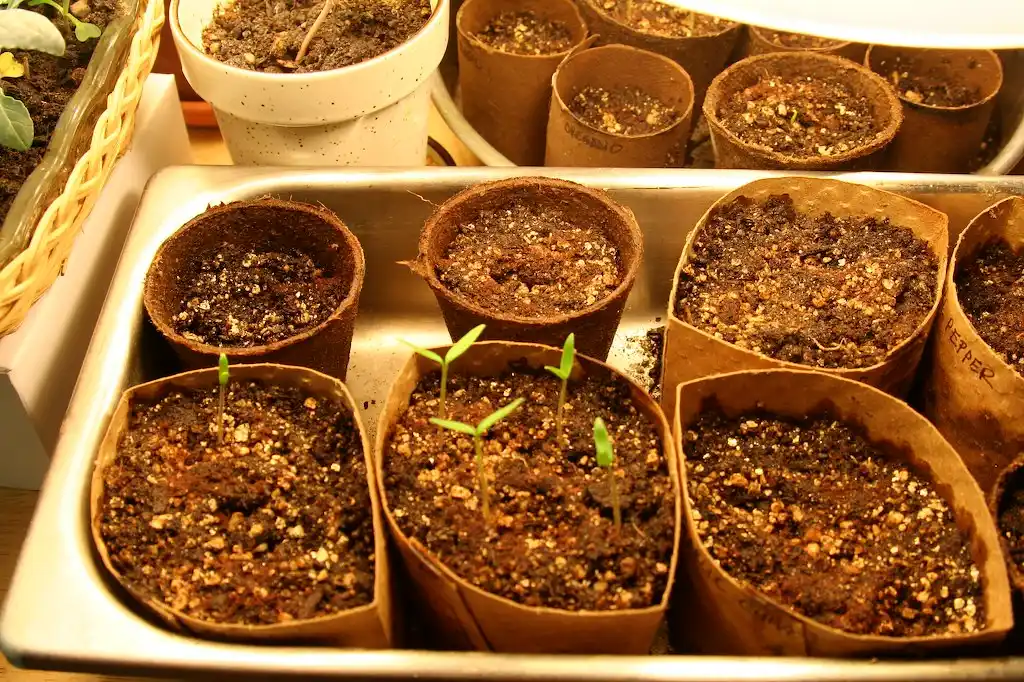
Small seeds and short indoor stays fit seed trays or cell flats. Bigger seeds, or seedlings that will stay indoors longer, often do better in a larger pot after sprouting so roots do not hit a hard stop too early.
Whatever container is used, it needs drainage. It also needs a label. I still label first, because beginners forget labels constantly, then end up guessing which flat holds lettuce and which holds basil when the first true leaves appear.
Decision 3: depth follows seed size
Large seeds need more cover than dust-like seeds. A common rule of thumb is to plant seeds at a depth of roughly two to three times their diameter, then follow the packet if it gives a crop-specific instruction. Very small seeds are often pressed onto the surface or covered only lightly. That rule is widely repeated by university and Extension seed-starting guides because it balances moisture contact with the seedling’s limited stored energy.
Sow too deep and seedlings burn energy before reaching light. Sow too shallow and the seed coat may dry out or the root may push the seedling out of the mix.
Decision 4: moisture before and after sprouting
During germination, the mix should stay evenly moist. It should never swing from bone dry to waterlogged. Seed-starting mix is meant to hold moisture without staying soggy, which is one reason it works better than heavy garden soil in trays.
After sprouting, the target changes slightly. The surface can dry a bit between waterings, but the root zone should still stay evenly moist. Constant saturation invites damping off. In my trays, the easiest way to judge this is by weight: a freshly watered flat feels heavy, while a tray that is only surface-damp but dry through the cell feels surprisingly light.
Decision 5: light strong enough to keep seedlings compact
Window light can be misleading for beginners. It looks bright to people, but in practice it often comes from one side, fades fast a few inches from the glass, and fails to keep indoor seedlings compact, so I use grow lights indoors for 14 to 16 hours daily. University of Minnesota Extension and similar university seed-starting guides recommend that general daily light range for indoor seedlings.
Keep the light close to the seedling canopy and raise it as the plants grow. If stems stretch, the light is too weak, too far away, or left on for too short a day. In my setup, most LEDs perform best when kept roughly 2 to 4 inches above the canopy unless the fixture runs hot; that is close to the spacing recommended in Extension guidance for fluorescent or LED seedling lights.
How do I start planting from seeds as a beginner?
Start by choosing the crop, then decide whether it belongs indoors or outside. Use the packet for sowing method and days to maturity, check whether older seed is still likely to germinate, and build the setup around moisture, depth, container size, and light instead of relying on the calendar alone.
Read the packet for method first, not date first
Seed packets usually tell beginners three things that matter right away: whether to direct sow or transplant, how deep to sow, and how long the crop needs to mature. I read those lines before I look at any calendar, because a zone chart alone will not tell you that carrots should stay in the bed or that basil needs indoor heat first.
Days to maturity matter later too. For fall crops, count backward from the first fall frost date to see whether there is enough season left. For warm-season crops such as tomatoes, that count-back matters because they need sustained warm weather to grow, flower, and ripen well, not just a frost-free date on paper.
Check seed viability before filling trays
Seed viability drops with age, heat, and humidity. An old packet stored in a hot shed may sprout sparsely even if the sowing depth was perfect. A newer packet stored cool and dry is a safer beginner choice. USDA and university seed-storage guidance consistently point to cool, dry storage as the simplest way to preserve germination.
For older seed, sow a bit more thickly than usual or test a small sample first. If only a few sprout, the problem may be age rather than timing.
Use a simple beginner workflow
- Read the packet for sowing method, depth, and days to maturity.
- Decide indoor start or direct sow based on crop type.
- Fill containers with seed-starting mix, not garden soil.
- Label before sowing.
- Sow at the right depth for seed size.
- Water the mix evenly so it is moist but not soggy.
- Place under grow lights if starting indoors.
- Thin crowded seedlings after sprouting.
- Transplant only when weather, soil, and frost risk fit the crop.
If you want a step-by-step companion to that workflow, I use the same sequence described in this seed-starting indoors guide and then pair it with a frost-date countback before potting up or moving trays outside.
When should I start seeds indoors for my area?
Use USDA hardiness zone as a quick temperature map, then pair it with your last spring frost date and first fall frost date. I treat zone as a broad clue about winter lows, then do the real scheduling from frost dates: count backward from the last spring frost date for indoor starts, and count backward from the first fall frost date with days to maturity for late sowings and fall crops.
What USDA hardiness zone can and cannot tell you
USDA hardiness zone maps local climate by average winter minimum temperature. It helps explain what survives winter outdoors, but it does not tell beginners the exact week to sow seeds. It works best as shorthand, not as a complete microclimate rule. That distinction comes straight from the USDA Plant Hardiness Zone Map itself: the map is about average annual extreme minimum temperature, not day-to-day spring planting timing.
Two gardens in the same zone can warm at different speeds. South-facing beds, raised beds, black containers, wind exposure, and cold pockets can shift practical timing by a week or two.
Use the last spring frost date to anchor transplants
The last spring frost date is the average date temperatures stay near or below freezing for the final time in spring, and in practice it anchors the safe transplant window. Indoor starts are counted backward from that date based on how long the crop should stay inside. NOAA freeze-probability data and local Extension planting calendars are the most useful sources I trust for this step.
Tomatoes, peppers, eggplant, and basil are common examples. Many of these are started indoors because they need a long warm season, yet they cannot be planted out while frost is still possible.
Use the first fall frost date to judge late plantings
The first fall frost date is the average autumn date temperatures first drop to freezing or below. It sets the rough end of the warm-season harvest window and helps with count-back timing for fall vegetables. NOAA climate normals and freeze statistics matter here more than generalized gardening copy because they tell you what cold usually does in your area.
Take the crop’s days to maturity, count backward from that frost date, and then check whether the crop tolerates light frost or needs heat through harvest. Tender fruiting crops need more caution than cool-season greens.
Calendar tools are useful, but they are still tools
Garden calendars can save time when local dates are hard to piece together, but I trust them most when they are clearly built from USDA hardiness information, NOAA freeze data, or a land-grant university or Extension planting calendar. The reason they matter is simple: they turn frost averages into a countback window for indoor sowing, direct sowing, and transplant timing.
I still treat any calendar as a starting point rather than a promise. Then local conditions finish the decision: soil temperature, rain, wind, bed exposure, and whether seedlings are in a cold tray by a bright window or under a strong light. For a more precise countback process, I pair my local frost dates with this last spring frost date and seed-starting schedule guide.
Which seeds should be direct sown instead of started indoors?
Direct sow root crops, many beans and peas, and other quick growers that either dislike transplanting or reach harvest fast enough outdoors. Indoor starts make more sense for slow, frost-tender crops, while direct sowing still depends on soil temperature, frost timing, and how fast the bed dries and warms.
Root crops usually belong where they will finish
Carrots, radishes, parsnips, turnips, and many beets are stronger direct-sow candidates because root disturbance can fork, stunt, or stall them. A neat indoor tray start often turns into a misshapen harvest.
That does not mean they are foolproof. Fine seed needs shallow sowing, even moisture, and a surface that does not crust over after watering.
Fast growers often catch up outside
Lettuce, spinach, arugula, dill, cilantro, many peas, and many beans often gain little from a long indoor stay. Once the soil suits them, they can move quickly outdoors.
Direct sowing also avoids crowding under lights. That matters for beginners with limited space.
Warm soil still matters for direct sow warm-season crops
Cucumbers, squash, corn, and beans are often direct sown, but they still need a suitable bed. Cold, wet soil slows germination and can rot seed before it ever sprouts.
A calendar can say the frost risk has passed, yet the seedbed may still be too cold after heavy rain or too shaded to warm well. Timing is weather plus soil, not frost date alone.
What do I need to start seeds indoors?
Start with a fine-textured seed-starting mix, containers with drainage, labels, a tray to catch water, and enough light for strong indoor growth. Use cell flats for small starts, move long-stay seedlings into larger pots, and avoid garden soil because it compacts, drains poorly, and raises disease risk.
Seed-starting mix beats garden soil in trays
Seed-starting mix is made for germination. It is fine enough for small seeds, drains well enough to keep air around new roots, and still holds enough moisture for even sprouting.
Garden soil is heavy in this setting. In a tray, it tends to pack down, stay unevenly wet, and form a crust that tiny seedlings struggle to break through.
Seed trays and cell flats keep the process manageable
Seed trays or cell flats are the standard beginner container because they help with spacing, watering, and tracking varieties. Each cell gives roots their own zone, which makes thinning and transplanting easier.
Drainage holes matter. So does a tray underneath so water can be absorbed without blasting seeds out of place from above. Label every row or cell block as soon as it is sown.
When to use larger pots
Larger seeds such as squash and cucumbers are often better in a roomier pot if they must be started indoors briefly. The same is true for any seedling that will stay inside long enough to fill a small cell with roots.
If roots circle the cell and the top growth stalls, pot up. Waiting too long can set the plant back before it ever reaches the garden.
Grow lights are usually the difference between sturdy and leggy
Most indoor windows do not give enough duration or intensity for compact seedlings. In my setup, seedlings stay stocky only when the fixture is close, directly overhead, and run on a timer, which is why grow lights support upright, dense growth and keep stems from stretching toward a side light source.
Run them for 14 to 16 hours daily. Keep the fixture close to the tops of the seedlings, usually only a few inches above the canopy unless the fixture runs hot, and adjust it upward as the canopy rises. If leaves pale or scorch, back the light off a bit. If stems stretch, move it closer or improve light strength. For ongoing care after emergence, I follow the same compact-growth cues covered in this seedling care and feeding guide.
How deep should I plant different seed sizes?
Plant most seeds at a depth around two to three times their diameter, then follow the packet if it gives a crop-specific instruction. Very small seeds are often surface sown or covered lightly, while larger seeds need firmer cover so they stay moist and rooted during germination.
A simple depth guide by seed size
| Seed size | How to sow | What to watch for |
|---|---|---|
| Dust-like or very fine | Press onto the surface or cover very lightly | Drying out on top of the mix |
| Small | Cover lightly, roughly two to three times seed diameter | Crusting if watered too hard |
| Medium | Plant a bit deeper, still near two to three times seed diameter | Rot in soggy mix |
| Large | Give firm cover and stable moisture | Cold, wet mix slowing sprouting |
Surface sowing has a place
Many beginners bury tiny seed too deeply because bare surface sowing feels wrong. It is often the right move. Small seed has limited stored energy and may not be able to push through a thick layer of mix.
For these crops, the goal is close contact with the moist surface, gentle watering, and steady light once they sprout.
Depth errors create predictable problems
Too deep usually means slow or failed emergence. Too shallow often means the seed dries out, washes sideways, or pops up with the seed coat still attached.
If a tray germinates unevenly, depth is one of the first things I check. Moisture and old seed are the next two.
Seed Starting Setup Checklist
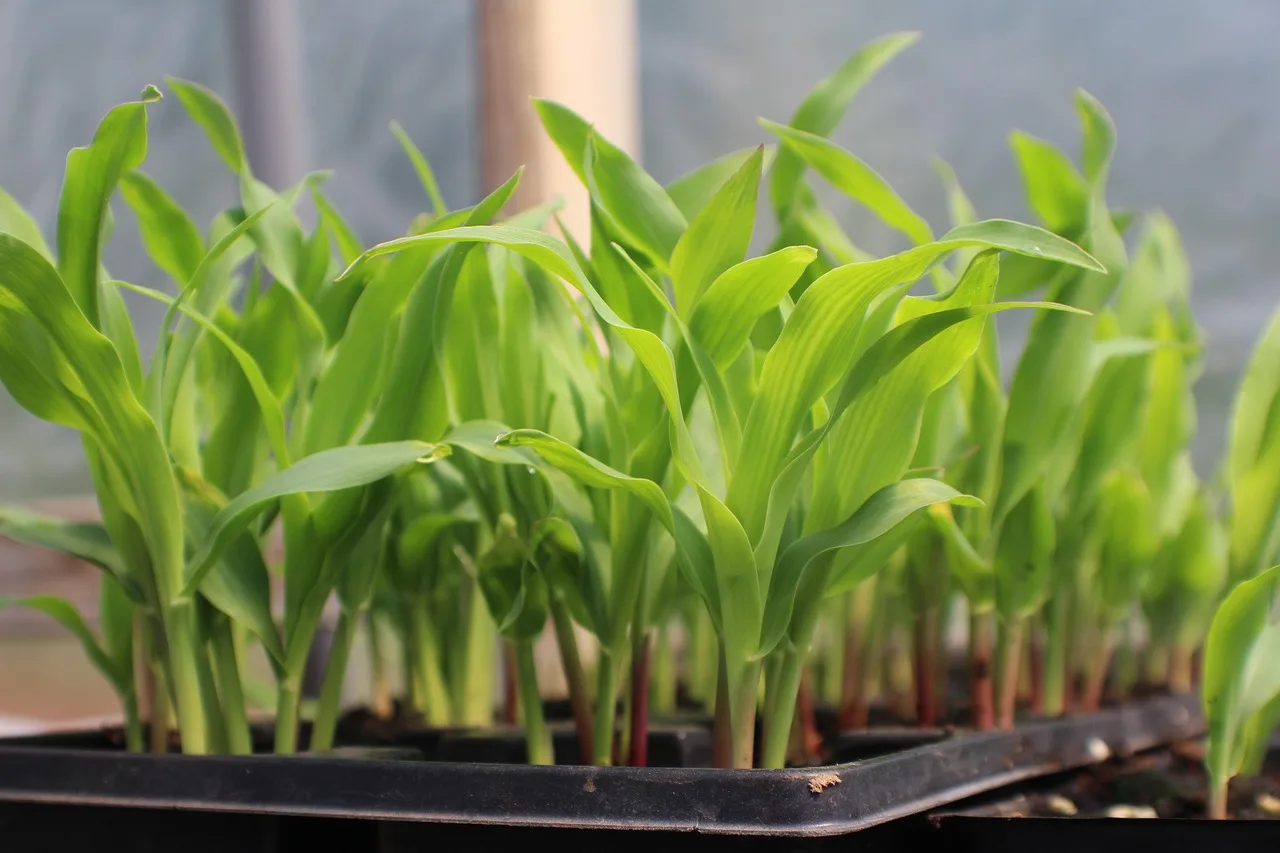
Use this as a one-page decision sheet before sowing. It turns vague advice into a few clear calls: indoors or outside, cell tray or pot, how wet to keep the mix, and how to set the lights so seedlings stay compact.
Seed starting setup checklist
| Decision | Beginner choice | Use it when | Avoid it when |
|---|---|---|---|
| Indoor vs direct sow | Indoor for slow, frost-tender crops; direct sow for root crops and many quick growers | You need a head start or want to protect tender seedlings from frost | The crop dislikes transplanting or catches up quickly outside |
| Container choice | Cell flat for most small starts; larger pot for bigger seeds or longer indoor stays | You want easier spacing, drainage, and labeling | You plan to leave a fast-growing seedling cramped too long |
| Watering target | Evenly moist for germination; moist root zone after sprouting; never waterlogged | The mix feels damp through the cell and the surface is not swampy | Water sits in the tray for long periods or the top dries hard between waterings |
| Light schedule | Grow lights for 14 to 16 hours daily | Indoor starts need compact growth | You rely on weak side-window light alone |
| Light distance | Keep lights close to the seedling tops and raise them as the canopy rises | Stems stay short and leaves face upward without stretching | Stems lean, lengthen fast, or reach sideways |
One-page crop-by-crop checklist
This is the printable sheet I wish I had when I started. It is not a generic crop list. It is the actual go/no-go checklist I use before sowing a tray: does the crop prefer indoor starts, how close should the light begin, and what moisture target helps prevent either dry stalls or soggy collapse.
| Crop | Start indoors or direct sow? | Why this method usually works best | Starter container | Light distance after sprouting | Watering target |
|---|---|---|---|---|---|
| Tomato | Start indoors | Needs a head start and cannot handle frost | Cell flat, then pot up if staying inside longer | About 2 to 4 inches above canopy | Evenly moist at germination; after sprouting, let the surface dry slightly while the root zone stays moist |
| Pepper | Start indoors | Slow starter and very frost-tender | Cell flat or small pot | About 2 to 4 inches above canopy | Steady moisture with no standing water; do not let cells swing from soggy to dusty |
| Basil | Start indoors in cool climates; direct sow only after warm weather settles | Tender and easily stalled by cold nights | Cell flat | About 2 to 4 inches above canopy | Even moisture during germination; slightly drier surface once roots establish |
| Lettuce | Usually direct sow; indoor starts are optional for an early transplant batch | Fast grower that often catches up outside | Shallow cells if started indoors | About 2 to 3 inches above canopy | Do not let shallow cells dry fully; keep consistently moist but airy |
| Carrot | Direct sow | Root disturbance can fork or deform roots | Garden bed | Not usually under lights | Keep the seed row evenly moist until emergence; avoid crusting on the soil surface |
| Radish | Direct sow | Quick crop with little benefit from indoor starting | Garden bed | Not usually under lights | Steady moisture for fast germination; avoid long dry gaps that toughen roots |
| Bean | Usually direct sow | Fast in warm soil and not worth a long indoor stay | Garden bed | Not usually under lights | Moist, not cold and saturated; seed can rot in chilly wet soil |
| Pea | Usually direct sow | Cool-season crop that performs well outside early | Garden bed | Not usually under lights | Even moisture during germination, especially in breezy spring beds |
| Cucumber | Usually direct sow; start indoors only briefly if needed | Grows quickly and dislikes lingering too long in small cells | Small pot if started indoors | About 2 to 4 inches above canopy | Moist but well-aerated; never leave potting mix swampy |
| Squash | Usually direct sow; start indoors only briefly if needed | Fast grower that can become rootbound quickly | Roomier pot | About 2 to 4 inches above canopy | Moist root zone with slight drying at the top between waterings |
Mistake-to-fix table
| Problem | Likely cause | Fix |
|---|---|---|
| Legginess | Weak light, light too far away, or too little daily light | Use grow lights for 14 to 16 hours daily and keep the fixture close to the canopy |
| Damping off | Soggy mix, stale airflow, crowded seedlings | Reduce watering, improve airflow, thin seedlings, and avoid heavy soil |
| Failed germination | Old seed, wrong depth, dry mix, or cold wet conditions | Check viability, reset sowing depth, keep the mix evenly moist, and wait for better conditions |
Common beginner mistakes and how to fix them
Most seed-starting problems trace back to a short list: old seed, wrong depth, soggy mix, weak light, or bad timing. These issues are common. They are also fixable once the symptom is matched to the setup choice that caused it.
Slow germination and poor sprouting
If nothing appears, check age and storage first. Seed viability falls with heat, humidity, and time. Then check depth and moisture. A tray that dries at the surface each afternoon can fail even when the lower mix stays damp.
Cold outdoor beds also stall seed. Direct sowing only works when the crop and the soil both fit the date.
Leggy seedlings
Leggy seedlings are stretched seedlings. The cause is usually light that is too weak, too far away, or too short in daily duration.
Move the light closer, keep it overhead rather than from the side, and run it for 14 to 16 hours daily. Thin crowded cells so seedlings are not competing under the lamp. In my own trays, legginess shows up fastest in tomatoes and basil if the fixture drifts even a couple inches too high for several days.
Damping off and overwatering
Damping off often shows up as healthy-looking seedlings that suddenly pinch at the base and collapse. Constantly wet mix and stale air make it more likely.
Use seed-starting mix, not garden soil. Water enough to keep roots supplied, but do not leave cells saturated. Space and airflow matter too.
Timing mistakes
Starting too early is common. Seedlings outgrow their cells, become rootbound, and sulk before the weather is ready. Starting too late leaves warm-season crops with too little season to finish.
The fix is less about trusting a branded calendar and more about using a transparent countback: local last spring frost date, crop-specific indoor lead time, and actual outdoor conditions at transplant time. That same transplant check matters when moving from indoor trays to beds, especially if nights are still cold, wind is strong, or the soil is slow to warm.
Frequently asked questions
How much light do seedlings need indoors?
Most indoor seedlings need grow lights for 14 to 16 hours daily because window light is often too weak or too directional. Keep the fixture close to the tops of the seedlings and raise it as they grow so stems stay short instead of stretching.
How do I know my seed-starting calendar from frost dates?
Find the last spring frost date and first fall frost date for the local area, then work backward. Count backward from the last spring frost for indoor starts and transplant timing. Count backward from the first fall frost with days to maturity for late crops and fall harvest planning.
What crops need 6 to 8 weeks indoors before transplanting?
Tomatoes, peppers, eggplant, and many herbs are common indoor-start crops because they need a longer run-up before outdoor conditions suit them. They are also frost-tender, so they cannot be rushed outside early even if they look ready in the tray.
Which seeds should be direct sown instead of started indoors?
Direct sow root crops such as carrots, radishes, beets, and parsnips, plus many beans, peas, and other quick growers. These crops either dislike transplanting or gain little from an indoor head start, provided outdoor soil conditions are warm or workable enough for the crop.
How do I avoid common seed-starting timing mistakes?
Do not start everything at once. Match the crop to the method first, then count from frost dates. Starting too early leads to rootbound, oversized seedlings, while starting too late shortens the harvest window. Zone helps, but frost dates and local conditions make the better timing call.
Sources
- USDA Agricultural Research Service, USDA Plant Hardiness Zone Map. Used for the explanation of what hardiness zones do and do not measure.
- NOAA National Centers for Environmental Information and NOAA freeze or climate normals resources. Used for the discussion of last spring frost, first fall frost, and why frost-date timing should be based on local climate data.
- University of Minnesota Extension, seed-starting indoors guidance. Used for daily indoor light duration, keeping lights close to seedlings, and practical tray setup.
- Iowa State University Extension and Outreach and other land-grant Extension seed-starting guides. Used for the two- to three-times-seed-diameter sowing depth rule and general germination practice.
- Oregon State University Extension Service and similar university storage references. Used for the points on seed viability declining with age, heat, and humidity, and the value of cool, dry storage.
- Cornell Cooperative Extension, Penn State Extension, and similar university vegetable-starting references. Used to support the indoor-start versus direct-sow crop distinctions for warm-season transplants, root crops, and quick cool-season crops.