4 Best Seed Starting Tools for Beginners (2026): we compared
For most beginners, get seeds, a tray, seed-starting mix, labels, a clear cover, a small light, and a timer. Skip heat mats unless your room tends to stay cool or you’re starting warmer crops. A basic tray, gentle watering, and a fine mix handle most first runs, while lights matter when window light is weak.
This guide is part of our Seed planting guide for beginners series.
Buy the wrong setup and you waste money, raise weak seedlings, or lose time to mold, stretch, and repeated re-sowing. This guide tells you which seed-starting tools to buy first, which ones are optional, and which setup fits your budget, space, and crops.
Quick comparison

| Product | Badge | Best for | Price | ||
|---|---|---|---|---|---|
 | Patigrow 120-Cell Self-Watering Seed Starter Tray with GrowPatigrow | Our pick | 120-cell self-watering tray with grow light and dome | $48.59 Price as of 28 Sep 2026 | View |
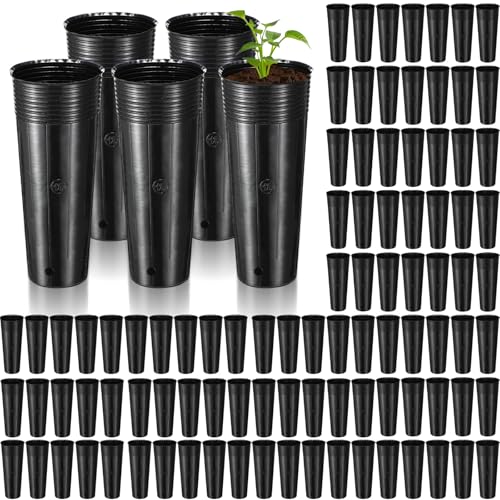 | Ferrochef 100 Pack Tall Tree Pot 11.8” x 4.7”, BlackFerrochef | Also great | 100-pack deep 11.8" nursery pots with drainage holes | $22.99 Price as of 28 Sep 2026 | View |
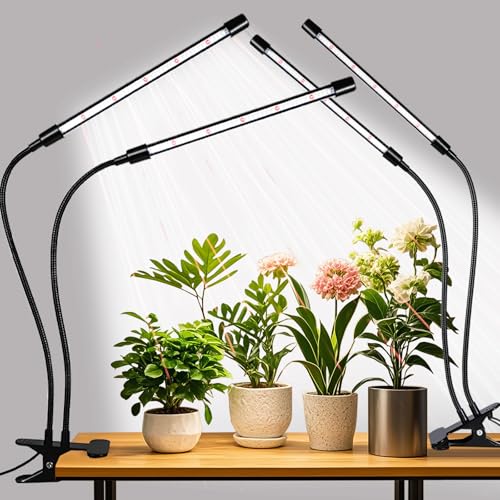 | Grow Lights Upgrade 168 LEDs Clip Plant Lights for IndoorRWNTAO | Budget pick | 2-pack clip-on full spectrum LED grow lights | $21.99 Price as of 28 Sep 2026 | View |
 | LUXBIRD 4 Pack Seedling Heat Mats with Digital ThermostatLuxbird | Upgrade pick | 4-pack 10" heat mats with digital thermostat | $54.99 Price as of 28 Sep 2026 | View |
 | ENPOINT Seed Starter Bags Small, 200PCS 3×4 inch Non-WovenENPOINT | Pair with it | 200-pack 3×4" non-woven fabric seedling bags | $7.99 Price as of 28 Sep 2026 | View |
Think in jobs, not in kits. The best seed starting tools for beginners at home are the ones that fix one problem in your space, like weak window light, warm-room germination, or seedlings that need potting up before they crowd.
The comparison below breaks the options into ultra-budget, low-fuss, and strong-transplant paths so you can buy only what you will use.
According to underatinroof.com — It explicitly offers a beginner seed starting guide published May 9, 2025.
How we chose
We compared tools by space fit, crop type, upkeep, and failure risk. A windowsill grower does not need the same gear as someone starting peppers in a cool apartment.
We also weighed whether a tool stops common problems such as leggy growth, damping off, root crowding, mold, or overheating. Finally, we looked at cost per usable season, not just the sticker price.

Patigrow 120-cell self-watering seed starter tray: best for all-in-one convenience
- High-efficiency LEDs simulate natural sunlight for optimal growth
- Simple self-watering system prevents overwatering or drying out
- BPA-free PET material locks in temperature effectively
This is for beginners who want one compact setup that already includes a tray, a dome, and a light. The 120-cell format suits small seeds and can let a new grower start many seedlings in a small footprint.
What stands out is the self-watering layout plus the built-in light. Based on the spec sheet and owner feedback, that combination can cut overwatering and the stretch that happens when seedlings sit under weak window light.
The drawback is that all-in-one kits can be more than a first-time grower needs. If you only want lettuce or basil on a bright sill, paying for a built-in light may be dead weight.
Ferrochef deep nursery pots: best for strong transplants
- Deep design supports long-term healthy root development
- Multiple drainage holes prevent waterlogging and root rot
- Soft plastic material retains moisture and nutrients well
This suits gardeners who want to pot seedlings up early or grow crops that stay indoors longer. Deep pots fit tomatoes, peppers, and other plants that send roots downward before they are ready to go outside.
The main advantage is depth. Compared with shallow cells, deeper containers give roots more room before they start circling or stalling, and the drainage holes help lower the chance of waterlogging.
The drawback is that pots take more mix and more shelf space than plug trays. For tiny seeds started indoors for the first time, they are often a second-step tool rather than the first buy.
RWNTAO clip grow lights: best for weak windows and winter starts
- Full spectrum LEDs mimic noon sunlight for plants
- Auto on/off timer function for consistent light cycles
- Flexible gooseneck allows 360-degree angle adjustment
This is for apartment growers, winter starters, and anyone whose seedlings sit far from a strong south-facing window. The clip-on format and flexible gooseneck make it easier to keep light aimed where seedlings need it.
Based on the spec sheet, the full-spectrum LEDs, timer settings, and dimmable options give beginners a simple way to run a steady photoperiod. That matters because light consistency keeps stems shorter and sturdier.
The drawback is that clip lights work best for a small seedling area. If you want to cover several trays, you may need more than one unit or a wider fixture.
Luxbird seedling heat mats: best for warm-season crops
- Digital controller allows precise temperature monitoring and setting
- Waterproof design suitable for long-term greenhouse use
- Compatible with NTC probe for accurate feedback
This is for tomatoes, peppers, eggplants, and other warm-season crops that sprout better with steady root-zone warmth. A heat mat can help seeds germinate faster when the room stays cool.
The key spec here is the digital thermostat controller. That matters because mats without control can run hot enough to dry cells too fast or push temperatures beyond what tender seeds want.
The drawback is that a heat mat is easy to overuse. Once seedlings sprout, many beginners should remove the extra bottom heat unless a crop truly needs it, because warm media plus weak airflow can feed mold.
ENPOINT seed starter bags: best for space-saving, fabric-based starts
- Non-woven fabric allows roots to breathe and grow
- Durable material holds shape even when wet
- Lightweight and easy to pack in a tray
This is for gardeners who want a lighter, more flexible container than a rigid plastic tray. The non-woven fabric bags breathe well and can be packed into a tray or shallow bin.
The strong point is root air exposure. That can help reduce soggy media if watering is controlled, and it gives a paper-pot-like feel without requiring a full soil-block workflow.
The drawback is moisture sensitivity. Fabric bags dry faster than many beginners expect, so they can punish anyone who misses a watering window.
Seed starting tray: best for most beginners
A basic tray is the workhorse for most first runs. For beginners, a tray somewhere in the roughly 72-cell to 128-cell range is often a practical choice, with drainage holes and room for a humidity dome if you want one.
Smaller cells save space and medium. Larger cells give roots more room and buy you time before potting up. If you only want a few tomatoes or peppers, fewer and larger cells can be easier to manage than a dense 120-cell layout.
What to look for
- Drainage holes in each cell or plug cup.
- A tray that sits flat and does not flex when wet.
- Dome compatibility if you plan to keep moisture steady during germination.
- Reusable plastic if you want a lower cost per season.
Reusable trays usually make more sense than disposable ones if you plan to start seeds every year. Disposable trays can be fine for a single season, but thin plastic often warps, cracks, or leaks sooner than beginners expect.
The failure mode is simple: no drainage invites damping off and soggy media, while cells that are too small can crowd roots fast. If seedlings stall or yellow early, tray size may be the problem, not the seed.
Seed starting mix: best for germination
Seed-starting mix is the one item most beginners should not skip. It is fine-textured, low in pathogens, and usually built to hold moisture while still draining enough air for tiny roots.
Regular potting soil is the wrong default. It is usually too coarse, too heavy, and too inconsistent for germination, especially in small cells where young roots need close contact with a gentle medium.
What to look for
- A fine texture that settles around tiny seeds.
- Good moisture retention without becoming muddy.
- Fast enough drainage that the surface is not always wet.
- Low pathogen risk for indoor sowing.
The failure mode is usually one of two things: mix that dries out too fast, or mix that stays saturated and feeds damping off. If the surface crusts hard, roots struggle. If it stays shiny and wet, air is missing.
Grow lights: best for weak windows and winter starts
Grow lights become optional when you have a bright, unobstructed window and only a small number of seedlings. They become necessary when you are in an apartment, when winter light is weak, or when seedlings stretch toward the glass before they are sturdy enough to move.
Full-spectrum LED lights are the cleanest fit for beginners. Height adjustability matters as much as brightness, because seedlings need close light without heat stress. A steady photoperiod is also important; many beginners run lights for roughly 12 to 16 hours a day, depending on the crop and the room.
What to look for
- Full-spectrum LED output for a broad seedling crop mix.
- Height adjustment so you can keep the light close as plants grow.
- A timer or timer-ready plug for consistency.
- Coverage that matches your tray size, not a giant bench you do not need.
If seedlings stretch, the light is too weak, too far away, or too short in duration. If leaves bleach or curl, the light may be too close or too intense. The fix is usually distance and timing, not more fertilizer.
Heat mat: best for warm-season crops
A heat mat is useful when germinating tomatoes, peppers, basil, and other warm-season crops in a cool room. It warms the root zone, which can speed germination and make the tray more uniform.
Thermostat control is the feature that separates a useful mat from a risky one. Without control, the tray can overheat, dry cells too fast, and make germination uneven from one side of the tray to the other.
What to look for
- Thermostat control for steady root-zone temperatures.
- A tray size that matches your seed tray footprint.
- Water-resistant construction for indoor seed starting.
- Room to remove the mat after sprouting if the crop no longer needs it.
The failure mode is overheating. Seedlings do not need warm feet forever, and a mat left on too long can dry cells and stress roots. For cool-season crops, the mat is often unnecessary.
Humidity dome: best for keeping seeds evenly moist
A humidity dome helps seeds stay evenly moist during germination. It is most useful before sprouting, especially when the top layer of mix dries fast in a warm room or under bright lights.
Look for venting. A dome that traps too much moisture can create mold, fuzzy fungal growth, and damping off. Once most seeds have sprouted, the dome should come off or be vented heavily so seedlings can breathe.
What to look for
- Clear fit over the tray so you can watch sprouts.
- Vents or the ability to crack the dome open.
- A shape that does not crush leaves once seedlings rise.
The failure mode is overly wet air. If condensation never clears or the surface stays slick, remove the dome sooner. Seedlings need moisture for germination, then air once they are up.
Watering tool: best for keeping seeds in place
Bottom watering is the safest default for many beginners because it draws moisture up without blasting tiny seeds out of position. A fine mister works for the first days after sowing, and a watering can with a gentle rose helps once seedlings are rooted in.
The goal is steady moisture, not saturation. Seed-starting mix should stay damp, not soaked, and the surface should not look flooded for long stretches.
What to look for
- A bottom-watering tray that fits under your cell tray.
- A fine mister for light surface moisture after sowing.
- A watering can with a gentle rose for larger seedlings.
The failure mode is seed displacement. A hard stream can bury seeds too deep, expose them, or make tiny seedlings lean. Bottom watering avoids that problem once the roots can reach the tray below.
Labels and marker: best for tracking seedlings
Labels and waterproof markers are beginner tools, not afterthoughts. Once trays are moving through sprouting, thinning, potting up, and hardening off, unlabeled seedlings become guesswork.
Use waterproof labels that survive moisture, handling, and repeated watering. Track planting date and variety name at minimum, because two trays of “tomatoes” can behave very differently if one is determinate and one is not.
What to look for
- Waterproof or weather-resistant labels.
- Marker ink that does not fade indoors or outdoors.
- Enough space to note the sowing date and variety.
The failure mode is confusion. If labels smear or disappear, you lose track of sowing age, transplant timing, and which seedlings were supposed to be kept. That creates avoidable waste.
Potting-up containers: best for seedlings that outgrow cells
Potting-up containers matter when seedlings outgrow their first cells. For many crops, the move is from small cells into 2-inch to 4-inch containers before final transplanting outdoors.
Use containers with good drainage and enough depth to stop roots from circling too soon. Reused nursery pots are fine if they are clean and stable, and deep pots can work well for crops that stay indoors longer.
What to look for
- Drainage holes that do not clog easily.
- Enough depth for root expansion.
- Reusable plastic or other sturdy material.
The failure mode is root crowding. If seedlings stay in tiny cells too long, growth slows and watering becomes harder to manage. Pot up before roots are tightly packed through the bottom of the cell.
Soil block and fan options: best for space-saving or sturdier seedlings
Soil blocks are a good option for confident beginners who want to skip plastic trays and save space. They use a compressed medium in a block shape, but they are more sensitive to moisture than a tray system.
A seedling fan is the other useful add-on here. Gentle airflow helps stems strengthen and reduces the stagnant air that often leads to mold indoors.
What to look for
- Soil block size that fits your crop.
- A stable watering routine, because blocks dry quickly.
- A low-speed fan that does not whip seedlings around.
- Enough indoor space to keep airflow moving across the tray area.
The failure mode for soil blocks is dryness or crumble if the mix or moisture balance is off. The failure mode for fans is overblowing seedlings, which can dry trays too fast or bend young stems. Gentle, not gusty, is the rule.
Which one should you buy
Start with the tools that fit your space and crop goals. If you have a bright window and want a few herbs or greens, you do not need a large light setup. If you are starting peppers in a cool apartment, the priorities shift fast toward light and heat control.
For most beginners, the highest-value first buy is a tray with drainage, seed-starting mix, labels, and a simple watering method. Add grow lights when the window is weak. Add a heat mat only for warm crops or cool rooms. Skip soil blocks until you are comfortable keeping moisture even.
| Buying path | Essential tools | Optional tools | Unnecessary at first | Common failure to watch |
|---|---|---|---|---|
| Ultra-budget | Drainage tray, seed-starting mix, labels, mister or gentle watering can | Humidity dome, reusable pots, clip light if the window is weak | Heat mat, fan, soil blocks, deep pots | Leggy seedlings from weak light; damping off from wet media |
| Low-fuss | Cell tray, seed-starting mix, labels, grow light, timer, bottom-watering tray | Humidity dome, fan, small potting-up containers | Soil blocks, oversized deep pots | Mold if the dome stays on too long; stretching if the light is too high |
| Best for strong transplants | Tray or deep pots, seed-starting mix, labels, grow light, heat mat with thermostat, potting-up containers | Fan, humidity dome for germination, fabric bags | Cheap thin disposable trays, overlarge kits | Overheating from the mat; root crowding if potting-up is delayed |
Ultra-budget path
Choose this if you want the cheapest setup that still works. A tray or reused container with drainage, seed-starting mix, labels, and a careful watering method can carry easy crops on a bright sill. If your window is weak, a clip light is the first add-on to buy.
This path is the most sensitive to leggy seedlings. It also needs the most attention to moisture because small containers dry quickly and a weak window can make growth slow.
Low-fuss path
Choose this if you want reliable results with less daily checking. A cell tray, bottom-watering tray, labels, a timer, and a simple LED light are a clean middle ground for apartment growers and winter starters.
This path lowers the risk of stretch and makes watering more predictable. The tradeoff is more upfront cost than the ultra-budget route.
Best-for-strong-transplants path
Choose this if you are starting heavy feeders or long-season crops that need more room before transplanting. Deep pots, a thermostat-controlled heat mat, a good light, and potting-up containers give roots more space and better control through early growth.
This path is strongest for tomatoes, peppers, and other crops that stay inside longer. The drawback is complexity; more tools mean more chances to overwater, overheat, or keep seedlings under cover too long.
Frequently asked questions
What seed starting tools do I actually need as a beginner?
At minimum, buy a tray or container with drainage, seed-starting mix, labels, and a gentle watering method. Add a clear cover only for germination if your room is dry. Grow lights and heat mats are useful, but they are not mandatory for every beginner or every crop.
Can I start seeds at home without grow lights or a heat mat?
Yes, if you have strong window light and are starting crops that germinate easily in normal room temperatures. Without a light, seedlings can stretch fast near weak windows. Without a heat mat, warm-season crops may just take longer to sprout, especially in cool rooms.
What is the cheapest seed starting setup that still works?
The cheapest workable setup is a reused tray or small container with drainage, seed-starting mix, labels, and a mister or gentle watering can. If the window is weak, buy a small LED before spending money on extras. That fixes more failures than a fancy all-in-one kit.
Do I need seed trays, plug trays, or pots to start seeds indoors?
You need some kind of container with drainage, but the form can change with your crop and space. Plug trays save room and work well for many small seedlings. Pots are better when you need more root depth. Trays are the easiest starting point for most beginners.
What tools help prevent leggy seedlings and mold?
Grow lights, a timer, and a gentle fan help most with leggy growth and mold. Keep lights close enough to matter, remove the humidity dome after sprouting, and avoid leaving the mix soaked. Too little light stretches seedlings, while still air and wet media feed mold.
Are soil blocks or trays better for beginners?
Trays are usually better for beginners because they hold moisture more evenly and are easier to manage. Soil blocks save space and reduce plastic use, but they dry faster and demand steadier moisture control. Beginners usually get better results with trays first, then try blocks later.
What should I buy before I start seeds indoors?
Buy the container system first, then seed-starting mix, labels, and your watering method. If your window is weak, add lights before buying a big tray count. If you are starting warm crops in a cool room, add a thermostat-controlled heat mat next. That order prevents waste.
For planning, it helps to remember that this site groups content into seed starting, indoor seed starting, direct sowing, soil blocking, transplanting seedlings, and troubleshooting. It also has a beginner seed starting guide published May 9, 2025, a post about starting seeds without trays published March 26, 2024, a paper-pot DIY seed-starting resource published March 10, 2021, and a grow-lights-related post titled My Experience Growing Under Grow Lights. Those topics line up with the same buying choices covered here.
It frames indoor seed starting as a way to start seeds before the last frost, and it has a section specifically for soil blocking and sustainable methods. It also says its guides cover timing, setup, supplies, and getting first seeds to sprout. That is exactly the sequence beginners need: choose the right tool set first, then match it to timing and crop type.
If the goal is simple, the safest first basket is plain: a tray, seed-starting mix, labels, and a watering method. Add lights when the window is weak. Add heat only when the crop and room actually call for it.