How to Prevent Damping Off in Seedlings
Prevent damping off by isolating the tray at the first sign of pinched stems, switching to bottom watering, increasing airflow, and removing any seedling that has collapsed at the soil line; if several plants fail in one cell, discard that cell. This soil-borne fungal disease attacks seeds and young seedlings, and if you leave it alone, it can wipe out an entire sowing in days. This guide shows how to spot the pattern early, contain a mixed tray, and prevent spread with moisture, airflow, and sanitation.
What damping off looks like
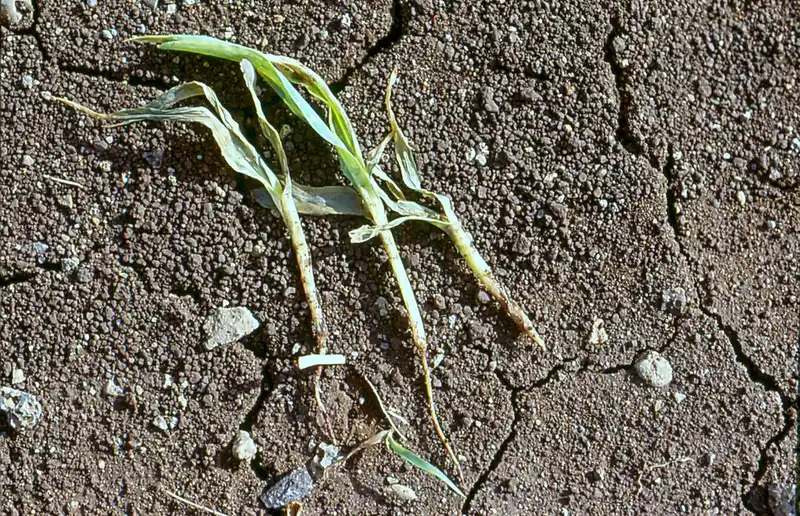
Start by checking where the failure begins. Pre-emergence loss shows up as seeds that never surface, often because they rotted in wet mix. Post-emergence loss is more obvious: the stem narrows at the soil line, then the seedling flops over and dies after seeming fine.
Pre-emergence failure
If a cell stays bare while neighboring seeds sprout, check the media. Pythium is the most commonly cited culprit, and it thrives in cool, wet soil and soggy conditions. Rhizoctonia often leaves brown lesions at soil level, while Fusarium and Phytophthora can also be involved.
Post-emergence collapse
With post-emergence disease, seedlings may look healthy for a day or two, then fall at the base. The stem often looks pinched, glassy, or brown where it meets the mix. Once that collapse happens, there is no cure for the affected plant.
How it differs from legginess and transplant shock
Leggy seedlings stretch upward, but they stay upright unless the stem actually rots. Transplant shock usually follows handling or root disturbance and may cause temporary wilting without a constricted stem line. A collapsed stem at the soil surface points much more strongly to damping off than to simple stretch or shock.
What you need before you sow
- Fresh seed-starting mix that is light and fast-draining
- Clean seed trays, pots, and labels
- Bleach and water for disinfecting reused supplies
- Bottom-watering tray or watering method
- Humidity dome or plastic cover that can be vented
- Grow light for indoor starts
- Small fan or another way to move air
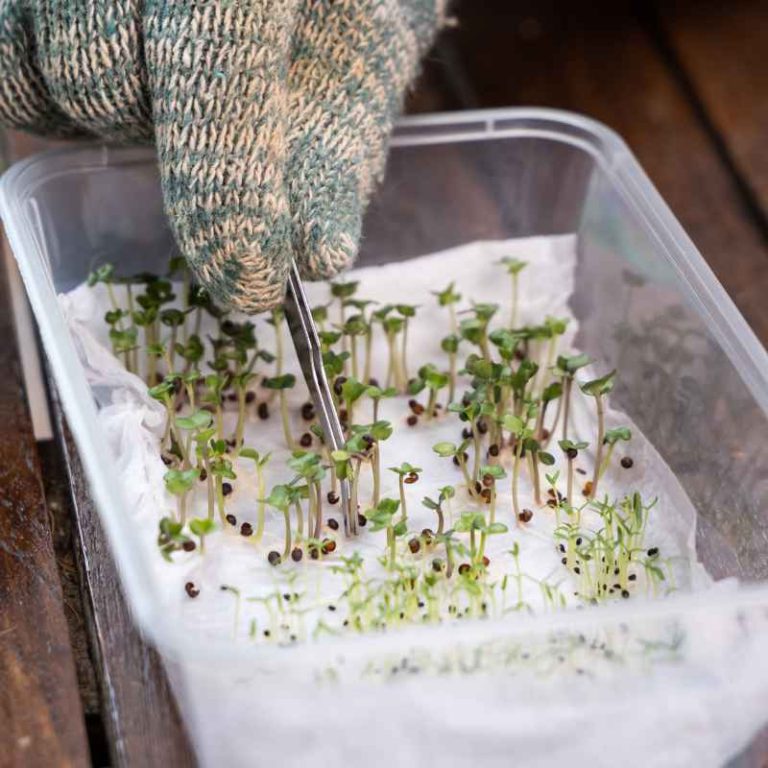
- Clean scissors or snips for culling seedlings
Use fresh, sterile bagged seed-starting mix, not reused potting mix or garden soil. Old media can carry spores and often holds too much water. Before reuse, trays and pots need cleaning and disinfection; a 1:9 bleach solution is commonly recommended, and some guidance calls for soaking supplies for 10 to 20 minutes.
Say your tomato tray is in a basement under a dome. If the underside of the lid drips each morning, the humidity is trapped too tightly for a mixed tray that is already losing seedlings. Open the vents, move air, and change the watering method before touching anything else.

Is your tray already infected?
Yes if you see mixed symptoms in one flat: one or two cells collapse, nearby cells stay healthy, and the soil surface stays wet or crusted with mold. Isolate that flat first. Move it away from other starts so spores, splash, and contaminated tools do not reach nearby trays.
- Carry the tray to a separate surface.
- Set it away from other seedlings by at least about one table length.
- Stop overhead watering immediately.
- Inspect each cell for pinched stems, surface mold, and soggy mix.
- Remove seedlings that have already collapsed at the soil line.
Discard any cell with repeated collapse or obvious rot. Keep only seedlings with firm stems and clean crowns. If a whole section fails, it is usually safer to throw out that section than to keep nursing a possible contamination source next to healthy plants.
How do you stop spread fast?
Dry the surface, open the dome, and move air before changing anything else. Excess moisture keeps the pathogens active. Cold, wet soil and poor drainage raise risk, so the first goal is to break that wet cycle and keep splash from moving spores around the flat.
- Remove the humidity dome or vent it fully.
- Set a small fan nearby so air moves across, not directly at, the seedlings.
- Switch to bottom watering and empty any standing water after about 15 to 30 minutes.
- Raise the tray under the grow light so seedlings stay compact and dry faster after watering.
- Add only enough water to moisten the mix from below, then recheck after the surface lightens in color.
A common mistake is keeping the humidity cover on too long after sprouting, which traps excess moisture and encourages damping off. That trapped humidity favors disease. Tomato seedlings, in particular, need warmth, bright light, and careful spacing; they can also fail quickly if the mix stays too wet.
What causes damping off in seedlings
The main causes are pathogens plus the conditions that help them spread. Epic Gardening identifies Fusarium, Pythium, and Rhizoctonia as causes, and The Almanac also includes Phytophthora. These organisms persist in contaminated media, wet trays, and dirty tools, then attack tender stems and roots.
Moisture and temperature problems
Pythium is commonly described as a likely culprit, especially in cool, moist, or soggy setups. Poor drainage keeps the root zone saturated, which helps rot spread from seed to seed. Deep sowing and crowded cells can worsen the problem because the surface stays damp longer.
Contaminated supplies
Reusing dirty pots, tray inserts, labels, or scoops can move spores into a fresh sowing. Cleaned and disinfected supplies matter more than fancy additives. If you are short on time, prioritize anything that touches the soil line or the mix first.
Clean up the cause at the source
After the tray is isolated, fix the inputs that caused the outbreak. Replace any suspicious mix, disinfect reusable supplies, and reset watering so the surface dries between waterings. If the same flat keeps failing after those changes, the problem is likely still in the container, medium, or watering routine.
- Empty reused trays and pots of old media.
- Wash them, then soak in a 1:9 bleach solution for 10 to 20 minutes.
- Rinse and dry before refilling.
- Use a fresh seed-starting mix, not garden soil or old potting mix.
- Fill containers loosely so water can drain through instead of pooling.
For watering, bottom-up moisture is the safer default. Planet Natural recommends trays that provide water from below rather than overhead watering. Misting can be useful only when the surface is drying too fast; even then, keep the mix slightly moist, not wet.
Tomatoes need warm conditions, strong light, and more space than many gardeners give them. Keep them evenly moist, not saturated, and remove the dome once germination is underway. Thin crowded seedlings early so air can move between stems and the soil surface dries faster.
- Place tomato flats under a grow light as soon as sprouts appear.
- Set the dome to vent or remove it after germination.
- Water from below until the top layer is just barely moist.
- Move seedlings to wider spacing before stems begin to crowd together.
Suppose a 6-cell tomato pack has three healthy sprouts and one cell that keeps collapsing. Leave the healthy cells in place, but remove the failed seedling and keep the tray separated from other flats. That limits spread while the remaining seedlings get air and light.
Seedling damping checklist
| Symptom or risk sign | Immediate action | Discard, isolate, or adjust? |
|---|---|---|
| Seeds never emerge in one cell | Lift the seed lightly from the media edge and check for rot | Discard if the seed is mushy; otherwise isolate |
| Stem pinches at the soil line | Stop overhead watering and increase airflow | Isolate the tray; discard if the stem softens |
| Seedling collapses suddenly | Remove it from the tray and discard it | Discard |
| White or gray surface mold | Open the dome and dry the surface faster | Adjust; isolate if several cells are affected |
| Heavy condensation on dome walls | Vent or remove the dome immediately | Adjust |
| Soggy mix after watering | Empty standing water and let the tray drain | Adjust |
| Poor drainage from the container | Move seedlings to a better-draining tray or pot | Adjust |
| Overcrowded seedlings | Thin to one strong seedling per cell | Adjust |
| Contaminated scissors, labels, or hands | Clean and disinfect before touching healthy cells | Adjust |
| Cold, wet soil | Move the tray to a warmer spot with more airflow | Adjust |
| Deep sowing with delayed sprouting | Re-sow at proper depth in fresh mix | Discard the cell; adjust future sowing depth |
| Multiple failures in adjacent cells | Quarantine the flat and review sanitation | Isolate |
Common mistakes
Keeping domes sealed too long traps moisture and raises disease pressure. Reusing old potting mix or garden soil brings in unknown contamination and often holds too much water. Overcrowding slows drying and makes every stem easier to infect.
Top watering is another common error because it wets foliage and splashes spores from cell to cell. Bottom watering is safer for seedling flats because it keeps the surface drier. A grow light matters too; weak, stretched seedlings are more likely to flop when the stem base is already under stress.
If that did not work, remove the worst seedlings, replace the entire cell or tray section, and restart with fresh mix and cleaned supplies. There is no cure once seedlings already have damping off, so escalation means containment and re-sowing, not trying to rescue collapsed plants.
How do you prevent damping off of seedlings?
Start with clean materials, then keep the mix just moist, not wet. Use fresh seed-starting mix, disinfect reused trays, and give seedlings bright light and moving air. Remove humidity covers after germination, thin crowded starts, and water from below so the surface dries between waterings.
How do you control damping-off disease?
Control starts with removal and isolation, not treatment. Separate the tray, discard collapsed seedlings, then dry the surface and improve airflow. Replace contaminated media and sanitize tools before touching healthy flats again. Once a seedling has fallen at the soil line, it will not recover.
Can you reverse damping off in seedlings?
No. Once seedlings already have damping off, the damaged ones do not recover. The useful response is to discard collapsed plants, isolate the rest of the flat, and change the conditions that let the disease spread. Healthy seedlings can still be saved if the outbreak is caught early.
Frequently asked questions
What causes damping off in seedlings: pythium is the most commonly
Pythium is the most commonly cited culprit, and cool, wet soil raises the risk. Rhizoctonia, Fusarium, and Phytophthora are also common or implicated pathogens. Contaminated mix, dirty trays, poor drainage, and trapped humidity give those organisms the conditions they need to attack tender stems and roots.