How to Start Plants From Seeds Indoors (Beginner Guide)
Starting plants from seeds indoors is a rewarding process that empowers gardeners to nurture healthy, robust plants from the very beginning. Whether you’re aiming for vibrant vegetables, fragrant herbs, or colorful flowers, mastering indoor seed starting offers greater control over your plant’s health and growth.
This skill can save you money, extend your growing season, and deliver stronger seedlings ready to thrive outdoors. Yet, for beginners, the process may seem daunting—choosing the right seeds, preparing materials, and avoiding common pitfalls all require careful planning and attention.
The good news is that indoor seed starting is accessible for everyone, regardless of experience level. With the right guidance and a systematic approach, you can confidently transform a handful of seeds into flourishing garden plants. This comprehensive guide will walk you step-by-step through everything you need to know—from selecting seeds and setting up your workspace to nurturing seedlings and transplanting them outdoors.
Backed by expert insights, practical examples, and actionable advice, you’ll be equipped to start your own indoor seed journey and achieve gardening success.
Key Takeaways
- Indoor seed starting gives you control over plant health and timing.
- Proper preparation, including choosing the right seeds and materials, is essential for success.
- Lighting, temperature, and moisture are critical factors for seed germination.
- Regular care, monitoring, and gradual acclimatization ensure strong seedlings.
- Common mistakes can be avoided with planning and troubleshooting.
- Real-world examples demonstrate the benefits and flexibility of indoor seed starting.
Choosing The Right Seeds For Indoor Starting
Selecting the right seeds is the foundation for a successful indoor garden. Not all plants are equally suited for indoor seed starting, so understanding the best options and how to evaluate seed quality is crucial.
Best Types Of Seeds To Start Indoors
Certain plants are especially well-suited for indoor seed starting due to their growth habits and needs:
- Vegetables: Tomatoes, peppers, eggplants, lettuce, broccoli, and cabbage.
- Herbs: Basil, parsley, cilantro, oregano, and chives.
- Flowers: Marigolds, petunias, zinnias, snapdragons, and impatiens.
Seeds for these plants benefit from controlled indoor conditions, as they may require longer growing periods or delicate handling. For example, tomatoes and peppers need a head start indoors because they require a long warm growing season.
Additionally, plants like cole crops (cabbage, broccoli, cauliflower) and certain annuals, such as impatiens and begonias, perform better when started indoors due to their slow initial growth. Starting these seeds indoors allows you to maximize the productivity of your garden, especially in regions with short growing seasons or unpredictable spring weather.
By selecting varieties known for their vigor and disease resistance, you can increase the likelihood of a bountiful harvest and reduce the risk of crop failure.
How To Read And Interpret Seed Packets
Seed packets provide vital information to guide your choices:
- Germination time: How long it takes for seeds to sprout.
- Planting depth: How deep to sow the seeds.
- Light requirements: Full sun, partial shade, etc.
- Days to maturity: When to expect harvest or blooms.
- Special instructions: Such as pre-soaking or stratification.
Always check for expiration dates and storage recommendations to ensure viability. High-quality seeds, often from reputable suppliers like Burpee, offer higher germination rates and disease resistance.
In addition, look for terms like “pelleted seed” (which means they’re coated for easier handling), “treated seed” (possibly with fungicide), or “organic” (grown and processed without synthetic chemicals). Some packets also provide recommended sowing schedules based on USDA hardiness zones, which helps you plan your indoor sowing dates for optimal outdoor transplanting.
Seed Viability And Storage
Seed viability—the ability to germinate—decreases over time. Store seeds in cool, dry conditions, ideally in airtight containers. Most seeds remain viable for 1–5 years, though some (like parsnip) lose viability quickly. Always test older seeds by placing a few in a damp paper towel to check for germination before sowing.
It’s also helpful to track seed purchase and storage dates. Use silica gel packets or powdered milk to absorb excess moisture in your storage containers. For long-term storage, refrigeration between 32–41°F (0–5°C) can extend viability, but avoid freezing unless specifically recommended.
Choosing Heirloom Vs. Hybrid Varieties
- Heirloom seeds: Offer traditional flavors and traits, and allow for seed saving.
- Hybrid seeds: Often bred for disease resistance and higher yields, but may not produce true-to-type offspring if saved.
Consider your gardening goals when selecting between these options. Many beginners start with hybrids for predictable results, but heirlooms are favored for unique flavors and adaptability.
If you’re interested in supporting biodiversity or cultivating plants with local history, heirloom seeds are a meaningful choice. Hybrids, by contrast, can offer greater uniformity in growth, size, and maturity, making them popular for gardeners seeking reliable, high-yielding crops. Keep in mind, however, that hybrid seeds often need to be purchased annually, while heirlooms allow you to save seeds for future seasons, promoting sustainability.

Credit: www.youtube.com
Preparing Your Indoor Seed-starting Workspace
Creating an optimal environment for seed starting maximizes your chances of success. This involves gathering supplies, setting up proper lighting, and ensuring the right temperature and humidity.
Essential Supplies And Equipment
A well-equipped workspace includes:
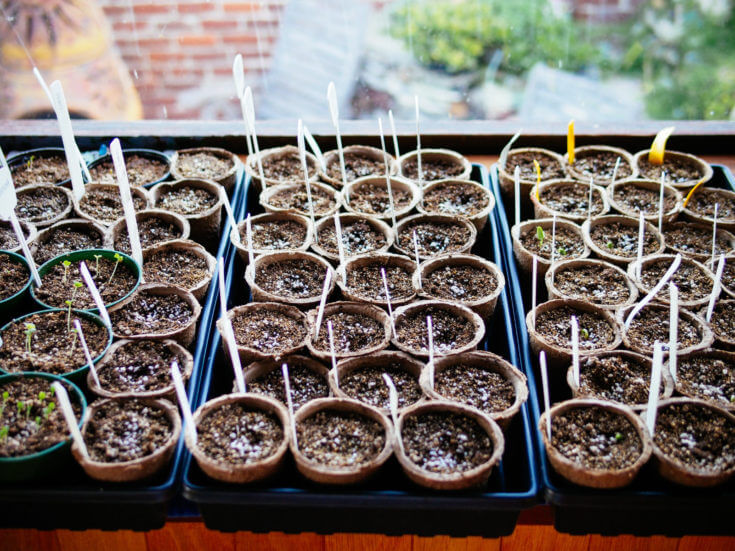
- Seed trays or pots: Shallow trays or individual pots for sowing seeds.
- Seed-starting mix: Lightweight, sterile medium for improved germination.
- Plastic domes or clear covers: To maintain humidity.
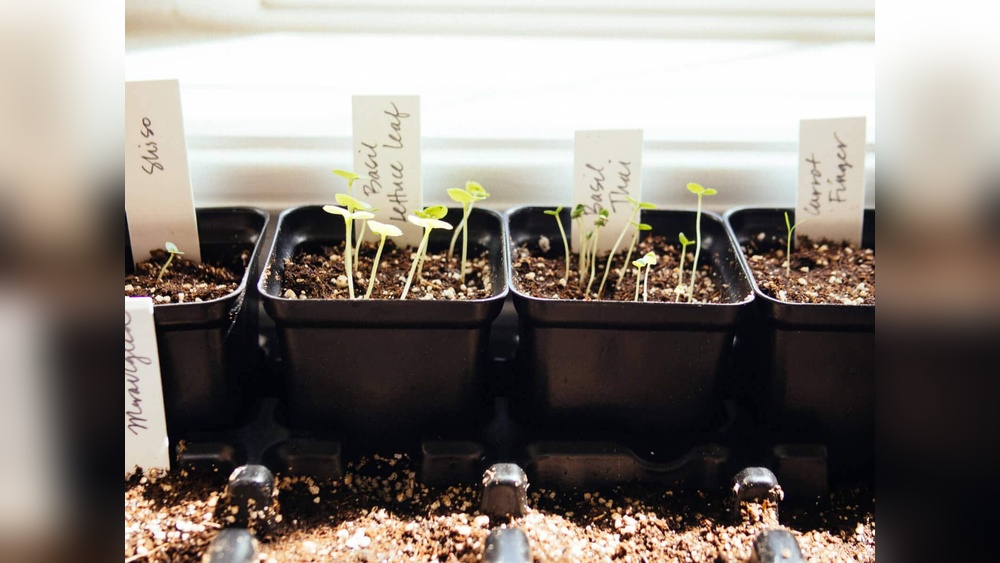
- Labels and markers: For tracking plant varieties.
- Spray bottles: For gentle watering.
- Grow lights: If natural light is insufficient.
- Heat mats: For warmth-sensitive seeds.
Investing in quality supplies can boost results. For example, using sterile seed-starting mix reduces the risk of fungal diseases.
For sustainability, consider reusable trays and biodegradable pots made from peat or coconut coir, which can be transplanted directly into the garden. Self-watering trays or capillary mats simplify moisture management and are especially helpful for busy gardeners. When choosing containers, ensure they have drainage holes to prevent excess moisture buildup—a common cause of seedling failure.
Setting Up Lighting For Seedlings
Adequate light is vital for strong, healthy seedlings. Most homes lack enough natural sunlight, so grow lights are recommended. Use fluorescent or LED lights, positioning them 2–4 inches above seedlings.
| Light Type | Cost (USD) | Energy Efficiency | Recommended For |
|---|---|---|---|
| Fluorescent | $20–50 | Moderate | Beginners |
| LED | $50–150 | High | All levels |
| Incandescent | $15–30 | Low | Not recommended |
Lights should be on 12–16 hours per day, mimicking daylight. Use timers for consistency. For more details, see Wikipedia: Grow Light.
If you have a south-facing window, you might supplement with grow lights only on cloudy days. Otherwise, full-spectrum LED lights provide the closest approximation to natural sunlight and are highly energy-efficient. Adjustable light stands or shelves allow you to raise or lower lights as seedlings grow, preventing legginess.
Temperature And Humidity Considerations
Most seeds germinate best at 65–75°F (18–24°C). Heat mats can maintain consistent warmth for heat-loving plants like tomatoes. Keep humidity high during germination by covering trays with plastic domes, but remove covers once seedlings emerge to prevent mold.
Monitor humidity levels; aim for 50–70%. Too much moisture can cause damping-off disease, a common seedling killer. A small fan improves air circulation and helps prevent fungal issues.
If your home is particularly dry (common in winter), use a room humidifier or place trays on a shallow tray filled with water and pebbles to gently increase humidity. Conversely, if condensation forms inside tray covers, briefly vent them daily to prevent fungal growth.
Organizing And Labeling
Proper organization prevents confusion and mistakes:
- Label each tray or pot with the plant name and sowing date.
- Arrange trays by light needs and germination rates.
- Keep a logbook or spreadsheet to track progress, watering, and growth.
This organization is especially important when starting multiple varieties.
Color-coded labels or waterproof plant tags make tracking multiple varieties easy. For more complex setups, gardeners use smartphone apps or spreadsheets to set reminders for watering, fertilizing, and transplanting. Good record-keeping enables you to learn from each season and improve your seed starting success year after year.

Credit: www.growjoy.com
Step-by-step Guide To Sowing Seeds Indoors
Following a proven process increases your chances of healthy seedlings. This section provides a detailed, actionable roadmap for beginners.
Preparing The Seed-starting Mix
Use a sterile, soilless seed-starting mix—not regular garden soil. Moisten the mix before filling trays or pots, ensuring it’s damp but not soggy. Fill containers, leaving about ½ inch from the rim.
- Common ingredients: Peat moss, coconut coir, vermiculite, perlite.
- Avoid: Heavy soils or compost that may harbor pests or diseases.
Pre-moistening helps prevent uneven watering after seeds are sown and ensures even contact between seeds and the medium. For homemade mixes, combine two parts peat or coir, one part vermiculite, and one part perlite for excellent drainage and aeration.
Sowing Seeds: Depth And Spacing
Seed packets specify depth and spacing. As a rule:
- Small seeds: Sow on the surface, gently pressing down.
- Medium seeds: ¼–½ inch deep.
- Large seeds: ½–1 inch deep.
Space seeds evenly to prevent overcrowding. For tiny seeds, mix with sand for easier distribution.
It’s better to sow seeds slightly too shallow than too deep—most seeds need some light to germinate. Use a toothpick or pencil to make shallow holes for individual seeds, and cover lightly with mix or vermiculite. Overcrowding can result in weak, spindly seedlings that are difficult to separate later.
Watering After Sowing
Water gently to avoid displacing seeds. Use a spray bottle or bottom-watering method (place trays in a shallow water pan). Keep the mix moist but not waterlogged.
- Tip: Cover trays with plastic domes to retain moisture until seeds sprout.
Bottom-watering reduces the risk of fungal diseases by keeping the surface dry, which is critical in the early stages. For consistent moisture, check trays daily, as seeds and seedlings can dry out quickly in heated homes.
Covering And Maintaining Moisture
Cover trays with clear plastic to create a mini-greenhouse effect. Remove covers once seedlings emerge to prevent disease. Monitor daily; seeds can dry out quickly indoors.
If you notice condensation dripping from the cover, prop it open slightly to improve air circulation. Some gardeners use plastic wrap or glass sheets for smaller containers, but ensure there’s enough ventilation to avoid mold.
Example: Starting Tomato Seeds
A home gardener in Chicago started tomato seeds indoors in mid-March using a sterile mix, heat mat, and LED grow light. Within 7 days, seedlings emerged. Regular misting and removal of the dome after germination resulted in 95% germination rate, compared to 70% when using unsterilized garden soil. This demonstrates the impact of proper setup.
This example also highlights the importance of adjusting care to the needs of each plant. Tomatoes thrive with bottom heat and consistent moisture but are sensitive to overwatering and poor air circulation. The gardener’s attention to detail and willingness to adapt methods led to notably higher success.
Credit: gardenbetty.com
Nurturing Seedlings: Light, Water, And Nutrition
Once seeds have sprouted, ongoing care is essential for robust growth. This section explains how to optimize conditions and prevent common problems.
Providing Adequate Light
Seedlings require intense light to avoid becoming leggy (tall and weak). Adjust grow lights so they are always 2–4 inches above plants. Rotate trays daily for even exposure.
- Tip: If seedlings lean toward light, increase intensity or move lights closer.
For best results, use a timer to provide consistent 14–16 hour cycles, mimicking spring’s increasing daylight. Plants also benefit from brief periods of darkness, which supports healthy development. If natural light is available, supplement with artificial light to maintain proper intensity throughout cloudy weeks.
Watering Seedlings Properly
Water when the top layer feels dry. Overwatering leads to root rot and fungal diseases; underwatering causes wilting and stunted growth.
- Bottom-watering is effective: Place trays in water for 10–15 minutes, then drain.
- Avoid splashing leaves, which can spread disease.
Check for even moisture by gently pressing the soil surface. If trays feel heavy, wait another day before watering. For very small seedlings, a fine mist sprayer helps prevent disturbance.
Fertilizing For Healthy Growth
Seed-starting mixes lack nutrients. Begin fertilizing once seedlings develop their first true leaves.
- Use a diluted liquid fertilizer (¼ strength) every 1–2 weeks.
- Organic options like fish emulsion are gentle and effective.
| Fertilizer Type | Application Frequency | Pros | Cons |
|---|---|---|---|
| Liquid Synthetic | Weekly | Quick results | Risk of burning |
| Organic (Fish Emulsion) | Biweekly | Gentle, sustainable | Odor |
| Slow-Release Granules | Once at transplant | Easy to use | Not for young seedlings |
Be cautious not to over-fertilize—seedlings are sensitive, and too much fertilizer can cause leaf burn or stunted roots. If leaves turn pale or growth stalls, it may indicate a nutrient deficiency; adjust feeding accordingly.
Thinning And Transplanting Seedlings
Crowded seedlings compete for resources. Thin by snipping weaker plants at soil level, leaving the strongest.
- Transplanting: Move seedlings to larger pots when they have 2–3 sets of true leaves.
- Handle gently by the leaves, not the stems, to avoid damage.
If seedlings are tightly packed, use a dibber or pencil to carefully tease them apart, preserving as many roots as possible. Transplant into individual pots filled with fresh, moistened seed-starting mix or potting soil. Water gently to settle roots and minimize shock.
Example: Lettuce Seedling Care
A school garden project started lettuce seeds indoors. After sprouting, students used fluorescent lights and bottom-watering. Thinning improved airflow and reduced disease, leading to a 90% survival rate when transplanting outdoors—a testament to attentive care.
Such success stories reinforce the value of each step—thinning, proper light, and careful watering. By engaging students in hands-on learning, the project also fostered a love of gardening and healthy eating habits.
Troubleshooting Common Seed-starting Problems
Even with best practices, issues can arise. Understanding and addressing these challenges ensures your seedlings stay healthy.
Damping-off Disease
Damping-off is a fungal disease that causes seedlings to collapse and die. Prevention:
- Use sterile seed-starting mix.
- Avoid overwatering.
- Provide good air circulation.
If damping-off appears, remove affected seedlings and sterilize trays.
Sterilize reused containers by soaking in a 10% bleach solution for 10 minutes and rinsing thoroughly. Cinnamon sprinkled on the surface can act as a natural antifungal. Avoid overcrowding, as dense planting increases humidity and disease risk.
Poor Germination
Low germination rates can result from:
- Old or poor-quality seeds.
- Incorrect temperature or moisture.
- Insufficient light.
Test seed viability before sowing. Adjust environmental conditions as needed.
If seeds fail to sprout, double-check packet instructions—some need pre-soaking or chilling (stratification) before sowing. Persistent issues may indicate problems with water quality or contaminated equipment.
Leggy Seedlings
Leggy growth signals inadequate light. Move lights closer or increase intensity. Rotate trays and ensure 12–16 hours of light daily.
Cooler temperatures (around 60–65°F/16–18°C) can help slow stem elongation and promote sturdier growth. If legginess persists, consider transplanting seedlings deeper into pots to encourage additional root development.
Mold And Algae
Excess moisture and poor ventilation can encourage mold and algae. Remove covers after sprouting, use fans for airflow, and water sparingly.
A thin layer of vermiculite on the soil surface can suppress algae. If mold appears, gently scrape it off and allow the surface to dry slightly before the next watering.
Example: Overcoming Damping-off
A gardener in Seattle experienced damping-off in basil seedlings. By switching to a sterile mix, reducing watering, and adding a small fan, subsequent batches had zero disease—highlighting the importance of environmental control.
This example demonstrates that small changes—like improved air flow or sterilizing containers—can dramatically reduce losses and boost overall confidence.
Hardening Off And Transplanting Outdoors
Transitioning indoor-grown seedlings to the outdoors requires gradual acclimatization, known as hardening off. This step prevents shock and ensures healthy growth after transplanting.
The Hardening Off Process
Begin 1–2 weeks before transplanting:
- Place seedlings outdoors in a sheltered area for 1–2 hours.
- Gradually increase exposure to sun and wind each day.
- Bring seedlings indoors at night if temperatures drop.
After 7–10 days, seedlings can withstand full outdoor conditions.
During hardening off, reduce watering slightly to encourage resilience, but don’t allow seedlings to wilt. Protect from heavy rain or sudden temperature swings with a cold frame or cloche if needed. This gradual process toughens cell walls and helps seedlings adapt to outdoor fluctuations.
Transplanting Seedlings
Choose a cloudy day or late afternoon to reduce stress. Prepare garden beds by loosening soil and adding compost.
- Dig holes slightly larger than root balls.
- Handle seedlings gently by leaves.
- Water thoroughly after transplanting.
Space plants according to packet recommendations, giving each enough room to grow. For tall or vining plants, consider supports or stakes at planting time to avoid disturbing roots later.
Minimizing Transplant Shock
Transplant shock can stunt growth or cause wilting. Strategies include:
- Watering well before and after transplanting.
- Avoiding root disturbance.
- Mulching to retain moisture.
Mulch also suppresses weeds and moderates soil temperature. Some gardeners use a diluted seaweed solution as a root drench to promote recovery and root growth.
Example: Successful Pepper Transplants
A home gardener in Texas hardened off pepper seedlings for 10 days, gradually increasing sunlight exposure. Transplanting on an overcast day and mulching reduced shock, resulting in vigorous plants that produced fruit two weeks earlier than direct-sown peppers.
Their approach—patience, gradual adjustment, and attentive aftercare—demonstrates the payoff of a thorough hardening-off process.
Real-world Examples And Case Studies
Learning from real-world successes helps reinforce best practices and inspire beginners. Here are three brief case studies:
Urban Apartment Gardening
An urban gardener in New York City started herbs (basil, cilantro, chives) on a windowsill using compact LED grow lights. Despite limited space, proper organization and regular care yielded lush, flavorful herbs year-round. This demonstrates indoor seed starting’s flexibility for apartment dwellers.
Utilizing vertical space with multi-tiered shelving and self-watering planters, the gardener maximized yield from a minimal footprint. Even a sunny kitchen window can become a year-round source of fresh greens.
School Garden Project
A school in California launched a spring vegetable garden. Students started tomato, lettuce, and marigold seeds indoors in reusable trays. Through teamwork, careful watering, and record-keeping, the project achieved a 95% transplant survival rate. The experience taught valuable lessons in science and sustainability.
Teachers integrated seed starting into science curricula, using observations to reinforce concepts like photosynthesis and plant growth cycles. Students enjoyed hands-on learning and the pride of harvesting their own crops.
Community Garden Expansion
A community garden in Ohio used indoor seed starting to extend their growing season. Volunteers sowed seeds in February, using donated grow lights and heat mats. By May, robust seedlings were transplanted outdoors, increasing yields by 30% compared to previous years.
The garden’s surplus allowed donations to local food banks, illustrating how indoor seed starting can benefit entire communities and address food insecurity.
Data-driven Benefits Of Indoor Seed Starting
Growing from seeds indoors offers measurable advantages over direct outdoor sowing. Here’s a comparison of key benefits:
| Factor | Indoor Seed Starting | Direct Outdoor Sowing |
|---|---|---|
| Plant Health | Controlled environment; fewer pests/diseases | Vulnerable to weather and pests |
| Yield | Higher; earlier harvest | Lower; later harvest |
| Cost | Lower; seeds are inexpensive | Higher; must buy mature plants |
| Flexibility | Can start any time indoors | Limited by outdoor conditions |
| Success Rate | Up to 95% with proper care | Varies; often 60–75% |
Research by University of Minnesota Extension confirms that indoor seed starting can increase transplant survival rates and yields, especially for vegetables requiring a long growing season.
In addition to these metrics, indoor seed starting provides other qualitative benefits, such as the satisfaction of growing plants from scratch and the ability to choose from a much wider variety of cultivars than those available as nursery transplants. For those with children, it offers a hands-on educational activity that builds responsibility and curiosity.
Advanced Tips And Resources For Beginners
Once you’ve mastered the basics, refine your indoor seed starting with advanced techniques and reliable resources.
Advanced Techniques
- Soil blockers: Create custom-sized blocks of seed-starting mix, reducing plastic waste and improving root health.
- Bottom heat: Use heat mats for warmth-sensitive seeds.
- Automated watering systems: For large-scale or busy gardeners.
Experiment with biochar or worm castings as soil amendments to boost microbial activity and seedling vigor. Try succession planting—staggering seed starts every few weeks—to ensure a continuous harvest throughout the season. For larger setups, consider installing adjustable racks with multiple light levels and self-watering trays to streamline care.
Recommended Resources
- Gardener’s Supply Company for supplies and tutorials.
- The Old Farmer’s Almanac for planting calendars and tips.
- Botanical Interests for quality seeds and advice.
Books like “The New Seed-Starters Handbook” by Nancy Bubel provide in-depth guidance for enthusiasts ready to take their skills to the next level.
Connecting With Gardening Communities
Join online forums or local clubs for support and inspiration:
- Reddit’s r/gardening: Share experiences and ask questions.
- Local extension offices: Offer workshops and advice.
Participating in seed swaps or community gardens can expand your knowledge and seed collection while connecting you with fellow gardeners facing similar challenges and successes.
Example: Soil Blocker Success
A gardener in Portland switched to soil blockers for starting lettuce and spinach. Improved root health and reduced transplant shock resulted in higher yields and less waste, demonstrating the value of advanced techniques.
The gardener also noted a reduction in plastic use and less root binding, thanks to the air-pruning effect of soil blocks, which encourages robust root systems.
Frequently Asked Questions
How Long Does It Take Seeds To Germinate Indoors?
Most seeds germinate in 5–14 days under proper conditions, but timing depends on the plant species and environment. Tomatoes and peppers typically sprout in 7–10 days, while lettuce and herbs may emerge in 3–7 days. Always check seed packets for specific timelines.
Some slow-germinating seeds like parsley or eggplant may take up to three weeks. Maintain patience and keep trays moist during this time.
What Is The Best Seed-starting Mix To Use?
A sterile, soilless mix containing peat moss or coconut coir, vermiculite, and perlite is ideal. Avoid regular garden soil, which may contain pests or diseases. Brands like Miracle-Gro and Espoma offer reliable options, but homemade mixes are also effective.
For organic gardening, ensure your mix is OMRI-listed or certified organic. Adjust mix components based on your local humidity—add more perlite for drier homes, more coir for moisture retention in arid climates.
Can I Use Regular House Lights For Seedlings?
Regular house lights are usually too weak for seedlings. Grow lights (fluorescent or LED) provide the intensity and spectrum needed for healthy growth. Position lights close to plants and provide 12–16 hours per day for best results.
If you must use household bulbs, choose “daylight” or “full-spectrum” LEDs, but expect slower, leggier growth compared to dedicated grow lights.
How Do I Prevent Seedlings From Becoming Leggy?
To prevent leggy seedlings, provide intense, consistent light, keep lights close (2–4 inches above plants), and avoid overcrowding. Rotate trays for even exposure and ensure seedlings are not shaded by others.
Maintain cooler temperatures and avoid excess nitrogen fertilizer, which can also cause rapid, weak growth.
When Should I Transplant Seedlings Outdoors?
Transplant seedlings outdoors after hardening off for 7–10 days, when they have 2–3 sets of true leaves and nighttime temperatures remain above 50°F (10°C). Choose a cloudy day or late afternoon to minimize transplant shock.
Monitor weather forecasts and be prepared to protect young plants with row covers or cloches if a late frost threatens.
Indoor seed starting is a transformative skill for gardeners of all levels. By following proven steps, troubleshooting common issues, and connecting with resources, you can grow strong, healthy plants ready to thrive outdoors. Whether you’re seeking to save money, extend your growing season, or simply enjoy the hands-on joy of gardening, starting seeds indoors opens up a world of possibilities.
Explore, experiment, and watch your garden flourish from the very first seed.