How to Protect Seeds From Damping Off Disease
Protect seeds from damping off by starting with sterile mix, keeping the surface only lightly moist until germination, and increasing airflow once seedlings have true leaves. Ignore that sequence and seedlings can collapse at the soil line overnight, wiping out trays fast. This guide matches the right step to each risk window: before sowing, after germination, and after first true leaves.
Before sowing


Damping off is a soil-borne disease complex that can rot seeds before emergence or make seedlings collapse at the soil line after they sprout. Extension sources tie it to several water molds and fungi, including Pythium, Rhizoctonia, and Fusarium, especially in cool, wet, stagnant conditions. Once seedlings are collapsed or girdled at the stem base, they are usually not worth saving.
Sanitation matters because the organisms can persist in contaminated mix, on trays, and on tools. Use fresh seed-starting mix, clean containers, and drainage holes so the root zone drains quickly and dries a little between waterings. Reusing old mix from a failed tray keeps the same problem in play. University of Minnesota Extension recommends sterile starting mix and clean containers for indoor seed starting, while Penn State Extension notes that sanitation and drainage are core prevention steps.
What it looks like in trays
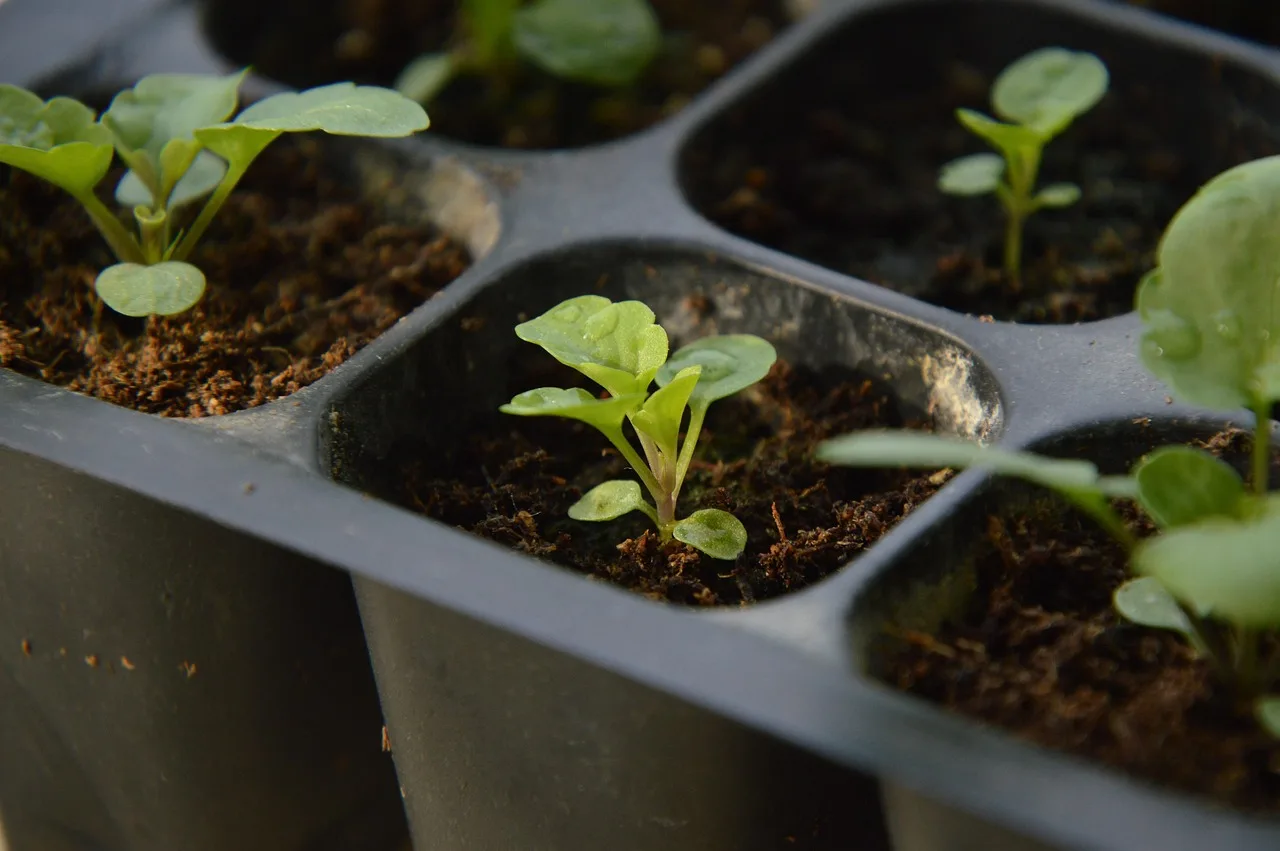
Pre-emergence loss looks like seed failure: the tray has gaps, but the seed never makes it above the mix. Post-emergence loss looks different. The stem narrows at the soil line, then the seedling falls over.
Slow-germinating crops are at higher risk because they sit longer in the danger zone. Tiny seeds are also vulnerable, since they are sown near the surface where moisture swings fast.
What you’ll need
- Fresh or sterile seed-starting mix that is lightweight, fast-draining, and soilless
- Clean seed trays and pots with drainage holes
- Bleach or hydrogen peroxide for disinfecting used containers and tools
- A spray bottle or bottom-watering tray
- A humidity dome, if you need short-term moisture retention
- A gentle fan
- A heat mat, if your crop benefits from warmer germination
- A thermometer for checking soil temperature
How do you prevent damping off before sowing?
Start with clean supplies. Use fresh seed-starting mix instead of garden soil, disinfect trays and tools, and begin with containers that drain freely. Warm, airy conditions before sowing lower the chance that fungi settle in before the seeds even germinate.
- Discard old potting mix if a previous tray failed from rot.
- Wash used containers, then soak them in a 1 part bleach to 9 parts water solution for at least 15 minutes.
- Rinse and dry tools before filling trays.
- Fill clean containers with fresh seed-starting mix and press it lightly, not hard.
- Set trays where the soil can stay warm and air can move.
Say your tray has 24 cells and last season’s mix stayed damp for days. Reusing that mix raises risk. Fresh mix, clean cells, and drainage holes remove three common failure points before any seed goes in.
Why seed-starting mix matters
Seed-starting mix is used instead of garden soil because it is lighter, more uniform, and less likely to stay soggy. Garden soil can compact in trays and hold too much water around the seed.
If you use new trays, keep them clean anyway. If you reuse old trays, disinfect them first. A contaminated tray can spread the problem across an entire flat.
During germination
Keep the mix moist, not soaked. Bottom watering is usually safer than overhead watering because it wets the root zone without splashing spores across the surface. Use a dome only while it helps hold moisture, then remove it once most seeds have sprouted. Exact warmth targets vary by seed type, so match the crop rather than aiming for one universal number. For many vegetables and flowers, warmer germination speeds emergence; soil below about 65°F is a warning sign for many crops, and some warm-season seeds germinate best closer to the low 70s. Utah State University Extension notes that germination temperature depends on the crop and that cold media slows sprouting.
- Water from below until the mix is evenly damp.
- Check the surface each day; it should dry a little between waterings.
- Lift the dome once germination begins on most cells, or sooner if condensation stays heavy.
- Set the tray where light is strong and indirect for 12 to 16 hours daily.
What protects the seeds from fungus after sowing? Stable moisture without saturation, plus clean containers and fresh mix. The goal is damp media with air spaces still open, not a swamp.
Humidity domes: help first, then remove
Domes can help tiny seeds and slow crops by holding moisture near the surface. They also raise humidity, which can favor fungal growth if they stay on too long. Once the seeds are up, vent the dome or remove it.
A common first-timer mistake is leaving the dome on until the seedlings look tall enough to handle. By then, the surface may have stayed too wet for too long.
Timing box: dome, fan, and thinning
| Step | When to do it | Why it matters |
|---|---|---|
| Remove or vent dome | Once most seeds have sprouted, or earlier if condensation is heavy | Reduces stagnant humidity around the stem base |
| Start a fan | After emergence, when seedlings can already stand upright | Moves air across the tray and helps surfaces dry a little between waterings |
| Thin seedlings | As soon as you can identify the strongest plants in each cell | Prevents overcrowding and lowers humidity around crowded stems |
After emergence
After emergence, the focus shifts to air movement, spacing, and steadier drying at the surface. A small fan can help move air around the tray and keep seedlings healthy. Thin crowded cells early so humidity is less likely to build around the stems. Warmth still matters, but airflow and light become the bigger priorities once sprouts are up.
- Move a gentle fan near the tray so leaves barely flutter.
- Thin crowded seedlings as soon as you can identify the strongest plants.
- Keep bottom watering, but let the surface dry a bit between waterings.
- Raise light levels so stems do not stretch and weaken.
How do you keep seedlings from collapsing at the soil line? Give them air, space, and warm media. Collapse often follows a period of stagnant humidity, cool soil, and wet mix right at the stem base.
Temperature targets that help
Cool soil can increase risk, and soil below about 65°F is a warning sign for many crops. When the crop allows it, a heat mat can help keep the medium warm enough for faster germination. Photosynthesis claims vary by plant and growth stage, so it is better to follow crop-specific germination guidance than a single universal leaf-temperature number.
Use the crop’s preferred germination temperature, then ease off once sprouts are up. Warmth helps most before emergence. After that, airflow matters more. Slow, high-risk crops such as parsley, peppers, celery, onions, and many flowers benefit from closer temperature control because they germinate more slowly and spend longer in wet media.
Damping off prevention checklist
| Phase | Check | Yes/no action |
|---|---|---|
| Pre-sow sanitation | Trays, pots, and tools are cleaned or disinfected | If no, wash and disinfect before filling |
| Pre-sow sanitation | Mix is fresh, sterile, and soilless | If no, replace it with seed-starting mix |
| Pre-sow sanitation | Containers have drainage holes | If no, switch containers |
| Germination window | Surface stays lightly moist, not wet | If no, reduce water and switch to bottom watering |
| Germination window | Dome is removed once most seeds sprout | If no, vent or lift it now |
| Post-emergence care | Air moves gently around seedlings | If no, add a small fan |
| Post-emergence care | Seedlings are spaced or thinned | If no, thin crowded cells |
| Post-emergence care | Soil stays warm rather than cool and wet | If no, warm the tray or water less often |
Is it damping off, overwatering, cold soil, or poor germination?
Use the symptoms, timing, and soil feel to narrow it down. Damping off usually shows as sudden collapse, soft stem tissue, and a pinched stem at the soil line. Overwatering makes the tray feel heavy and soggy without the telltale stem girdling. Cold soil slows everything down, while poor germination leaves bare cells without rot.
| Problem | Likely symptoms | Timing | Soil feel | What to do next |
|---|---|---|---|---|
| Likely damping off | Seedling collapses at the soil line; stem may look pinched, water-soaked, or brown | Often right after sprouting or when seedlings are still very small | Cool, wet, or stagnant at the surface | Remove affected seedlings, reduce moisture, increase airflow, and discard contaminated mix if several cells are involved |
| Overwatering | Leaves may yellow or droop; soil stays shiny or saturated but stems are not girdled | Can happen at any stage | Heavy, soggy, or waterlogged | Water less often, use bottom watering, and let the top layer dry slightly |
| Cold soil | Slow or uneven sprouting; seedlings may stall without collapsing | Before and during germination | Cool to the touch; may stay damp longer than expected | Warm the tray to the crop’s preferred range and avoid saturating the mix |
| Poor germination | Bare cells or weak sprouting with no stem collapse | After the normal germination window for that crop | Can be normal, too dry, or too wet | Check seed age, depth, temperature, and moisture before re-sowing |
Common mistakes
Overwatering is often one of the quickest ways to invite trouble. Seedlings need to stay moist but never saturated. If the tray looks shiny or heavy for days, back off and let the surface dry a little before the next watering.
Dirty trays, old mix, and crowded cells also raise risk. So does leaving a humidity dome on too long. The dome helps only while seeds need extra moisture; after that, it can trap damp air around the stems.
Suppose a 6-cell tray of basil sprouts well but two cells stay empty after about 10 days while the others look fine. That may be poor germination in those cells, not damping off. By contrast, soft stems at the soil line point much more strongly to damping off.
What if a tray already got contaminated?
If several seedlings collapse and the mix smells sour or stays soggy, stop watering that tray. Remove dead seedlings, then discard the mix if rot is spreading across cells. Clean the container again before reuse.
Nearby healthy seedlings can be worth keeping only if the problem is limited to one or two cells. If most of the tray shows collapse, re-sow in fresh mix and a disinfected tray.
How do you prevent damping off in seedlings?
Use a three-part routine: sanitize before sowing, keep germination moisture steady without saturation, and increase airflow after emergence. That sequence matches the disease’s risk window and gives each stage the conditions it needs, without leaving wet surfaces exposed longer than necessary.
Frequently asked questions
How do I stop damping off in seedlings once it starts?
There is no cure once plants are infected, so remove collapsing seedlings and reduce spread. Stop overhead watering, improve airflow, and discard contaminated mix if several cells are affected. Re-sow in fresh mix and sanitized containers.
How do I protect newly planted seeds from damping off disease?
Use sterile mix, disinfected trays, and bottom watering from the start. Keep humidity only as high as needed for germination, then vent or remove the dome. Warm conditions help, especially for slow seeds that sit longer before sprouting.
What prevents seeds from germinating in seed trays?
Cold, wet mix and poor drainage are common culprits. Check whether the medium is below 65°F, whether the cells are waterlogged, and whether the tray sits in stagnant air. Slow crops may simply need more time before any failure is declared.
Should I use a fan, dome, or bottom watering for seedlings?
Use all three at different times. A dome helps before sprouting, bottom watering keeps the surface from staying soaked, and a fan matters most after emergence. Remove the dome once most seedlings are up and begin thinning crowded cells.
Can overcrowding cause damping off in seedlings?
Yes. Crowded seedlings trap humidity and reduce airflow, which helps fungi spread. Thin early so stems have space and the surface dries between waterings. Dense cells are especially risky when the tray is already cool and wet.