When Should You Start Fertilizing Seedlings? Right Timing
Growing healthy seedlings is both a science and an art. For gardeners and commercial growers alike, nurturing young plants from seed to robust transplants is a critical stage—one that hinges on providing precise care at the right time. Among the most common questions is: when should you start fertilizing seedlings? Fertilizing too early or too late can spell the difference between thriving plants and stunted, unhealthy growth. Getting the timing right is crucial, but the answer depends on several factors including plant species, the type of growing medium, environmental conditions, and the specific fertilizer used.
This article dives deep into the timing and science of fertilizing seedlings. You’ll discover research-backed guidelines, real-world examples, actionable tips, and clear data comparisons. Whether you’re a home gardener starting tomatoes on a windowsill or a professional grower managing hundreds of trays, understanding the right timing to begin fertilization will maximize your seedlings’ potential.
Let’s decode the essential steps and best practices to ensure vibrant, resilient young plants that are ready for transplant.
Key Takeaways
- Seedling fertilization should begin after true leaves appear, not at the cotyledon stage.
- The timing varies by plant species, growing medium, and environmental conditions.
- Over-fertilizing or using the wrong type can cause nutrient burn and stunted growth.
- Using a diluted, balanced fertilizer is safest for young seedlings.
- Monitoring leaf color, growth rate, and root development helps fine-tune fertilization.
- Real-world case studies demonstrate how proper timing boosts yield and plant health.

Credit: www.greenacelawncare.com
Understanding Seedling Growth Stages
For precise fertilization, it’s essential to understand the key stages of seedling development. Each phase has unique nutrient requirements and sensitivities.
Germination And Cotyledon Stage
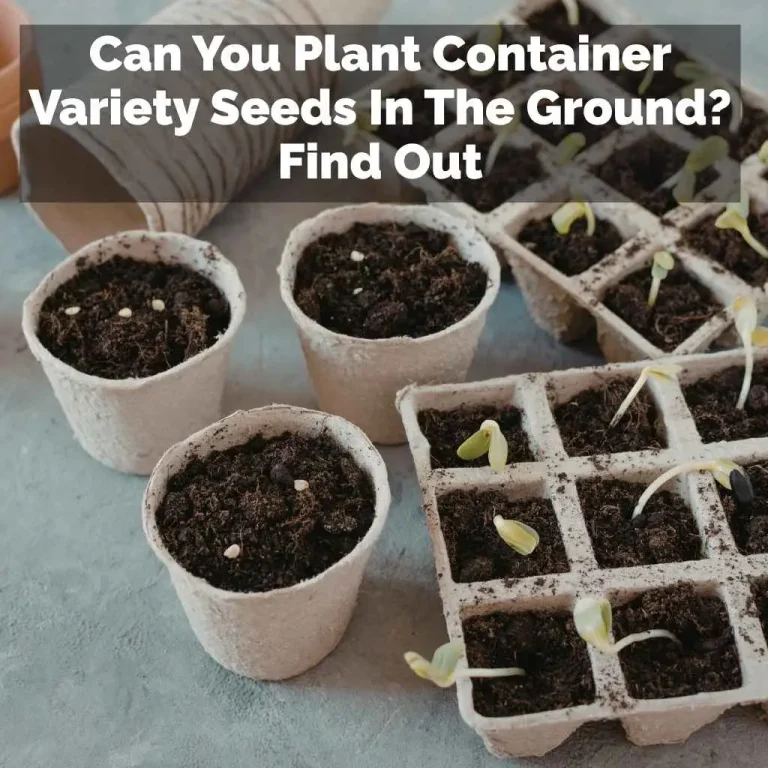
After sowing, seeds undergo germination, absorbing water and swelling until the seed coat breaks. The first leaves to appear are the cotyledons—these are not true leaves but embryonic structures packed with nutrients. During this stage, seedlings rely entirely on their stored food reserves. Introducing fertilizer now can overwhelm their delicate roots, leading to fertilizer burn and impaired growth.
Key traits of cotyledon stage:
- Only seed leaves visible (usually rounder and thicker than true leaves)
- Roots are fragile and undeveloped
- No external nutrient demand
It’s important to recognize that the cotyledon stage is a period of vulnerability. The root system at this point is just beginning to develop, and the seedling’s metabolic activity is still relatively low. Some growers are tempted to “jump start” growth with fertilizer at this stage, but research and decades of horticultural experience consistently show that this can lead to more harm than good.
The cotyledons themselves contain the nutrients needed for initial growth, and adding external fertilizer can create a toxic environment for the newly forming roots.
Emergence Of True Leaves
The appearance of the first true leaves signals a major developmental shift. True leaves resemble the mature foliage of the plant and indicate that the seedling’s internal reserves are depleted. At this point, the plant begins actively absorbing nutrients from its environment, making it the ideal time to start light fertilization.
Indicators for fertilization readiness:
- At least one set of true leaves is present
- Seedling shows active growth and increasing leaf size
This is the critical turning point for the seedling. The development of true leaves coincides with an increase in the seedling’s photosynthetic capacity and an uptick in metabolic rate. The roots, now slightly more established, are better equipped to absorb diluted nutrients from the growing medium.
This is why most university extension services and horticultural experts universally recommend waiting for this stage before fertilizing.
Vegetative Growth Phase
As more true leaves develop, the seedling enters a phase of rapid vegetative growth. Nutrient needs increase, particularly for nitrogen, which supports leafy growth. The root system also expands, improving nutrient uptake efficiency.
Vegetative growth characteristics:
- Multiple sets of true leaves
- Noticeable stem elongation
- Roots start filling the cell or container
At this stage, seedlings are able to handle more frequent and slightly stronger fertilizer applications. The plant’s demand for nutrients such as nitrogen (for leaf growth), phosphorus (for root development), and potassium (for overall health) increases steadily. Experienced growers often observe that seedlings respond quickly to the right nutrition during this phase, with visible improvements in color, vigor, and root mass.
Transition To Transplanting
Shortly before transplanting, many growers boost fertilization to “harden off” seedlings, preparing them for outdoor conditions. This stage may require adjustments in the fertilizer formula to balance phosphorus (for root growth) and potassium (for stress resilience).
During the hardening-off process, the goal is to gradually acclimate seedlings to outdoor conditions while ensuring they have the nutrient reserves needed for rapid establishment post-transplant. Some growers use a slightly higher potassium formula or supplement with trace minerals to enhance stress resistance and disease tolerance.
This approach is especially beneficial in commercial operations where transplant shock can significantly impact yields.
Key Factors Influencing Fertilization Timing
The ideal moment to start fertilizing seedlings isn’t one-size-fits-all. Consider the following influential factors to tailor your approach:
Type Of Growing Medium
The substrate used can dramatically affect when and how much to fertilize.
- Soilless mixes: Common in seed-starting trays, these are typically composed of peat, coco coir, perlite, or vermiculite and contain little to no nutrients. Fertilization is required soon after true leaves appear.
- Compost-rich or amended soils: If the starting mix includes compost or organic amendments, nutrient reserves may last longer, delaying the need for added fertilizer.
| Growing Medium | Initial Nutrient Content | Time to First Fertilization |
|---|---|---|
| Soilless Mix (peat/coco) | Very Low | After 1st true leaves |
| Seed-Starting Mix with Compost | Moderate | After 2nd set of true leaves |
| Garden Soil | Variable | May not need initial fertilization |
The choice of medium is often dictated by the type of plants grown and the grower’s resources. For instance, commercial operations using plug trays filled with sterile soilless mix will need to begin fertilizing earlier than gardeners using rich, organic potting soils.
Seed-starting mixes containing compost can provide a buffer, but it’s important to monitor for signs of nutrient exhaustion, such as slowed growth or pale leaves, which indicate it’s time to supplement.
Plant Species And Growth Rate
Different crops have varying nutrient demands. For example, tomatoes and peppers are heavy feeders and benefit from earlier fertilization, while lettuce and herbs require less aggressive feeding schedules.
Crops like brassicas (broccoli, cabbage) also have moderate to high nutrient requirements during the seedling stage, whereas slow-growing perennials or flowers may thrive on less frequent, weaker feedings. Understanding the specific needs of each crop is vital for maximizing growth and avoiding issues such as leggy, weak plants or stunted development.
Environmental Conditions
- Light: Seedlings under strong grow lights or in greenhouses grow faster and exhaust nutrients quickly.
- Temperature: Warm conditions accelerate metabolism and nutrient uptake.
- Watering regime: Overwatering can leach nutrients, necessitating earlier fertilization.
Environmental factors can change rapidly, especially in home settings where temperature and light levels can fluctuate daily. Monitoring these variables and adjusting fertilization accordingly is a hallmark of experienced growers. For example, during an unusually cloudy week, reducing fertilization can prevent salt buildup and root stress.
Fertilizer Type And Concentration
- Synthetic fertilizers provide nutrients in readily available forms; however, they can cause root burn if overapplied.
- Organic options (such as fish emulsion or compost tea) release nutrients more slowly and gently.
It’s critical to use a diluted solution (typically 1/4 to 1/2 strength of the manufacturer’s recommendation) for young seedlings.
Selecting the right fertilizer type and concentration is especially important in hydroponic or container systems where nutrients are not buffered by soil. Organic growers may opt for fish-based or seaweed-based fertilizers, which tend to be safer for tender roots, while conventional growers may use water-soluble synthetic blends for quick results.

Credit: simplelawnsolutions.com
When To Start Fertilizing: Research-backed Guidelines
Timing fertilizer applications correctly is both a science and an art. Here’s what research and expert consensus recommend:
Wait For True Leaves
Numerous studies, including those from University of Minnesota Extension, emphasize that seedlings should not be fertilized until the first true leaves appear. Applying fertilizer before this point risks damaging the root system and causing salt buildup.
Waiting for true leaves ensures that the seedling is physiologically ready to utilize external nutrients. This is supported by controlled trials where seedlings fertilized at the cotyledon stage showed reduced survival rates and more frequent root damage compared to those fertilized after true leaf emergence.
Use Diluted Solutions
A comprehensive study in the journal *HortScience* found that applying fertilizer at 1/4 strength immediately after true leaves emerge promotes steady, healthy growth without risk of burn. Concentrations above 1/2 strength can cause toxicity, especially in soilless mixes.
Professional growers often start with a highly diluted solution and gradually increase strength as the seedlings demonstrate tolerance. This incremental approach minimizes the risk of salt stress and helps seedlings acclimate to increasing nutrient levels.
Gradually Increase Frequency
Begin fertilizing once per week after the appearance of true leaves. As the seedling grows and develops a more robust root system, increase to twice weekly if growth is vigorous and no signs of stress are present.
This gradual increase in frequency matches the seedling’s increasing nutrient needs as it develops. It’s common practice in both home and commercial settings to alternate between plain water and fertilizer solution to prevent salt buildup and ensure steady, uniform growth.
Adjust For Growth Stage And Signs
Monitor for signs of nutrient deficiency (pale or yellowing leaves, slow growth) or toxicity (leaf tip burn, stunted roots). Adjust the fertilization schedule and concentration accordingly.
Observation is key: healthy seedlings should display vibrant green leaves, steady growth, and sturdy stems. Any deviation from these indicators should prompt a review of fertilization practices.
| Stage | Fertilizer Strength | Frequency |
|---|---|---|
| After true leaves | 1/4 strength | Once per week |
| 2-3 sets of true leaves | 1/2 strength | Twice per week |
| Pre-transplant | Full strength (optional) | Weekly or as needed |
Real-world Example: Tomato Seedlings
A home gardener starting tomato seeds in a peat-based soilless mix notices the first true leaves 12 days after sowing. Following best practices, they begin fertilizing with a 1/4 strength balanced liquid fertilizer. Within a week, the seedlings show deeper green color and increased vigor, while neighboring seedlings that received fertilizer earlier displayed root burn and stunted growth.
In a larger greenhouse setting, tomatoes grown for commercial transplant are similarly managed: fertilization begins at the first true leaf stage and is incrementally increased. This practice has been shown to increase uniformity and transplant success, ultimately boosting yield per acre.
Credit: www.gardeningknowhow.com
Choosing The Right Fertilizer For Seedlings
Not all fertilizers are created equal, especially for young plants with sensitive roots. Selecting the right type, formulation, and application method is key.
Balanced Vs. High-nitrogen Fertilizers
Seedlings require a balanced nutrient profile (equal parts nitrogen, phosphorus, and potassium) in early stages. Overemphasis on nitrogen can cause leggy growth, while excessive phosphorus may inhibit micronutrient uptake.
- Recommended N-P-K ratio: 10-10-10, 20-20-20, or similar balanced formulas.
- Avoid “starter” fertilizers with high phosphorus unless specifically transplanting outdoors.
Using a balanced formula ensures that the seedlings receive all essential macronutrients without tipping the scale in favor of rapid, weak growth. Some specialty fertilizers for seedlings include additional micronutrients and chelated minerals for enhanced uptake.
Liquid Vs. Granular Fertilizers
- Liquid fertilizers are preferred for seedlings because they allow precise dilution and are absorbed quickly.
- Granular or slow-release fertilizers are less suitable for tiny root systems and risk uneven distribution.
Liquid fertilizers also facilitate foliar feeding if necessary, although this is rarely needed at the seedling stage unless correcting a specific deficiency.
Organic Vs. Synthetic Options
- Organic choices (e.g., fish emulsion, seaweed extract, worm tea) feed soil microbes and provide a gentle nutrient release.
- Synthetic products offer immediate results but require careful dilution.
Organic fertilizers are particularly favored in organic and sustainable growing systems. Many of these products contain not only macronutrients but also beneficial microbes and trace minerals, which can help build soil health and resilience in the long term.
Micronutrient Considerations
Seedlings also need trace elements like iron, magnesium, and calcium. Deficiencies can appear as chlorosis (yellowing) or leaf deformities. Look for fertilizers labeled as “complete” or containing micronutrients.
Micronutrient deficiencies are more common in soilless media and hydroponics, where natural soil buffers are absent. Using a complete fertilizer or supplementing with products specifically designed for seedlings can prevent these problems.
Case Study: Lettuce In Hydroponics
In a commercial hydroponic setup, lettuce seedlings grown in rockwool cubes are started on a 1/8 strength hydroponic nutrient solution after true leaves appear. The gentle approach prevents salt buildup, resulting in uniform, healthy transplants with high survival rates post-transplant.
Hydroponic growers often pay close attention to electrical conductivity (EC) and pH of the solution, adjusting both to match the stage of seedling growth. Keeping EC low during the early seedling phase is crucial to avoid osmotic stress and support vigorous development.
Best Practices For Fertilizing Seedlings
Applying fertilizer isn’t just about timing—it’s also about technique and consistency. These practices will maximize seedling health and minimize risks.
Proper Dilution And Application
- Always pre-mix fertilizer at the recommended dilution in a separate container.
- Water seedlings with the fertilizer solution, ensuring even distribution without oversaturating the medium.
- Discard any unused diluted fertilizer after 24 hours to prevent microbial growth.
When mixing, use lukewarm, chlorine-free water if possible. This aids nutrient uptake and prevents shocking the roots. Additionally, use a watering can or syringe to apply the solution gently, avoiding soil disturbance and leaf splash, which can cause disease.
Frequency And Scheduling
- Maintain a regular schedule (e.g., every 7 days) and adjust based on observed plant response.
- Avoid fertilizing during periods of low light or cool temperatures, as uptake will be reduced.
Consistency is crucial. Set reminders or use a garden journal to track fertilization dates, especially if you are raising multiple crops or succession plantings. This ensures no seedling group is neglected or overfed.
Monitoring For Issues
- Watch for leaf color changes, growth rate, and root health.
- If signs of over-fertilization appear (e.g., brown leaf tips, wilting), flush the medium with clean water and reduce fertilizer concentration.
Using a hand lens or gently removing a seedling from its cell can help inspect root health—healthy roots are white and fibrous, while stressed roots may appear brown or mushy.
Integrating With Watering
- Fertilize when the medium is slightly dry to avoid root rot.
- Alternate between plain water and fertilizer solution to prevent salt accumulation.
For best results, water evenly and ensure containers have good drainage. This prevents waterlogged roots and supports optimal nutrient uptake.
Real-world Example: Pepper Seedlings In Coco Coir
A small-scale grower raises pepper seedlings in coco coir, a medium with no inherent nutrients. After the first set of true leaves, they begin weekly applications of a 1/4 strength organic seaweed extract. The result is robust, green plants with strong root systems, outperforming a control group given fertilizer at sowing, which suffered from root rot.
Pepper seedlings are particularly sensitive to overwatering and high fertilizer concentrations. This method, combining careful timing and organic fertilizer, produces transplants that adapt quickly after planting out, with higher yields and fewer losses due to transplant shock.
Common Mistakes And How To Avoid Them
Even experienced gardeners can make fertilization errors. Avoid these frequent pitfalls to ensure healthy seedlings.
Fertilizing Too Early
Applying fertilizer before true leaves appear can cause root damage and salt stress. Always wait for at least one set of true leaves.
Cotyledons supply everything the seedling needs in the early days. Fertilizing before this stage can disrupt the delicate balance required for root and shoot formation.
Using Full-strength Fertilizer
Seedlings are sensitive—start with 1/4 to 1/2 strength solutions. Full-strength fertilizer is rarely appropriate before transplanting.
Many fertilizer package instructions are intended for mature plants. Always adjust the dilution for seedlings, and when in doubt, err on the side of caution.
Overwatering With Fertilizer
Excess moisture combined with fertilizer can lead to both root rot and nutrient leaching. Water only as needed and monitor soil moisture.
Seedlings in trays or flats are especially prone to this mistake, as the small volume of medium dries out quickly but can also become waterlogged just as fast.
Ignoring Plant Signals
Seedlings will “tell” you if they’re unhappy—yellowing, stunted growth, or leaf burn are all warning signs. Regularly inspect plants and adjust practices accordingly.
Keeping a close eye on your seedlings and responding promptly to their signals is the best way to catch problems early and correct them before they become severe.
Neglecting Medium Ph
Many nutrients become unavailable if pH is too high or too low. Aim for a pH of 5.8–6.5 for most seedlings.
If you notice persistent issues despite proper fertilization, test the pH of your water and growing medium. Small, inexpensive pH meters are widely available and invaluable for troubleshooting.
Real-world Example: Over-fertilization In Commercial Greenhouse
A commercial flower grower applied full-strength fertilizer to petunia seedlings immediately after germination, resulting in widespread leaf burn and a 30% reduction in viable transplants. Switching to a 1/4 strength solution after true leaves appeared eliminated the issue and improved crop uniformity.
This example underscores the importance of both timing and dilution, even in high-tech, commercial settings. Small adjustments can have dramatic impacts on success rates and profitability.
Comparing Fertilization Schedules By Plant Type
Not all vegetables or flowers have the same fertilization needs. Here is a quick-reference table for popular crops:
| Plant Type | First Fertilization Timing | Recommended Fertilizer Strength |
|---|---|---|
| Tomato | After first true leaves | 1/4 – 1/2 strength |
| Pepper | After first true leaves | 1/4 strength |
| Lettuce | After second set of true leaves | 1/8 – 1/4 strength |
| Cucumber | After first true leaves | 1/4 strength |
| Herbs (basil, parsley) | After first true leaves | 1/8 – 1/4 strength |
| Marigold | After second set of true leaves | 1/4 strength |
For more crop-specific information, refer to resources like Penn State Extension.
Tailoring your fertilization schedule to the plant species increases both the quality and uniformity of your transplants. Fast-growing crops like cucumbers and tomatoes generally require more frequent feeding, while slower growers or those with lower nutrient needs (like lettuce and most herbs) do best with a gentler approach.
Environmental Factors That Impact Fertilization Success
While timing is critical, environmental factors can make or break your fertilization success.
Light Intensity
Seedlings under strong artificial lights (LED, fluorescent) grow faster and will use nutrients more rapidly than those in low-light windowsills. Adjust fertilization frequency accordingly.
For example, seedlings under high-output grow lights may require fertilization every 5-7 days, while those in natural, lower light may need fertilizing only every 10-14 days. Insufficient light can also lead to leggy seedlings, regardless of fertilization practices.
Temperature And Humidity
- Higher temperatures speed up growth and nutrient uptake.
- Lower temperatures slow metabolism; in cool conditions, fertilize less often.
- High humidity can reduce transpiration, slightly reducing nutrient demand.
Maintaining optimal temperature and humidity not only maximizes growth but also prevents common issues such as fungal diseases, which are exacerbated by excess moisture and poor airflow.
Water Quality
Hard or chlorinated water can interact with fertilizer salts and impact nutrient uptake. Use filtered or distilled water for sensitive seedlings when possible.
In regions with high mineral content in tap water, consider using rainwater or reverse osmosis water, especially for hydroponic and high-value crops.
Airflow And Disease Pressure
Good airflow reduces disease and allows leaves to transpire and absorb nutrients efficiently. Overcrowded or poorly ventilated environments increase stress and reduce fertilizer efficiency.
Installing small fans, spacing trays, and thinning seedlings can make a notable difference in seedling health and responsiveness to fertilization.
Case Study: Indoor Grow Room Vs. Greenhouse
A controlled experiment by Royal Horticultural Society compared fertilization timing in indoor grow rooms (under LEDs) and passive greenhouses. Indoor-grown seedlings reached the true leaf stage four days earlier and required earlier fertilizer application, while greenhouse seedlings needed less frequent fertilization due to lower light and temperature fluctuations.
This demonstrates the importance of adjusting fertilization practices to match the growing environment and the rate of seedling development.
Troubleshooting Seedling Fertilization Problems
Despite best efforts, problems can arise. Here’s how to identify and solve common fertilization issues.
Nutrient Deficiencies
Symptoms:
- Pale yellow leaves: Nitrogen deficiency
- Purple-tinged leaves: Phosphorus deficiency
- Interveinal chlorosis: Magnesium or iron deficiency
Solution: Increase fertilizer concentration slightly or switch to a complete formula with micronutrients.
It’s important to act quickly when deficiencies are observed, as seedlings can decline rapidly. Also, check the pH and ensure the roots are healthy, as nutrient uptake depends on both.
Fertilizer Burn
Symptoms:
- Brown, crispy leaf edges or tips
- Wilting despite moist soil
- Slow or stunted growth
Solution: Flush the root zone with clean water, skip fertilization for 1-2 weeks, and resume at a lower strength.
Prevention is the best cure for fertilizer burn. Always err on the side of less when dealing with young seedlings.
Root Rot
Symptoms:
- Mushy, brown roots
- Foul odor from medium
- Wilting leaves
Solution: Reduce watering, improve drainage, and avoid fertilizing until roots recover.
Root rot is often fatal to seedlings, so early detection and correction of watering practices are essential.
Salt Buildup
Symptoms:
- White crust on soil surface
- Poor water absorption
Solution: Periodically flush pots with distilled water to remove excess salts.
Regularly alternating between fertilizer solution and plain water helps prevent this issue.
Frequently Asked Questions
What Are The Signs That Seedlings Need Fertilizer?
Look for slow growth, pale or yellowing leaves, and weak stems. These signs often indicate that the seedling has exhausted the nutrients available in the starting medium and would benefit from a diluted fertilizer application.
Is It Possible To Skip Fertilizing Seedlings Entirely?
If your starting mix contains ample organic matter or you’re using pre-fertilized seed-starting mixes, you may not need to fertilize right away. However, most soilless and inert media require supplemental feeding once true leaves emerge for optimal growth. For more details, see Gardening Know How.
Can I Use Homemade Compost Tea For Seedlings?
Yes, compost tea can be used if well-diluted. Ensure it is free from pathogens and has been strained to prevent clogging watering devices. Start with a weak solution and observe seedlings for any adverse reactions.
Compost teas can be a source of beneficial microbes as well as nutrients but should be prepared with care to avoid introducing disease.
What Happens If I Over-fertilize My Seedlings?
Over-fertilization can cause fertilizer burn, stunted root development, and sometimes death of the seedling. If you suspect over-fertilization, flush the growing medium with plenty of clean water and avoid fertilizing until recovery. More information is available from Old Farmer’s Almanac.
Are Organic Fertilizers Safer For Seedlings?
Generally, organic fertilizers are gentler and less likely to cause root burn because nutrients are released more slowly. However, improper concentration can still harm seedlings. Always dilute and monitor plant response. For more on organic options, check Oregon State Extension.
Growing robust seedlings starts with understanding their unique needs. Fertilizing at the right time—after the first set of true leaves—sets the stage for vigorous, healthy plants ready for transplant. By choosing the right fertilizer, using proper dilution, and observing environmental cues, you’ll avoid common mistakes and ensure optimal seedling health.
Whether you’re nurturing tomatoes for your backyard or managing a commercial greenhouse, these guidelines will help you achieve the best possible results, season after season.
For ongoing success, continually observe your seedlings, adapt your practices to changing environmental conditions, and stay informed with the latest research from trusted horticultural institutions. By combining experience, attention to detail, and these research-backed best practices, you can consistently produce strong, healthy transplants that thrive in your garden or business.
Happy growing!