When Is the Best Time to Plant Clover Seeds for Success?
Planting clover seeds at the right time is the single most important factor for a thick, healthy stand that chokes out weeds and enriches your soil. This guide breaks down the optimal planting windows for spring and fall, soil temperature requirements, and step-by-step instructions to ensure your clover thrives, whether you’re creating a food plot, a lawn alternative, or a living mulch.
Simply put, the best time to plant clover seeds is either in early spring after the last frost or in late summer to early fall, about 6-8 weeks before the first expected frost. The key is consistent soil moisture and temperatures between 40°F and 70°F, with fall planting often yielding better long-term results for many regions.
Key Takeaways
- Planting clover seeds in early spring (March-April) or late summer/early fall (August-September) provides the ideal conditions for germination and root establishment.
- The optimal soil temperature for clover seed germination is between 48°F and 68°F, but they will still sprout in cooler soils if moisture is adequate.
- Fall planting is generally preferred for most regions because it avoids summer heat stress and gives the clover a head start against winter weeds.
Why Timing Matters for Planting Clover Seeds
Timing your clover planting correctly is not just about following a calendar date. It directly influences seed germination rates, young plant survival, and how quickly your stand fills in. Clover is a cool-season perennial legume, meaning it grows best in moderate temperatures and struggles in extreme heat or drought.
When you plant clover seeds at the wrong time, you face several risks. Seeds may rot in cold, wet soil. Young seedlings can be scorched by hot summer sun.
And weeds, which are most aggressive in late spring and early summer, can easily outcompete your tender clover plants. Getting the timing right aligns your planting with the clover’s natural growth cycle, giving it the best possible start.
Important: Clover seeds need consistent moisture to germinate. Dry conditions for 48 hours after planting can kill the emerging radicle (root). Always plant when a week of mild, damp weather is in the forecast.
Spring vs. Fall: Which Is the Best Season to Plant Clover Seeds?
The debate between spring and fall planting comes down to your local climate, intended use, and weed pressure. Both seasons have distinct advantages and drawbacks. For most homeowners and farmers, fall planting is the top choice because it mimics the clover’s natural cycle of establishing in autumn to grow vigorously the following spring.
| Factor | Spring Planting | Fall Planting |
|---|---|---|
| Optimal Window | Late March to mid-April | Late August to late September |
| Weed Competition | High (summer annuals emerge) | Low (cool-season weeds are weak) |
| Summer Heat Stress | Significant risk for new seedlings | None (established before winter) |
| Winter Survival | N/A (plants mature through summer) | Good (with proper crown development) |
| Primary Risk | Drought and heat after germination | Early frost damaging young plants |
This comparison shows that fall planting is generally lower risk. The cooler autumn temperatures reduce water loss through evaporation, meaning you don’t have to water as frequently. Plus, clover develops a deep root system during the mild fall, which helps it survive winter dormancy and explode with growth in early spring.
What Is the Ideal Soil Temperature for Planting Clover Seeds?
Soil temperature is the hidden variable that dictates success more than air temperature. Clover seeds require a minimum soil temperature of 40°F to begin the germination process, but the sweet spot for fast, uniform germination is between 48°F and 68°F. If the soil is too cold (below 40°F), the seeds will simply sit in the ground and may rot.
If it’s too hot (above 77°F), germination rates drop sharply.
You can use a simple soil thermometer to check the temperature at a depth of 1-2 inches. For spring planting, wait until the soil has consistently reached 45°F or higher at that depth. For fall planting, the soil will naturally be within the ideal range as summer heat fades.
The National Climatic Data Center suggests that a 4-inch soil temperature of 50°F at 8 AM is a reliable trigger for spring planting in most northern states.
- Minimum soil temp: 40°F (seed can germinate but very slowly)
- Optimal soil temp: 48°F to 68°F (fastest and most uniform germination)
- Maximum soil temp: 77°F (germination drops off; above 86°F seeds may fail)
- Key indicator: When maple and oak trees start budding, your soil is usually ready for clover.
- Overseeding tip: Frost-seeding in late winter (when soil freezes at night and thaws by day) works well for mixing clover into existing pastures.
- Monitoring: Check the USDA Plant Hardiness Zone map to refine your local planting window.
Warning: Do not rely solely on air temperature. A warm day does not mean the soil has warmed up. Always measure soil temperature directly for accurate clover seed planting decisions.
How to Plant Clover Seeds for the Best Results
Success comes from combining good timing with proper technique. Start by selecting the right clover species for your region and goals. White clover is excellent for lawns and grazing.
Red clover works best for hay and soil improvement. Crimson clover is a popular winter annual cover crop. Regardless of the type, the planting process follows the same core steps.
Step 1: Prepare the Seedbed
Clover seeds are tiny and need firm soil contact. Remove existing vegetation by mowing low or tilling lightly. Rake the soil smooth.
Do not bury seeds deeper than 1/4 inch. The University of Illinois Extension advises that broadcasting on a firm seedbed and then lightly rolling or packing the soil is more effective than deep drilling.
Step 2: Inoculate the Seeds
Clover is a legume that requires Rhizobium bacteria to fix nitrogen from the air. Most seeds come pre-inoculated, but if yours are not, purchase the appropriate inoculant for your clover species. Mix it with the seeds just before planting.
Inoculation can boost yields by 30-50% according to field trials from the American Society of Agronomy.
Step 3: Broadcaster Application
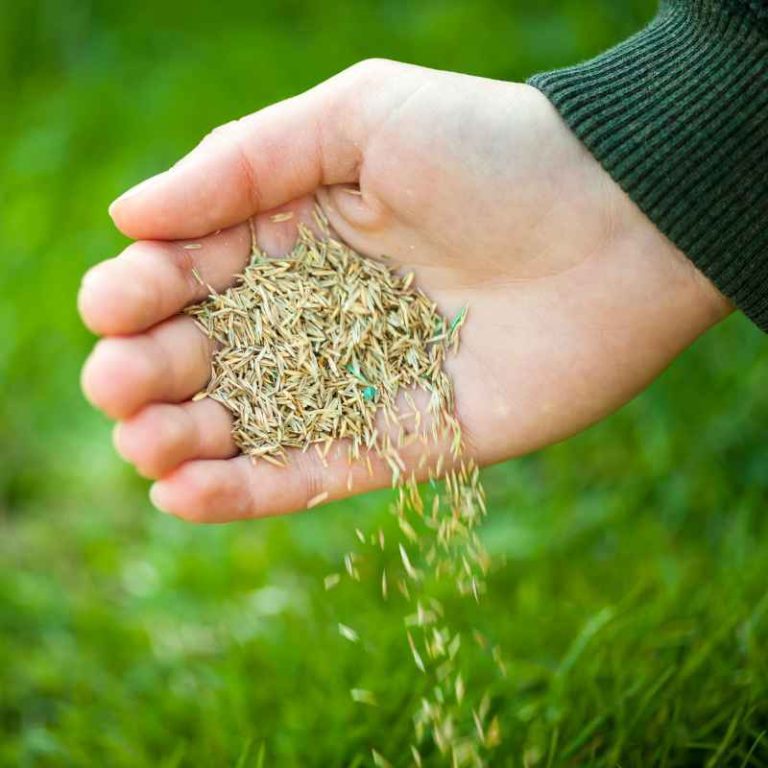
Use a hand-held broadcaster or a mechanical seeder for larger areas. For pure clover stands, sow at a rate of 8-10 pounds per acre (about 1/4 pound per 1,000 square feet). When mixing with grass seed, reduce the clover rate to 2-4 pounds per acre.
Walk in two directions (north-south then east-west) for even coverage.
Step 4: Lightly Cover the Seeds
After broadcasting, rake the soil very gently to cover the seeds with no more than 1/8 inch of soil. Alternatively, use a lawn roller half-filled with water to press the seeds into the soil surface. If you use a cultipacker, the small indentations help trap moisture and protect seeds from wind.
Step 5: Water Consistently
Clover seeds must stay moist for 7-14 days to germinate. Water lightly every day if there is no rain. Heavy watering can wash seeds away, so use a fine mist setting on your hose or sprinkler.
Once seedlings have two true leaves, you can reduce watering to once or twice a week.
- Mow or remove existing vegetation to create bare soil areas.
- Rake the soil to break up clumps and create a firm, level surface.
- Inoculate clover seeds with Rhizobium bacteria immediately before sowing.
- Broadcast seeds evenly, walking in perpendicular directions.
- Press seeds into the soil using a roller, cultipacker, or light foot traffic.
- Keep the soil consistently moist until germination is complete (about 10-14 days).
Tip: For lawns, consider “overseeding” your clover right into the existing grass. Mow the lawn short, rake away thatch, broadcast the clover seed, and water well. This works best in late summer when grass is under heat stress and clover takes advantage.
Common Mistakes When Planting Clover Seeds
Even with perfect timing, small errors can ruin your clover stand. The most frequent mistake is planting too deep. Clover seeds have limited energy reserves.
If you bury them more than a half-inch deep, the shoot will run out of fuel before reaching the surface. Always err on the side of shallow planting.
Another common problem is choosing the wrong clover species for the site. White clover tolerates wetter soils and close mowing. Red clover needs well-drained soil and does not handle traffic well.
Crimson clover is a winter annual that dies back in summer. Mis-matching the clover to your climate and use leads to disappointing results.
- Planting too deep: Cover seeds with no more than 1/4 inch of soil.
- Ignoring soil pH: Clover needs a pH between 6.0 and 7.0. Test and lime if necessary before planting.
- Skipping inoculation: Non-inoculated clover grows poorly and produces less nitrogen.
- Over-fertilizing with nitrogen: Clover makes its own N. Adding high-nitrogen fertilizer encourages grass weeds to take over.
- Planting during a drought: Without consistent moisture, seeds will not germinate or will die after sprouting.
- Not controlling perennial weeds first: Broadleaf weeds like dandelions or thistles will outcompete young clover if not removed beforehand.
- Mowing too soon: Wait until clover is at least 3-4 inches tall before the first mow, and set your mower to 3 inches high.
Warning: Do not apply pre-emergent herbicides after sowing clover. These prevent all seed germination, including your clover. If you need to control weeds after clover emerges, use a selective post-emergent herbicide labeled for use on clover.
Choosing the Best Time to Plant Clover Seeds for Your Specific Needs
Your intended use for the clover stand should also guide your planting schedule. For a clover lawn that you want to look good all spring and summer, late summer planting (mid-August to mid-September) is ideal. The clover establishes roots in fall, then takes off in early spring, forming a dense, low-lying mat that stays green well into summer.
For wildlife food plots used for deer and turkey, fall planting is almost always superior. Deer will heavily browse young spring-planted clover, potentially killing it. Fall-planted clover sets deep roots over winter, and by the following spring it’s robust enough to withstand grazing.
The Quality Deer Management Association recommends planting clover food plots between August 15th and September 15th in most of the U.S.
| Use Case | Recommended Season | Reason |
|---|---|---|
| Lawn Alternative | Late Summer / Early Spring | Fall gives best weed control; spring works with bare soil prep. |
| Wildlife Food Plot | Fall (Aug-Sept) | Avoids summer heat and heavy browsing. |
| Livestock Pasture | Late Summer / Frost Seeding | Allows establishment before heavy grazing pressure. |
| Cover Crop (Soil Health) | Late Summer (Aug-Sept) | Provides winter erosion control and nitrogen for spring crops. |
| Erosion Control on Banks | Early Fall or Late Winter | Fall gives deep roots before winter rains; winter frost seeding works well. |
For cover cropping to enrich your vegetable garden soil, plant clover in early spring as a green manure, then till it under before you set out tomatoes or peppers. Alternatively, plant it in late summer after your main crop is harvested to protect bare soil over winter and fix nitrogen for the next growing season. The USDA Natural Resources Conservation Service notes that clover cover crops can add 80-150 pounds of nitrogen per acre.
How Regional Climate Affects Clover Planting Schedules
Your local climate dictates the exact calendar dates for planting. In the northern U.S. (Zones 3-5), spring planting should happen as soon as the soil is workable, typically late March to early May.
Fall planting should be completed by early to mid-August, 8 weeks before the first hard frost. In these colder regions, spring planting carries higher risk from late frosts that can damage tender growth.
In the southern U.S. (Zones 7-9), the primary planting window shifts to fall (September through November). Summer heat in the South is too intense for spring-planted clover to survive.
The ideal time is once the scorching 90+ degree days are over and overnight lows drop into the 50s. Southern gardeners often enjoy a second, early spring window in February or March for short-season clover types like crimson clover.
- Northern states (Zones 3-5): Spring: April-May. Fall: July 15 – August 15.
- Central states (Zones 6-7): Spring: March-April. Fall: August 15 – September 30.
- Southern states (Zones 8-10): Spring: February-March (cooler species only). Fall: October-November.
- Pacific Northwest: Spring: April-May. Fall: August-September. Mild winters allow for very late fall planting in many areas.
- Mountain/High Altitude: Spring only (May-June). Short growing season makes fall planting risky due to early snow.
The best tip is to track your local soil temperature with a simple sensor. Once the soil hits 45-50°F and a week of moderate weather is forecast, it’s go time. For fall, wait until the worst 90-degree summer weather has passed, but don’t delay too long.
Aim for a minimum of 6 weeks before your average first frost date so seedlings can develop a crown.
Frequently Asked Questions
Can I plant clover seeds in the summer?
Summer planting is generally not recommended for cool-season clovers like white or red clover. High heat and drought stress make germination difficult. If you must plant in summer, choose a heat-tolerant species like berseem clover and provide consistent irrigation.
Expect a lower success rate compared to spring or fall planting.
Should I soak clover seeds before planting?
Soaking is not necessary and can actually harm the seeds if they sit in water too long. Clover seeds have a hard seed coat that naturally breaks down with soil moisture and temperature changes. Simply broadcast them onto a prepared seedbed and keep the soil consistently damp for the first two weeks.
How long does it take for clover to grow from seed?
Under ideal conditions (50-70°F soil temp, consistent moisture), clover seeds germinate in 5-10 days.
You will see small seedlings emerge after about a week. Full establishment with significant leaf coverage typically takes 4-6 weeks. A mowable clover lawn with dense coverage can take 8-12 weeks from planting.
Can I mix clover with grass seed?
Yes, clover mixes very well with turf grass, especially fescue, ryegrass, and Kentucky bluegrass.
For a mixed lawn, use a ratio of 80-90% grass seed to 10-20% clover seed by weight. Plant them together at the same depth. Clover’s nitrogen fixation will actually help keep your grass green without chemical fertilizer.
What happens if I plant clover seeds too late in the fall?
Planting too late in fall, less than 6 weeks before the first hard frost, leaves the seedlings vulnerable.
They may not develop a strong enough root system or crown to survive winter. Young plants that freeze when under 2 inches tall are unlikely to survive. If you miss the fall window, wait until early spring for better results.
Final Thoughts
Mastering the timing of planting clover seeds transforms a common landscaping task into a high-success operation.
Prioritize fall planting for most regions, but do not hesitate to plant in spring if your schedule demands it. Always check soil temperature first, keep seeds shallow and moist, and match your clover species to your site’s conditions. With these strategies, you will enjoy a vigorous, low-maintenance clover stand that benefits your soil, wildlife, and landscape for years.