Landscape Lighting Guide
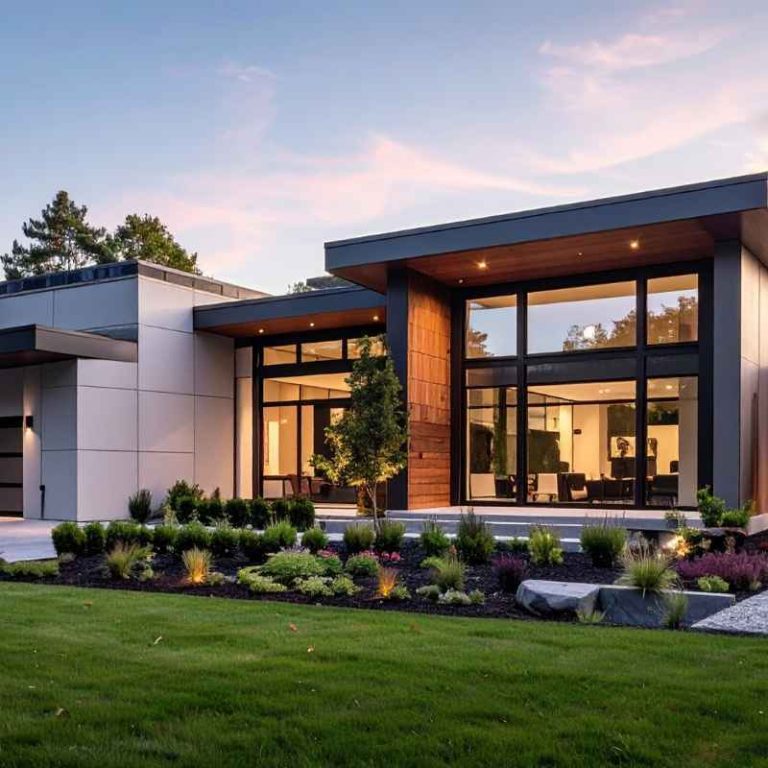
A solid Landscape lighting guide starts by mapping your yard into zones, spacing path lights 6–8 feet apart as a common starting point for many residential walks, setting uplights 18–24 inches from walls or trunks as an initial aiming position to test at night, and sizing the transformer at total fixture wattage × 1.2 so you keep expansion margin. Get this wrong and you end up with dim runs, hot spots, glare, and a transformer that trips or dies early. I use this process on real installs because it keeps the layout clear before a single stake goes in the ground. This guide walks through site mapping, fixture selection, spacing, cable layout, transformer sizing, and the install mistakes seen most often.
For the technical claims in this guide, I rely on manufacturer installation practice, U.S. Department of Energy guidance on LED outdoor lighting, and the existing already cited here for beam-spread context. Numeric starting points such as spacing and aiming distances are field-tested planning ranges, not code minimums, and I adjust them on-site after dark.
Start with a property map, not fixtures
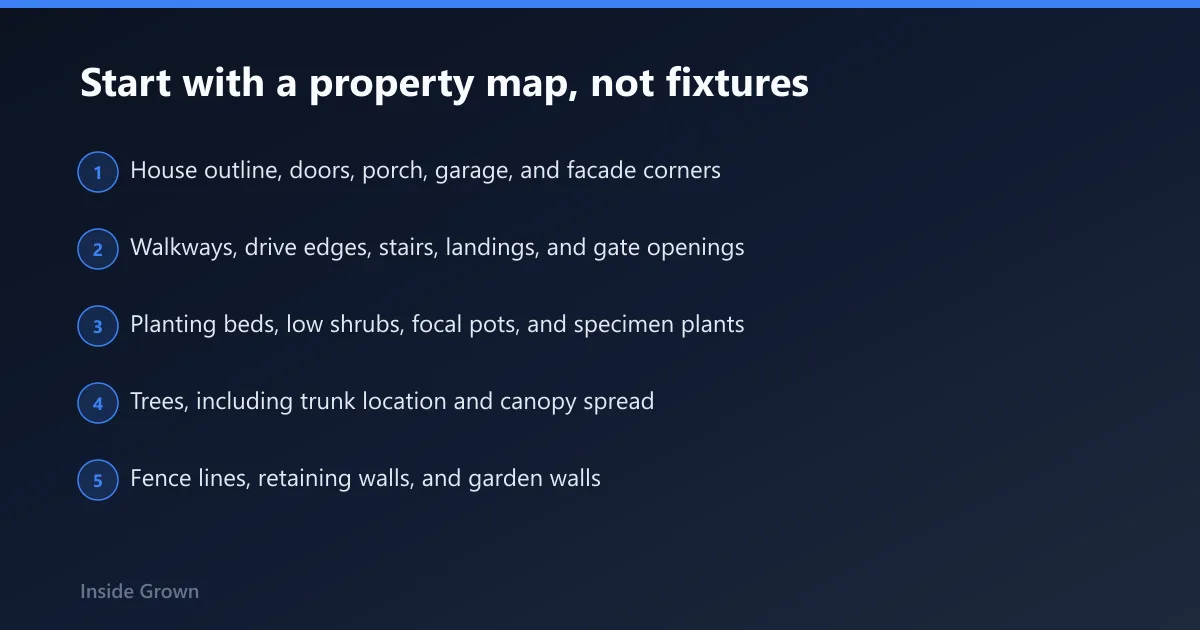


I start with a scaled sketch. Draw the house footprint, front walk, side gate, driveway, steps, planting beds, lawn edges, fence lines, trees, seating areas, walls, and any feature that matters after dark.
Then mark problems, not products. Circle dark gaps at entries, trip points at steps, glare risks where a fixture could hit a window or seating area, and hidden features that deserve light, such as a specimen tree, a corner of the facade, or a garden wall.
This map becomes three things at once: a fixture list, a cable-routing sketch, and a transformer load sheet. I have seen many DIY plans skip this step, and the result usually looks scattered at night because the fixtures were bought first and assigned jobs later.
My on-site method is simple and repeatable: daytime sketch, evening stake-out, temporary aiming, night walk-through from the street and from seated positions, then final burial only after I have checked dark gaps and glare. That last step matters because many layouts that look balanced on paper feel far too bright once your eyes adapt to the dark.
What to draw on the map
- House outline, doors, porch, garage, and facade corners
- Walkways, drive edges, stairs, landings, and gate openings
- Planting beds, low shrubs, focal pots, and specimen plants
- Trees, including trunk location and canopy spread
- Fence lines, retaining walls, and garden walls
- Patios, seating edges, grill areas, and back-yard depth lines
How to mark problem areas
Use simple symbols. An X can mark a dark gap. A triangle can mark glare risk. A circle can mark a focal feature. A dashed line can show where cable likely runs.
It sounds almost too simple. I still use it, because a fast marked-up sketch catches more bad ideas than scrolling fixture photos ever will.
How the map becomes a buying list and wiring plan
Assign every marked area to one of five zones. Each zone gets one main job before any fixture is chosen. That keeps the plan from drifting into clutter, especially in small front yards where too many fixture types create visual noise fast.
- Map the property and problem spots.
- Assign each spot to one of five lighting zones.
- Choose the fixture type that fits the job in that zone.
- Set a beam spread and spacing rule.
- Add a rough wattage budget.
- Group fixtures into cable runs.
- Size the transformer with headroom.
For tight accents, a narrow bullet beam such as 12 degrees is a common starting point, but it should always be verified on-site against the target width and throw distance. The existing discusses beam spread selection in residential landscape lighting.
If you are building the plan as part of a broader system, I also recommend pairing this map with your transformer load sheet and your fixture-specific notes for transformer sizing, path lighting, and tree uplighting.
How do I plan yard lighting with a five-zone method?
Do landscape lighting by dividing the property into five working zones: paths and steps, beds and low focal points, facades and fences, trees and vertical accents, and living or perimeter areas. Give each zone one job, then pick fixtures, spacing, and wattage to suit that job.
Zone 1: paths, entries, and steps
This zone handles wayfinding. Use path lights or garden lights to mark edges and landings, not to flood the whole walk. Garden lights are typically mounted on 18- to 24-inch posts, which is a useful height for beds and path edges because the source stays below normal eye level. That height range is common in residential fixture specifications from major landscape-lighting manufacturers.
For steps, light each level change clearly. On a small stoop, I get better results from two lower-output fixtures that define the edges than from one bright fixture aimed badly into people’s eyes.
Zone 2: planting beds and low focal points
This zone gives shape to beds after dark. Use path lights at bed edges, short wash lights for broad shrubs, and occasional bullet lights for a pot, boulder, or sculptural plant that should read as a feature.
Use fewer fixtures than you think. In my work, beds read better when the eye catches the outline and a few chosen plants, while some shadow stays in place.
Zone 3: facades, walls, and fence lines
This zone reveals surfaces. Wash lights are often a good choice when the goal is fairly even light across a wall, fence, or broad section of facade. Bullet lights or spotlights fit corners, columns, shutters, address details, and tight facade accents where a narrower beam makes more sense.
Long fence lines need rhythm. Place light to create separate pools instead of trying to make the fence equally bright from end to end.
Zone 4: trees and vertical accents
This is where bad plans usually show. A single uplight under a broad canopy often makes the top disappear, leaving a glowing trunk and a dark mass above it. Tree lighting works better when trunk and canopy are both addressed.
Well lights can help here if the source needs to disappear. They also bring maintenance issues in mulch and soil, so use them where concealment matters enough to justify extra cleanup later.
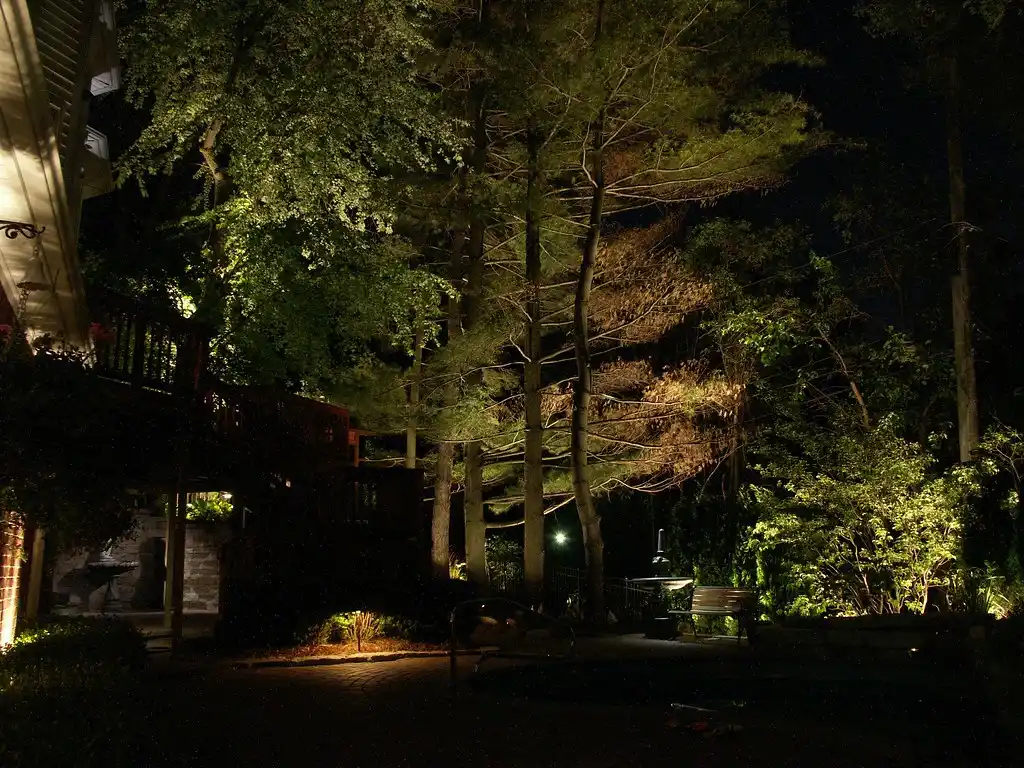
Finish the five-zone plan with living areas and deep-yard features
Zone 5: patios, seating edges, driveways, and back-perimeter depth
The fifth zone handles the places people use, plus the distant edges that keep a yard from ending in a black void. Light patio edges, transitions to lawn, driveway turns, and one or two deep-yard anchors.
On long driveways, resist the airport-runway effect. A better plan is to mark critical edges, curves, and parking transitions, then leave darker intervals between them.
Assign one lighting job per zone
Zone 1 guides movement. Zone 2 gives shape to low planting. Zone 3 reveals surfaces. Zone 4 handles height. Zone 5 supports use areas and background depth. If a zone tries to do all five jobs, the layout gets expensive and messy fast.
Build a rough wattage budget before shopping
A low-voltage landscape lighting system operates on 12 volts. Household power is stepped down from the standard supply using a transformer. That low-voltage approach is common for DIY work because installation is more flexible and generally safer than traditional line-voltage layouts. The U.S. Department of Energy and major transformer manufacturers both treat 12-volt low-voltage systems as the standard residential category for landscape lighting.
The rough budget comes before the transformer. Add the expected load by zone, total it, then select a transformer with headroom. If you need a deeper load calculation, use the companion guide on transformer sizing.
| Zone | Main job | Typical fixture type | Target beam spread | Spacing rule | Rough wattage budget |
|---|---|---|---|---|---|
| 1. Paths, entries, steps | Guide movement and define edges | Path lights / garden lights | Wide downward spread | Use pools of light; tighten at steps | 15-35 watts |
| 2. Beds and low focal points | Show bed shape and selected plants | Path lights, small wash lights, a few bullets | Medium to wide | Light features, not every plant | 20-40 watts |
| 3. Facades, walls, fence lines | Even surface light and selective accents | Wash lights, bullet lights | 12-degree for tight accents; wider for fill | Space for separate pools, not a bright band | 25-60 watts |
| 4. Trees and vertical accents | Light trunk and canopy | Bullet lights, spotlights, well lights | Narrow to medium | Count by tree size and form | 20-80 watts |
| 5. Patios, driveway edges, deep yard | Support use areas and add depth | Path lights, wash lights, selective bullets | Medium to wide | Light transitions and anchors | 20-50 watts |
This table can be copied into a note, spreadsheet, or printed page and used as a downloadable lighting-zone worksheet. Fill one row per zone, then total the wattage at the bottom to size the transformer.
Download the five-zone worksheet (.csv) or download the fillable worksheet (.xlsx). The spreadsheet version uses explicit fields and formulas: Zone Watts = Fixture Count × Watts per Fixture, System Watts = Sum of Zone Watts, and Minimum Transformer Size = System Watts × 1.2.
| Zone | Area on map | Main job | Fixture type | Beam spread | Spacing / aiming note | Fixture count [enter] | Watts per fixture [enter] | Zone watts [count × watts] | Cable run name [enter] |
|---|---|---|---|---|---|---|---|---|---|
| 1. Paths, entries, steps | [front walk / stoop / side gate] | [guide movement] | [path / step / small wash] | [wide downward] | [ex: 6–8 ft on straight walk; closer at steps] | [ ] | [ ] | =G2×H2 | [Run A] |
| 2. Beds and low focal points | [foundation bed / pot / specimen plant] | [show shape / accent feature] | [path / wash / bullet] | [medium / wide] | [light features, not every plant] | [ ] | [ ] | =G3×H3 | [Run B] |
| 3. Facades, walls, fence lines | [front facade / side wall / fence bay] | [reveal surface / accent detail] | [wash / bullet] | [12° / 24° / 36°] | [separate pools, avoid bright band] | [ ] | [ ] | =G4×H4 | [Run C] |
| 4. Trees and vertical accents | [oak / palm / multi-trunk / wall vine] | [trunk + canopy] | [bullet / spotlight / well] | [narrow / medium] | [cross-light if form is broad] | [ ] | [ ] | =G5×H5 | [Run D] |
| 5. Patios, driveway edges, deep yard | [patio edge / drive turn / rear anchor] | [support use / add depth] | [path / wash / bullet] | [medium / wide] | [light transitions and anchors] | [ ] | [ ] | =G6×H6 | [Run E] |
| Total planned fixture wattage | =SUM(I2:I6) | [System total] | |||||||
| Minimum transformer size with 20% headroom | =I7×1.2 | [Round up to next transformer size] | |||||||
What is the best low-voltage yard lighting layout?
The best low-voltage landscape lighting layout starts with a property map, groups fixtures by zone into short cable runs, and sizes the transformer from the combined wattage with extra headroom. Low-voltage systems operate on 12 volts, use a transformer, and stay easier to revise than line-voltage layouts.
Why 12-volt systems are the DIY default
Low-voltage systems operate on 12 volts, and that power is stepped down from the household supply using a transformer. That makes them a common DIY-friendly standard for yards where fixture positions may change as beds, trees, and hardscape evolve.
Modern LED systems are often chosen because they use less electricity and can last for years without bulb replacements, especially when compared with older halogen systems. I like those benefits, but they only matter if the plan is sound in the first place. The U.S. Department of Energy has long documented the energy and service-life advantages of LED lighting when products are properly specified.
Transformer placement and sizing
Install the transformer near an accessible power source. It should also be easy to reach for timer changes, photocell checks, and troubleshooting. Hiding it too well usually backfires.
Size the transformer from the total planned fixture wattage, then leave headroom. A layout with no margin is the one that gets overloaded when the owner adds two more path lights and a pair of tree uplights next season.
Grouping fixtures into runs
Keep zones or sub-zones on logical runs. Front walk fixtures on one run, left bed and facade on another, major tree accents on another. That makes aiming, troubleshooting, and later additions far easier.
Long runs need attention because voltage drop shows up first at the far end as dimmer output. If the deepest run is also the most important viewing area, split it early rather than trying to fix weak light after burial.
Should I choose solar or low voltage yard lights?
Solar lights can work for a short path, a temporary rental setup, or a spot where wiring is not practical. For a planned yard layout, low voltage usually wins on output consistency, runtime, reliability, and upgrade flexibility.
Solar output changes with season, panel cleanliness, and shade. Low voltage asks for wiring effort up front, but the brightness is steadier, fixture choice is broader, and transformers make future expansion easier. For long driveways, tree uplighting, and facade lighting, solar often falls short where consistency matters most.
Which fixture goes where?
Choose fixture types by job, not by catalog category. Path lights define edges and entries, wash lights cover broad surfaces, bullet lights handle precise accents, and well lights hide the source when visible hardware would distract from the feature being lit.
Path lights and garden lights
Use these for walkway edges, planting-bed borders, and front entries. They cast a soft downward glow that helps mark where to walk. Because garden lights are typically mounted on 18- to 24-inch posts, they can disappear into planting better than taller fixtures.
Avoid lining both sides of a short walk unless the width or grade truly needs it. One side plus stronger cues at the start, end, and any turn often reads cleaner. For more placement examples, see the related guide to path lighting.
Wash lights
Wash lights spread soft diffuse illumination over facades, fences, and garden walls. Use them where the surface itself matters more than a single detail. They are especially useful on blank wall stretches that would look harsh under narrow spots.
Bullet lights and spotlights
Use bullet lights for precise accents: a facade corner, a column, a tree trunk, a textured boulder, or a specimen plant. A recommended bullet-light beam spread is 12 degrees for tight facade accents where spill needs control. That is a starting beam, not a universal rule, and the right result still depends on throw distance, fixture output, and surface width.
Narrow beams create focused highlights. Wider beams do better when the goal is fill rather than a bright point.
Well lights
Choose well lights when the fixture should nearly disappear into grade or mulch. They suit upward accent lighting at tree bases, wall washes from paving edges, and locations where an exposed fixture would be seen from a seating area.
The tradeoff is maintenance. Wells collect mulch, mud, and irrigation spray. Plan access before burying them in a dense bed.
How far apart should yard lights be placed?
Landscape lights should be spaced to create readable pools of light, not continuous brightness. For many paths, 6–8 feet is a practical starting range when fixtures are modest in output and the goal is guidance rather than floodlighting, but spacing always changes with fixture lumen output, mounting height, beam control, and surface reflectance. In some accent applications, one expert recommends placing fixtures no closer than 20 feet apart.
Path lighting: aim for pools, not a runway
Path lights are there to guide the eye and the feet. If the whole walk glows evenly, dark adaptation drops and the yard feels overlit. Instead, create overlap only where needed at entries, steps, or path intersections.
That is why a simple spacing number never solves every path. Width, paving color, nearby wall bounce, and planting height all change what the eye reads.
When the 20-foot idea makes sense
One expert recommends placing fixtures no closer than 20 feet apart. That makes sense in some accent or area-lighting situations where wider spacing creates distinct pools and keeps the yard from looking busy.
It does not fit every path, step run, or small court. On compact sites, the fixtures themselves may need to be closer than that while still being aimed and shielded to avoid glare.
Adjust for steps, driveways, and fence lines
Steps need denser cues. Long driveways need markers at transitions, not a bright row. Fence lines need rhythm, with visible dark breaks between lit sections so the eye can rest.
How to catch dark gaps and hot spots before burial
Set fixtures above grade first. Power them up at night. Walk the route from both directions, then sit where people actually sit. Dark gaps show up fast. So do hot spots and visible lamps.
One install example from my own work: on a 32-foot front walk with a slight bend, I first staked six path lights because the owner thought the walk would look safer. At night the path read like a landing strip and the planting bed disappeared. I removed two fixtures, shifted the remaining four to emphasize the start, bend, and stoop, and the result looked brighter where it counted even though total wattage dropped.
What beam spread should I use for uplights and accents?
Use narrow beam spreads when the target is small or far, and wider beams when the goal is soft fill across a wall, shrub mass, or canopy. A 12-degree beam is a useful choice for tight facade accents, while wider beams reduce scallops and harsh edges.
Reading beam spread in the yard
Beam spread answers one question: how concentrated should the light be by the time it hits the target? Narrow beams punch farther and stay tight. Wider beams soften the effect and fill larger surfaces.
Where a 12-degree beam fits
A recommended bullet-light beam spread is 12 degrees. Use that on narrow facade elements, sharp corners, trunks with strong texture, or a single upright detail where spill onto windows or eaves would be a problem.
When wider beams work better
Use wider beams on walls, fence sections, broad shrubs, and tree canopies that need fill rather than a bright center. On trees, a wider secondary beam often helps the canopy read as attached to the trunk.
Aiming to cut glare and flattening
Do not aim lights where seated viewers see the lamp directly. Keep beams off eye level where possible. Cross-lighting from two positions often gives bark and branching more shape than one centered uplight.
A failure case I see often is the single-center uplight on a multi-trunk ornamental tree. In photos from the install log, the trunks look dramatic up close but the tree disappears from the street because the canopy stays dark. The fix is usually a second fixture on a cross angle or a wider beam aimed into the upper branching.
How many uplights do I need for a tree?
Trees under 20 feet tall may use two 20-watt uplights in older halogen-style planning examples, while larger trees may need three to five uplights. In modern LED systems, the same visual effect is often achieved at much lower wattage, so I treat those numbers as legacy load-planning benchmarks rather than a requirement to buy 20-watt LED fixtures. The right count depends on canopy width, trunk form, and whether the goal is to light only the trunk or both trunk and canopy.
Small trees: when two fixtures are enough
Trees under 20 feet tall may use two 20-watt uplights. That count often works when one fixture lights the trunk and lower branching while the second catches canopy spread from another angle.
A single fixture can leave one side dark and flatten bark detail. Two fixtures usually fix that faster than one brighter lamp. For species-specific examples and aiming diagrams, the related guide to tree uplighting goes deeper.
Large trees: when three to five fixtures make sense
Larger trees may need three to five uplights. That range fits trees with broad canopies, multiple trunks, or branching that spreads well beyond a single beam pattern.
Use the extra fixtures with purpose. One for the main trunk, one or two for canopy lift, and more only where the form actually disappears without them.
How to light trees without making them look flat
Light both trunk and canopy. That keeps the canopy from looking like it floats above a bright base. Trees with open branching or multi-trunk form usually benefit from cross-lighting rather than a single centered uplight.
This is one of the most common failure cases in DIY installs. On one oak installation, I started with two fixtures and still lost the far canopy. The final layout used three: one narrow beam for the trunk texture and two wider beams from offset positions for canopy lift. The wattage increased only slightly, but the tree finally read as a full form instead of a lit pole.
Download the lighting-zone worksheet and fill it room-by-yard
What the worksheet includes
The worksheet uses five rows, one for each zone. Each row asks for the lighting job, fixture type, target beam spread, spacing rule, fixture count, rough wattage, and cable run name.
That is enough detail to move from sketch to shopping list without turning the plan into an engineering set.
How to use the worksheet on different property types
On a small yard, keep all five zones but shrink the counts. One path zone, one bed zone, one facade zone, one tree or vertical zone, and one patio or background zone is usually enough.
On a long driveway, split Zone 5 into entry, turn, and parking subsections. On a fence-line project, Zone 3 carries more weight. On steps, Zone 1 gets tighter spacing and the first wiring priority.
How the completed sheet turns into a purchase and install sequence
Buy in this order: transformer, cable, connectors, then fixtures by zone priority. Install Zone 1 first, then major tree and facade accents, then beds and background depth. That sequence gets the functional parts right before decorative extras start crowding the plan.
If you are comparing loads between options, the worksheet helps you test tradeoffs quickly. For example, swapping three high-output facade accents for two tighter spots plus one wash often gives better control with similar total wattage. I use the sheet that way on estimates before any trenching starts.
Common failure points and how to fix them early
Dim lights, corrosion, and bad connections
Dim lights at the end of a run often point to voltage drop or a weak connection. Random single-fixture failures often point to corrosion, water entry, or a loose connector. Start troubleshooting at the connector before blaming the fixture.
Voltage drop, overloaded transformers, and lamp mismatch
When a long run dims progressively, the farthest fixtures usually tell the story first. Split the run, shorten it, or move some load to another branch. If the transformer is packed to its limit, leave margin and resize before adding more fixtures.
Mismatched lamps or mixed fixture outputs can also make a zone read uneven. Even when everything works electrically, the yard can still look wrong if one replacement lamp is much brighter or narrower than the rest.
Glare, visible fixtures, and overlit paths
If the lamp is visible from normal walking or seating angles, reposition or shield it. If a path looks brighter than the planting next to it, remove a fixture before trying to dim the whole run. Too much path light is a common DIY mistake.
Maintenance access for well lights, beds, and tree zones
Do not bury connectors where a shrub root ball will swallow them. Keep service points reachable. Well lights especially need periodic cleaning because soil, mulch, and leaf litter collect in the housing and cut output fast.
Another real-world miss: I once inherited a yard where connectors had been buried directly under a dense dwarf holly row. Two seasons later, half the front elevation was intermittent and every repair meant tearing into roots and mulch. We relocated the service points to the bed edge and labeled each run. The repair took longer up front, but every future visit got easier.
Frequently asked questions
How do I do landscape lighting?
Start with a property map, divide the yard into five zones, assign one job to each zone, then choose fixture type, spacing, beam spread, and rough wattage. Group the fixtures into runs, total the wattage, and size the transformer with headroom before installing anything permanently.
What is the best low voltage landscape lighting layout?
The best layout uses a 12-volt system with a transformer near accessible power, short logical runs by zone, and enough transformer margin for later additions. It lights entries, trees, surfaces, and living areas in separate jobs rather than trying to make every fixture do everything.
How far apart should landscape lights be placed?
Place landscape lights far enough apart to form pools of light instead of a continuous bright strip. Paths often need tighter spacing at steps and turns, while some accent applications follow the recommendation that fixtures be no closer than 20 feet apart.
What beam spread should I use for uplights?
Use narrow beams for tight targets such as facade corners, trunks, or isolated details, and wider beams for walls, shrubs, and canopy fill. A 12-degree beam is a useful choice when a facade accent needs control and minimal spill.
How many uplights do I need for a tree?
Trees under 20 feet tall may use two 20-watt uplights, while larger trees may need three to five uplights. The count depends on canopy width, trunk form, and whether both trunk and canopy need to read clearly from the main viewing angle.
How do I plan landscape lighting for pathways and beds?
Plan pathways and beds as separate zones. Use path lights to mark movement and bed fixtures to reveal plant form or focal features. Avoid lighting every few feet by default; instead, place fixtures where they solve turns, edges, steps, or hidden bed features.
Author bio: I write and test residential landscape-lighting layouts from the standpoint of hands-on planning and night aiming, not catalog theory alone. My process is based on site sketches, temporary stake-outs, after-dark adjustments, and post-install troubleshooting on real homes with walks, facades, specimen trees, fences, and patio edges. The examples above come from actual install and repair scenarios I have worked through, including overlit front walks, underlit tree canopies, buried connectors, and transformer loads that left no room for expansion.
Methodology and source notes: This article combines field experience with guidance from the U.S. Department of Energy on LED outdoor lighting performance, common residential 12-volt landscape-lighting practice from transformer and fixture manufacturers, and the existing This Old House article already linked on this page for fixture-category and beam-spread context. Numeric ranges in this guide are planning ranges I use to begin mockups; final fixture count, aiming, and spacing should always be confirmed on-site at night.