How to Winterize Outdoor Landscape Lighting
Winterize low-voltage outdoor lighting before the first hard freeze by wiping fixtures clean, sealing or rewrapping connections, setting the transformer timer, and leaving only frost-safe parts in place. Skip this and wet splices, cracked wire insulation, tripped transformers, and dark paths can follow. This guide separates what to adjust, what to protect, and what can stay on all winter.
Check connections and keep the transformer running



Cold weather does not usually stop a healthy 12-volt system. The transformer steps down standard household power, and most low-voltage systems remain powered through winter. What changes is exposure: moisture enters weak connections, freeze-thaw cycles push fixtures out of plumb, and snow tools hit what you forgot to mark.
Most winter fixture damage comes from equipment, not weather. That makes the pre-freeze check more useful than a midwinter rescue. Adjust the timer, confirm the photocell, protect exposed parts, and leave the transformer on unless there is a fault.
📊 Low-voltage landscape lighting systems operate on 12 volts. Source: Thisoldhouse.
What you’ll need
- Voltage tester for identifying live wires
- Screwdrivers for cabinet latches, covers, and small fittings
- Clean cloths or a soft brush
- Broom or brush for gentle snow removal
- Wire connectors and electrical tape for visible repairs
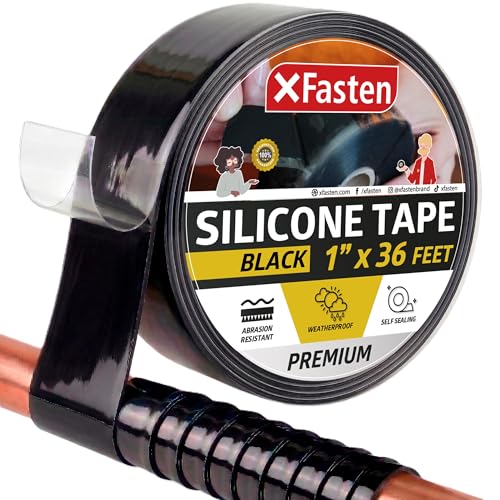
- Weatherproofing sealant for housings and penetrations
- Silicone grease or lubricating spray for moving parts and hinges
- Anti-corrosion spray for exposed metal parts
- Marker stakes or flags for driveway-adjacent fixtures
Landscape lighting winter checklist
| Component | Action before first freeze | Winter watch-out |
|---|---|---|
| Timer/photocell | Set lights to come on before dusk; test photocell triggering after seasonal change | Dirty or misaligned sensors may switch late or not at all; leave on if controls work |
| Transformer cabinet | Close, latch, and keep vents clear; confirm the unit is healthy | Blocked vents or a damaged cabinet can trap moisture; usually leave powered on |
| Visible connections | Inspect before ground freezes; tighten, reseal, and rewrap where needed | Water entry is common at exposed joints; leave on only after repair |
| Fixture lenses | Clear snow, ice, and debris gently; check for cracks and corrosion | Cracked lenses can take on water and freeze; leave on if intact |
| Stakes | Reset any fixture that has shifted or tilted | Repeated freezing and thawing can push staked fixtures out of plumb; leave on after resetting |
| Well lights | Remove debris and standing water; confirm the lens sits flush | Buried housings trap slush and meltwater; leave on if drainage is clear |
| Snow-prone or driveway-adjacent fixtures | Mark and protect them before plows, shovels, or snowblowers come through | Equipment strikes crack lenses and bend stems; leave on only if out of the path |
Inspect fixtures and connections
- Walk the system before the ground freezes and note every fixture that sits low, tilts, or fills with debris.
- Lift off loose leaves, mulch, and packed dirt from lenses and housings.
- Check visible wire connections for cracks, looseness, or dampness, then reseal them with the right connector and electrical tape where needed.
- Look for corrosion on exposed metal parts and apply anti-corrosion spray after the area is dry.
- Reset any staked fixture that has shifted. Freeze-thaw movement can move it again, so check alignment after the next thaw.
For example, if path lights are about 20 feet apart and one fixture leans after a cold snap, check its placement. That is a placement issue, not a bulb issue. Reset the stake, press the soil back firmly, and recheck the beam angle after the next freeze-thaw cycle.
Do you need to shut off outdoor lights for winter?
Usually no. A healthy low-voltage system can often stay powered through winter, and the transformer can usually keep running if it stays in good condition. Shut the system off only if a cabinet is damaged, a connection is wet and unrepairable, or a fixture is broken enough to create a fault.
Open the transformer cabinet, confirm it is closed and latched, and make sure vents stay unobstructed. If the timer or photocell is unreliable, fix that first rather than killing the whole system. Winter use is often fine; winter neglect is not.
Adjust timers and photocells
Set the schedule for shorter winter days before dusk arrives earlier. Astronomical timers should be adjusted for the winter season as days shorten, and a photocell should still trigger when daylight falls. If either control is dirty, shaded, or misaligned, the lights may come on late or cycle poorly.
- Go to the controller menu and set the on-time to 20 to 30 minutes before local sunset.
- Check the photocell in late afternoon by covering it briefly; the lights should switch according to the programmed delay.
- If the timer drifts after a power interruption, reset the clock and date from the main menu.
- If the system uses a smart controller, confirm the dusk schedule in the app and disable any summer-only offset.
Suppose a timer is set for 6:30 p.m. in October but dusk moves earlier in December. If the path now darkens before the lights switch, move the on-time earlier in 15-minute steps and recheck the next evening.
Protect fixtures from snow and ice
Clear snow and ice gently with a broom or brush. Avoid shovel blades, snowblower chutes, and hard scraping on lenses or housings. LED fixtures generally run cool and may not melt themselves out of a snowbank, so buried heads usually need to be uncovered by hand.
- Brush snow away from lens openings and recessed wells after each storm.
- Remove slush from well lights before it refreezes around the housing.
- Apply weatherproofing sealant to visible gaps, cracks, and cable entries once surfaces are dry.
- Use silicone grease or lubricating spray on hinges, pivot points, and other moving parts that can stick in cold weather.
- Mark fixtures near driveways and walks so snow equipment stays clear of them.
Picture a well light beside a driveway where salt spray and slush collect. The cover may look fine from above, but water can sit around the rim and freeze. Keep the lens clear, seal gaps, and verify that meltwater can drain away from the housing.
Common mistakes
Leaving a cracked connector exposed is the fastest way to get a wet splice. Repair it before the soil freezes, because once water gets in, the problem can spread into the cable.
Another mistake is letting staked fixtures drift all winter. Repeated freezing and thawing can push them out of plumb, which changes beam aim and puts the housing in the path of snow removal.
Do not use a snow shovel as a probe around buried lights. A broom or brush is the right tool for clearing the lens surface, and a voltage tester is the right tool before any repair work near live wiring.
Frequently asked questions
How do you winterize outdoor landscape lighting?
Start with a pre-freeze inspection of the transformer, timer, photocell, fixtures, and visible connections. Clean snow and debris, seal weak points, and reset any fixture moved by frost heave. Leave the healthy low-voltage system powered and only shut down damaged parts that need repair.
How do you protect outdoor lighting fixtures from snow and ice?
Brush them off after storms, keep well lights free of slush, and apply sealant to openings that can take on water. Mark fixtures near driveways and walks so shovels, plows, and snowblowers do not hit them during routine clearing.
What should you check on a landscape lighting system before freeze-up?
Check the timer, photocell, transformer cabinet, visible wire connections, lens condition, stake alignment, and any low-lying or buried fixtures. Look for corrosion, cracks, loose fittings, and drainage problems, then fix the ones that can admit water before the first hard freeze.
How do you adjust a landscape lighting timer for winter?
Move the on-time earlier so lights come on before dusk, then confirm the photocell still triggers at the right time. Astronomical timers should be updated for shorter days, while smart controls should be checked for any summer offset or sunset schedule drift.
Can snowblowers or plows damage outdoor lighting?
Yes. Most winter fixture damage comes from equipment, not weather. A blade or chute can crack a lens, shear a stem, or bend a stake, so flag every fixture that sits near a driveway, walk, or plow route before the snow starts.