How to Wire Multiple Zones in Landscape Lighting
Divide the lights into zones by area, expected load, wire gauge, and run length. Keep each transformer branch within the fixture voltage range recommended by the manufacturer, and size the transformer so the connected load stays below the unit’s rated capacity; many manufacturers and installers leave about 20% headroom, but the exact limit should follow the transformer label and instructions. If a run is too long or too heavily loaded, the far fixtures can dim, color can shift, and the transformer can run hot.
How multi-zone outdoor lighting works

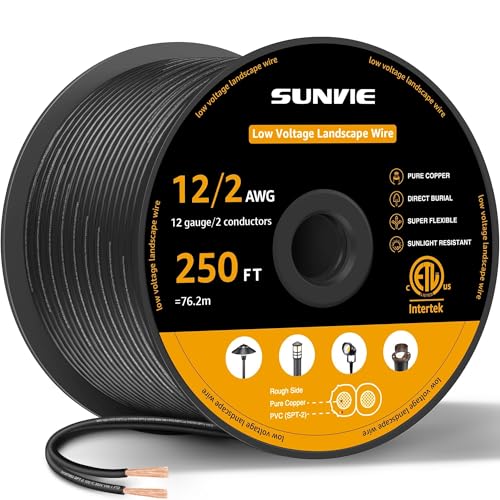
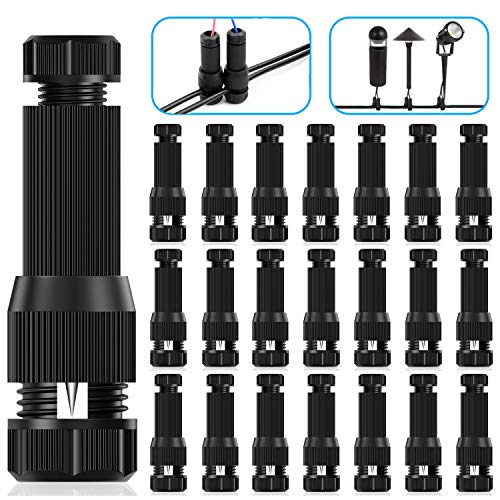
Low-voltage landscape lighting is typically a parallel system: the transformer steps line voltage down to a low-voltage output, and the fixtures are fed as branches rather than daisy-chained in a true series circuit. The National Electrical Code requires outdoor receptacles that serve this equipment to be GFCI protected where applicable, and outdoor wiring methods, burial depth, and fixture installation must follow the code article and the product instructions used for the job. For 120V transformer power, use a GFCI-protected outdoor outlet and confirm local code requirements before installation. For zone planning, the practical goal is not simply to “make it work,” but to keep every branch inside the voltage window that the lighting system can tolerate.
Zones are separate lighting groups. One zone may cover front walk lights, another may cover trees, and a third may cover a patio edge. Split a large layout when one long run would push you past wattage limits, create visible dimming at the far fixtures, or make troubleshooting harder than it should be. For broader planning, see transformer sizing for low-voltage lighting and landscape lighting layout planning.
A shared transformer still makes sense when the total wattage stays inside the transformer rating, the selected tap keeps the fixtures in their rated operating range, and the layout can be divided into short, manageable branches. A hub topology is usually better than a series run because it keeps the long trunk shorter and the zone branches easier to balance. When the area is spread out or the distance is large, separate home runs from the transformer can outperform a shared hub because they reduce resistance on the longest branches and make voltage balancing easier.
What you’ll need
- Low-voltage outdoor lighting transformer with 12V or 24V output and multi-tap options such as 12V, 13V, 14V, and 15V, sized with about 20% headroom above total fixture wattage
- Dedicated 120V GFCI outdoor receptacle for the transformer
- 12-gauge direct-burial outdoor cable; 14-gauge direct-burial cable for shorter branches where the load and distance allow it
- Waterproof connectors with silicone-filled or gel-filled protection
- Multimeter for voltage checks at the fixture heads
- Tape measure, marker, paper layout plan, and trenching tools
- Fixture count and wattage list for each zone
How do you split fixtures into zones?
Group fixtures by area, function, and total wattage before you wire anything. A zone should make sense on the ground first, then on paper. Keep long runs separate from short runs, and leave room for future fixtures so the first install does not have to be rebuilt later. The simplest rule is to break the layout where distance and load begin to work against each other.
Say your front path uses six 4-watt path lights and a 12-watt accent fixture. That 36-watt group can usually stay together if the wire run is short. If the backyard trees sit 70 feet away, make them a separate zone so the long branch does not pull the whole system down.
- List every fixture by area and wattage.
- Sort fixtures into short, medium, and long runs.
- Keep function together where possible, such as path lights, tree uplights, or patio wash lights.
- Split any group that would overload the transformer branch or force a very long cable run.
- Reserve spare wattage for future fixtures instead of maxing out the first zone.
How do you size the transformer and wire?
Add the fixture wattage for each zone, then choose a transformer with enough capacity for the connected load and a reasonable buffer for expansion. A common planning target is no more than about 80% of the transformer’s rated wattage, but the transformer instructions and nameplate should control the final decision. Do not choose the tap by making the farthest light merely bright enough; choose a tap that keeps the first and last fixtures within the voltage range recommended for the fixtures and lamps used.
For wire, use heavier gauge for longer runs. Landscape lighting voltage-drop guidance from cable and transformer manufacturers generally points to heavier conductors as run length increases, and direct-burial cable is the normal choice for permanent outdoor runs. A common practical split is this: use 14-gauge for shorter branches, and move to 12-gauge as the run grows or the fixture load climbs. Connector choice matters too: use outdoor-rated waterproof connectors that are listed or specified for low-voltage landscape cable, not indoor wire nuts.
Simple planning formula: total zone watts ÷ transformer watts = loading ratio. If the result is 0.80 or less, the zone is in the common planning range; if it is higher, reduce load, split the zone, or move to a larger transformer. For voltage-drop checks, use: fixture volts = transformer tap voltage minus estimated drop. The goal is to keep the first and last fixture inside the manufacturer’s approved operating range, not to chase a single “perfect” number.
| Zone name | Fixture count | Total watts | Estimated wire length | Recommended wire gauge | Transformer tap | Voltage-drop risk | Troubleshooting note |
|---|---|---|---|---|---|---|---|
| Front walk | 6 | 36 | 38 ft | 14-gauge | 12V | Pass | If dim, check the last splice and connector seals |
| Side yard trees | 5 | 50 | 72 ft | 12-gauge | 13V | Pass | If dead, test the hub branch for an open connection |
| Patio edge | 8 | 64 | 94 ft | 12-gauge | 14V | Pass | If uneven, shorten the branch or split off two fixtures |
For a quick decision rule, treat runs over 50 feet as 12-gauge territory unless the load is very low and the voltage test at the fixture heads stays in range. If a zone still looks borderline after the gauge change, shorten the branch or split the zone again. That 50-foot threshold is a practical planning cue, not a code rule.
How do you wire each zone?
Use a hub-and-spoke layout. Bring the transformer output to a hub point, then branch short tails to each fixture or small fixture group. That is usually better than a long daisy-chain because it keeps resistance more even and makes one bad branch easier to isolate. In low-voltage landscape lighting, the standard wording is parallel branches, not series wiring, because each fixture or fixture group should receive power from the same source branch instead of relying on the next fixture down the line. Separate home runs from the transformer can be the better choice when a shared hub would force one branch to become too long or would make the voltage balance uneven.
Make every splice with a waterproof connector, including fixture leads and branch joins. Silicone-filled or gel-filled connectors help keep moisture out and reduce corrosion at the connection points. Choose connectors and cable assemblies that are rated for low-voltage outdoor use and compatible with direct-burial landscape cable. Do not use standard indoor wire nuts outside.
For connector selection, match the connector to the cable type, conductor count, and burial environment. For cable suitability, use direct-burial low-voltage landscape cable that is specifically intended for outdoor lighting runs; if the run crosses a walkway, patio edge, or frequent traffic area, protect it according to local code and product instructions.
- Mount the transformer near a GFCI-protected outdoor outlet.
- Run one cable from the transformer to each zone hub.
- Branch from the hub to each fixture with the shortest practical tail.
- Strip only the amount of insulation the connector requires, then make the splice.
- Seal every splice and fixture connection with a waterproof connector.
- Label each zone at the transformer before burying cable.
Picture a patio zone with four lights around one seating area. A central trunk reaches the patio edge, then four short tails drop to the fixtures. That layout is easier to test than four separate long home runs, and it usually keeps voltage drop under better control. When the patio is stretched out or the fixtures are widely spaced, a pair of smaller home runs may be better than one longer shared branch.
How do you test and fix a bad zone?
Start at the power source. Make sure the outdoor receptacle is GFCI-protected and trips and resets correctly before you connect the transformer. Then measure voltage at the fixture heads with a multimeter. Voltage drop is the usual reason a far fixture dims, and the fix is often shorter runs, heavier wire, or a different transformer tap that stays inside the allowed fixture voltage range. The key check is simple: the first and last fixtures in the zone should both land in the fixture manufacturer’s acceptable voltage range.
- Verify the GFCI outlet powers the transformer.
- Turn on one zone at a time.
- Measure voltage at the first and last fixture in the zone.
- If the far fixtures are dim, move to 12-gauge cable or shorten the branch.
- If a zone is dead, inspect each splice in order from the hub outward.
- If the branch still fails, disconnect that zone and retest the transformer output.
If a roughly 64-watt patio zone lights the first two fixtures but the last two stay dim, the run may need to be split or shortened. If the transformer tap is already within the fixture voltage range, the next step is not to raise it again. Split the branch, shorten the run, or move the far fixtures to their own zone.
Outdoor lighting zone worksheet
Use this worksheet before trenching. It gives you a side-by-side view of load, distance, wire size, and voltage-drop risk so you can decide whether one transformer branch should become two.
Pass/fail logic: a zone passes if the calculated load is at or below the transformer’s practical loading target, the selected wire gauge is suitable for the run length, and the measured fixture voltage at the first and last light stays inside the fixture’s approved range. A zone fails if any one of those checks fails. Use the worksheet as a planning tool, not a guess.
Worked example, 12V tap: if a zone is planned on a 12V tap and the first fixture measures 12.1V while the last fixture measures 11.2V, the branch may be acceptable only if the fixture range includes that lower reading. If the last fixture falls below the allowed range, shorten the run, split the zone, or move to heavier wire.
Worked example, 15V tap: if a long branch starts at 15.0V and the last fixture drops to 13.6V, the zone can pass only when the fixture manufacturer allows that range. If the fixtures are designed for a tighter range, the correct fix is not more voltage alone; it is a shorter branch, a different topology, or a separate home run.
| Zone | Fixture count | Total watts | Estimated wire length | Recommended wire gauge | Transformer tap | Pass/fail for voltage-drop risk | Troubleshooting note |
|---|---|---|---|---|---|---|---|
| Zone 1: front walk | 6 | 36 | 38 ft | 14-gauge | 12V | Pass | Watch the last fixture after burial |
| Zone 2: side yard trees | 5 | 50 | 72 ft | 12-gauge | 13V | Pass | Check the hub splice if output falls off |
| Zone 3: patio edge | 8 | 64 | 94 ft | 12-gauge | 14V | Pass | Split into two branches if the last fixtures dim |
Use the table as a decision aid, not a promise. If a zone passes on paper but still reads low at the fixture heads, the branch is too long, the gauge is too light, or a splice is adding resistance.
Common mistakes
One mistake is loading a transformer too close to its limit. Keep the total near 80 percent of rated capacity, not at the ceiling. Another is using a long daisy-chain when a hub branch would reduce resistance and simplify troubleshooting.
Another common miss is choosing a tap by the brightest near fixture instead of the voltage range the manufacturer allows for the lamps or LEDs. That can overdrive closer fixtures and shorten their life while the far end still sags.
A third mistake is skipping waterproof connectors. Moisture intrusion can create intermittent dimming that looks like a bad transformer when the real fault is a corroded splice. Also, do not bury direct-burial cable without checking the run depth your plan calls for; common planning guidance puts low-voltage burial depth in the 6- to 12-inch range, but the required depth should follow the cable listing, local code, and site conditions.
Frequently asked questions
How do I wire multiple outdoor lighting zones?
Run each zone as its own branch from the transformer or from a shared hub, then label the branch at both ends. Keep each zone within its wattage limit and use the tap that matches the fixture voltage range. Test one zone at a time so a bad branch does not hide another fault.
Should outdoor lighting zones be wired in series or hub-and-spoke?
Hub-and-spoke is usually the better choice. A series run adds resistance as you move down the cable, which makes troubleshooting harder and can increase dimming at the far fixtures. A hub layout keeps branches shorter and more predictable.
How do I size wire gauge for different zones?
Use 14-gauge for shorter, lighter branches and move to 12-gauge for longer runs, especially past 50 feet. Then confirm the result with a voltage reading at the fixture heads. If the reading is low, step up to heavier wire or split the zone.
How many fixtures can one transformer power?
It depends on total wattage, not fixture count alone. Add the wattage for every light, then keep the working load to about 80 percent of the transformer’s rated capacity. A 150W transformer, for example, should be loaded well below 150W if you want room for voltage stability and future expansion.
Sources
National Electrical Code requirements for outdoor receptacles, GFCI protection, and outdoor wiring methods; manufacturer installation instructions for landscape-lighting transformers, low-voltage luminaires, direct-burial cable, and waterproof connectors; and standard voltage-drop planning guidance used in low-voltage lighting layouts.