Landscape lighting layout for beginners: a simple plan
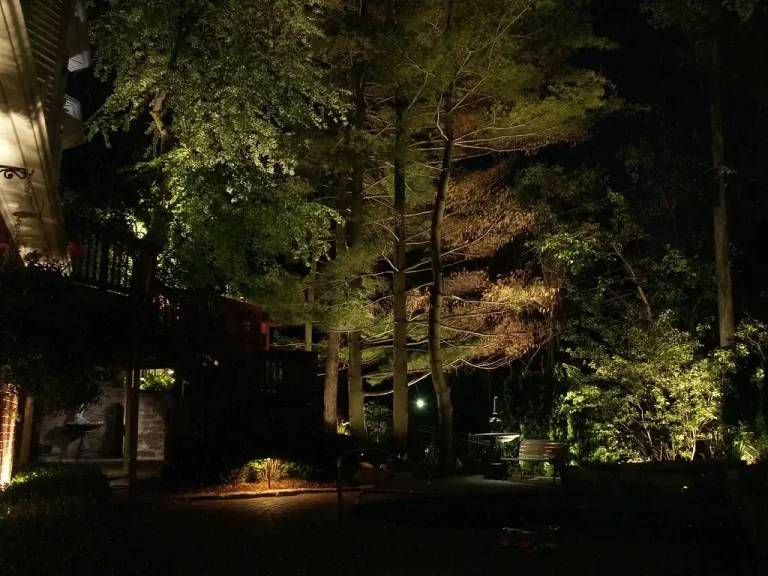
I plan a beginner lighting layout by zones: safety first, then focal points, then patio light. Place path lights at regular intervals, and make sure each step is lit. Poor planning leaves dark hazards, glare, and a fixture count that blows the budget. This guide shows a simple zone-by-zone method for front walks, side paths, steps, and a small patio before you buy anything or run wire.
This guide is part of our Landscape lighting guide series.
What a beginner outdoor lighting layout should do first

A beginner layout should solve movement first. I start by marking where people walk, step, enter, and turn, then I give those areas the clearest light. After that, I add task light for patios and security zones, then I use accent fixtures for trees, walls, and other features.
Start with a simple zone order
Use this order on paper: safety paths first, task areas second, accent lighting third. That keeps the plan from becoming a pile of pretty lights with no purpose. It also keeps the fixture count under control.
Begin by sketching the yard and marking the main zones: front entry, walkways, steps, driveway edges, patio, and focal features. Leave some areas dark on purpose. Dark space gives the eye a place to rest and keeps the yard from looking flat or overlit.
Know which areas matter most
Front yard plans usually start with the path to the door and any steps near the entry. Side yards often need the most help with movement and visibility. Patio-first plans care more about task light and softer ambient light near seating.
How do I map my yard before buying fixtures?
Map the yard by tracing the places people use most, then note where power can reach and where the darkest hazards sit. A good sketch shows walks, steps, entries, patio edges, driveways, trees, walls, and sculptures. That map becomes the buying list.
Use a beginner worksheet
Take a sheet of paper and draw the yard shape as simply as possible. Put a box for the house, lines for hardscape, circles for trees or shrubs, and arrows for walking directions. The goal is not art. The goal is placement logic.
- Draw the house, driveway, main walk, side path, patio, and steps.
- Mark every entry point and every turn.
- Circle focal features such as trees, a sculpture, or a textured wall.
- Mark where a transformer could sit near a power source.
- Mark areas that should stay dim or dark.
Sample yard map
| Zone | What to mark | Priority | First fixture type |
|---|---|---|---|
| Front walk | Entry, turns, step changes | Safety | Path lights |
| Side yard | Narrow run, dark corners | Safety | Path lights or small floodlights |
| Patio | Seating edge, grill, door | Task | Floodlights or soft ambient fixtures |
| Tree bed | Trunk, canopy, sightline | Accent | Spotlights or well lights |
| Driveway edge | Cars, curb, path to door | Safety | Path lights or floodlights |
Which fixture types should I use first?
Start with path lights, then add spotlights, floodlights, or well lights only where the map shows a need. I use that order because beginners actually use a yard that way. The safest choice is usually the simplest one that solves the right problem.
Path lights
Path lights guide visitors along walkways and driveways and give a soft glow close to the ground. They are a standard low-voltage fixture type, which makes them a common beginner starting point. Use them where people walk, not as a substitute for every other light.
Spotlights
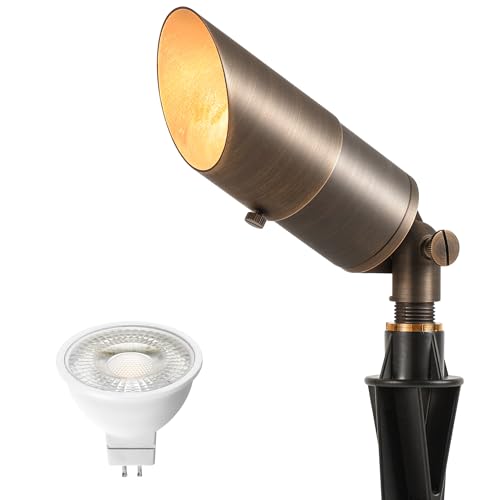
Spotlights draw attention to trees, shrubs, sculptures, and architectural details. They use an adjustable aim and usually a narrow beam when the goal is to isolate one object. A spotlight pointed at a broad surface often creates hot spots and rough shadows.
Floodlights
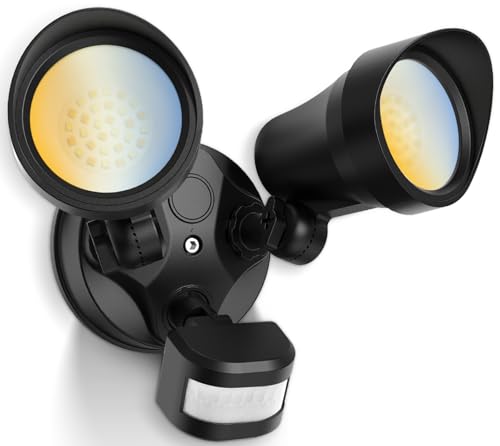
Floodlights are used for driveways, patios, and backyards when broader coverage matters. They spread light wider than spot fixtures, so they work well for task lighting and security lighting. They can also make a small yard feel more open if aimed carefully.
Well lights and in-ground uplights
Well lights are mounted below grade. They give a hidden fixture look and are useful for wall, step, and feature illumination when you do not want the light source to stand out. They are best where the beam can rise without shining directly into people’s eyes.
Where should path lights be placed in a yard?
Place path lights where they guide the walking surface without shining into eyes. The beam should land on the path, edge, or step, not blast across a face. Spacing changes with width, turns, and changes in elevation, so the path shape matters more than a fixed rule.
Use spacing that follows the path
On a straight walk, place lights so the lit pools overlap enough to guide movement without creating a runway effect. Wider walks need more separation than narrow ones. Curves need closer spacing on the outside of the bend and on any dark inside corner.
At turns, entry changes, and step transitions, add an extra marker. Those spots are where people hesitate or miss a level change. For steps, light every step or at least make sure each riser is clearly visible from the approach.
Keep the light low and useful
Path lights should sit low enough to reduce glare and high enough to avoid being hidden by plants. A light that is too tall can hit the eye instead of the pavement. One that is too short can disappear into mulch or groundcover.
How do beam angle and color temperature change the look?
Beam angle controls spread and focus. Narrow beams are better for features that need a tight punch of light, while wider beams are better when an area needs a softer spread. Color temperature changes whether the light feels warm and calm or cooler and clearer.
Narrow beam versus wide beam
Use narrow beams for trees, sculpture, and strong architectural details. Use wider beams for a wall wash, patio coverage, or a broader planting bed. Mismatching beam spread is a common beginner mistake. A narrow beam on a large wall can leave dark gaps. A wide beam on a small shrub can flatten the shape.
Warm versus cool color temperature
Warm light usually feels softer on stone, wood, and planting beds. Cooler light can help visibility, but it can also look harsher and increase glare if used everywhere. For curb appeal, many beginner plans work better with a warmer look on paths and features, then cooler light only where clear visibility matters most.
Aim matters as much as bulb choice
A fixture aimed below eye level usually feels easier to look at. Aim spotlights so the beam lands on the feature, not across windows or into a neighbor’s view. When the beam crosses the sightline, glare shows up fast.
How do I build a starter system with low-voltage, solar, and controls?
Low-voltage 12 V lighting is the easiest wired starting point for most beginners because it is common, flexible, and safer to handle than line-voltage gear. It needs a transformer, though, because the system steps down household power to the lower voltage the fixtures use.
Choose and place the transformer
Pick a transformer that matches the total planned wattage and leaves room to grow. For a starter layout, place it near power and close enough that cable runs stay sensible. A transformer that is too small limits the system. One that is badly placed makes wire runs messy.
Lighting systems can include transformers, timers, and photocells. Timers make the system run on a schedule. Photocells turn lights on at dusk and off at dawn, which is useful when the goal is automatic switching and energy-saving operation.
When solar is a fit
Solar lighting uses solar panels, batteries, and photosensors, so it avoids wiring. It works best for low-demand paths and garden spots where brightness needs are modest and sun exposure is good. It is less dependable for driveways, heavy-use steps, or places shaded much of the day.
A simple starter shopping rule
Begin with only the fixtures needed for the safety zones. Add accent lights later. That keeps the layout honest. It also keeps the budget from vanishing into extra fixtures that do not solve a real problem.
Beginner layout worksheet and 3-phase shopping plan
A beginner worksheet should translate the map into purchase priorities. Buy by zone, not by catalog page. First cover the walk and steps. Then handle task areas. Then add feature lighting only after the base plan works at night.
Fixture-by-fixture placement rules
- Path lights: place along walks and driveway edges where people need a soft guide, with extra units at turns and step changes.
- Spotlights: aim at one tree, shrub, sculpture, or architectural detail at a time with a narrow beam when the goal is focus.
- Floodlights: use for patios, driveways, and backyards when broader coverage is needed.
- Well lights: place below grade for hidden uplighting on walls, steps, or strong features.
- Solar fixtures: reserve for low-demand garden spots or short paths with good sun.
Three-phase starter shopping plan
| Phase | Area type | Buy first | Why it comes now |
|---|---|---|---|
| Phase 1 | Front walk, side path, steps | Path lights and a transformer | These zones affect safety and daily movement |
| Phase 2 | Patio, driveway edge, seating area | Floodlights, photocell or timer | These zones need task light and easier control |
| Phase 3 | Trees, shrubs, walls, sculpture | Spotlights or well lights | These are accents, not the core layout |
Common beginner mistakes to avoid
Overlapping beams can create bright patches and muddy shadows. Dark gaps usually mean the spacing ignored turns or elevation changes. Harsh glare often comes from poor aiming or a beam that is too wide for the target. Overlighting makes the yard feel flat and wastes fixtures. Mismatched fixture scale looks awkward, especially when a tiny path light is used beside a large facade.
Frequently asked questions
How do I plan an outdoor lighting layout for a beginner?
Start by dividing the yard into safety, task, and accent zones. Mark the paths, steps, entries, patio edges, and focal features on a simple sketch. Then choose fixture types by zone and buy only what the first phase actually needs.
Where should path lights be placed in a yard?
Place path lights where they guide feet, not eyes. That usually means along walkways, driveway edges, turns, and changes in level. Keep the light on the walking surface, and add extra markers near steps and entry points.
What types of outdoor lighting fixtures should I use first?
Most beginners should start with path lights for movement, then add floodlights for patios or driveways, and spotlights for trees or features. Well lights come later if a hidden fixture look is desired. Solar fixtures fit only the lowest-demand areas.
How do I choose between spotlights, floodlights, and path lights?
Use path lights for walking routes, spotlights for single features, and floodlights for broader coverage. The deciding factor is the shape of the area you want to light. Narrow and specific calls for a spotlight. Wide and useful calls for a floodlight.
How do I light walkways and steps safely at night?
Use path lights to trace the route and add light to every step or at least every change in level. The goal is to make the walking surface easy to read without creating glare. Aim lower, and keep the beam off the eyes.
Can solar lights work for a beginner outdoor lighting layout?
Yes, but only in the right places. Solar lighting is best for low-demand paths and garden spots with good sun. It is a weaker choice for driveways, major steps, or any area that needs dependable brightness every night.