How to Light Garden Paths Without Annoying Neighbors
Use fully shielded, downward-facing path lights at 2700K or warmer, keep each fixture low in output, and space them so the path stays visible without lighting the neighbor’s yard. Bad placement creates glare, light spill, and complaints. This guide shows how to choose fixtures, aim beams, set spacing, and use timers so paths stay safe and neighbors stay undisturbed.
What you’ll need


- Low-voltage path lights, shielded bollards, or low-stakes fixtures
- Warm white lamps or integrated LEDs, ideally 2200K to 2700K
- Transformer for a 12V low-voltage lighting system
- Timer, photocell, or smart controller with a shutoff schedule
- Measuring tape and a marker for spacing
- Dark-time test period after installation
Path lighting planning table
Use this table before you install anything. The goal is simple: keep the beam low, narrow enough to stay on the walkway, and dim enough that the fixture does not read as a bright point from next door.
| Path width | Fixture type | Recommended mounting height | Suggested beam spread | Brightness target | Spacing | Common glare risks |
|---|---|---|---|---|---|---|
| 2 to 3 ft | Low stake with hood or full cutoff | 8 to 14 in. | 30° to 60° | 20 to 80 lumens | 5 to 8 ft apart | Wet stone, pale gravel, nearby windows |
| 3 to 4 ft | Shielded bollard or edge-mounted light | 14 to 24 in. | 45° to 90° | 40 to 100 lumens | 6 to 10 ft apart | Wide beam spill, fence reflection, lamp source visible at eye level |
| 4 to 6 ft | Shielded bollard, low post, or paired stakes | 18 to 30 in. | 45° to 90° with cutoff | 60 to 120 lumens | 8 to 12 ft apart | Overlap bright spots, pale concrete, light bouncing off siding |
| Boundary-adjacent path | Full cutoff bollard or low stake with hood | 8 to 18 in. | 30° to 45° | 20 to 60 lumens | 5 to 8 ft apart | Bedroom windows, shared fences, glossy pavers |
How should you choose the fixtures?
Pick low-height path lights with downward output, then favor shields, hoods, or full cutoff shapes that block side glare. For neighbors, the best choice is usually a lower-output fixture at the path edge, not a taller lantern that leaves the lamp source visible from across the boundary.
Follow these steps
- Choose a low-profile stake, bollard, or edge fixture that keeps the light source below eye level and out of direct view.
- Select a warm white LED in the 2200K to 2700K range; warmer light tends to be less visually intrusive than cooler white light at the same lumen output.
- Start with 20 to 80 lumens for narrow paths and 60 to 120 lumens for wider ones, then stop at the lowest level that clearly marks footing.
- Prefer narrow to moderate beam spread when the path runs near windows, fences, or shared property lines.
Say your 3-foot path runs beside a bedroom window 20 feet away. A 60-lumen, shielded stake light placed low on the path edge usually creates less nuisance than a taller, wider-beam fixture at the same output, because the source stays below the sightline.
How do you place them near neighbors?
Keep fixtures close to the path edge and aim the light only at the walking surface. Height matters because a lamp raised higher is visible from farther away, even when the lumen rating stays the same. On boundary-adjacent paths, a low fixture with a controlled beam is usually easier to live with than a taller post.
Follow these steps: set each fixture about 6
- Set each fixture about 6 to 12 inches in from the edge when the path allows it.
- Angle the lamp head straight down or slightly inward toward the center of the path.
- Keep the top of the source low enough that a standing neighbor cannot see the LED directly from outside the fence line.
- Avoid placing fixtures opposite bedroom windows or reflective walls unless the beam is tightly shielded.
Suppose a 4-foot walkway borders a fence and a pale concrete patio. Moving the light 4 inches closer to the inside edge and lowering the mounting height from 24 inches to 14 inches can reduce side spill more effectively than trimming output alone.
How do you wire and control runtime?
Use a 12V low-voltage system when you want easier layout control and safer path lighting near planting beds and edges. Plan the transformer load, then watch distance and voltage drop on longer runs, because dimming at the far end can tempt people to compensate with brighter fixtures and more nuisance light.
Follow these steps: map the run
- Map the run from transformer to the farthest fixture and add the wattage of every light.
- Stay within the transformer’s rated load and leave headroom rather than filling it to the limit.
- Use heavier-gauge cable for long runs so the farthest lights do not sag in brightness.
- Set a timer, photocell, or smart controller with a shutoff schedule so the path turns off late at night.
- Use dusk-to-dawn mode only when all-night lighting is truly needed; otherwise, choose a curfew-friendly shutoff, such as midnight or 11 p.m.
Use a timer with a nightly cutoff if the path is only needed for evening arrivals. A photocell can turn the system on at dusk, but a timer can turn it off before bedroom hours on the neighboring side of the property.
What should you do about reflective surfaces and windows?
Reflective gravel, pale concrete, glossy pavers, wet stone, and light-colored siding can throw stray light sideways even when the fixture itself is shielded. That is why runtime, output, and surface choice all matter. A low lamp over a bright surface can still read as glare from next door.
Follow these steps: inspect the path surface after
- Inspect the path surface after dark and note any bounce off pale or glossy material.
- Reduce output first if the fixture is already aimed correctly and the spill is coming from reflection.
- Swap wide beam heads for narrower ones where the path is close to windows or fences.
- Add shielding or a hood if the lamp source itself is visible from neighboring windows.
Picture a gravel strip beside a shared fence. If the gravel is light colored, even a modest fixture can create a bright patch. A hooded light at 40 lumens often performs better there than a 100-lumen open head.
Common mistakes
Most complaints come from a few predictable errors. They are easy to avoid once you know what to look for.
- Overbright fixtures: They wash the boundary and make the walkway harder, not easier, to read. Start low and add only if footing is still unclear.
- Wide beams aimed across the property line: They reach windows and fences faster than narrow beams.
- High mounting: Taller fixtures expose the source and increase the chance of light trespass.
- Ignoring reflective surfaces: Wet concrete and pale pavers can bounce light into neighboring yards.
- Running lights all night by default: Use late-night shutoff unless a full-night path is necessary.
If the first setup still feels bright, lower output by 10 to 20 lumens per fixture, then recheck after dark. Small changes matter on short paths, especially near bedroom windows or shared fences.
How do I light a garden path without shining into my neighbor’s yard?
Use low-height, fully shielded path lights with warm white output, then keep the beam aimed straight down at the walking surface. Place fixtures close to the path edge, avoid wide beams that cross the boundary, and set a timer so the lights are off during late-night hours. Shields, height, spacing, and runtime all matter.
Frequently asked questions
What is the best path light spacing to avoid glare?
For many garden paths, a common starting point is about 5 to 8 feet for narrow walks and about 8 to 12 feet for wider ones. Tighter spacing only helps if each fixture is dimmer and better shielded; packing bright fixtures too close together often increases overlap and glare instead of improving visibility.
How bright should garden path lights be so they are not annoying?
A practical range is 20 to 80 lumens for narrow paths and 60 to 120 lumens for wider paths, with the lower end usually better near neighbors. Brightness should mark footing, not flood the area. If you can clearly see the path edge at night, stop increasing output.
What color temperature is least disruptive for outdoor path lighting?
Warm white is the safer choice, usually 2200K to 2700K for residential paths near neighbors. Cooler light tends to feel harsher and more noticeable through windows. Lower Kelvin ratings are generally less likely to stand out at night, especially when the fixture is already shielded and aimed down.
How can I aim path lights downward to keep light on the ground?
Choose fixtures with full cutoff, a hood, or a recessed lens, then angle the head straight down or slightly inward toward the path center. If the lamp source is visible from standing height across the fence, the fixture is too high or too open for a neighbor-sensitive layout.
Are solar path lights too dim for a garden path?
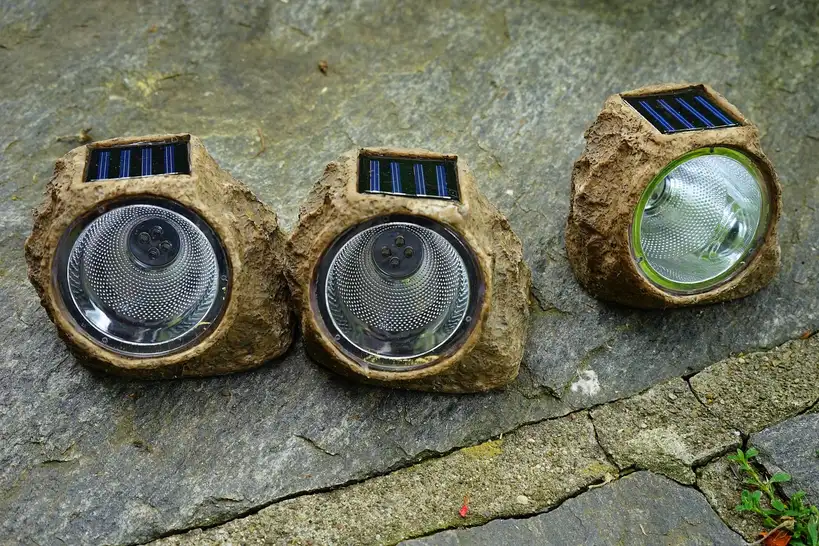
Sometimes yes. Many solar path lights are too dim or too inconsistent for wider paths, shaded areas, or long winter nights. They can work on short, sheltered walks, but if the path needs clear footing and controlled spill near a boundary, low-voltage shielded fixtures are usually the more reliable choice.
Do shielded path lights reduce light spill to neighbors?
Yes. Shields, hoods, and full cutoff designs block side glare and keep the source below eye level, which reduces how much light reaches windows, fences, and adjacent yards. They do not solve every problem by themselves, so keep the fixture low, the beam narrow enough, and the runtime limited.
How do I keep path lights from creating glare in windows?
Lower the fixture, shorten the beam spread, and turn the lamp head away from the window line. If glare still appears, move the fixture 6 to 12 inches inward from the edge or reduce the lumen output by 10 to 20 lumens. Window glare often comes from the source being visible, not from the path itself.
How do I block neighbors light?
Use full cutoff or hooded path lights, keep them low, and aim them only at the walkway. Add a timer or curfew-based shutoff so the lights do not run late into the night. If the boundary still feels bright, reduce output first, then tighten spacing only if the path becomes unsafe to walk.
Is that my neighbor’s garden?
Check the property line before installing lights, especially near fences, shared hedges, and side yards that are easy to confuse from above grade. Mark the line, then keep fixtures on your side with the beam directed inward. If the layout is tight, low cutoff fixtures reduce the chance of lighting into the wrong space.