How to Light a Driveway Safely at Night: Fixture Placement
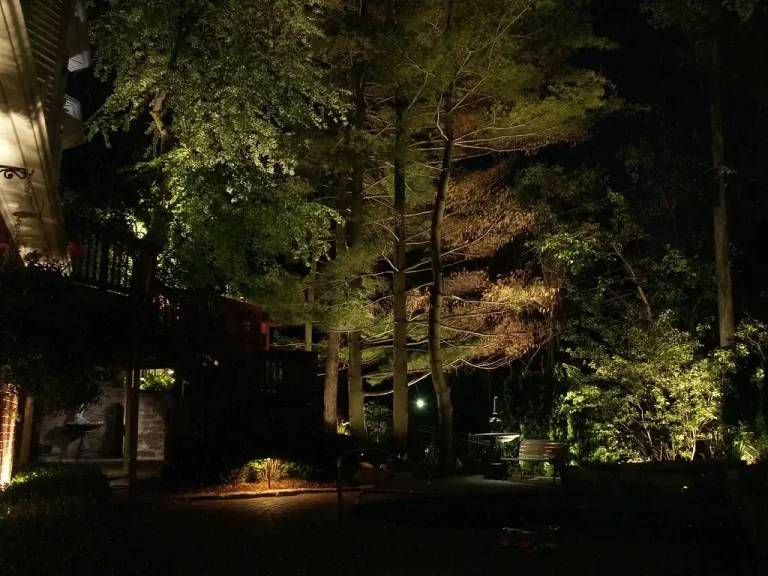
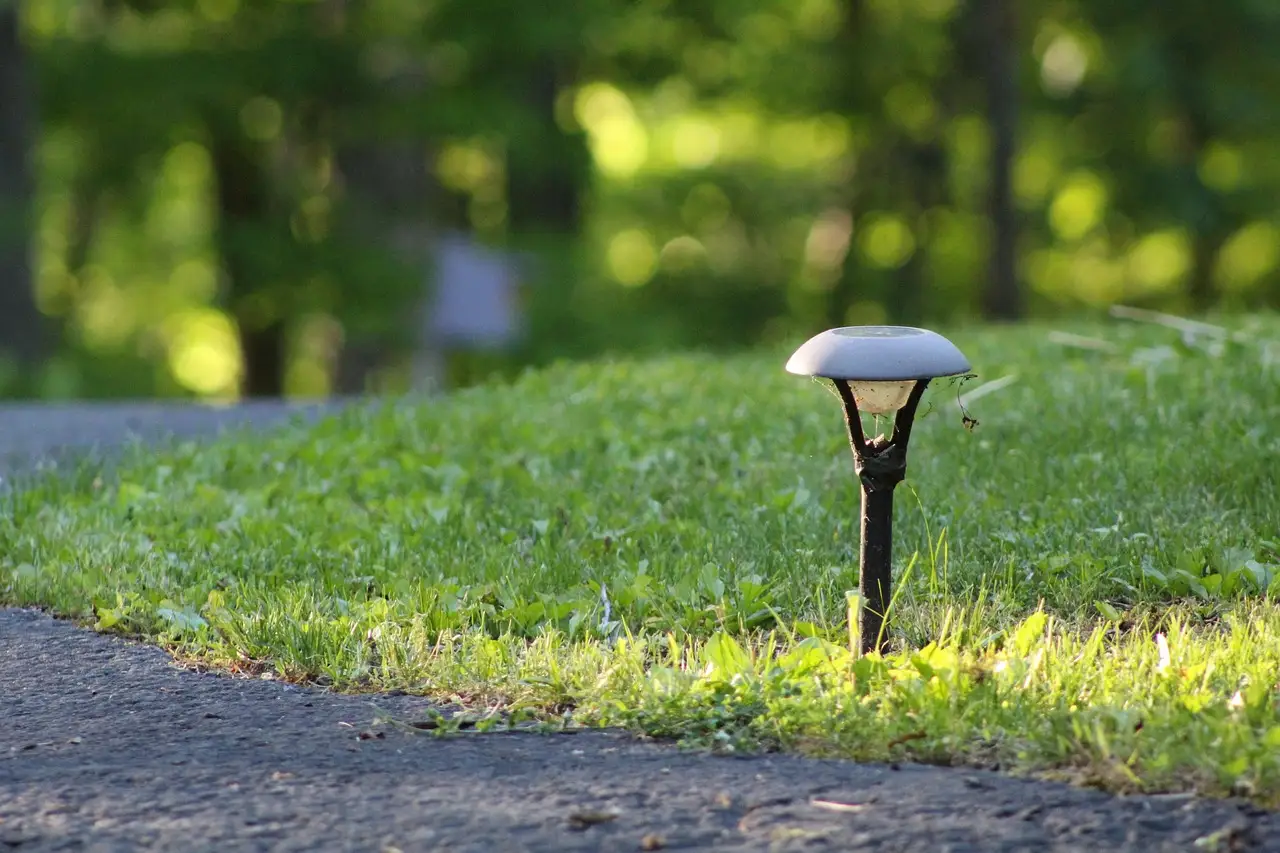
Use low-glare fixtures: roughly 12–18 inches high for path edges, spaced about 18–30 feet apart for guidance, and shielded lights at turns, entrances, and steps so drivers can read the route without seeing hot spots. I’ve seen poor lighting cause missed edges, bad turns, trips, and headlight confusion. This guide covers spacing, fixture types, placement, glare control, and code-aware choices for vehicle and pedestrian safety.
This guide is part of our Landscape lighting guide series.
Start by breaking the driveway into three zones: entry, travel run, and turn or curve. That split matters because each zone has a different job. The entry has headlight conflict and street glare. The travel run needs clear edge reading. Curves need tighter visual guidance and less direct brightness.
How do I light a driveway safely at night?


Start with the entry, travel run, and curve
The entry zone is where cars leave public lighting and enter a darker private space. That is where people miss a curb, a step, or a change in grade. The travel run is usually the longest section, so it needs consistent edge cues without a row of bright points. Curves need the most attention because the eye needs direction before the steering wheel reaches the bend.
Pedestrians matter here too. A driveway is not only a vehicle lane. People walk along edges, cross from mailbox to door, carry bags, and step over cracks or expansion joints. Lighting has to reveal those hazards, not simply outline the pavement.
Decide whether the main risk is drivers, walkers, or both
If the driveway is used mainly by cars, the priority is readable guidance from the seat. If people walk it often, edge visibility and surface texture matter more. Most homes need both. That usually means a lower, shielded light at the edge plus a few stronger cues at entrances, turns, and any transition in height.
Choose the right fixture type before spacing
Do not start with fixture count. Start with use case. Path lights work well for edge guidance. In-ground markers sit low and help define a line without much visual clutter. Bollards suit wider or busier drives. Wall-mounted options help near garages, retaining walls, or porch-adjacent aprons where poles would clutter the route.
What is the best spacing for driveway lights?
A practical starting point is the 8–10 foot spacing rule for visibility. That spacing gives the eye enough markers to read the route without creating a runway of glare. On curves, slopes, and entry points, the spacing should tighten. Long drives usually work better with staggered placement than a rigid line.
Use the 8–10 foot rule as a starting point
That spacing is a guide, not a finish line. Wider beam spreads may cover more ground, but the driveway edge still needs repeated cues. If the fixtures are too far apart, dark pockets appear between pools of light. If they are too close, the drive starts to feel noisy and overly bright.
Tighten spacing at bends, slopes, and aprons
Curves and aprons are the places where drivers hesitate. Tighten spacing there so the eye reads the turn before the tires reach it. Steeper sections also need closer cues because shadow patterns change with angle. At the apron, where driveway meets street, lighting should help with the crossing without washing into traffic.
Stagger fixtures on long drives to avoid a tunnel look
Long straight runs can look flat if lights mirror one another across the pavement. Alternating lights on opposite sides is recommended over direct mirroring. Staggered layouts are suggested for long driveways because they guide motion without creating a rigid corridor effect.
| Driveway zone | Fixture type | Spacing logic | Glare check |
|---|---|---|---|
| Entry | Shielded path light, wall-mounted light, or in-ground marker | Closer than the travel run; tighten around apron edges and steps | Check from the driver seat with headlights on and from the sidewalk |
| Travel run | Path lights or in-ground markers | Use 8–10 feet as a starting point; stagger on long drives | Look for bright points that outshine the pavement or create dark gaps |
| Turn or curve | Shielded path lights, bollards, or low wall-mounted units | Place closer together than on straight runs | Stand at the approach and confirm the turn reads without direct lamp view |
Should driveway lights be on one side or both sides?
One side can be enough on a narrow, straight driveway with little pedestrian traffic. Both sides help when the drive is wide, curved, sloped, or used by people walking at night. The right answer depends on how much depth reading the driver needs and how well one side defines the edge.
When one side is enough
A single side often works on a simple straight run with good surface contrast and a clean edge. It also suits driveways where the opposite side is a fence, wall, or planting strip that already frames the route. Keep the fixtures shielded so they read the edge without throwing light across the full width.
When both sides help with depth and edge reading
Both sides are useful when the driveway turns, drops in grade, or splits pedestrian and vehicle movement. They help the eye judge width and depth, especially near the garage apron and street entry. Use alternating lights rather than direct mirror placement so the layout feels guided instead of boxed in.
How driveway width changes the answer
As the driveway gets wider, one side loses precision. The far edge becomes harder to read from the car. Wider drives often need more than one light source near the entry and turn, even if the long middle run stays single-sided. The goal is edge definition, not symmetry.
Driveway lighting placement checklist for each zone
Use the checklist below before buying fixtures. It separates vehicle guidance from pedestrian visibility and keeps the design tied to actual risk. That is the quickest way to avoid over-lighting a straight section while leaving the apron and curve too dark.
- Mark the entry zone. Identify the street edge, apron, any step, and where headlights first strike the property.
- Mark the travel run. Note every long straight section, side path, mailbox approach, and place where someone may walk.
- Mark turns and curves. Find the inside edge of each bend and any place where the drive narrows or shifts grade.
- Choose fixture types by zone. Use shielded path lights, in-ground markers, bollards, or wall-mounted options where each one fits the task.
- Check glare from two viewpoints. View from the driver seat and from the walking route.
- Confirm local code and HOA limits before digging or wiring. Check permit needs, setback lines, height limits, and any brightness or style restrictions before digging or wiring.
Which fixtures work best for driveway lighting?
The best fixture depends on whether the light must guide wheels, reveal an edge, or help someone walking beside the drive. Path lights are the most flexible for edges. In-ground markers stay low and are good where a cleaner look is needed. Bollards and wall-mounted units suit larger or more active driveways.
Path lights for edge guidance
Path lights work well when the edge needs to be visible without becoming the focus. They are a strong choice for straight runs, mailbox approaches, and pedestrian-heavy edges. Use edge placement and shielding so the beam spreads onto the driveway, not into eyes.
In-ground markers for low-profile direction
In-ground markers can help on narrower drives, at turns, or where snow, vehicles, or foot traffic make above-grade fixtures awkward. They keep sightlines clear. The tradeoff is maintenance. Choose only if the site stays reasonably clean and the fixture has solid weather resistance.
Bollards and wall-mounted options for wider or busier drives
Bollards help on wider drives where a low point of reference is not enough. Wall-mounted fixtures are useful beside garages, gates, or retaining walls. Both should be shielded to avoid headlight conflict and side glare. If a fixture throws light into the road or toward neighbors, it is placed wrong.
How bright and what color should driveway lights be?
Driveway lighting should be bright enough to show edges and transitions without blasting the eyes. Warm light usually feels more comfortable and less harsh, while cooler light can appear sharper and can increase the sense of glare. The best choice is the one that keeps the route readable from the car and the sidewalk.
Brightness that supports visibility without hot spots
Brightness should be controlled at the fixture, not corrected after installation. Use shielded optics and avoid aiming directly across the driveway at eye level. The test is simple: if the source itself pulls attention before the pavement does, it is too exposed or too strong.
Warm vs cool color temperature for comfort and contrast
Warm tones usually reduce eye strain and blend better with residential settings. Cooler tones can feel crisp, but they can also make glare more noticeable on glossy pavement or wet surfaces. For most homes, a warmer appearance gives enough visibility without making the driveway look clinical.
Glare checks from the driver seat and from the sidewalk
Check the entry from the driver seat with the vehicle headlights on, then walk the route from the sidewalk. A good layout shows the edge and the turn before showing the lamp. If the source is visible at normal approach angles, add shielding, lower the mounting point, or shift the fixture.
What power and weatherproofing do driveway lights need?
Low-voltage lighting is often a practical fit for driveway edges, and a 12V transformer is commonly used in outdoor lighting setups. Plan the transformer, cable length, and fixture count together because long runs lose voltage. Outdoor fixtures also need weather resistance, sealed connectors, and LED compatibility.
Low-voltage system basics and when 12V makes sense
A 12V system works well for many residential driveways because it is easier to route and adjust than line-voltage lighting. It is especially practical for path lights, markers, and low bollards. The key is to size the system around the full route, not a short sample section.
Transformer sizing, cable length, and voltage drop
Count all fixtures first, then add a modest buffer when estimating total wattage. That buffer helps cover losses and future adjustments. Cable length affects performance, and long runs can dim the farthest fixtures if the wire is undersized or the layout is too extended. Keep runs organized and avoid burying a plan that depends on perfect power at the end of a long cable.
IP ratings, LED compatibility, and failure points
For outdoor exposure, an IP65 rating or higher is a practical target. Corrosion-resistant materials such as stainless steel or weatherproof aluminum alloy are a smart choice, especially where irrigation or salt exposure is common. Waterproof connectors and silicone sealants are recommended at junction points. LED fixtures should match the transformer and dimming method if used.
What causes driveway lights to flicker or fail?
Flicker usually points to a wiring, connection, or power issue, not a decorative problem. Loose connectors, water at junction points, voltage drop, poor transformer sizing, and incompatible LEDs are common causes. Failures also happen when fixtures are placed where vehicles, sprinklers, or freeze-thaw cycles stress the housing.
Dark spots from spacing or layout
Dark spots often mean the spacing is too wide or the layout ignores a turn, slope, or apron. The fix is usually to move the fixtures closer, stagger them, or add one more point at the weak zone. If the darkness appears only after a long run, voltage drop may be part of the problem.
Flicker from moisture or loose junctions
When lights flicker after rain or after mowing, inspect the connectors first. Water intrusion at a splice can create intermittent failure. Recheck seals, connector tightness, and cable routing. Any junction near spray, pooling water, or repeated flex should be redone with proper waterproofing.
Headlight conflict and entrance glare
Entrance glare happens when the driveway light competes with the car’s headlights or bounces off the street. The fix is often simple: lower the angle, shift the fixture farther from the apron, or use a shielded source with less spill. The entrance should be readable, not washed out.
Do driveway lights need weatherproofing and code compliance?
Yes. Outdoor fixtures need weather protection, and the installation has to follow local electrical code, HOA rules, setback lines, and any brightness or style limits. Some areas require permits before exterior electrical work. Ignoring those checks can turn a clean lighting plan into a removal job.
Permit, setback, and brightness checks
Before trenching or wiring, confirm whether a permit is needed. Check setback lines carefully because fixture placement near setback lines can violate rules according to the page. Some zoning laws also cap brightness to reduce light pollution, which matters near property lines and street fronts.
Fixture height and style restrictions
HOAs sometimes limit how tall fixtures can be or what they look like from the street. That affects both bollards and wall-mounted units. Keep the design simple and functional if the neighborhood has rules. Safety lighting that passes review is better than a larger design that has to come down.
Frequently asked questions
How do I light a driveway safely at night?
Divide the driveway into entry, travel run, and turn or curve zones, then light each one for the task it serves. Use shielded fixtures, controlled spacing, and a glare check from both the driver seat and the sidewalk. Add pedestrian visibility at edges, steps, and mailbox approaches.
What is the best spacing for driveway lights?
Use 8–10 feet as a starting point for visibility, then tighten spacing at curves, slopes, and aprons. Long drives usually benefit from staggered placement rather than perfect mirroring. The right spacing is the one that keeps the route readable without creating bright spots and dead gaps.
Should driveway lights be on one side or both sides?
One side can work on a narrow, straight drive with clear edges. Both sides help when the drive is wider, curved, or shared by walkers. Alternating fixtures is often better than direct mirroring because it gives depth cues without turning the driveway into a bright corridor.
How bright should driveway lighting be to avoid glare?
Bright enough to show the edge, not bright enough to dominate the view. Shielding matters as much as output. If the fixture source is obvious before the pavement is, glare is too high. Check the approach at night, especially where headlights meet the entry zone.
What color temperature is best for driveway lights?
Warm color temperature is usually easier on the eyes and feels less harsh on wet or reflective pavement. Cooler tones can improve contrast in some layouts, but they often increase the feeling of glare. For most homes, warm light gives safer visibility with better comfort.
Do I need low voltage lights for a driveway?
Low-voltage lighting is a strong choice for many driveways because it is easier to install, adjust, and expand. A 12V transformer is described as common for outdoor lighting setups. It still needs proper sizing, LED compatibility, and attention to cable length so the far end does not dim.