How to Choose Low Voltage Landscape Lights: A Buyer’s Guide
Choose low voltage yard lights by the job: path lights for walkways, spotlights for accents, well lights for uplighting, and 12V fixtures with narrower beams for more focused light or wider beams for broader coverage. Pick the wrong type and you waste money, create glare, and still leave dark spots. This guide shows how to match fixture type, beam spread, durability, and wiring to your yard, walkway, or front yard.
What low voltage yard lights should do in your yard

- Includes 60W light-sensing transformer
- Flexible lighting layout with connectors
- Energy efficient with 80% power saving
Low voltage yard lights should solve one lighting job, not sit there as decoration. The best system for a front walk is different from one for a tree line or a retaining wall, and the right choice starts with the effect you want at night.
A 12V low voltage outdoor lighting system steps down power from a standard GFCI outlet through a transformer. In use, fixtures often end up in roughly the low-11-volt range once the system is loaded, so run length and layout can matter as much as the fixture itself.
Match fixture type to the job
Path lights are for walking zones and edge definition. Spotlights aim at trees, facades, signs, and focal points. Hardscape lights work on steps, walls, and benches where the beam needs to graze a surface instead of spread across open ground.
If a kit includes a transformer and connectors, it is usually the easiest starting point for a first system or a small upgrade. If the yard has long runs, mixed fixture styles, or older parts already in place, individual parts give more control.
Set the main buying rule
Buy by beam spread, brightness, and mounting height before you look at finish or price. A narrow beam can make a tree trunk pop. A wider beam can fill a path evenly. Mounting height changes both glare and coverage, so the same fixture can work well in one spot and fail in another.
The right decision is usually visible on paper. If the beam misses the target, or the light source sits too low for the surface, the yard will still feel patchy.
Use the yard layout to decide between kit and parts
Kits suit simple layouts because they reduce mismatch risk between transformer, wire, and fixture count. Individual parts suit longer runs, future expansion, or mixed needs such as a front walk, tree uplighting, and step lighting in one system.
Older systems often force an upgrade path. A transformer that worked with halogen may be undersized or poorly matched to LED loads, so replacing only fixtures can leave dim ends and uneven brightness.
How much light do you need?
Choose light output for the task, not the package label. Path lighting wants enough brightness to guide feet without throwing glare into the eyes. Accent lighting wants enough punch to hit the subject cleanly. Task areas need the most useful spread, not the highest number on the box.
Choose lumens for the task, not the package label
One tested path light draws 3.4 watts and produces 155 lumens. That is a useful reference point for soft path illumination, but it should not be copied blindly to every yard. Path lights, spotlights, and hardscape lights need different output levels because they do different work.
The SUNVIE spotlight pack is listed at 900 lumens per fixture, which is a very different job from a low-output path light. For accents, that kind of output can be useful. For a narrow walkway, it can be too much unless the beam is controlled.
Use beam spread to avoid glare and dark gaps
Beam spread matters because it controls where the light lands. Narrow beams are useful on trees, columns, and architectural details. Wider beams are better for paths and shallow wash effects. If the beam is too narrow, the scene gets bright spots and dead space.
Mounting height changes beam behavior. A higher mount usually needs a wider spread to cover the same area, while a lower mount can use a tighter beam without spilling light into the viewer’s eyes.
Pick 3000K warm white first
For most homes, 3000K warm white is the default starting point. It tends to read softer at night and pairs well with brick, stone, wood, and plantings. The hykolity path light is rated 3000K warm white, which matches that common residential choice.
Cooler white can work where the goal is crisp visibility, modern hardscape lines, or a more clinical look. In many yards, though, it feels harsher and can make glare more obvious.

Which fixture type fits the job?
Fixture type should follow use case. Path lights solve movement and edge definition, spotlights solve aiming and focus, and hardscape lights solve close-range wash on surfaces. The wrong body style can be bright but still useless.
Path lights for walkways and entry edges
Use path lights where people need direction without seeing the source. The Hinkley Harbor 12V LED Outdoor Lighting Path Light has a craftsman look and an etched lens, which suits entries and refined front yards. The tradeoff is that decorative styling may cost more than a plain utility fixture.
The hykolity path light uses a cast aluminum body and crackled glass shade, with a 5-year warranty. That helps on appearance and service life, but crackled glass can be a poor fit if the goal is the cleanest possible beam.
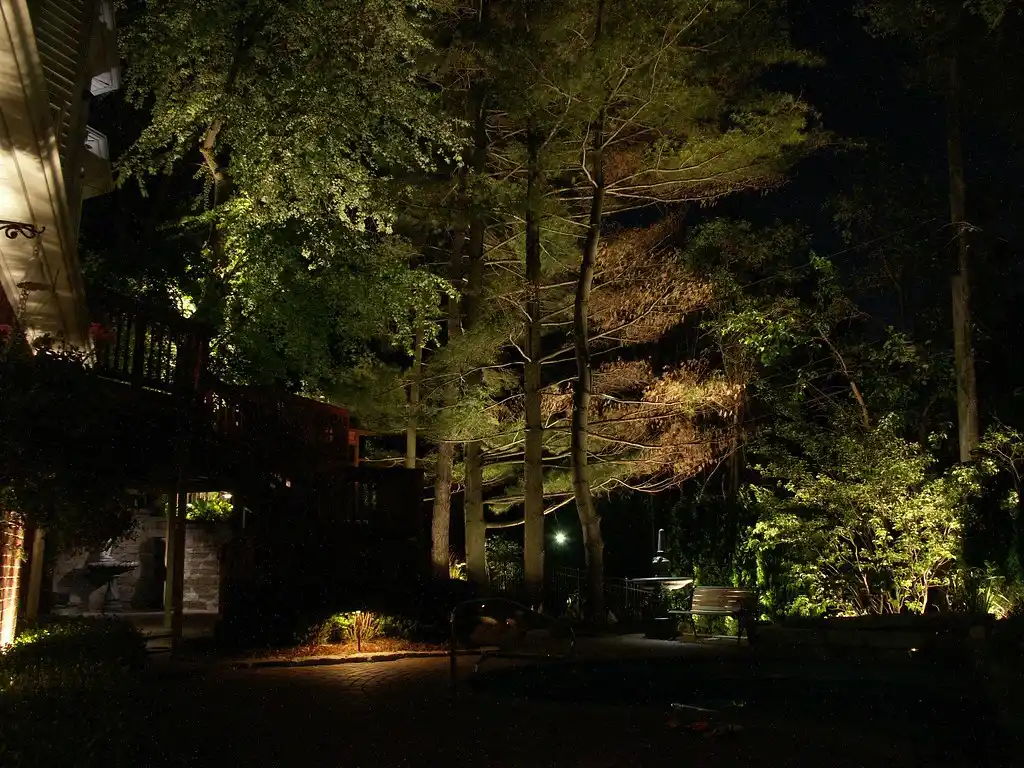
Spotlights for trees, facades, and focal points
Spotlights fit when the beam needs to travel farther or land on a target with shape. One spotlight option is rated IP66 waterproof and has a 270 degree adjustable head, which gives useful aiming range in wet or exposed spots. The downside is that adjustable heads can collect more dirt and may need periodic tightening.
The Gardencoin brass fixture uses replaceable MR16 bulbs and carries a lifetime warranty. That makes service easier over the years, especially if a lamp fails or the visual goal changes. Brass can cost more up front, and replaceable bulbs add a future bulb purchase.
Hardscape lights for steps, walls, and seating areas
Hardscape lights belong where the beam grazes a surface. They are better for stairs, seat walls, and retaining walls than for open lawns. Because they sit close to material, finish quality and heat management matter more than wide area output.
If the surface is pale stone or painted masonry, a lower-output hardscape fixture often looks cleaner than a bright spotlight aimed too low. That reduces glare and helps the lighting read as part of the structure.
How do you choose the transformer and wire?
Choose the transformer and wire from the layout outward. The transformer must cover total fixture wattage with headroom, and wire must handle run length without pushing the far end dim. On long runs, poor sizing shows up as uneven brightness before it fails completely.
Size the transformer to total wattage with headroom
A transformer or power pack converts line voltage to low voltage, and it should be outdoor-rated with moisture protection. Single-output units are simpler. Multitap units are better when the layout has different run lengths or when the yard needs voltage fine-tuning.
For planning, add up the LED fixture wattage and leave headroom. If the system is near the limit on paper, it is easy to end up with dim far-end fixtures, especially after adding one more light later.
Pick wire gauge using distance and voltage drop risk
Yard lighting wire comes in 16, 14, 12, 10, and 8 gauge. The Garden Glove recommends 16 gauge for runs of 30-50 feet, 14 gauge for 50-75 feet, and 12 gauge for 75-150 feet. Longer runs and higher load push the choice toward thicker wire.
Voltage drop is the issue to watch. It shows up as dim lights at the far end, uneven brightness, or fixtures that look warmer and weaker than the first ones in the run. Thicker wire helps, and so does splitting the run.
Use layout, not guesswork, to place the system
Put the transformer where the longest likely branch stays practical. If the yard needs multiple zones, a multitap transformer can help balance output. If the plan includes future growth, leave room for a few more watts now rather than replacing the transformer later.
For buried cable, keep the line shallow and hidden under mulch or rock where possible. The point is not deep burial. The point is protection, clean appearance, and fewer accidental cuts.
What makes a fixture worth buying long term?
Long-term value comes from wet-location rating, corrosion resistance, serviceability, and warranty. A fixture that looks good on day one can become expensive if it fails near irrigation, rusts in a season, or cannot be repaired without replacing the whole unit.
Check IP rating and moisture exposure limits
IP or waterproof rating tells you how well the fixture handles rain, spray, and garden moisture. In irrigation-heavy yards, that rating matters as much as the beam. A wet-location fixture is a better fit than a decorative one with weak sealing.
Connectors matter here too. Waterproof wire connectors, including silicone-filled and quick-connect styles, can make or break reliability. Bad connectors are a common failure point, especially when the system sits in damp mulch or is adjusted later.
Compare finish durability, corrosion resistance, and warranty
Cast aluminum, brass, and coated finishes do not age the same way. The Gardencoin brass fixture and the hykolity cast aluminum path light show two different ownership profiles: brass usually favors long service life, while aluminum often balances weight and cost. Finish quality matters most where sprinklers and salt air hit the hardware.
Warranty is part of the buy decision, not an afterthought. The hykolity fixture includes a 5-year warranty, and the Gardencoin brass fixture has a lifetime warranty. A longer warranty is useful if the fixture is hard to reach.
Decide between replaceable bulbs and integrated LEDs
Replaceable bulbs help when service access is poor or when the light’s aim may change later. Integrated LEDs reduce bulb handling and often simplify ownership, but when the emitter fails the whole fixture may need replacement. That difference matters more on tall uplights and buried hardscape pieces.
For upgrade projects, mixed systems often make the choice obvious. If the old setup uses replaceable lamps, keeping that format may be cheaper over time. If the yard needs low maintenance, integrated LED path lights are easier to live with.
Use the selection worksheet before you buy
A worksheet keeps the choice tied to the actual yard. It forces a buyer to score fit, not hype. It also helps compare mixed fixtures and upgrade paths when the system already has an older transformer or a few mismatched lights.
| Criterion | 1 point | 3 points | 5 points | What to favor |
|---|---|---|---|---|
| Use case | Wrong job | Can work | Exact job | Path, accent, or hardscape match |
| Beam spread | Too narrow/wide | Acceptable | Well matched | 20–40° for focus, 100°+ for broad coverage |
| Lumens | Too dim/bright | Borderline | Useful output | Enough without glare |
| Color temperature | Poor fit | Usable | Right tone | 3000K warm white for most homes |
| Material | Light-duty | Mid-grade | Corrosion-aware | Cast aluminum or brass where exposure is higher |
| IP rating | Weak | Moderate | Wet-location ready | Rain and irrigation exposure |
| Bulb replaceability | Hard to service | Some service | Easy to service | Usefulness where access is poor |
| Wire gauge need | Mismatch | Close | Appropriate | Run length and voltage drop risk |
| Transformer headroom | Near limit | Some margin | Comfortable margin | Total fixture wattage plus future growth |
| Maintenance access | Hard to reach | Okay | Easy to service | Where replacement will be a chore |
Score hard-to-reach fixtures higher on serviceability
For tree uplights, buried hardscape pieces, and fixtures behind dense plantings, maintenance access should weigh more heavily than decorative appeal. A replaceable bulb, better connector access, and a longer warranty can save more over time than a slightly nicer finish.
For front-yard path lights, appearance and beam quality may matter more because the fixtures are easier to reach. The worksheet should reflect that difference.
What are the most common buying mistakes?
The most common mistakes are choosing by looks alone, under-sizing the transformer, using wire that is too small for the run, and ignoring service access. Another common miss is buying bright spotlights for a path, then wondering why the walkway still feels harsh and uneven.
Watch for these failure cases
Flickering often points to connector trouble or a poor fit between transformer and load. Dim lights at the far end point to voltage drop or wire gauge that is too light. Uneven brightness often means the layout should be split into shorter branches or connected to different taps.
Mixed fixtures are another trap. A yard with old halogen pieces and new LED units can look fine on paper but behave poorly if the transformer or wire plan stays unchanged.
If that did not work, try this next
Recheck the transformer setting first, then split the longest run, then move up one wire gauge if the far end still dims. If the issue is recurring at the same fixture, swap the connector before replacing the light itself. The connector is often the cheapest failure to fix.
Prevention
Keep spare connectors and a labeled layout sketch with the transformer settings. That makes later repairs and expansion faster, especially when the system mixes new fixtures with older ones.
Frequently asked questions
How do I choose the right transformer size for low voltage yard lights?
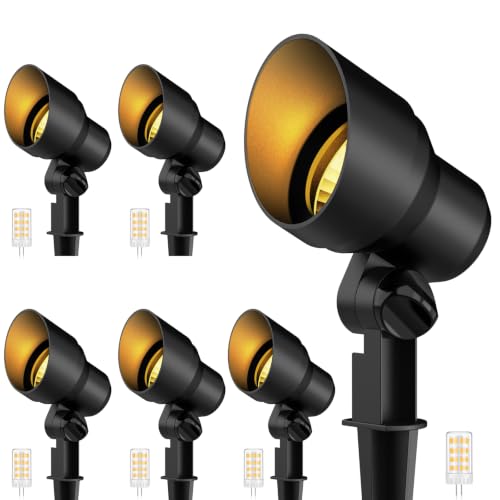
- Replaceable G4 bulb
- Safe 12V low voltage system
- Durable cast aluminum construction
Add the LED wattage of every fixture, then choose a transformer with extra capacity rather than a unit that sits at the limit. Outdoor-rated, moisture-protected power packs are the safer pick. Multitap units help when one branch is much longer than the others.
What wire gauge should I use for low voltage yard lights?
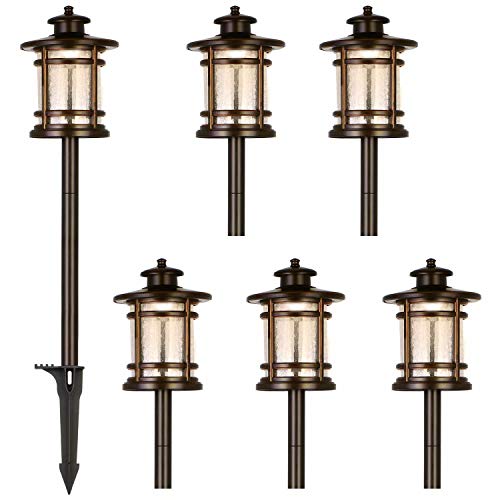
- Durable cast aluminum construction
- Easy to use with maintenance-free LED
- Wide application for pathways and gardens
For 30-50 feet, 16 gauge is a common starting point. For 50-75 feet, use 14 gauge. For 75-150 feet, use 12 gauge. If the run is longer, or if the far end looks dim, move thicker and shorten the branch.
How many lumens do I need for path lights?
Use just enough light to guide steps without glare. A path light around the 155-lumen range can work well in many residential settings, especially when the beam is controlled. Wider spacing or darker paving may call for more fixtures instead of more brightness per fixture.
What color temperature is best for outdoor lighting?

- Dimmable integrated LED bulb
- Suitable for wet locations
- Cohesive design for stately exteriors
Start with 3000K warm white for most homes. It usually looks natural against stone, siding, and planting beds, and it tends to feel less harsh at night. Cooler white is better only when the goal is a cleaner, sharper look or a more modern feel.
How far should low voltage lights be from the transformer?
There is no single distance limit. The real constraint is voltage drop. Shorter branches are easier to balance, but longer ones can work with thicker wire, a multitap transformer, or fewer fixtures per branch. If the last fixtures look dim, the run is too long for the current layout.
How do I set up low voltage outdoor lighting?
Start by mapping the fixture jobs, then size the transformer, then choose wire gauge by run length. Connect with waterproof connectors and keep cable hidden or buried shallowly. If the yard is complex, buy the parts separately instead of forcing a kit to do every job.
Where do I buy low voltage yard lighting?
Buy from sellers that show transformer rating, fixture wattage, IP rating, connector type, and warranty clearly. If those details are missing, skip it. For replacement parts, keep the existing fixture style in mind so the new piece matches voltage, beam spread, and service needs.