Landscape Lighting for Large Yards and Estates Plan
For large yards and estates, consider designing exterior lighting as several zones—such as arrival, paths, architecture, trees, water, and security—so each area has its own circuit, controls, and purpose. Poor zoning creates glare, dark gaps, higher energy use, and costly rewiring later. This guide shows how to divide a property, choose fixtures by zone, and build a lighting plan that scales cleanly.
This guide is part of our Landscape lighting guide series.
Why large properties need a zoned lighting plan


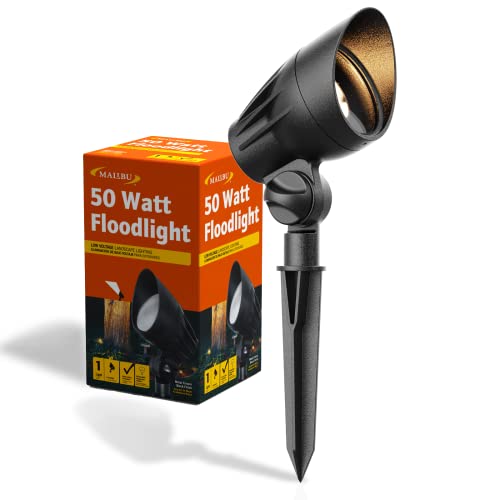
Large properties need zone-based planning because distance, sightlines, and varied uses change how light behaves. A few fixtures that work on a small yard often leave estates with hot spots near the house and weak coverage at the far edge, especially when voltage drop and beam spread are ignored.
What changes when the yard gets bigger
As the site grows, the lighting system stops behaving like a front-yard accent plan and starts acting like an electrical network. Long runs create resistance, tall trees need different beam control than paths, and multiple entries or outbuildings usually need separate switching and dimming.
Like a site plan, estate lighting needs composition. You are arranging focal points, spacing, and contrast across a wide field, not filling every dark corner.
How zones prevent overlighting and dead spots
Zones let you assign brightness and control by area. Entry lighting can stay bright for arrival, while perimeter lighting can sit lower to avoid spill onto neighboring lots. That separation prevents the common estate mistake of blasting the whole property at one level.
Where standalone fixtures usually fail
Standalone fixtures fail when they are chosen one by one without a load plan or beam strategy. The result is often a bright porch, dim drive, and overlit façade. On larger sites, that patchwork look comes from treating each fixture as an object instead of a node in a system.
How do you divide a large estate into lighting zones?
Divide a large estate into entry, circulation, feature, safety, and privacy or perimeter zones. Each zone should have a defined purpose, a separate switching or dimming plan, and fixture types matched to distance and viewing angle. This keeps the property balanced instead of uneven.
Entry zone
The entry zone includes gates, front approach, porch, and primary façade. This area usually needs clear identity and enough illumination for arrival, but not so much that windows glow. Use wall lights, focused spotlights, and well lights only where the architecture needs lift.
Circulation zone
The circulation zone covers driveways, long walks, secondary paths, and crossings between buildings. It needs consistent spacing, low glare, and even pools of light so people can read the route. Path lights and low-glare wall lights are common here.
Feature zone
The feature zone is for trees, sculpture, water, specimen planting, and façade accents. It should be brighter than the background but tighter in spread. Spotlights and narrow well lights work here when the goal is to draw attention without lighting the whole scene.
Safety zone
The safety zone covers steps, grade changes, retaining walls, edges of patios, and transitions near dark corners. This zone should be practical first. Hardscape lights and wall lights often do better here than decorative path fixtures because they place light exactly where feet need it.
Privacy and perimeter zone
The privacy and perimeter zone handles fence lines, rear boundaries, gates, and dark edges far from the house. The goal is subtle boundary definition, not stadium lighting. Lower-output floods, shielded wall lights, and carefully aimed spotlights keep light inside the property line.
What fixtures belong in each zone?
Match fixture type to job. Path lights suit circulation, spotlights and floods suit trees and façades, well lights hide at grade for discreet uplight, and hardscape or wall lights suit steps, walls, and entries. That match matters more on large sites because beam reach and glare control vary by zone.
Path lights for circulation
Path lights work best when they mark edges and help with wayfinding, not when they act as the main source of brightness. On estates, they are usually spaced to guide movement along long walks and drive edges, with lower mounting height to keep the view open.
Spotlights and floods for trees and facades
Spotlights give narrow to medium beams for trunk-to-canopy work or architectural details. Floodlights cover broader surfaces and can wash large façades, but they need restraint. On a big property, a flood used too close to a wall can flatten texture and create glare through nearby windows.
Well lights for uplighting without visible source points
Well lights are useful when you want uplight from grade without a visible fixture body. They can help under trees, along masonry, and near drive edges. They need careful drainage planning and aiming because a hidden source is only helpful if it stays dry and stays pointed correctly.
Hardscape and wall lights for steps, retaining walls, and entries
Hardscape and wall lights solve close-range tasks. They light vertical faces, steps, and landings without throwing a beam across the whole property. On estates, they often reduce the need for oversized path fixtures near entries and terraces.
How do you size the transformer and plan the load?
Size the transformer from the total fixture wattage, then add some headroom for future zones and voltage correction. Low-voltage exterior lighting often runs at 12V, but the transformer should support multi-tap outputs and the actual load should be calculated before trenching so the system can expand cleanly.
Wattage capacity and expansion margin
Add the wattage of every fixture on a circuit and keep the transformer below full capacity. Most manufacturers recommend leaving expansion margin rather than loading to the limit. That reserve matters on estates because new trees, gates, or walks often get added later.
Multi-tap voltage outputs
Multi-tap transformers offer different output taps, often around 12V, 13V, 14V, or 15V, so you can compensate for long runs. The correct tap depends on the circuit length, fixture load, and wire gauge. Higher taps can help offset distance when the design is otherwise sound.
Timer and photocell compatibility
A transformer should work with the chosen control method, whether timer, photocell, or smart controller. Photocells turn lighting on at dusk automatically, while timers and smart controls support dimming schedules and separate zones. On large properties, that control flexibility is as important as the transformer size itself.
Why load calculation matters before trenching
If load is guessed after wire is buried, you can end up with dim end-of-run fixtures, too few circuits, or an undersized transformer. A proper plan lists each zone, fixture count, estimated wattage, and likely wire length so the system can be balanced from the start.
| Zone | Typical fixtures | Rough load example | Common failure point |
|---|---|---|---|
| Entry | 4 wall lights, 2 spotlights, 2 well lights | About 120 to 180 W | Overlit façade and glare into windows |
| Circulation | 12 path lights, 4 wall lights | About 80 to 140 W | Uneven spacing and dark gaps on curves |
| Feature | 6 spotlights, 4 uplights | About 100 to 200 W | Too much spill on nearby lawn or pavement |
| Perimeter | 8 shielded floods, 2 gate lights | About 90 to 160 W | Visible source points and neighbor spill |
How do voltage drop and wire gauge affect large-yard lighting?
Voltage drop is the main reason far-end fixtures dim on large properties. Longer runs and smaller wire increase resistance, which reduces voltage at the last fixture. To manage it, choose wire gauge for distance and load, then split long circuits across more than one tap or transformer.
Why long runs dim fixtures at the far end
Current flowing through wire loses voltage over distance. A fixture close to the transformer may look correct while the last unit on the run appears weak or warm. On estates, that issue is common because runs can extend through driveways, courts, planting beds, and perimeter edges.
Choosing wire gauge for distance and total load
Common low-voltage outdoor wire sizes are 12, 10, and 8 AWG. Thicker wire has lower resistance and helps keep brightness consistent on long runs or higher loads. The right size depends on total wattage and run length, not just the number of fixtures.
Ways to split long runs across multiple circuits or taps
Break long routes into shorter circuits when the layout stretches across a large yard. Use multiple transformer taps, separate transformers, or distributed zones near distant areas like a rear gate or outbuilding. That approach keeps the system balanced and reduces the chance of dim far-end fixtures.
Suppose a 200-foot driveway has eight path lights and two wall lights. If every fixture hangs on one long run, the last two can dim noticeably. Splitting the drive into two circuits often gives cleaner light with less rework.
Use this zone map and load-planning worksheet
Use this worksheet before you trench. It turns a large property into a planning document with fixture counts, rough wattage, and failure points. A worksheet like this also helps you phase the work, starting with the zones that matter most for access and safety.
Large-yard lighting zone map
- Entry zone: gate, front approach, porch, façade, and arrival court.
- Circulation zone: driveway, long walkways, side paths, and transitions.
- Feature zone: specimen trees, water, architectural walls, and focal planting.
- Safety zone: steps, retaining walls, grade changes, and terrace edges.
- Privacy/perimeter zone: fence lines, rear boundaries, and dark property edges.
Load-planning worksheet
- List each zone and its purpose.
- Count fixtures by type and multiply by wattage.
- Estimate run length from transformer to farthest fixture.
- Choose wire gauge for distance and total load.
- Check transformer capacity and leave expansion margin.
- Split any run that risks voltage drop or glare control problems.
Common failure points to check before installation
- Dim fixtures at the far end of a long run.
- Overlit façades that flatten texture and leak light into windows.
- Dark pockets between fixtures on curves and long walks.
- Visible source points in lawns, beds, or fence lines.
- Too much brightness on one zone and too little on another.
How do you control glare, color, and beam spread on estates?
Control glare with the right beam spread, shielding, and aiming angle. Use narrow beams for tall trees or distant accents, medium beams for trunks and façades, and wide beams only where coverage matters. Warm white usually suits premium exterior lighting better than cool white because it looks softer and reduces harshness.
Beam spread choices for trees, paths, and facades
Narrow beams work for tall specimen trees and columns. Medium beams handle many façades, medium-height plantings, and trunk-to-canopy uplighting. Wide beams belong on broad walls, driveway edges, and large planting masses where the goal is coverage rather than a sharp accent.
Warm white versus cool white in premium exterior lighting
Warm white, often around 2700K to 3000K, usually reads calmer and less stark on stone, wood, and planting. Cool white can look bright, but it often feels harsher on homes and can make minor aiming errors more obvious. On estates, warm white is the safer default.
Shielding, aiming angles, and cutoff for spill control
Shielding cuts light where it is not needed. Aim fixtures so the beam lands on the target surface, not above it or into a neighbor’s lot. A tight cutoff near windows, roads, and boundaries keeps the system refined and reduces nuisance glare.
Say your property has a 60-foot cedar at the rear fence and a bedroom window 25 feet away. A narrow uplight with a shielded housing and a lower aiming angle will usually do far better than a brighter flood with no cutoff.
How do you light trees, driveways, and long walkways at night?
Use different fixture jobs for each element. Trees usually need uplighting with beam control, driveways need edge definition and low glare, and long walkways need evenly spaced path lights or wall lights. The goal is not maximum brightness; it is readable geometry across distance.
Trees
For trees, aim from outside the root zone when possible and choose beam spread by canopy size. Tall trunks often need narrow or medium beams, while broad canopies may need two fixtures from different angles. That reduces flat shadows and keeps the canopy from looking washed out.
Driveways
Driveways need visibility without headlight conflict. Use path lights, low wall lights, or carefully shielded uplights at bends, gates, and apron areas. On a long drive, avoid placing every fixture on one side only, or the route can feel lopsided and hard to read.
Long walkways
Long walks work best with consistent spacing and low glare. The spacing depends on fixture output and path width, but the pattern should feel even rather than clustered. If a walkway passes near windows, choose lower brightness and tighter shielding to prevent spill.
Should I use low voltage or solar exterior lighting for a large yard?
Low-voltage lighting is usually the better fit for a large yard because it supports longer runs, zoning, dimming, transformer sizing, and consistent output. Solar fixtures rarely suit estate-scale planning because their output, battery life, and placement flexibility do not match long driveways, tall trees, or perimeter runs.
Why solar usually falls short on estates
Solar fixtures depend on direct sun, small batteries, and local panel placement. That makes them hard to coordinate across multiple zones or shaded areas. They may work for a few accent points, but they are a poor match for driveways, gates, outbuildings, and long sightlines.
Why low voltage scales better
Low-voltage exterior lighting, typically 12V, is designed for exact planning. You can size the transformer, divide loads, correct voltage drop, and add dimming or smart controls. That makes it the practical choice for large-property lighting systems that need consistency and future expansion.
How much does exterior lighting for a large yard cost?
Cost depends on zone count, fixture quality, wire length, transformer size, and whether the work is done in phases. Large-yard projects usually cost more because the system needs more circuits, more wire, and more planning. The useful question is not fixture count alone, but how much area each zone must cover.
How to phase the work
Start with entry and safety zones, then add circulation, feature, and perimeter lighting later. That order gives the property usable light first and lets the system grow without tearing out finished work. Phasing is especially useful when the site includes long drives or future planting changes.
What drives the budget up
Budget rises when runs are long, wire needs to be heavier, and multiple transformer taps or units are required. Custom aiming for trees, shields for glare control, and extra labor for trenching around hardscape also add cost. The larger the property, the more system design matters.
Frequently asked questions
How do you light a large yard without making it look overdone?
Limit each zone to a clear job and keep brightness uneven only where emphasis is needed. Use warm white, shielded fixtures, and fewer wide-beam floods. Large yards look overdone when every tree, wall, and edge gets equal intensity instead of a layered plan.
How many exterior lights do I need for a large estate?
The number depends on zone count, driveway length, tree height, and boundary depth. A better method is to count fixtures by purpose: entry, circulation, feature, safety, and perimeter. That approach prevents both under-lighting and the common mistake of adding fixtures without a load plan.
What is the best layout for exterior lighting on a big property?
The best layout uses separate circuits for arrival, paths, architecture, trees, and perimeter edges. Keep bright focal points near the house and lower levels farther out. That structure helps the property read clearly from the road and from inside the home.
How do you avoid glare and dark spots in estate lighting?
Use shielding, proper aiming, and fixture spacing that matches the path or façade length. Glare comes from exposed sources and poor cutoff, while dark spots come from runs that are too sparse or too long. Both problems usually point to weak zoning, not weak fixtures.
What transformer size do I need for a large exterior lighting system?
Add the wattage of every fixture on the planned circuits, then choose a transformer with extra capacity for future growth. Multi-tap models help correct for long runs and voltage drop. The right size depends on the total load and the farthest circuit, not the property size alone.
How do you zone exterior lighting for different areas of a large property?
Assign one zone to arrival, one to circulation, one to feature accents, one to safety, and one to privacy or perimeter. Use separate controls when possible. That lets you dim the grounds after hours while keeping entries, steps, or gates visible when needed.
What lighting is best for gates, walls, and long fence lines?
Gates and walls usually need wall lights, small spotlights, or well lights with careful shielding. Fence lines work best with lower-output fixtures spaced to define the boundary, not flood it. The goal is clarity and restraint, especially near neighboring property lines.