How To Install Sunvie Landscape Lights
Transforming your outdoor space with Sunvie landscape lights can dramatically boost curb appeal, safety, and nighttime ambiance. Whether you’re highlighting architectural features or creating cozy garden pathways, installing these lights is an accessible DIY project with lasting rewards. While many homeowners hesitate, thinking outdoor lighting requires professional help, Sunvie’s user-friendly systems make it possible for anyone with basic tools to achieve professional-grade results.
This comprehensive guide walks you through every step of installing Sunvie landscape lights, from planning your lighting layout to wiring and maintenance. Drawing on real-world examples, practical tips, and data-backed guidance, you’ll discover how to make the most of your investment and avoid common pitfalls.
Let’s illuminate your yard with confidence and style.
Key Takeaways
- Sunvie landscape lights offer a cost-effective and energy-efficient way to enhance outdoor spaces.
- Careful planning and layout design are essential for optimal results and safety.
- Installation requires minimal tools and basic electrical know-how, making it accessible for most homeowners.
- Choosing the right transformer and wire gauge prevents performance issues and extends system life.
- Regular maintenance ensures long-term reliability and consistent illumination.
Understanding Sunvie Landscape Lights
Before diving into installation, it’s crucial to understand what makes Sunvie landscape lights stand out . These lights are engineered for durability, energy efficiency, and easy installation, catering to both beginners and seasoned DIYers.
Types Of Sunvie Landscape Lights
Sunvie offers several lighting solutions tailored to different outdoor needs:
- Spotlights: Ideal for accentuating trees, sculptures, or architectural features.
- Pathway Lights: Perfect for illuminating walkways and garden borders.
- Floodlights: Designed for larger areas requiring broader illumination.
- Deck and Step Lights: Enhance safety and ambiance on stairs or elevated surfaces.
Key Features And Benefits
Sunvie lights are known for their:
- LED technology: Lower energy consumption and longer lifespan compared to halogen bulbs.
- Weather-resistant construction: Built to withstand rain, snow, and UV exposure.
- Adjustable heads: Customize beam direction for targeted lighting effects.
- Tool-free installation: Many models feature quick connectors and easy-to-follow instructions.
Compatibility And Expansion
Most Sunvie landscape lights are compatible with standard low-voltage (12V) systems, making them easy to integrate with existing setups or expand over time . This flexibility allows homeowners to start small and gradually add more lights as desired.
Example: Lighting A 50-foot Walkway
A homeowner looking to illuminate a 50-foot garden path might choose Sunvie’s 8-pack of LED pathway lights. By spacing each light 6-7 feet apart, they achieve even coverage and improved safety, all while consuming less than 1 watt per fixture.

Credit: www.youtube.com
Planning Your Sunvie Landscape Lighting Project
Proper planning is the cornerstone of a successful landscape lighting installation. By taking time to map out your design and calculate electrical requirements, you’ll avoid common errors and maximize your lighting investment.
Mapping Out Your Lighting Design
Begin by walking your property at dusk to identify areas needing illumination. Focus on:
- Entryways and steps (for safety)
- Trees, shrubs, or water features (for visual impact)
- Pathways and driveways (for navigation)
- Architectural highlights (for curb appeal)
Sketch your property and mark where each light will go. Consider the beam angle and light intensity required for each location.
Calculating Power Needs
Sunvie lights typically operate on low voltage (12V), but you’ll need a transformer to convert household current (120V) to the appropriate level. Add up the wattage of all planned fixtures to determine the minimum transformer size. For example:
- 8 Sunvie LED pathway lights (each 3W): 8 x 3W = 24W total
- Choose a transformer rated at least 25-30% higher: 30-36W minimum
Selecting Wire Gauge
Wire gauge is essential for preventing voltage drop, which can cause lights farthest from the transformer to dim. Use the following table to select the appropriate wire size based on total wattage and cable run length:
| Wire Gauge | Max Wattage (50 ft) | Max Wattage (100 ft) | Typical Use |
|---|---|---|---|
| 12 AWG | 192W | 96W | Large systems, long runs |
| 14 AWG | 144W | 72W | Medium systems |
| 16 AWG | 108W | 54W | Small systems, short runs |
Pro Tip
Always round up your transformer and wire size to accommodate future expansions and prevent overloads.
Real-world Example: Avoiding Voltage Drop
When I installed Sunvie lights along a 100-foot driveway, I opted for 12 AWG wire and a 75W transformer, even though my initial setup drew only 40W. This prevented voltage drop and left room for adding more lights in the future.
Tools And Materials Needed
Gathering the right tools and materials before starting ensures a smooth installation process and minimizes interruptions.
Essential Tools
- Wire cutters/strippers
- Phillips and flathead screwdrivers
- Rubber mallet or small hammer
- Garden trowel or shovel
- Measuring tape
Required Materials
- Sunvie landscape lights
- Low-voltage transformer (sized appropriately)
- Low-voltage landscape wire (12, 14, or 16 AWG)
- Waterproof wire connectors
- Timer or photocell (optional, for automated operation)
- Stakes or mounting hardware (included with most kits)
Optional Accessories
- Cable conduit or protective tubing (for high-traffic areas)
- Smart home integration modules
- Replacement bulbs or spare LEDs
Example: Cost Breakdown Comparison
Here’s a side-by-side estimate of DIY versus professional installation costs for a standard 8-light Sunvie setup:
| Item | DIY Cost | Professional Cost |
|---|---|---|
| Sunvie 8-pack Lights | $60 – $100 | $60 – $100 |
| Transformer | $30 – $60 | $30 – $60 |
| Wire & Connectors | $20 – $40 | $20 – $40 |
| Labor | $0 | $200 – $400 |
| Total | $110 – $200 | $310 – $600 |
Pro Tip
Always buy extra connectors and a few feet of wire to account for miscalculations and future repairs.

Credit: www.nonclinicalcareers.com
Step-by-step Installation Guide
Installing Sunvie landscape lights is straightforward when broken down into manageable steps. Follow this detailed guide to ensure a safe, professional-looking result.
Preparing The Site
- Mark fixture locations: Use stakes or flags at each planned light position.
- Plan wire runs: Map out the most direct, hidden routes from the transformer to each fixture.
Installing The Transformer
- Choose a location: Mount the transformer near an outdoor GFCI outlet and away from direct rain.
- Mount securely: Attach the transformer to a wall or stake using included hardware.
- Connect primary power: Plug the transformer into the GFCI outlet, but leave it switched off until wiring is complete.
Laying The Cable
- Unroll wire: Starting at the transformer, lay wire along planned routes, leaving slack at each fixture location.
- Dig shallow trenches: Use a garden trowel to make a 2-3 inch trench, deep enough to conceal and protect the wire.
- Insert wire: Lay the cable in the trench and cover lightly with soil, except at fixture points.
Connecting The Lights
- Assemble fixtures: Follow Sunvie’s instructions to attach stakes and lamp heads.
- Attach to wire: Use included quick connectors or waterproof wire nuts to join each fixture to the main cable.
- Test connections: Lightly tug on connectors to ensure a secure fit and proper insulation.
Mounting The Lights
- Insert stakes: Use a rubber mallet to gently push stakes into the ground at marked spots.
- Adjust angles: Position lamp heads for optimal illumination and minimal glare.
Finalizing The Installation
- Connect to transformer: Attach the main cable’s leads to the transformer’s output terminals, matching polarity (+/-).
- Power up: Switch on the transformer and check each light for operation.
- Backfill trenches: Once all lights function properly, cover remaining exposed wire with soil or mulch.
Example: Step-by-step Path Lighting
A homeowner installing Sunvie path lights along a garden walkway reported the entire process, from unboxing to the final test, took just under three hours, thanks to clear instructions and quick connectors.
Warning
Never connect the transformer to power until all wiring is complete. This prevents electrical shorts and potential injury.
Optimizing And Troubleshooting Your Lighting System
Even with careful planning, minor adjustments or troubleshooting may be needed to perfect your Sunvie lighting system.
Fine-tuning Light Placement
- Reposition fixtures to avoid unwanted shadows or glare.
- Adjust angles to highlight features without shining into windows or neighboring yards.
- Change bulb color temperature (if supported) for warmer or cooler effects.
Managing Voltage Drop
If lights at the end of a run appear dim:
- Upgrade to a thicker wire (lower AWG number).
- Split long runs into shorter branches from the transformer.
- Use multiple transformers for large installations.
Addressing Common Issues
- Light not turning on: Check for loose connectors, blown fuses, or incorrect wiring.
- Flickering: Ensure waterproof connectors are fully seated and undamaged.
- Short lifespan: Confirm fixtures are rated for outdoor use and protected from water pooling.
Example: Troubleshooting A Flickering Path Light
After noticing a flickering Sunvie light, one user found a connector had become partially dislodged during heavy rain. Reinserting and tightening the connector resolved the issue immediately.
Pro Tip
Document your installation layout and keep a photo record for easier troubleshooting and future upgrades.
Enhancing Your System With Automation And Accessories
Modern landscape lighting systems offer smart features and accessories to maximize convenience and energy savings.
Adding Timers And Photocells
- Timers: Automate on/off cycles to match your lifestyle or seasonal changes.
- Photocells: Automatically activate lights at dusk and turn off at dawn.
Many Sunvie transformers support built-in or plug-in timers and sensors for seamless automation.
Integrating With Smart Home Systems
Some advanced Sunvie models or compatible add-ons allow integration with platforms like Amazon Alexa or Google Home. This lets you control lights via smartphone or voice commands.
Using Colored And Dimmable Leds
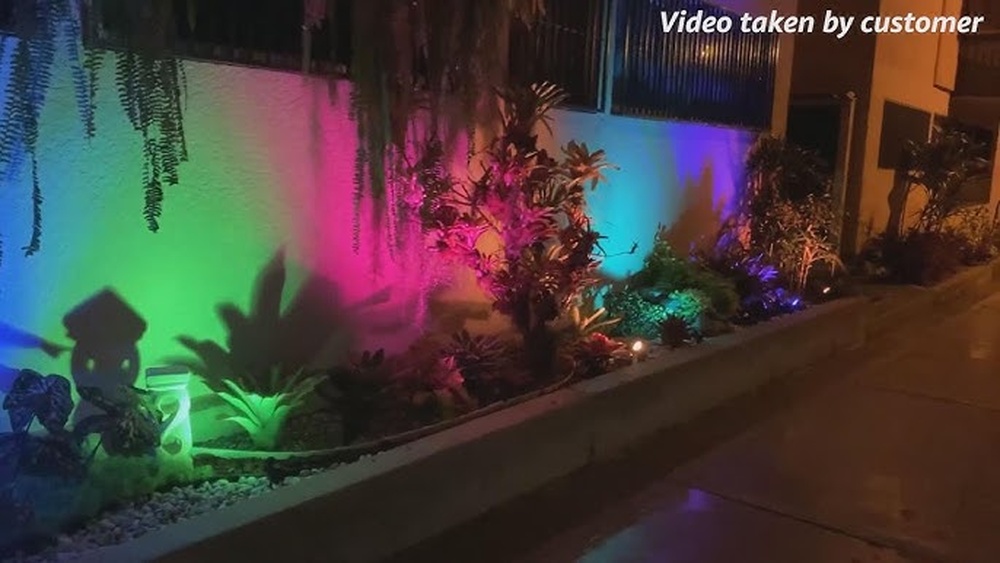
- RGB fixtures: Change colors for holidays or events.
- Dimmable LEDs: Adjust brightness for ambiance or energy savings.
Example: Smart Home Integration
A homeowner paired their Sunvie lights with a Wi-Fi-enabled outdoor smart plug, enabling remote control and scheduling via a smartphone app, no additional wiring needed.
Recommended Accessories
- Surge protectors (for transformers)
- Spare bulbs or LED modules
- Mounting extensions for elevated lighting
Maintenance And Long-term Care
Routine maintenance ensures your Sunvie landscape lights remain bright, efficient, and safe for years to come.
Cleaning And Inspection
- Wipe lenses and housings with a damp cloth to remove dirt and debris.
- Inspect wiring and connectors for signs of wear or corrosion.
- Check stakes and mounts for stability and adjust as needed.
Seasonal Adjustments
- Trim plants to prevent overgrowth from blocking light beams.
- Reposition fixtures as landscaping matures or seasonal needs change.
- Test system before and after harsh weather for any issues.
Replacing Bulbs And Components
- Use only Sunvie-approved replacement bulbs or LEDs.
- Follow manufacturer instructions for safe and proper replacement.
Pro Tip
Keep a small kit of spare connectors, bulbs, and fuses on hand for quick repairs.
Example: Annual Maintenance Routine
One gardener spends 30 minutes each spring cleaning lenses, tightening connections, and checking for buried wire exposure, helping their Sunvie lights perform reliably year after year.
Comparison: Sunvie Vs. Competing Landscape Lighting Brands
Choosing Sunvie is often a decision weighed against other popular lighting brands. Here’s a feature comparison to help you understand the differences:
| Feature | Sunvie | Malibu | Hykolity |
|---|---|---|---|
| Average Price (8-pack) | $70 | $85 | $65 |
| LED Wattage | 3-7W | 4-8W | 3-6W |
| Weatherproof Rating | IP65 | IP44 | IP65 |
| Quick Connectors | Yes | No | Yes |
| Warranty | 24 months | 12 months | 18 months |
Sunvie stands out for its combination of affordability, durability, and user-friendly features, making it a compelling choice for homeowners seeking balance between cost and quality.
Frequently Asked Questions
How Do I Prevent Animals From Disturbing My Landscape Lights?
To deter animals like raccoons or squirrels from tampering with fixtures, bury wires deeper (at least 6 inches in problem areas), use protective conduit, and consider adding natural deterrents like citrus sprays near vulnerable spots.
Can I Use My Existing Transformer With Sunvie Lights?
Yes, as long as your existing transformer is low-voltage (12V) and provides sufficient wattage for your total lighting load. Always check the transformer’s wattage rating and compare it to the combined wattage of your Sunvie fixtures before connecting.
What Should I Do If One Of My Sunvie Lights Is Significantly Dimmer Than The Others?
A single dim light usually indicates a poor connection, voltage drop, or a faulty bulb. Inspect the wire connectors for secure attachment, check for damage along the cable, and replace the bulb if needed. If the problem persists, consider upgrading to a thicker wire or shortening the cable run.
Are Sunvie Lights Compatible With Solar Power Systems?
While Sunvie lights are primarily designed for wired low-voltage setups, some homeowners have successfully paired them with solar-powered 12V battery systems and inverters. Ensure your solar setup can handle the total wattage of your lighting system, and use proper voltage regulation to avoid damaging the LEDs.
How Can I Safely Extend My Sunvie Lighting System In The Future?
To expand your system, first verify that your transformer has adequate capacity for additional lights. Use the same wire gauge or thicker for extensions, and always use waterproof connectors. Map out new fixture locations and follow the same installation steps outlined in this guide for consistent results.
Installing Sunvie landscape lights is a rewarding DIY project that enhances both the beauty and functionality of your outdoor spaces. With careful planning, the right tools, and ongoing maintenance, you’ll enjoy reliable, energy-efficient illumination for years to come. For more technical details on low-voltage outdoor lighting, visit the Low Voltage Lighting Wikipedia page. If you’re seeking creative inspiration for your landscape design , check out Garden Design’s Outdoor Lighting Ideas. Whether you’re a first-time DIYer or a seasoned gardener, Sunvie’s accessible systems make it easier than ever to brighten your nights and showcase your home’s best features.