How to Landscape a New Construction Home From Scratch
Building a new construction home is an exciting milestone, but staring out at a barren yard of raw dirt and rocks can quickly dampen the thrill. Yet, this blank slate is also a rare opportunity: you have the freedom to create an outdoor space tailored exactly to your vision, needs, and lifestyle. With thoughtful planning and strategic investments, your new home’s landscape can boost curb appeal, increase property value, and provide year-round enjoyment.
Landscaping a new construction property from scratch comes with unique challenges, from compacted soil and drainage issues to the absence of mature trees. Whether you dream of a lush lawn, vibrant flower beds, or a low-maintenance retreat, a step-by-step approach is key.
This comprehensive guide covers everything you need to know, from site assessment to planting and maintenance, helping you transform a bare lot into a thriving, beautiful landscape.
Key Takeaways
- Planning and site evaluation are crucial first steps for successful landscaping.
- Soil improvement and proper grading prevent future drainage and growth problems.
- Plant selection should consider climate, maintenance needs, and long-term growth.
- Hardscaping adds structure, function, and value to your property.
- Irrigation and lighting systems are essential for sustainability and security.
- Phased installation allows you to manage costs and workload efficiently.
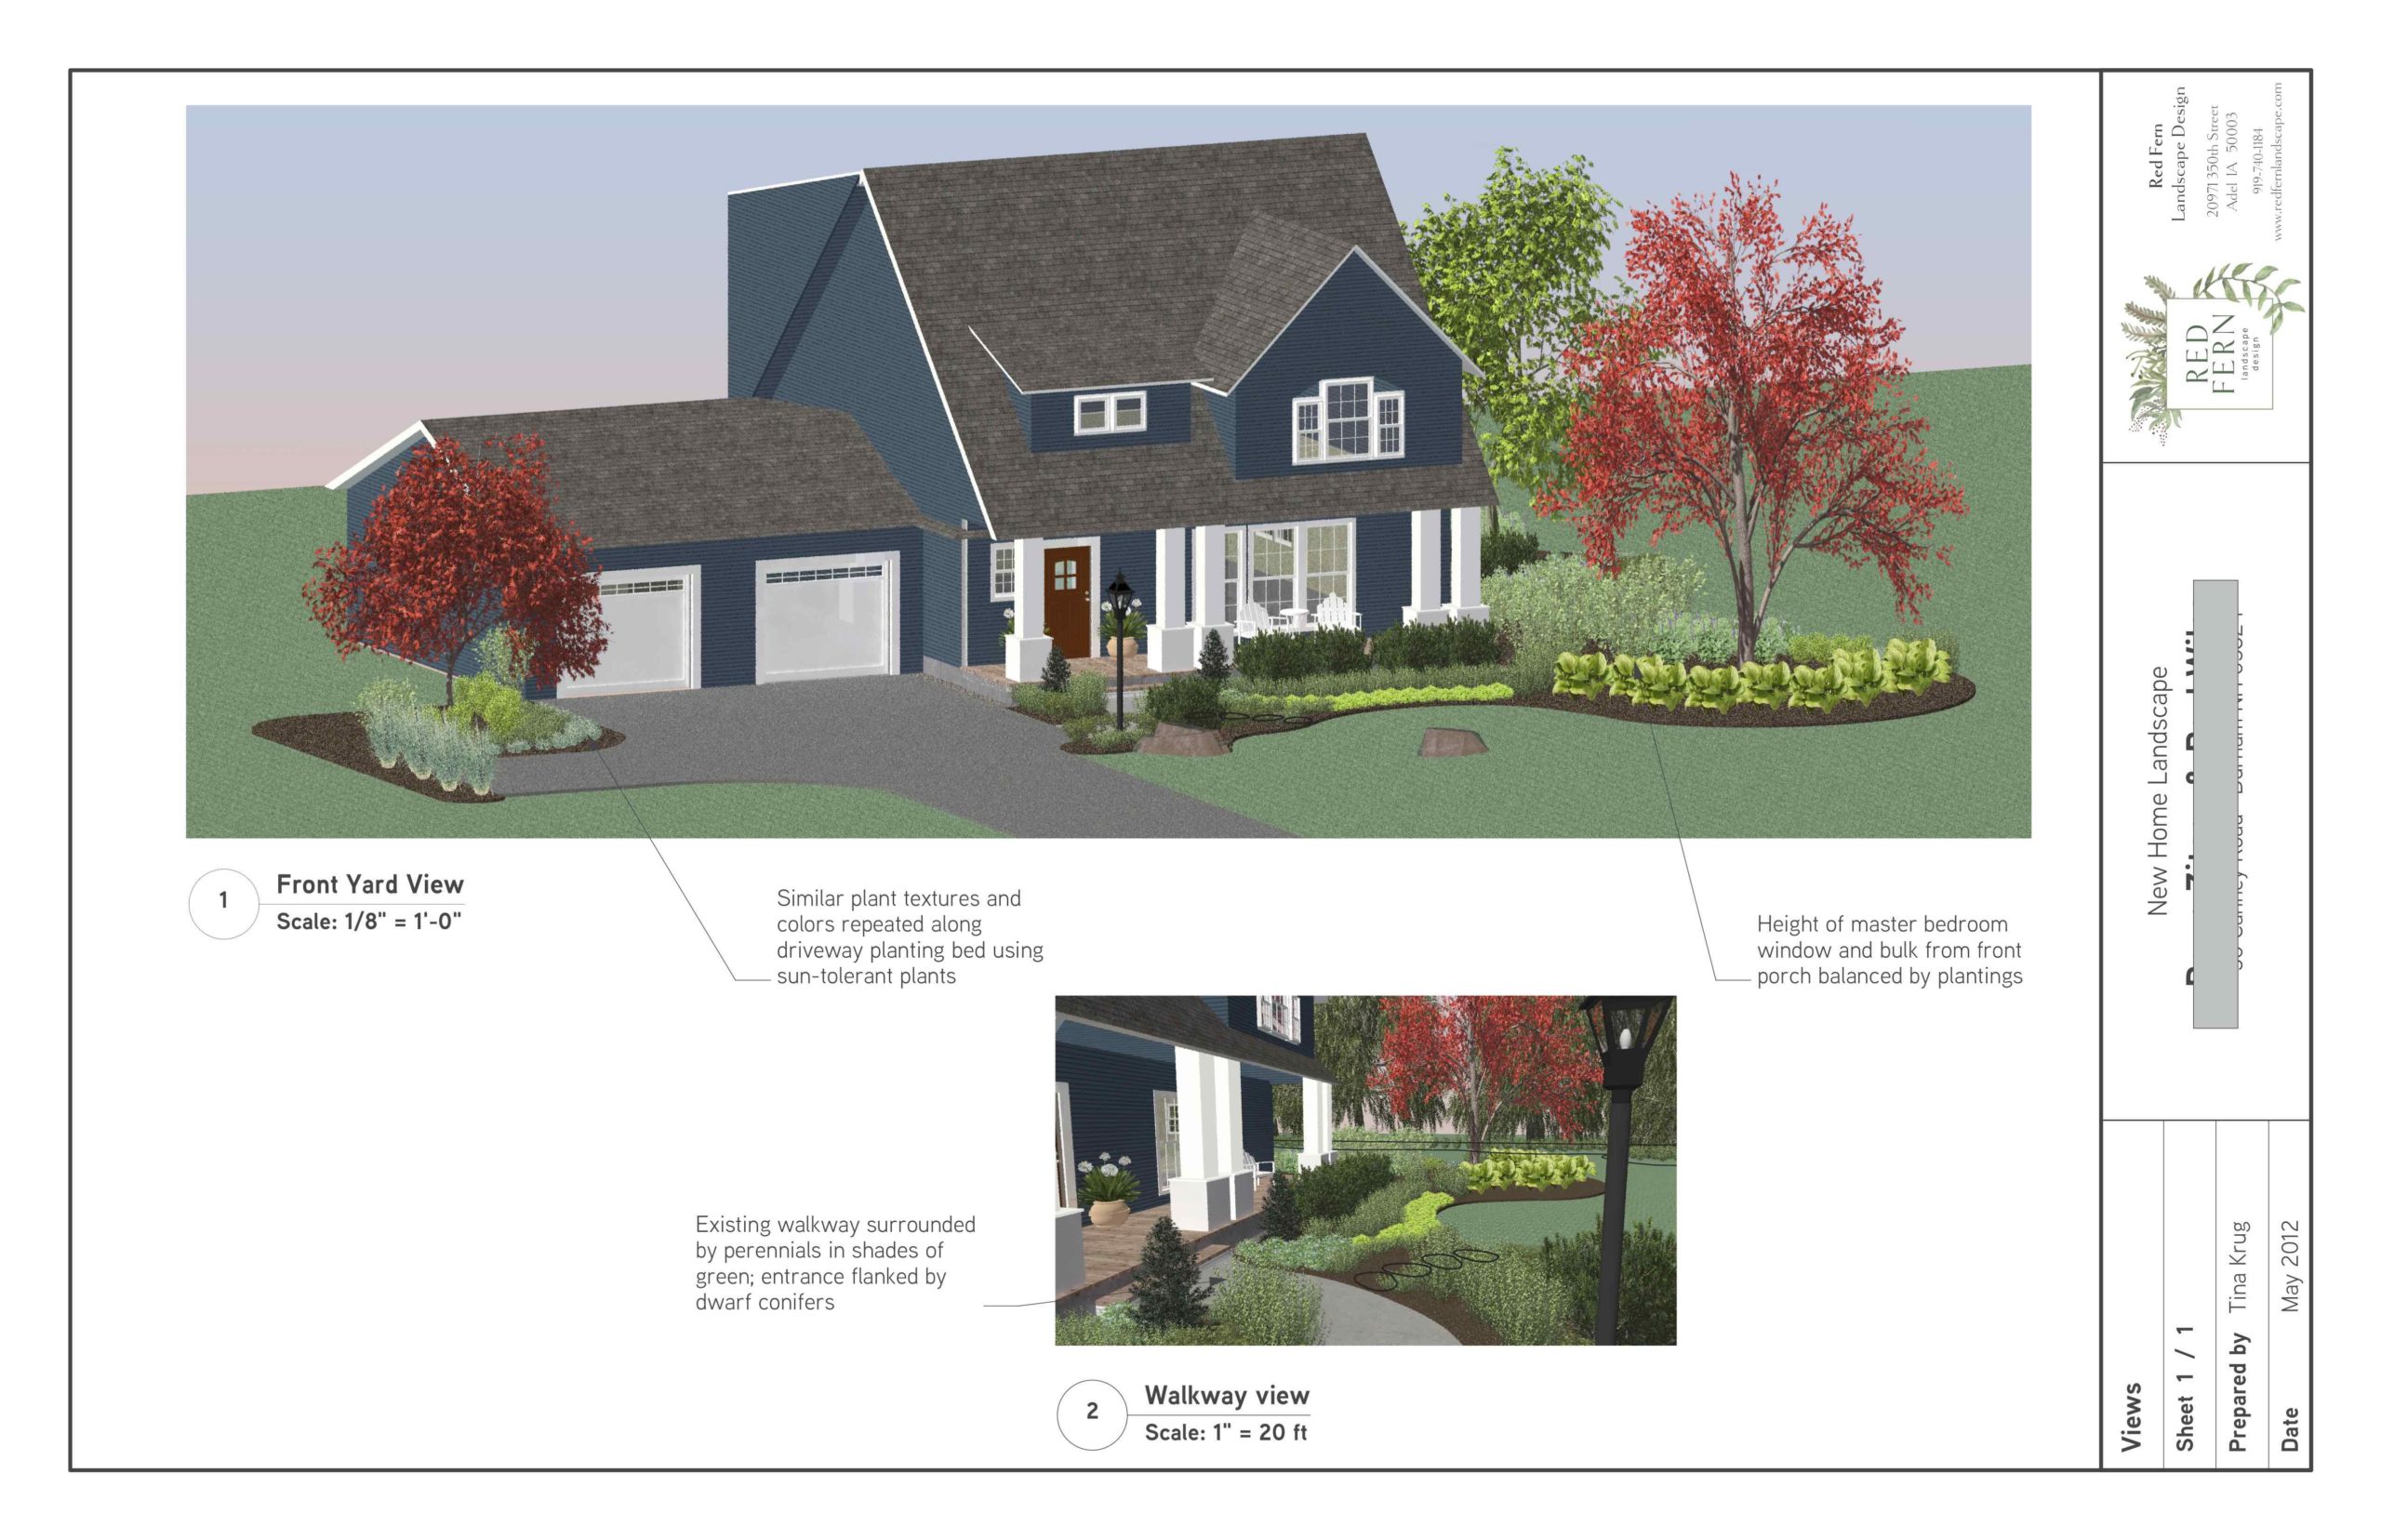
Credit: redfernlandscape.com
Assessing Your Site And Setting Priorities
Before you break ground, a careful evaluation of your property is essential. Understanding the unique characteristics of your lot helps you avoid costly mistakes and ensures your landscape thrives for years.
Evaluating Soil Quality And Drainage
Most new construction sites have compacted soil due to heavy machinery. This soil is often low in organic matter and struggles to support healthy plant growth. Compacted soil can also create a hostile environment for roots, making it difficult for water, air, and nutrients to penetrate. This is especially problematic for lawns and garden beds, which require loose, nutrient-rich soil to flourish.
- Test your soil for pH, nutrient levels, and texture. Soil testing kits are available at garden centers or through local cooperative extensions. A soil test will reveal deficiencies and help you determine which amendments are needed.
- Check drainage by digging a hole (about 1 foot deep), filling it with water, and timing how long it takes to drain. If water lingers for more than 4 hours, you may have drainage issues. Poor drainage can lead to root rot and mold, so addressing this early can prevent future headaches.
In addition to basic testing, consider consulting a soil scientist or landscape professional if your site has severe drainage issues, such as persistent puddles or waterlogged areas after rain. They may recommend solutions like soil amendments, French drains, or even regrading to redirect water flow.
Identifying Sun And Shade Patterns
Observe your yard throughout the day to determine sun exposure. This information will guide your selection of plants and placement of outdoor living areas. Sun and shade patterns shift seasonally, so try to observe your site at different times of year if possible.
- Full sun: 6+ hours of direct sunlight
- Partial shade: 3-6 hours
- Full shade: Less than 3 hours
For example, the north side of your house may receive much less sun than the south or west, impacting what you can successfully grow in those areas. Shade from neighboring homes, fences, or newly planted trees can also alter light conditions.
Mapping these patterns allows you to plan where to place shade-loving plants versus sun-loving ones.
Analyzing Topography And Microclimates
Topography affects water flow, wind exposure, and temperature variations—collectively known as microclimates. Low areas may become soggy, while slopes might dry out quickly. Microclimates are influenced by factors such as proximity to structures, pavement, or bodies of water, and they can create pockets of warmth or coolness.
- Map out high and low spots. Use stakes and string to visualize changes in elevation.
- Note wind-prone areas or natural shelter. Windbreaks (like hedges or fences) can protect sensitive plants, while sheltered spots may be warmer and suitable for tender species.
Addressing microclimates is crucial for plant selection. For instance, fruit trees may thrive in sunny, protected areas, while evergreens can serve as windbreaks in exposed locations.
Defining Your Priorities And Budget
Consider how you intend to use your outdoor space:
- Children’s play areas: Plan for soft groundcover, shade, and safety fencing.
- Entertaining spaces: Include patios, seating, and possibly outdoor kitchens.
- Privacy screening: Use tall plants, fences, or hedges.
- Pet zones: Designate areas with durable turf or gravel.
- Vegetable or flower gardens: Ensure easy access to water and sunlight.
Set a realistic budget for both initial installation and ongoing maintenance. According to the Houzz 2026 report, new landscaping can cost between $5 and $20 per square foot, depending on complexity and materials. High-end projects with extensive hardscaping, mature trees, and specialty features can exceed these averages, so prioritize your must-haves and phase other elements as needed.

Credit: meadowlarklawn.com
Planning And Designing Your Landscape
A well-thought-out design is the blueprint for landscaping success. Whether you hire a professional or DIY, careful planning saves time, money, and frustration.
Creating A Master Plan
Draft a master plan that incorporates all desired elements, even if you’ll install them in phases. This plan should include:
- Scaled site map with property boundaries
- Existing structures (house, driveway, utilities)
- Desired features (patios, walkways, garden beds, trees)
- Placement of plants by size at maturity
- Locations of irrigation and lighting
A master plan helps you visualize the final outcome and avoid common mistakes, such as overcrowding plants or placing features in inconvenient locations. Take time to consider future needs—will you want a pool, additional seating, or expanded gardens? Planning ahead ensures you won’t have to redo work later.
Consider using free online tools like SmartDraw or professional landscape design software for more detailed plans. These tools allow you to experiment with layouts, compare plant options, and estimate costs.
Principles Of Good Landscape Design
Follow these key design principles for a harmonious and functional yard:
- Unity: Use a consistent style, color scheme, and materials. For example, repeat stone or wood finishes throughout the space.
- Balance: Symmetrical or asymmetrical arrangements create visual stability. Symmetrical landscapes often suit formal homes, while asymmetrical designs lend a relaxed, natural feel.
- Proportion: Scale elements to fit your home and lot size. Avoid oversized features that overpower the space.
- Focal Points: Draw attention with specimen plants, water features, or sculptures. Focal points anchor the design and create visual interest.
- Flow: Design pathways and sightlines to guide movement. Well-placed paths and open views encourage exploration and make navigation intuitive.
By integrating these principles, you create a landscape that feels cohesive and inviting, rather than cluttered or chaotic.
Zoning And Functional Areas
Divide your landscape into zones based on function:
- Entry and curb appeal: The front yard, visible from the street. Prioritize tidy plantings, welcoming walkways, and lighting.
- Private living spaces: Patios, decks, or screened nooks. Design for comfort, accessibility, and privacy.
- Utility areas: Trash storage, HVAC units, sheds—screened from view. Use plantings or fencing to hide unsightly features.
- Service zones: Vegetable gardens, compost bins, pet runs. Locate these areas for easy access and minimal disruption to main living spaces.
Creating distinct zones prevents overlap and ensures each area serves its intended purpose. For example, separating play zones from entertaining spaces reduces noise and preserves tranquility.
Choosing Diy Vs. Professional Design
While DIY saves on upfront costs, a professional landscape designer can help you avoid pitfalls and maximize your investment. According to the American Society of Landscape Architects, homeowners who invest 5-10% of their home’s value in landscaping see the best returns.
DIY Pros:
- Lower cost
- Creative control
- Opportunity to learn new skills and personalize the design
Professional Pros:
- Expert site analysis
- Efficient use of space and resources
- Unique, high-impact designs
- Access to higher quality materials and specialized contractors
| Aspect | DIY | Professional Designer |
|---|---|---|
| Cost | $0–$2,000 (tools/software) | $2,000–$8,000 (design fees) |
| Design Expertise | Variable | High |
| Time Required | High | Lower (faster process) |
| Customization | Full control | High (with professional input) |
Some homeowners opt for a hybrid approach: consulting a designer for the master plan, then completing installation themselves. This balances cost and expertise.

Credit: www.youtube.com
Preparing The Groundwork
Proper site preparation is the foundation of a healthy, long-lasting landscape. Cutting corners here can lead to years of frustration and expensive fixes.
Grading And Drainage Solutions
Ensure your lot is graded so water flows away from your home’s foundation. Poor drainage can cause basement flooding, foundation damage, and plant loss. Grading is typically performed with heavy equipment, but small adjustments can be made by hand in limited areas.
- Slope soil away from the house at a minimum of 2% (a 2-foot drop over 100 feet). This prevents water from pooling near the foundation.
- Install French drains or dry creek beds to manage runoff in problematic areas. French drains are especially useful in flat lots or where water collects after storms.
If your site is prone to flooding, consider permeable hardscape materials (like gravel or permeable pavers) that allow water to soak into the ground. Rain gardens are another solution, capturing runoff and filtering it naturally.
Amending Soil For Plant Health
New construction soil is often stripped of nutrients. Improve it by:
- Adding organic matter (compost, aged manure, leaf mold). Organic amendments enhance soil structure, water retention, and fertility.
- Till or aerate compacted soil to a depth of 6-12 inches. Use a rototiller or manual tools for small areas.
- Incorporate topsoil if needed (minimum 6 inches for lawns, 12 inches for beds). Quality topsoil provides a fertile base for new plantings.
For larger lots, consider hiring professionals to deliver and spread amendments. This ensures even coverage and saves time.
Installing Irrigation Systems
Early installation of irrigation is easier before plantings and hardscaping go in. Choose from:
- In-ground sprinklers for lawns and large areas.
- Drip irrigation for beds and foundation plantings.
Smart irrigation controllers can reduce water usage by up to 50% (EPA WaterSense). Look for systems with rain sensors, programmable zones, and remote access via smartphone apps.
Consider future needs when planning irrigation—will you add more beds, trees, or lawns? Installing extra lines or valves now can save money and disruption later.
Laying Out Hardscape Foundations
Install major hardscape elements—patios, walkways, retaining walls—before planting. This avoids damaging new plantings and ensures stable, lasting installations.
- Use gravel or sand bases for pavers. Proper base preparation prevents settling and uneven surfaces.
- Plan for proper drainage under all hardscape features. Sloped surfaces and drainage channels reduce water pooling.
Hardscaping is an investment in both function and aesthetics. Quality installation increases property value and reduces maintenance needs.
Short Case Study: Preventing Drainage Disasters
A homeowner in Austin, TX, installed a garden before addressing grading. After heavy rains, water pooled around the foundation, killing new shrubs and causing mold issues indoors. After regrading and adding French drains, plant health and home integrity were restored. The lesson: always prioritize drainage before planting.
This real-life example underscores the importance of addressing foundational issues before moving forward with landscaping. Early mistakes can be costly and time-consuming to fix.
Selecting And Installing Plants
Choosing the right plants ensures your landscape thrives with minimal intervention. Consider climate, mature size, and maintenance needs for every selection.
Selecting Trees, Shrubs, And Groundcovers
- Native plants are adapted to local conditions and require less water and fertilizer. They also attract beneficial wildlife and pollinators.
- Drought-tolerant species reduce maintenance in arid regions. Succulents, ornamental grasses, and certain perennials are excellent options.
- Choose varied heights and textures for visual interest. Layering tall trees, medium shrubs, and low groundcovers creates depth and appeal.
Popular tree choices for new construction include:
- Red maple: Fast-growing, vibrant fall color.
- River birch: Tolerates wet soil, attractive bark.
- Eastern redbud: Early spring blooms, compact form.
- Magnolia: Evergreen or deciduous, fragrant flowers.
For shrubs:
- Boxwood: Classic hedging, evergreen.
- Hydrangea: Showy blooms, shade tolerant.
- Ninebark: Colorful foliage, hardy.
- Aronia: Edible berries, wildlife value.
Groundcovers:
- Creeping thyme: Aromatic, drought tolerant.
- Sedum: Succulent, low-growing.
- Ajuga: Rapid spread, shade tolerant.
When selecting plants, consider their mature size, growth rate, and maintenance requirements. Avoid species known to be invasive in your region.
Installing Sod Vs. Seed
Lawn establishment options vary in cost, speed, and labor.
| Method | Cost per sq. ft. | Establishment Time | Maintenance Needs |
|---|---|---|---|
| Sod | $0.30–$0.80 | Instant | High (watering until rooted) |
| Seed | $0.10–$0.20 | 2–8 weeks | Moderate (watering, weed control) |
Sod provides instant results but requires intense watering and care until established. Seed is less expensive but more vulnerable to erosion, weeds, and inconsistent growth. For large lawns, consider hydroseeding—a process that sprays a mixture of seed, mulch, and fertilizer to promote uniform germination.
Planting Techniques For Success
- Dig wide, shallow holes—twice the width of the root ball. Proper hole preparation encourages roots to spread.
- Loosen roots before planting. Gently tease apart circling roots to prevent girdling.
- Backfill with native soil, not fertilizer-rich amendments. Native soil acclimates plants and avoids shock.
- Mulch around plants to retain moisture and suppress weeds. Mulch also regulates soil temperature and prevents erosion.
Water new plantings deeply and regularly until established. Stake young trees if wind is a concern, but remove stakes after one year to prevent dependence.
Mulching And Weed Control
Apply 2–3 inches of organic mulch (bark, wood chips) around all plantings, but keep mulch away from trunks and stems to prevent rot. Mulch not only conserves moisture but also improves soil fertility as it breaks down.
Weed control tips:
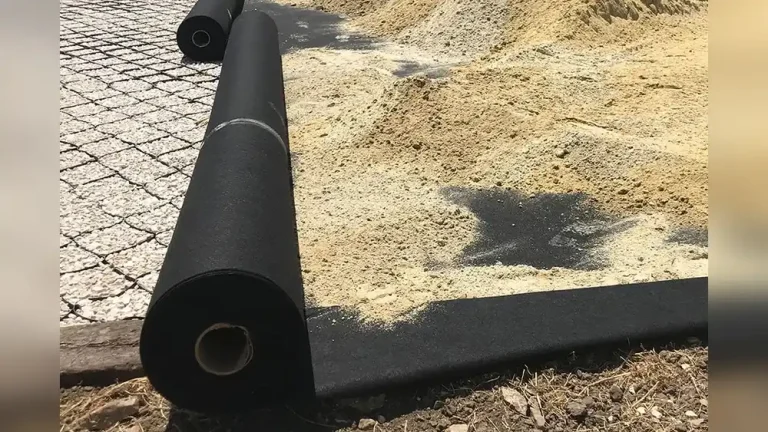
- Use pre-emergent herbicides or landscape fabric for large beds. These prevent seeds from germinating.
- Hand-pull or spot-treat weeds to prevent spread. Early intervention is key, as neglected weeds can quickly dominate new plantings.
Consider groundcover plants as living mulch—they suppress weeds and add beauty.
Real-world Example: Native Plant Transformation
A family in Denver, CO, replaced their builder-grade sod with a xeriscape garden using native grasses, yarrow, and coneflower. Within two seasons, water bills dropped by 60%, and pollinator sightings increased. The transformation attracted positive attention and inspired neighbors to follow suit.
The shift to native plants demonstrates how sustainable choices can yield cost savings, environmental benefits, and community impact.
Hardscaping: Patios, Walkways, And Structures
Hardscaping adds structure, function, and beauty to your landscape. Thoughtful placement and material choices can significantly boost your home’s value.
Planning Patios And Outdoor Living Spaces
- Determine size and shape based on intended use (dining, lounging, entertaining). Consider traffic flow, furniture placement, and sun exposure.
- Place patios adjacent to the house for easy access, with clear paths to other zones. Covered patios extend usability into rainy or hot weather.
- Incorporate features such as fire pits, built-in seating, or outdoor kitchens. Outdoor kitchens are increasingly popular, adding value and convenience for entertaining.
Consider how hardscape integrates with the landscape. Materials should complement the home’s architecture and surrounding plantings.
Walkways And Paths
- Connect major zones (driveway, front door, backyard) with durable, safe paths. Accessibility is key for all ages.
- Materials include pavers, flagstone, gravel, or concrete. Each offers unique style and maintenance needs.
- Curved paths create a sense of journey and discovery. Straight paths are more formal and efficient, while curves add softness and visual interest.
Lighting along walkways improves safety and ambiance. Edging materials help contain gravel or mulch.
Retaining Walls And Raised Beds
Sloped sites may require retaining walls to prevent erosion and create level spaces. Use stone, modular block, or timber, depending on style and budget.
- Raised beds are ideal for vegetable gardens or accessible gardening. They improve drainage and simplify maintenance.
Retaining walls can double as seating or planters, maximizing functionality. Consult professionals for tall or complex walls to ensure stability.
Fencing, Screens, And Privacy Structures
- Fencing defines property lines and keeps children/pets safe. Choose materials that match your home’s style—wood, vinyl, metal, or composite.
- Screens—trellises, living walls—add privacy and vertical interest. Plant climbing vines for natural beauty.
Privacy structures can also buffer noise from streets or neighbors, enhancing comfort.
Comparison Table: Hardscape Materials
| Material | Cost per sq. ft. | Durability | Maintenance | Style |
|---|---|---|---|---|
| Concrete | $6–$12 | High | Low | Modern |
| Pavers | $8–$16 | High | Low | Traditional |
| Natural Stone | $15–$30 | Very High | Low | Classic |
| Gravel | $1–$3 | Medium | Medium | Rustic |
Compare materials based on aesthetics, maintenance, and durability. For example, natural stone is luxurious but costly, while gravel is budget-friendly and quick to install.
Short Case Study: Maximizing Entertaining Space
A couple in Seattle installed a 350-square-foot paver patio with a built-in fire pit and string lighting. The space became the focal point for gatherings and increased their home’s appraisal value by over $15,000, far exceeding the $8,000 installation cost.
The key was integrating hardscaping early in the design process.
This case illustrates how thoughtful hardscape investments can yield substantial financial and lifestyle benefits.
Irrigation, Lighting, And Sustainable Practices
Smart systems make landscapes more sustainable, efficient, and enjoyable after dark.
Efficient Irrigation Systems
Install zoned irrigation to deliver water only where needed:
- Drip lines for beds and foundation plantings
- Rotary sprinklers for larger lawns
- Rain sensors or smart controllers for water efficiency
According to the EPA, up to 50% of outdoor water use is wasted due to inefficient systems. Properly designed irrigation reduces water bills and supports healthy plant growth.
For maximum efficiency, adjust irrigation schedules seasonally and inspect systems regularly for leaks or clogged emitters.
Outdoor Lighting Solutions
Landscape lighting increases safety, security, and ambiance.
- Path lights highlight walkways.
- Spotlights accentuate trees or architecture.
- String lights add festive charm.
Opt for LED fixtures and solar-powered options to reduce energy use. Low-voltage systems are safe and easy to install.
Consider lighting controls, such as timers or motion sensors, to automate operation and enhance security.
Rainwater Harvesting And Conservation
Collecting and reusing rainwater reduces demand on municipal supplies.
- Install rain barrels at downspouts. Use collected water for beds and gardens.
- Use rain gardens to filter and absorb runoff. Rain gardens also support pollinators and improve biodiversity.
Check local regulations before installing large rainwater systems—some municipalities offer rebates or incentives for conservation practices.
Composting And Eco-friendly Practices
Start a compost bin for yard and kitchen waste, creating free fertilizer for your plants. Mulching, xeriscaping, and native plantings further reduce environmental impact.
- Composting reduces landfill waste and enriches soil.
- Xeriscaping minimizes water use and maintenance.
- Integrated pest management (IPM) reduces reliance on chemicals.
Sustainable landscaping preserves natural resources and supports a healthy ecosystem.
Real-world Example: Water-efficient Landscape
A homeowner in Los Angeles converted their front lawn to drought-tolerant plantings and installed a drip system with a weather-based controller. Water usage dropped by 70%, qualifying for a city rebate and earning recognition from the local water authority (LADWP).
This example highlights how sustainable choices can yield both financial rewards and community recognition.
Phasing Your Landscape Installation
Tackling a new landscape all at once can be overwhelming and costly. Breaking the project into phases allows you to spread out expenses and effort, and make adjustments as you observe how the space is used.
Phase 1: Essential Infrastructure
- Grading and drainage
- Irrigation systems
- Hardscape foundations (patios, walkways)
- Soil improvement
Prioritizing infrastructure ensures a stable, functional base for all future landscaping. These tasks are best handled before plants or decorative features are installed.
Phase 2: Major Plantings And Lawn
- Trees and large shrubs (provide structure and shade)
- Sod or seed lawns
- Foundation plantings
Early plantings establish the framework of your landscape. Large trees and shrubs take time to mature, so planting them sooner accelerates the development of shade and privacy.
Phase 3: Beds, Borders, And Accents
- Perennials and small shrubs
- Groundcovers and mulch
- Annual flowers for seasonal color
This phase adds detail and personality. Beds and borders frame the space and provide year-round interest.
Phase 4: Details And Enhancements
- Outdoor lighting
- Water features
- Garden art or furnishings
Enhancements improve enjoyment and visual appeal. Install these once the main structure is in place.
Staying Flexible And Observant
Allow at least one full growing season between phases, if possible. This gives you time to:
- Assess microclimates
- Adjust plant choices based on performance
- Identify new needs or interests
Phased installation allows you to tweak your plan, respond to unexpected challenges, and avoid costly mistakes.
Budgeting For Phased Installation
According to the National Association of Realtors, phased landscaping can increase resale value by up to 15%. Many homeowners complete their landscaping over 3-5 years, prioritizing high-impact areas first.
Track expenses and plan each phase around your budget, seasonal timing, and available labor. This approach reduces financial strain and improves results.
Long-term Maintenance And Growth
Ongoing care ensures your investment matures beautifully and maintains value over time.
Establishing A Maintenance Routine
- Watering: Follow recommended schedules for new and established plants. Automated systems simplify this task.
- Pruning: Remove dead or diseased branches; shape as needed. Prune at appropriate times for each species.
- Fertilizing: Use slow-release or organic fertilizers based on soil needs. Avoid over-fertilizing, which can harm plants.
- Weeding: Address regularly to prevent invasions. Mulch and groundcovers minimize weed pressure.
Create a calendar for seasonal tasks, such as spring clean-up, fall leaf removal, and winter protection.
Monitoring Plant Health
Watch for signs of pests, diseases, or nutrient deficiencies. Early intervention prevents larger problems. Consult local extension services or professionals for persistent issues.
Integrated pest management (IPM) strategies combine monitoring, cultural practices, and minimal chemical use to maintain plant health sustainably.
Mulching And Replenishment
Top up mulch each year to maintain a 2–3 inch layer. This conserves moisture and minimizes weeds. Choose mulch types that complement your landscape style—bark, wood chips, or decorative stone.
Mulch also protects roots from extreme temperatures and reduces soil erosion.
Adapting As Your Landscape Matures
Plants grow and change; some may need to be moved, divided, or replaced. Be patient and flexible—landscaping is an evolving process. Mature trees may require professional care, while perennials benefit from periodic division.
Keep records of plant varieties, locations, and performance to inform future changes.
Professional Maintenance Vs. Diy
While many tasks are DIY-friendly, you may want to hire professionals for:
- Spring and fall cleanups
- Tree pruning or removal
- Irrigation system adjustments
A well-maintained landscape can yield a 100–200% return on investment at resale. Professional maintenance also frees up time and ensures high-quality results.
Frequently Asked Questions
How Soon After Construction Can I Start Landscaping?
You can begin landscaping as soon as heavy construction is complete and the ground is stable—typically after the builder’s final grading. However, it’s best to wait for the soil to settle (a few weeks to months) before installing lawns or delicate plants.
What Are The Best Low-maintenance Landscaping Options For New Homes?
Native plants, drought-tolerant species, mulched beds, and drip irrigation are all excellent low-maintenance choices. Avoid large expanses of lawn, which require frequent mowing, watering, and fertilizing.
Should I Install Hardscaping Or Plants First?
Always install hardscaping elements (patios, walkways, retaining walls) before planting. This prevents damage to new plants and ensures stable construction.
How Can I Improve Poor Soil On A New Construction Site?
Incorporate organic matter such as compost, leaf mold, or aged manure. Aerate or till compacted areas, and consider bringing in high-quality topsoil for lawns and beds.
Is Landscaping A New Home Worth The Investment?
Absolutely. According to the National Association of Landscape Professionals, landscaping can increase property value by up to 15% and greatly improve curb appeal and livability.
Creating a landscape from scratch after building a new home is both a challenge and a rewarding opportunity. By assessing your site, planning carefully, and phasing your installation, you can design an outdoor environment that’s beautiful, functional, and sustainable. Thoughtful investments in soil, plants, and hardscape will pay dividends in enjoyment and property value for years to come.
With patience, flexibility, and ongoing care, your blank slate will become a flourishing extension of your new home.