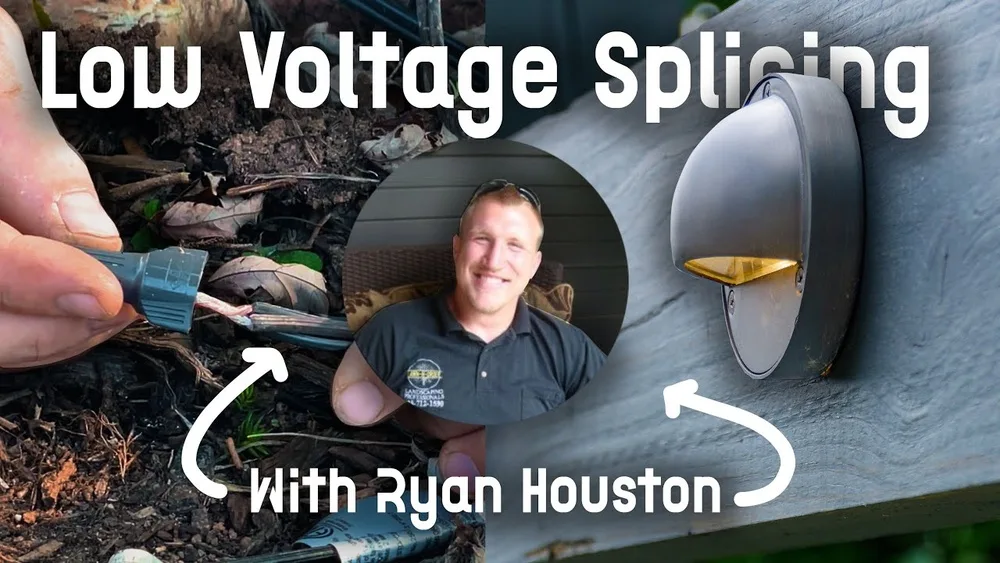
How to Splice Low Voltage Landscape Lighting Wire Easily
Low voltage landscape lighting has transformed the way homeowners and commercial property managers illuminate outdoor spaces, providing both aesthetic charm and essential safety. As more people opt for DIY landscape lighting, the ability to splice low voltage wire efficiently becomes increasingly important. Whether you’re adding a new fixture, repairing a break, or extending your system, knowing how to make a reliable splice ensures that your lighting system operates safely and stands the test of time.
But splicing low voltage landscape lighting wire isn’t just about twisting wires together and hoping for the best. With outdoor conditions—rain, snow, soil, and even garden critters—your connections must be robust, weatherproof, and code-compliant. This article will guide you step-by-step through the tools, techniques, and best practices for easily splicing low voltage landscape lighting wire.
You’ll discover expert tips, product comparisons, and real-world examples to ensure your splices are safe, effective, and built to last.
Key Takeaways
- Splicing low voltage landscape lighting wire is crucial for safe, reliable outdoor lighting installations and repairs.
- Using the right tools, connectors, and weatherproofing techniques ensures long-lasting, safe splices.
- Different methods—such as twist-on connectors, gel-filled wire nuts, and heat-shrink butt connectors—offer distinct pros and cons.
- Proper splicing improves system efficiency, reduces voltage drop, and prevents future maintenance headaches.
- Real-world examples and data-driven comparisons help you choose the best splicing method for your project needs.
- Always follow local electrical codes and manufacturer recommendations for safe installations.

Credit: www.youtube.com
Understanding Low Voltage Landscape Lighting Systems
Low voltage landscape lighting systems operate typically at 12V or 24V, offering increased safety and flexibility compared to high voltage systems. Understanding the basics of these systems is vital before tackling any splicing project.
How Low Voltage Lighting Works
Low voltage lighting systems use a transformer to step down household current (120V) to a safer 12V or 24V output. This lower voltage is ideal for outdoor environments, reducing shock risk and allowing for easy, flexible installations. The transformer is generally installed near a power source and connected to a timer or photocell for automatic operation.
Key components include:
- Transformer: Converts standard voltage to low voltage. Modern transformers often feature built-in timers and photocells for convenience and energy savings.
- Low voltage cable: Transports power to fixtures; usually 12, 14, or 16 gauge stranded copper wire. The use of stranded wire provides flexibility, making installation easier around curves or obstacles.
- Fixtures: Lights designed specifically for low voltage operation. These can include path lights, spotlights, floodlights, and specialty fixtures like underwater pond lights.
The system layout is typically a “daisy chain” or T-connection, where fixtures tap into the main run. This flexibility allows you to add, move, or remove lights as your landscape changes.
Common Applications
Low voltage landscape lighting is commonly used for:
- Pathway lighting: Providing illumination for walkways, enhancing safety and navigation after dark.
- Accent lighting for trees or architectural features: Highlighting focal points such as sculptures, fountains, or specimen plants.
- Deck and patio illumination: Creating inviting outdoor living areas by lighting stairs, railings, and seating areas.
- Safety and security lighting around walkways and entrances: Deterring intruders while welcoming guests.
Landscape lighting can also be used to define property boundaries, illuminate outdoor kitchens, and showcase water features. The versatility of low voltage systems means you can easily reposition fixtures to accommodate changes in landscaping or outdoor use.
Types Of Low Voltage Landscape Cables
Choosing the right cable is essential for a reliable system. The most common cable types are:
| Wire Gauge | Typical Use Case | Max Run Length (12V, 100W Load) | Flexibility |
|---|---|---|---|
| 12 AWG | Main runs, long distances | Up to 100 ft | Moderate |
| 14 AWG | Medium runs, branch circuits | Up to 75 ft | More flexible |
| 16 AWG | Short runs, single fixtures | Up to 50 ft | Most flexible |
Thicker wire (lower AWG number) allows for longer runs with less voltage drop, which is essential when powering multiple fixtures far from the transformer. For complex systems or installations where future expansion is anticipated, it’s wise to use a thicker cable for the main run and branch off with thinner wire for short runs to individual fixtures.
Voltage Drop And Its Impact
Voltage drop occurs when current travels over long cable runs, causing the voltage at the end of the line to be lower than at the source. This can result in dim lights or fixture malfunction.
- For optimal results, keep voltage drop under 10%.
- Use thicker cable (lower gauge number) for longer runs.
- Proper splicing ensures minimal resistance and avoids additional voltage loss.
- Factors such as the number of fixtures, total wattage, and wire quality also impact voltage drop. It’s crucial to calculate your system’s load and plan accordingly.
For more on low voltage systems, see the Wikipedia entry on low voltage.

Credit: www.youtube.com
Tools And Materials Needed For Splicing
Before starting your splice, gather the right tools and materials. This not only streamlines the process but also ensures a safe, durable connection.
Essential Tools
- Wire strippers: To remove insulation without damaging the copper strands. Choose strippers with multiple gauge notches for versatility.
- Cutting pliers: For clean, straight cuts on the cable. Side cutters or linesman pliers are ideal.
- Crimping tool: Needed for certain connectors like butt splices. Ensure the tool matches the connector size for a secure crimp.
- Screwdrivers: Useful for some specialty connectors, such as mechanical lugs or certain commercial-grade splices.
- Heat gun or lighter: For heat-shrink tubing (if using). A dedicated heat gun provides more controlled, even heat than a lighter.
Recommended Splicing Materials
- Waterproof wire connectors: Such as gel-filled wire nuts or direct-burial connectors. These are specifically designed for outdoor applications and resist moisture ingress.
- Heat-shrink butt connectors: Provide a secure, waterproof seal. The adhesive lining melts and bonds to the wire insulation for added protection.
- Electrical tape: For additional protection. Use only high-quality, UV-resistant outdoor electrical tape.
- Silicone sealant: For extra waterproofing in extreme conditions or when added redundancy is desired.
- Cable ties: To secure wires and maintain neatness. Keeping wires organized reduces the risk of accidental damage or confusion during future maintenance.
Safety Equipment
- Gloves: Protect hands from sharp wire ends, especially when stripping insulation or cutting old cables.
- Safety glasses: Prevent eye injuries from wire strands or tool slips, particularly when working in tight spaces or with older, brittle wire.
- Voltage tester: Confirm the power is off before splicing. Non-contact voltage testers are quick and easy for DIYers to use.
Product Comparison: Connectors
Choosing the right connector is key. Here’s a direct comparison:
| Connector Type | Waterproof | Ease of Use | Durability | Cost |
|---|---|---|---|---|
| Standard Wire Nut | No | Easy | Low | Low |
| Gel-filled Wire Nut | Yes | Easy | High | Medium |
| Heat-shrink Butt Connector | Yes | Moderate | Very High | High |
| Direct-Burial Splice Kit | Yes | Moderate | Very High | High |
Gel-filled wire nuts are a popular choice for their convenience and weather resistance. Heat-shrink butt connectors are preferred for areas subject to heavy moisture or where wires are directly buried. Direct-burial kits, often used in professional installations, combine mechanical strength with superior waterproofing.
For a deeper dive into product options, visit Lowe’s Landscape Lighting Accessories.

Credit: www.youtube.com
Step-by-step Guide: How To Splice Low Voltage Landscape Lighting Wire
A successful splice is more than just connecting two wires—it’s about ensuring electrical integrity and weather resistance. Here’s a detailed walkthrough of three popular splicing methods.
Preparing The Wire
- Turn Off Power: Unplug the transformer or switch off the circuit at the breaker. Always confirm with a voltage tester before touching wires.
- Locate the Break or Splice Point: Expose enough cable for manipulation by carefully digging away soil or mulch. Avoid damaging wire insulation during excavation.
- Cut Cleanly: Use cutting pliers to remove any damaged section. A clean cut ensures a better fit in connectors and more reliable electrical contact.
- Strip Insulation: Remove 3/4 inch of insulation from each wire end with wire strippers. Be careful not to nick or cut the copper strands, as this weakens the wire.
- Inspect Copper: Ensure all copper strands are bright and untarnished. If the wire appears dull or greenish, cut back until clean copper is exposed. Oxidized copper can cause resistance and eventual failure.
Method 1: Gel-filled Wire Nuts
Gel-filled wire nuts are easy and widely used for landscape lighting.
- Twist wires together clockwise until snug. For stranded wire, twist tightly to prevent stray strands.
- Insert twisted pair into the gel-filled nut. The gel inside the nut will envelop the wires, protecting against moisture.
- Twist nut firmly until resistance is felt. The connection should feel tight, and the nut should not easily spin off.
- Tug test to confirm a solid connection. Gently pull each wire to ensure it’s locked in place.
- Bury splice according to manufacturer guidelines. Some nuts are rated for direct burial, while others should be placed in a protected junction box.
Pros: Fast, simple, and waterproof.
Cons: Not as robust as heat-shrink for deep burial or wet areas.
Method 2: Heat-shrink Butt Connectors
For maximum durability, especially where moisture is a concern, use heat-shrink butt connectors.
- Insert stripped wire ends into each side of the connector until they meet in the middle.
- Crimp firmly with a crimping tool (ensure a strong grip). Use the correct die size for the connector and wire gauge.
- Apply heat with a gun or lighter until the tubing shrinks and adhesive oozes out, sealing the connection. Move the heat source evenly around the connector to avoid scorching.
- Let cool before handling further. The adhesive inside the connector creates a watertight bond.
Pros: Superior waterproofing and mechanical strength.
Cons: Requires a heat source and crimping tool.
Method 3: Direct-burial Splice Kits
Direct-burial kits are pre-packaged solutions with connectors and waterproof gel packs.
- Connect wires as per kit instructions (usually twist-on or crimp). These kits often accommodate multiple wire sizes and types.
- Insert connection into the gel-filled capsule. The gel flows around the connection to block moisture.
- Seal capsule tightly. Make sure the lid or cover snaps or locks in place.
- Bury at the recommended depth. Some kits provide extra casing for mechanical protection.
Pros: Code-compliant, ultra-reliable, and ideal for new installations.
Cons: More expensive and less flexible for tight spaces.
Final Steps: Testing And Weatherproofing
- Restore power and test the lighting system. Confirm all fixtures in the circuit illuminate as expected.
- Check for flickering or dim fixtures, which may indicate a poor connection or voltage drop.
- Inspect connections for exposed copper or loose wires.
- Re-bury wires and secure with cable ties if needed. Replace mulch or soil, taking care not to damage the newly spliced area.
If your splice is above ground or in an area prone to water pooling, consider adding an extra wrap of electrical tape or a bead of silicone sealant for added security.
For more on best practices, see the Family Handyman installation guide.
Best Practices For Safe And Lasting Splices
Ensuring your splice lasts through all seasons requires more than just connecting wires. Here are expert-recommended best practices.
Weatherproofing Techniques
- Always use waterproof connectors or seal with silicone and electrical tape. This is especially important for splices buried directly in soil or exposed to irrigation.
- Bury splices at least 6 inches deep to avoid accidental damage from garden tools or wildlife.
- Avoid low spots where water may pool. If unavoidable, elevate the splice slightly above the surrounding grade or use a waterproof junction box.
- Elevate connections slightly above grade in flood-prone areas by mounting splices on stakes or inside weatherproof enclosures.
Maintaining Polarity And Wire Orientation
Low voltage systems are polarity sensitive. Mixing up positive and negative leads can cause uneven lighting or fixture failure.
- Mark wires with tape before cutting, especially if both conductors have the same color insulation.
- Reconnect matching wires (ribbed to ribbed, smooth to smooth). Some cables have markings or color coding—pay close attention during splicing.
- Double-check connections before sealing, as correcting mistakes after sealing can be time-consuming and may damage connectors.
Preventing Future Problems
- Leave slack in the cable for future maintenance or fixture relocation. A few extra inches can save significant effort if repairs are needed later.
- Document splice locations for easy troubleshooting. Draw a simple map or take photos before re-covering splices.
- Test each fixture after splicing, not just the full circuit. This helps pinpoint any issues before burying wires.
Compliance And Safety
- Follow local codes and manufacturer recommendations. Some regions require specific connector types or burial depths.
- Use only UL-listed or code-compliant connectors. This ensures the products have been tested for safety and durability.
- Avoid splicing near sprinkler heads or in high-traffic areas to reduce the risk of accidental disturbance or water infiltration.
For the latest safety standards, refer to the National Electrical Code (NEC).
Real-world Examples And Case Studies
Learning from practical scenarios helps you avoid common pitfalls and improve your own splicing work.
Example 1: Repairing A Damaged Pathway Wire
A homeowner in Colorado noticed several path lights were out after heavy landscaping. Inspection revealed a cut wire beneath the mulch. Using gel-filled wire nuts and careful waterproofing, the repair took less than 15 minutes, restoring full function and preventing further outages.
In this case, the homeowner also wrapped the wire nuts with an additional layer of outdoor-rated electrical tape and placed a small marker flag nearby for future reference. After a full season of snow and rain, the lights continued to operate reliably.
Example 2: Expanding A Backyard Lighting System
A DIY enthusiast in Florida wanted to add two new spotlights to an existing system. She used heat-shrink butt connectors to splice the new fixture wires onto the main run. Despite frequent rain, the new connections have remained watertight for over two years.
She noted that the extra step of using a heat gun to properly shrink the tubing, rather than a lighter, provided a more uniform seal. Documenting the splice location and leaving a service loop also simplified future adjustments.
Example 3: Commercial Landscape Upgrade
A landscape contractor in California upgraded a hotel courtyard. For code compliance and durability, he used direct-burial splice kits for all new connections, ensuring the system met local regulations and could withstand exposure to irrigation and foot traffic.
The contractor worked closely with the property manager to schedule regular inspections, and all splices were mapped as part of the facility’s maintenance plan. The investment in high-quality kits paid off, as the system experienced zero failures over three years.
Lessons Learned
- Choose the right connector for your environment and application. For wet climates or direct burial, higher-grade connectors are worth the investment.
- Test before backfilling to save time on troubleshooting. One bad splice can affect multiple fixtures.
- Document your work—especially for larger or commercial projects. Maintenance is easier when you know exactly where splices are located.
For more real-world insights, see This Old House: Landscape Lighting Installation.
Troubleshooting Common Splicing Issues
Even with the best preparation, issues can arise. Here’s how to quickly diagnose and resolve them.
Flickering Or Dim Lights
Possible causes:
- Poor splice causing high resistance
- Incorrect polarity
- Excessive voltage drop due to long runs or thin wire
Solutions:
- Recheck all splices for tightness and clean copper contact.
- Use a multimeter to confirm voltage at fixture.
- Upgrade to thicker cable if needed.
- Consider splitting long runs into shorter segments or using multiple transformers for large projects.
Lights Not Working After Splice
Possible causes:
- Loose or broken connection inside the splice
- Short circuit (wires touching)
- Wrong wires joined (polarity issue)
Solutions:
- Open and inspect the splice.
- Check that all copper strands are securely twisted or crimped.
- Verify correct wire pairing (positive to positive, negative to negative).
- If using multi-strand cable, ensure no stray strands are shorting the connection.
Water Infiltration
Possible causes:
- Non-waterproof connector used
- Improper sealing or torn heat-shrink tubing
Solutions:
- Replace with waterproof connectors or reapply heat-shrink.
- Add silicone sealant for extra protection.
- Inspect nearby splices for similar issues, as moisture can migrate through the soil.
Corrosion Or Green Copper
Possible causes:
- Water inside the connection
- Untreated copper exposed to soil
Solutions:
- Cut back to clean copper.
- Respliced using a waterproof method.
- Consider using tinned copper wire for extra corrosion resistance in problem areas.
For a visual troubleshooting guide, visit Home Depot’s Landscape Lighting How-To.
Comparing Splice Methods: Which Is Best?
Choosing the right splicing method depends on your project’s needs, environment, and budget. Here’s a detailed comparison:
| Method | Waterproof | Installation Time | Cost (per splice) | Best For |
|---|---|---|---|---|
| Gel-Filled Wire Nut | Yes | 2-3 minutes | $0.50 – $1.00 | Quick repairs, DIY installs |
| Heat-Shrink Butt Connector | Yes | 4-5 minutes | $1.00 – $2.00 | Wet or buried locations |
| Direct-Burial Splice Kit | Yes | 5-7 minutes | $2.00 – $4.00 | Professional, code-compliant jobs |
| Standard Wire Nut + Tape | No | 2 minutes | $0.25 | Temporary, dry locations only |
Key takeaways:
- For most DIYers, gel-filled wire nuts offer a blend of convenience and weatherproofing.
- For maximum protection, especially below ground or in wet areas, heat-shrink butt connectors or direct-burial kits are best.
- Professional installers and commercial property managers often default to direct-burial kits for code compliance and peace of mind, especially on large or high-traffic projects.
For a comparison of splice connectors, see Garden Guides: Outdoor Connector Types.
Frequently Asked Questions
What Is The Safest Way To Splice Low Voltage Landscape Lighting Wire?
The safest method is to use waterproof connectors like gel-filled wire nuts, heat-shrink butt connectors, or direct-burial splice kits. These methods provide secure electrical connections and protect against moisture, corrosion, and accidental shorts. Always turn off power and follow local codes during installation. When in doubt, consult a licensed electrician.
Can You Use Electrical Tape Alone To Splice Landscape Lighting Wire?
No, electrical tape alone is not sufficient for outdoor splices. Tape can deteriorate due to moisture, UV exposure, and temperature changes, leading to exposed wires and system failure. Always use a proper outdoor-rated, waterproof connector for landscape lighting applications. Electrical tape can be used as an additional layer of protection, but not as the primary sealing method.
How Deep Should Low Voltage Landscape Lighting Wire Splices Be Buried?
Splices should typically be buried at least 6 inches deep to protect against accidental damage from landscaping tools, foot traffic, or pets. Local codes may vary, so consult guidelines for your area or refer to the National Electrical Code. In areas with heavy freeze-thaw cycles, deeper burial may be necessary to prevent wire movement.
How Do You Prevent Corrosion In Spliced Wires?
To prevent corrosion, always use waterproof connectors or seal splices with heat-shrink tubing and silicone. Ensure no bare copper is exposed to soil or moisture. If you see green corrosion on copper, cut back to clean wire before resplicing. Using tinned copper wire for splices in especially wet or corrosive environments can also help reduce oxidation.
Can You Splice Different Gauge Wires Together In Landscape Lighting?
Yes, you can splice different gauge wires together, but it’s crucial to use the correct connector size and ensure a tight, clean connection. Remember, the smallest gauge in the splice determines the maximum current capacity, so avoid overloading thinner wires. Always check the manufacturer’s specifications for compatible wire combinations and connector ratings.
Final Thoughts
Splicing low voltage landscape lighting wire doesn’t have to be daunting. With the right preparation, tools, and techniques, even beginners can achieve professional-grade, long-lasting connections. Prioritize waterproofing and code compliance for a trouble-free lighting system that enhances your property’s beauty and safety for years to come.
Whether you’re making a quick repair or upgrading your landscape lighting, follow the best practices outlined here for dependable results every time.
Proper splicing not only protects your investment but also ensures that your outdoor space remains inviting and safe, regardless of weather or season. By understanding your system, choosing quality materials, and taking the time to make careful connections, you set the stage for years of reliable, efficient lighting.
If you ever feel uncertain, don’t hesitate to consult with a licensed electrician or landscape lighting professional—they can help ensure your system meets all safety standards and delivers the performance you expect.
For ongoing learning and inspiration, continue exploring trusted resources and stay up-to-date with the latest products and techniques in the world of low voltage landscape lighting. Your outdoor oasis deserves nothing less than the best.