How to Replace a Landscape Lighting Bulb
Turn off power, remove the lens or retaining ring, and confirm the fixture uses a replaceable lamp before buying a new bulb; MR16 and G4 lamps usually do, integrated LED fixtures usually do not. Wrong parts waste time and can hide a failed socket, damaged wiring, or transformer problem. This guide shows how to identify the fixture, choose the correct replacement, and check the system when the new bulb still does not light.
What you’ll need


- Stable stepladder or other secure access method for hard-to-reach fixtures
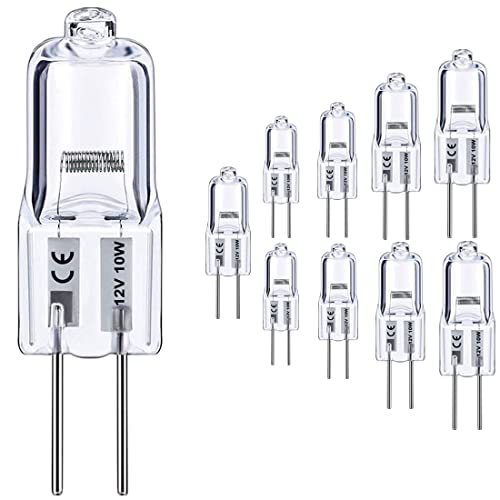
- Replacement lamp that matches the existing base, voltage, wattage, beam angle, and color temperature
- Work gloves for hot lamps and sharp housing edges
- Flashlight for reading fixture labels and bulb markings
- Appropriate tester for the circuit and fixture type
- Replacement gasket or seal if the fixture uses one
- Clean cloth for handling glass and wiping moisture from the housing
Can you replace the bulb in your fixture?
Start by confirming that the fixture is part of a low-voltage outdoor lighting system, usually 12V-24V, and that it uses a replaceable lamp rather than a built-in LED module. Read the label on the housing or transformer, then check the old lamp for voltage, wattage, base type, beam angle, and color temperature before you buy anything.
Read the label and the old lamp
Look for three places: the fixture label, the socket area, and the lamp itself. The label may list the voltage range, the lamp family, and the maximum wattage. The old bulb often has the base and wattage printed on the glass or metal collar. If the lettering is faded, compare the socket shape to a known MR16 or G4 lamp rather than guessing.
Tell a replaceable lamp from an integrated LED
Integrated LED outdoor lights use built-in chips and usually cannot be replaced like a bulb. Santa Barbara Electric notes that these fixtures commonly last 25,000 to 50,000 hours, but when the LED fails, the whole fixture or LED module may need replacement. If there is no removable lamp, no visible base, and no retention ring for a lamp, stop there.
Check wet-location markings before opening the housing
Outdoor lighting fixtures should be labeled for wet locations or the environment they are installed in. If a seal is cracked, a gasket is missing, or moisture is inside the housing, replace the seal before installing a new lamp. A wet fixture can corrode sockets and shorten lamp life.
Outdoor lighting bulb replacement compatibility checklist
Use this checklist before you remove the old lamp. EcoTek notes that compatibility depends on wattage, voltage range, beam angle, and color temperature, and generic MR16 replacements may fit but still be incompatible with the system.
| Fixture type | Base type | Voltage | Wattage | Beam angle | Color temperature | Wet-location suitability | Is the LED replaceable? | Most likely failure sign if wrong |
|---|---|---|---|---|---|---|---|---|
| Low-voltage spotlight | MR16 | 12V or 24V | Match the fixture maximum and transformer load | Match the old lamp’s narrow or wide spread | Match warm white or cooler white across nearby heads | Yes, if marked for wet locations | Yes, if it uses a removable lamp | Dim output, flicker, or hotspotting |
| Path light with pin base | G4 | 12V or 24V | Stay within the fixture rating | Usually less critical than beam spread, but still match when listed | Match adjacent fixtures to avoid color shift | Yes, if the body and gasket are intact | Yes, if the socket accepts a replaceable pin lamp | Loose fit, intermittent light, or socket damage |
| Integrated outdoor fixture | Built-in LED module | Usually 12V-24V | Module or fixture rating only | Fixed by the LED optics | Fixed by the LED module | Yes, if sealed correctly | No, usually not like a bulb | No removable lamp, dark module, or repeated failure |
| Transformer-fed accent head | MR16 or G4 | Match the transformer output | Keep total load within transformer limits | Match the original beam angle to avoid spill | Match nearby lamps for uniform appearance | Yes, if rated for exterior use | Yes, if the lamp is removable | Multiple lights failing or uneven brightness |
How do I replace a outdoor lighting bulb safely?

Shut off power at the transformer, then use an appropriate tester to confirm the circuit is de-energized before maintenance. Let the lamp cool, open the fixture without forcing clips or seals, remove the old bulb straight out, and install the replacement with the same base, voltage, wattage, beam angle, and color temperature.
- Turn off the transformer at its switch, timer, or breaker.
- Use a tester suited to the fixture and confirm the circuit is de-energized before touching the lamp.
- Set a stable stepladder if the fixture is out of reach.
- Remove the lens, retaining ring, or cap without bending the housing.
- Pull the old lamp straight out. Do not twist a pin-base lamp sideways.
- Install the new lamp with the same orientation and secure fit.
- Restore power and check brightness, beam pattern, and color match.
How do you remove outdoor lighting bulbs without breaking the fixture?
Use straight, controlled force and avoid prying on the socket or lens. A G4 pin-base lamp should come out with a gentle pull, not a twist that can spread the contacts. If corrosion or heat has fused the lamp in place, stop and clean the socket first rather than forcing it.
Say your deck-mounted spotlight takes a MR16 bulb and the retaining clip will not release. Pull the housing open, inspect for bent pins or white corrosion, and clean only what is accessible and dry. If the socket springs are loose or darkened, replacement of the socket or fixture may be safer than another bulb swap.
How do you replace outdoor lighting bulbs with LED?
Match voltage first, then wattage, base type, beam angle, and color temperature. LED replacements can save power, but a lamp that fits physically may still be incompatible with the system. Too little load can cause flicker or dimming, and the wrong optics can create hotspots or a different wash on the path.
Match the LED to the original lamp
- Read the old lamp markings for base type and voltage.
- Choose the same beam angle when the original spread matters.
- Match color temperature across all nearby fixtures.
- Keep wattage within the fixture and transformer limits.
- Test one lamp before changing the entire run.
Suppose a 12V MR16 halogen lamp was giving a warm, narrow beam on one shrub. A cooler LED with a wider beam may look brighter at first, but the color mismatch will stand out against nearby lamps and the spread will change the design. Replace one fixture first, then compare it at night.
What if the new bulb still does not work?

If the new lamp fails too, move from the bulb to the socket, then the transformer, then the wiring run. EcoTek flags flicker as a common problem with low-grade outdoor bulbs, and wrong replacements can cause thermal damage to sockets.
- Inspect the socket for corrosion, moisture, bent contacts, or heat damage.
- Swap the new lamp into a nearby fixture on the same run to isolate bulb failure from wiring failure.
- Check whether multiple fixtures on the same transformer are dim, flickering, or out.
- Inspect the transformer load and output if several lamps fail at once.
- Replace the fixture or call a pro if the LED module, socket, or housing is damaged.
When multiple burnouts point to a deeper issue
Repeated failures often mean the problem is not the bulb. A transformer that is overloaded, a wet socket, or a voltage drop farther down the run can shorten bulb life. TriState says burned-out lights can shorten the life of all bulbs in the system, so a single failure can snowball if you keep replacing lamps without checking the circuit.
A common first-timer mistake is replacing three failed bulbs on the same run and stopping there. If the newest lamp also fails quickly, inspect the transformer and the connections before buying more lamps. That is the cheaper move.
How much does the fix usually cost?
A simple bulb swap is the least expensive option. If the socket is corroded, a repair part or new fixture is the next step. If the fixture uses an integrated LED module, the cost can move from a lamp replacement to a module or fixture replacement, and a service call makes more sense when the transformer or buried wiring needs diagnosis.
Common mistakes
- Buying an MR16 or G4 lamp without checking the voltage on the fixture or transformer.
- Ignoring beam angle and changing the look of the lighting run.
- Mixing warm and cool color temperatures on the same path.
- Forcing a lamp into a corroded socket.
- Treating an integrated LED fixture like a standard bulb socket.
- Skipping the transformer check when several lamps fail together.
How do I replace Kichler outdoor lighting bulbs?
Use the fixture’s label and the old lamp’s markings first, not the brand name alone. Many Kichler fixtures use common outdoor lamp formats such as MR16 or G4, but the correct replacement still has to match voltage, wattage, beam angle, and color temperature. If the fixture is integrated LED, there may be no standard bulb to replace.
How do I change a low voltage light bulb?
Turn off the transformer, confirm the fixture type, and replace the lamp with the same low-voltage rating. Low-voltage outdoor lighting systems usually run at about 12V to 24V, so the transformer, lamp, and socket need to match the fixture’s rating. If the fixture is hard to reach, use a stable stepladder and keep the housing open only as long as needed.
How do I change outdoor lighting bulbs without a ladder?
Use a stable step platform, an extension pole made for the fixture type, or a second person to steady access if the light is mounted where a ladder would be awkward. Do not reach from unstable furniture or overextend from the ground. If the fixture cannot be reached safely, a service call is cheaper than a fall.
Frequently asked questions
Can you replace the bulb on LED outdoor lights?
Only if the fixture uses a removable lamp. Integrated LED outdoor lights use built-in chips and usually do not accept a standard bulb, so the fix may be a module or full fixture replacement instead. Check the label and the housing before you order parts.
What should I check before swapping a outdoor lighting bulb?
Check the fixture label, the old lamp markings, the socket condition, and the wet-location seal. Then match voltage, wattage, beam angle, and color temperature. If the fixture is part of a low-voltage outdoor lighting system, make sure the transformer output also matches the replacement lamp.