Gardening Techniques for Rebuilding Tired Soil
Diagnose tired soil first: if it’s compacted, loosen it; if organic matter is low, add compost; if nutrients are depleted, fertilize; if drainage is off, fix water movement before adding more material. Skip that step and you can waste a season feeding the wrong problem while roots stay weak and yields stay low. This guide shows how to identify each failure mode in beds, plots, and containers, then match the right gardening technique to rebuild the soil.
What tired soil looks like


Tired soil shows up as weak top growth, pale foliage, thin roots, crusting at the surface, and poor yield. The pattern matters: if plants stay small even after watering and sunlight are adequate, the soil may be the limiting factor rather than the weather.
Growth clues above ground
Look for stunted plants, yellowing leaves, short stems, and uneven growth across the bed. Plants may wilt quickly after heat or wind because roots cannot explore the soil well enough to pull in water and nutrients.
Root-zone clues below ground
When you dig a small test hole, tired soil may feel hard, slick, gray, sour, or dry and powdery in the wrong places. Root systems may stay shallow, twist around compacted zones, or stop at a hard layer.
When the problem is soil, not weather
If several crops struggle in the same spot season after season, the issue is likely soil fatigue. One cloudy week can slow growth. Repeated stunting across dry spells, wet spells, and normal weather points to a soil failure mode.
Tired soil triage matrix
Use this matrix before adding amendments. It separates the most common failure modes so you can choose the lightest effective reset instead of defaulting to compost everywhere.
| Failure mode | Common symptoms | Best first fix | Second-step fix | What not to do | Usual recovery time |
|---|---|---|---|---|---|
| Compaction | Hard surface, poor root spread, water sits on top, shallow roots | Broadfork or gently aerate when soil is moist, not wet | Add compost and mulch after loosening | Deep tilling or flipping layers | Weeks for better infiltration; a season for root recovery |
| Low organic matter | Thin, weak structure, fast drying, poor crumb, low biological activity | Add fully matured compost | Mulch the surface and repeat additions over time | Mixing in fresh, uncomposted material in planting zones | Several weeks for visible improvement; longer for structure |
| Nutrient depletion | Pale leaves, slow growth, poor flowering or fruiting, uneven vigor | Soil test, then targeted fertilizer or mineral amendment | Topdress compost to support biology and slow-release fertility | Guessing with random boosters | Days to weeks for plant response after the right amendment |
| Drainage imbalance | Waterlogging, sour smell, algae or moss, root decline after rain | Improve grading, avoid low spots, use raised beds where needed | Mix in organic matter only after water movement is corrected | Adding more compost without fixing drainage | Immediate change if the site is corrected; longer if soil profile needs rebuilding |
Should you test the soil first?
A soil test is the cleanest way to check pH and nutrient gaps before you amend. It helps you decide whether you need limestone, gypsum, rock phosphate, or nothing beyond compost and mulch. If the bed has obvious drainage failure or compaction, fix that first, then test if growth still lags.
What a soil test tells you
Tests are most useful when plants show symptoms that could come from either nutrient shortage or pH trouble. Low phosphorus, low potassium, or a pH outside the crop’s preferred range can block uptake even when the soil looks healthy on the surface.
When to use lime, gypsum, or rock phosphate
Use limestone when the test calls for pH correction. Use gypsum only when the test or site conditions justify it, such as improving structure without raising pH in some soils. Use rock phosphate when the test points to a phosphorus gap. Match the amendment to the problem.
When a test can wait
If the bed is clearly compacted or waterlogged, a test can follow the first fix rather than lead it. In that case, roots need air and drainage before they can use nutrients well. Testing too soon can distract from the real blockage.
Compost and worm castings
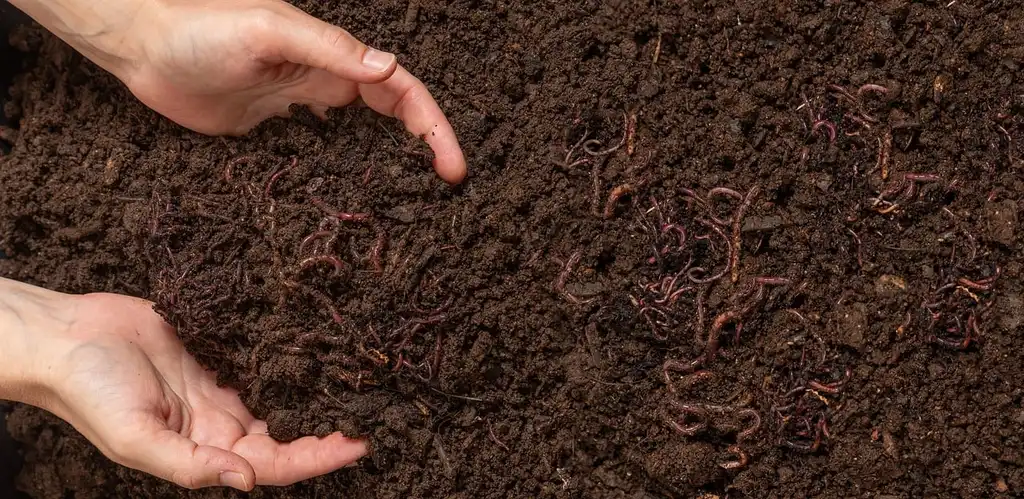
Compost is the main rebuild material for tired soil because it adds stable organic matter, feeds soil life, and supplies a slow stream of nutrients. Use fully matured compost before planting. A common rule of thumb is to apply about a 1-3 inch or 2-3 inch layer, then mix it into roughly the top 4-6 inches or, in more depleted or open soil, the top 6-12 inches.
How much compost to add
For a mild reset, a 1-3 inch layer on the surface may be enough before mulching. For a bed that has clearly lost structure or organic matter, a 2-3 inch layer is more appropriate. The key is to use finished compost, not raw material.
How deep to mix it
Work compost into the top 4-6 inches when you are maintaining a bed that still has decent structure. If the soil is very tired but not badly compacted, a deeper mix into the top 6-12 inches can help rebuild the rooting zone. Do not bury layers or invert the profile.
Why worm castings fit around new plantings
Worm castings are a safe, non-burning amendment that can be used as a thin layer or about 1/2 inch in planting zones. They add beneficial microbes and enzymes. Pair them with compost when you want a quicker biology boost around transplants or seedling rows.
Suppose a 4×8-foot raised bed lost vigor after three seasons of tomatoes and lettuce. The soil feels loose but pale, and leaves are small. In that case, a top layer of fully matured compost plus a thin band of worm castings around new transplants makes more sense than trying to fix drainage that is already adequate.
How do you fix compacted soil?
Fix compacted soil with gentle aeration first, then add organic matter after the pore space opens. Broadforking or similar loosening tools help air and water move to roots without turning the soil over. Deep tilling often breaks structure, brings buried layers to the top, and can make compaction worse later.
Use aeration or broadforking
Work when the soil is moist enough to open, but not sticky or saturated. Insert the tool, rock it slightly to crack the soil, and move across the bed in a grid. This loosens the root zone while leaving the layers in place.
Stop deep tilling
Deep tilling can destroy natural soil aggregates and mix low-oxygen subsoil into the top layer. That is a poor trade in tired beds, especially when the real issue is a compressed root zone rather than a lack of churn.
Add organic matter after loosening
Once the soil opens, topdress with compost and cover it with mulch. Organic matter supports structure over time, but it works better after you have restored air space and water movement. Leaf mold and well-rotted manure also count as organic matter when they are fully broken down.
Mulch and cover crops
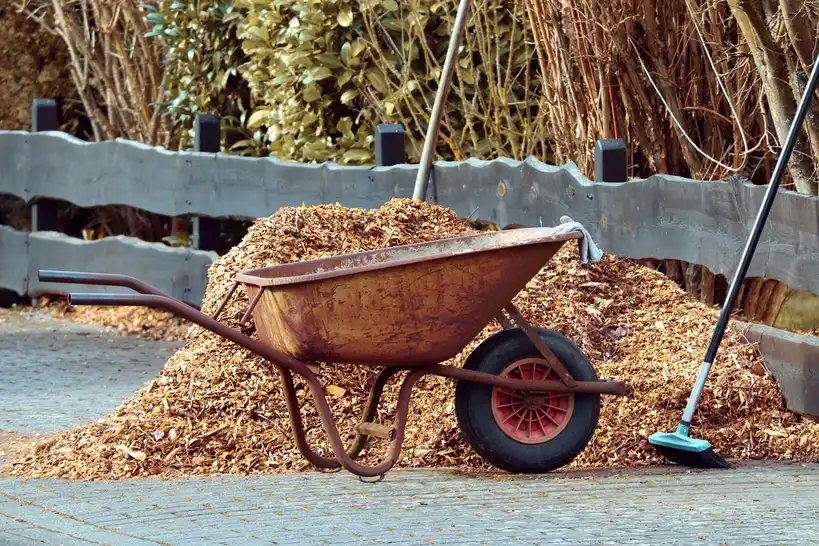
Mulch protects bare soil while it recovers. Use 2-4 inches of straw, wood chips, or shredded leaves to hold moisture, suppress weeds, and feed microbes as the material breaks down. Cover crops rebuild tired beds between seasons or on severely depleted ground where you do not want erosion or bare soil exposure.
Best mulch materials and depth
Choose straw for quick cover, wood chips for longer-lasting paths or perennial zones, and shredded leaves for a garden-friendly reuse of yard material. Keep mulch off plant crowns and stems. A 2-4 inch layer is the usual working range.
Which cover crops suit different goals?
Use clover or field peas when nitrogen fixation matters. Choose buckwheat for fast summer coverage. Rye and oats help with compaction, erosion control, and organic matter. Vetch and mustard are also useful in rotation, depending on the goal and season.
When to chop in or till
Let cover crops grow until mature enough to provide real biomass, then chop them down or till them in if your system allows it. In no-till beds, cutting them at the surface and leaving the roots in place can still improve structure. Do not let a cover crop become a weed problem.
A common first-timer mistake is to seed clover into a bed that is already waterlogged. If the drainage problem stays unsolved, the cover crop may germinate unevenly and the soil may remain cold and sour. In that case, drainage comes first, then biomass.
Can you reuse tired soil in raised beds or containers?
Yes, but the reset differs by setup. Raised beds can improve drainage and make planting and maintenance easier, so they often need fresh compost and amendments between seasons. Containers need drainage holes and more frequent watering, and their mix usually resets faster than in-ground soil.
Raised bed reset steps
Start by removing old roots and any diseased plant debris. Add fully matured compost, check whether the bed has settled, and top it up if needed. If the bed is compacted, loosen it gently before adding new material. Use crop rotation so you do not repeat the same crop family in the same place.
Container mix reset steps
Container soil loses structure and nutrients faster than in-ground beds, especially under frequent watering. Reuse it only if drainage is still open and the mix is not sour or crusted. Blend in compost, refresh nutrients if a soil test suggests it, and confirm that the pot drains freely.
Drainage and watering differences
Containers dry out faster than beds, so watering needs are more frequent. Raised beds usually drain better than flat ground, but low spots still matter. Avoid placing either system where water collects after rain. That warning matters as much as the amendments you add.
When is the best time to improve garden soil?
The best time is before planting, when you can correct the failure mode without disturbing roots. You can improve soil after harvest, between seasons, or ahead of a new bed. The work that needs weeks, like cover crops or organic matter buildup, should start early enough to pay off in the next cycle.
Immediate fixes
If the soil is compacted, loosen it now. If drainage is wrong, correct the water movement before adding more material. If you suspect nutrient gaps, test now and amend based on the result. These steps can happen before planting or as soon as the bed is available.
Seasonal rebuild steps
Compost, mulch, and cover crops do their best work over time. Use mulch right away to protect bare ground, then let biology and roots work through the season. A full recovery of structure and organic matter usually takes more than one pass.
Long-term habits
Rotate crops to avoid repeating the same family in one spot and to reduce pest buildup. Keep feeding the soil with organic matter rather than chasing symptoms only at harvest time. Healthy soil depends on steady care, not a single amendment.
Frequently asked questions
How do you revive tired garden soil naturally?
Start by identifying the failure mode, then use the lightest effective reset. Loosen compacted soil, add fully matured compost where organic matter is low, correct drainage before piling on more material, and use mulch or cover crops to protect the surface. Natural rebuilding works best when each step matches the problem.
What are the signs that garden soil is depleted?
Common signs include stunted growth, pale foliage, weak flowering or fruiting, shallow roots, crusting, and poor water movement. If plants keep underperforming in the same spot despite adequate sunlight and watering, the soil may be depleted or structurally off rather than simply dry or shaded.
How much compost should I add to exhausted soil?
A practical range is a 1-3 inch or 2-3 inch layer of fully matured compost, depending on how tired the soil is. Mix it into the top 4-6 inches for light rebuilding or the top 6-12 inches for a more serious reset. Avoid adding raw material directly to planting zones.
Should I test my soil before amending it?
Yes, when the issue could be pH or nutrient depletion. A soil test helps you avoid under-amending or over-amending and points you toward the right targeted fix, such as limestone, gypsum, or rock phosphate. If compaction or drainage is the obvious problem, correct that first and test after.
What cover crops help rebuild poor soil?
Clover, buckwheat, rye, oats, vetch, mustard, and field peas are all useful options. Choose based on the goal: nitrogen fixation, compaction relief, erosion control, or organic matter buildup. Use them between seasons or on severely depleted beds, then chop them down or till them in when mature enough to matter.