How to Sterilize Soil Safely for Seedlings
Sterilize seed-starting mix only when disease, fungus gnats, or weed seeds are a real risk. For most seed trays, use fresh mix. If you need to treat reused potting soil, heat the center to about 180°F (82°C) for about 30 minutes. Bad timing or too much heat can kill helpful biology, leave pests alive, or weaken seedlings. This guide shows when to sterilize, which method fits each problem, and how to keep from overprocessing the mix.
What you need


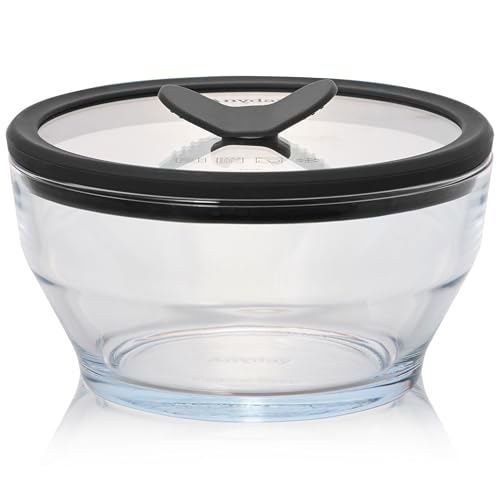
- Oven-safe pan or roasting tray
- Microwave-safe container with a loose lid or vented cover
- Soil thermometer that reads to at least 180°F (82°C)
- Foil for oven treatment, or a vented cover for the microwave
- Clean gloves
- Slightly moist potting mix or garden soil
- Clear plastic if you plan to solarize outdoors
- A clean work area away from food prep
Should you treat the soil?

Use treatment when the batch has a clear problem: damping-off in seed trays, repeated fungus gnat pressure, weed seeds, or a known contaminated reuse. If the mix is cheap to replace, or the contamination source is unclear, fresh commercial seed-starting mix is usually the safer choice. Home heat treatment is usually pasteurization, not true sterilization.
Treating soil is a risk decision, not a routine step. The goal is to reduce pathogens, pests, weed seeds, and insect eggs without damaging the mix more than needed. Heat can also reduce beneficial microbes, and those organisms help soil recolonize after treatment.
Soil safety decision table
| Scenario | Batch size | Contamination risk | Safest method | Equipment needed | Target | Pasteurization enough? |
|---|---|---|---|---|---|---|
| New seed trays for indoor starting | Small | Low to moderate | Fresh seed-starting mix | None | No heat treatment | Yes, skip treatment if mix is clean |
| Reused potting mix with fungus gnats | Small to medium | Moderate | Oven or microwave | Pan or microwave-safe container, thermometer, foil or vented cover | 180°F (82°C) for 30 minutes, or microwave until the soil reaches 180°F | Yes, for reuse if drainage and moisture control are also fixed |
| Seed-starting mix with damping-off history | Small | High | Fresh mix first; treat only if reuse is necessary | Oven setup if reuse is unavoidable | 180°F (82°C) for 30 minutes | Often yes, but fresh mix is safer |
| Outdoor bed with weed-seed pressure | Large | Moderate | Solarization | Clear or black plastic | 4 to 6 weeks or longer in hot sun | Usually yes for beds, if weather cooperates |
| Sample-sized soil or a very small batch | Very small | Moderate | Steam | Steam source and heat-safe container | At least 30 minutes or until 180°F (82°C) | Yes, if the batch is tiny and heating is even |
| Manure-rich, nitrogen-rich, or foul-smelling mix | Any | Unclear | Fresh mix instead | None | No heat treatment | No; replace it |
How to sterilize soil in the oven
Use the oven for small to medium batches when you need controlled heat. Slightly moist soil heats more evenly than dry soil, but it should not be soggy. The target is 180°F (82°C) in the soil itself for 30 minutes, and keep the oven temperature low enough that the soil does not scorch.
- Preheat the oven to a setting that stays below 200°F.
- Spread slightly moist soil about 4 inches deep in an oven-safe pan.
- Cover the pan with foil.
- Insert a soil thermometer into the center of the batch.
- Heat until the center reaches 180°F (82°C), then hold it there for 30 minutes.
- Remove the pan carefully and let the soil cool completely before use.
Check the center, not the oven dial. The surface can be hot while the middle stays cool. A common first-timer mistake is trusting the appliance setting and stopping too soon, which leaves the deepest soil untreated.
How to sterilize soil in the microwave
The microwave is best for very small batches. Use a microwave-safe container, heat in short bursts, and check the center with a thermometer rather than relying on a single time estimate. Use a vented cover or partially open lid so steam can escape. This is a heat treatment, not a food-safe cooking method.
- Place slightly moist soil in a microwave-safe container.
- Cover loosely or vent the lid so steam can escape.
- Heat in short bursts rather than one long run.
- Stir between bursts if the container shape allows it.
- Check the center with a thermometer and continue until the soil reaches 180°F.
- Let the container cool before opening fully.
Say your tray holds one pound of reused mix with fungus gnats. A microwave can handle that faster than the oven, but only if the center gets hot enough. If the top is hot and the middle is cool, keep heating in short bursts.
How to treat soil with steam or sun
Steam works well for small batches or sample-sized quantities. Use steam until the soil reaches 180°F (82°C), and do not overdo it. Excess heat can alter soil chemistry, so do not overdo it.
Solarization fits outdoor beds or very large amounts of soil. Use clear plastic and leave it in hot sun for about 4 to 6 weeks, or longer if needed. This depends on sustained warmth and strong sun, so it is slower and less reliable in cool or cloudy weather.
Picture a raised bed with weed-seed pressure but no indoor seedling problem. Solarization may be the least aggressive fit if the weather is hot enough. For a small seed tray, it would be too slow and too weather-dependent.
Common mistakes
Most failures come from poor heat control, bad moisture, or using the wrong batch. Heat treatment cannot fix a contaminated, foul-smelling, manure-rich, or nitrogen-rich mix safely. It can also leave you with dry, dead-feeling soil that still drains poorly, which invites fungus gnats and damping-off after planting.
- Do not heat soil that is dripping wet or dust dry; keep it slightly moist.
- Do not trust appliance settings alone; verify the soil center with a thermometer.
- Do not use kitchen equipment without a clean barrier and good ventilation.
- Do not treat manure-rich or nitrogen-rich mixes; replace them instead.
- Do not skip drainage and moisture control after treatment.
- If contamination returns quickly, discard the batch and start with fresh mix.
Steam burns and fumes are real risks. Keep treated soil out of food-prep zones, and do not use the same pan for dinner afterward unless it has been washed thoroughly, odors are gone, and only soil has touched it.
How to cool, store, and use treated soil
Let treated soil cool completely before planting. Store it in a clean container or bag, and keep it sealed until use so it does not pick up new contamination. Soil may recolonize with microbes over time, which is normal, but it should still stay free of obvious mold, gnats, and off odors.
After planting, keep moisture steady rather than wet. Seedlings fail fast in soggy mix, even when the soil started clean. If fungus gnats return, the problem is often excess moisture or contaminated nearby pots, not the heating step itself.
Suppose a small batch was heated correctly but seedlings still collapse within days. The next check is drainage and watering rhythm, not a hotter bake. Too much water can undo the benefit of treatment.
Frequently asked questions
How to sterilize soil for starting seeds
For starting seeds, a common safe choice is fresh commercial seed-starting mix. If you must reuse a batch, heat the center to 180°F (82°C) for 30 minutes in the oven, or use a small microwave batch with temperature checks. That helps reduce damping-off risk without overprocessing the mix.
How to sterilize soil for planting
For transplanting or general planting, use treatment only when the soil has a known pest or disease issue. Oven, microwave, steam, and solarization all work in different situations, but fresh mix is better when the batch is cheap to replace. Reused mix also needs drainage and moisture control afterward.
How to sterilize soil naturally
Solarization is commonly used as the natural option for beds or larger quantities. Cover the soil with clear plastic and leave it in hot sun for about 4 to 6 weeks or longer. It is slower than heat treatment and depends on strong weather, so it is not a quick fix for seed trays.
What temperature should soil reach to sterilize it safely?
For home use, the standard target is 180°F (82°C) at the center of the soil. The oven setting alone does not prove the batch is ready, so use a soil thermometer. Hold that temperature for 30 minutes if you are using the oven method.
Can I sterilize soil in the microwave or oven?
Yes, if the batch is small and you verify the soil temperature. The microwave works for small amounts, and the oven method calls for 180°F (82°C) for 30 minutes. In both cases, the soil itself must get hot enough.
When should I sterilize soil instead of using fresh mix?
Choose treatment when a reused batch has a clear problem, such as damping-off, fungus gnats, weed seeds, or a known contamination history. Choose fresh mix when the batch is inexpensive, the smell is off, or the contamination source is unclear. Fresh mix is usually the safer move for seed starting.