How to Check If Your Soil Is Healthy Before Planting
Check three things before you plant: structure, drainage, and nutrients. Healthy soil should crumble in your hand, let water move through at a practical pace, and test near pH 6.0 to 7.0 for many vegetables. If it stays rock-hard, stays wet, or tests far off-range, wait and fix the problem first.
Separate what you can see at the surface from what roots will face below it. A dark top layer can point to more organic matter, but color alone does not prove good soil. Use a soil probe or spade to see whether the rooting zone is loose enough for roots, water, and air to move through.
A pre-planting soil health checklist


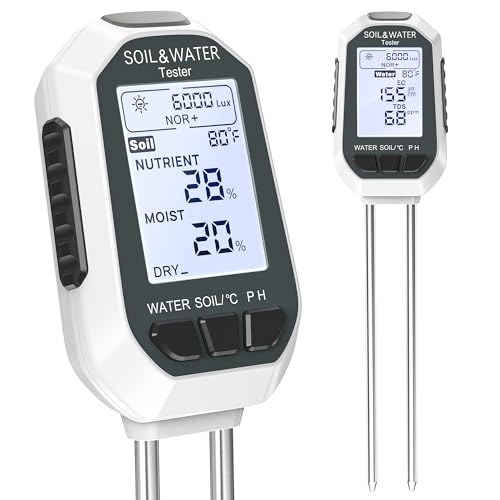

The fastest way to read soil health is to use the same three-part check every time: structure, drainage, and nutrients. That keeps you from treating a nutrient issue like a drainage issue, or planting into compacted ground that looks fine from above.
Planting readiness scorecard
| What you observe | What it likely means | Next action |
|---|---|---|
| Earthy smell | Biologically active soil | Good sign; keep checking the rest of the bed |
| Sour, rotten, or swampy smell | Poor aeration or excess moisture | Wait, improve drainage, and avoid planting now |
| Dark topsoil | Often more organic matter | Confirm structure and drainage before planting |
| Crusty surface | Surface sealing, low aggregation, or runoff risk | Mulch and loosen the top layer gently |
| Many earthworms in the root zone | Active soil life | Good sign; keep evaluating texture and drainage |
| Soil feels gritty | More sand; fast drainage, lower retention | Add organic matter and recheck water movement |
| Soil feels silky | More silt; moderate holding capacity | Check structure and crusting |
| Soil feels sticky | More clay; dense, slow drying, compaction risk | Test drainage and probe resistance before planting |
| Water drains in about 1 inch per hour | Usually workable for many garden plants | Proceed if pH and nutrients are also in range |
| Water still sits after 4 hours | Too slow; heavy soil or compaction | Wait or fix drainage before planting |
| Probe meets hard resistance below the surface | Compacted layer or dense fill | Loosen the zone or change planting depth |
| pH near 6.0 to 7.0 | Often suitable for many vegetables | Check nutrients, then plant |
| pH below 7 or above 7 by a wide margin | Acidic or alkaline soil; nutrient availability may shift | Amend to suit the crop before planting |
| Nitrogen, phosphorus, or potassium are very low or very high | Nutrient imbalance | Choose an amendment from the test result, not guesswork |
| Healthy structure, slow drainage, and low nutrients | Mixed problem | Fix drainage first, then add fertility |
| Healthy structure and drainage, but pH off-range | Mainly a chemistry problem | Amend pH before planting |
| Plant / amend / wait decision | Ready, fixable, or unsafe for planting | Plant if all three checks pass; amend if one issue is mild; wait if drainage or compaction fails |
What you’ll need
- Trowel or hand spade
- Water for a hole test
- Clear jar and ruler for a jar-style texture check
- Optional soil test kit for quick pH reading
- Lab soil test if you need phosphorus, potassium, or a fuller report
- Notebook or phone camera to record what you see
Step 1: Read the surface
Look for an earthy smell, dark topsoil, crusting, and worm activity before you dig. Those surface clues point to biological activity and organic matter, but they do not tell you whether the rooting zone is loose enough or well-drained enough to support planting.
- Clear mulch only where you need to inspect the soil surface.
- Smell the top layer and note earthy, sour, or rotten odors.
- Check whether the surface is bare, sealed, crusted, or covered with mulch.
- Look for worms and small casts where the soil stays moist but not waterlogged.
A common first-timer mistake is treating dark color as proof of healthy soil. Dark soil can indicate higher organic matter, but you still need structure and drainage checks.
Step 2: Check texture and structure
Texture tells you the sand, silt, and clay balance. Structure tells you how those particles clump together. Good soil is crumbly, not rock-hard or loose-grained, and over-tilling or repeated disturbance can break those clumps apart.
- Squeeze a damp handful and feel whether it is gritty, silky, or sticky.
- Break the clod apart and look for crumbs instead of one hard mass.
- Put a sample in a jar with water, shake it, and let the layers settle if you want a clearer read on sand, silt, and clay.
- If the soil falls apart into dust or stays in a dense lump, treat structure as a problem before planting.
Suppose a raised bed feels silky and breaks into fine crumbs, but a shovel still hits resistance a few inches down. That points away from texture and toward compaction or a dense layer below the surface.
Step 3: Test drainage and compaction
Drainage tells you how fast water moves through the root zone. Too fast often means sandy, low-retention soil. Too slow often means heavy or compacted soil. A probe or tool that barely enters the ground points to compaction, which can block root growth even when the top looks fine.
- Dig a hole and fill it with water for a simple water-in-hole test.
- Time how long it takes to drain; about 1 inch per hour is a practical target for many beds.
- Watch for water still sitting after 4 hours, which is too slow for most planting.
- Push a probe or spade into the soil and note hard layers or sudden resistance below the surface.
- If the issue is compaction, loosen the zone or aerate before you add fertilizer.
Say your new vegetable bed drains in under 15 minutes after watering. That is usually too fast for holding moisture and nutrients, so add organic matter before planting rather than assuming the problem is lack of fertilizer.
Step 4: Test pH and nutrients
Soil pH runs from 0 to 14, with 7 neutral. Below 7 is acidic, above 7 is alkaline. pH affects nutrient availability, so a soil can have fertilizer present and still not supply it well. Many plants prefer slightly acidic to neutral pH.
- Use a home kit for a quick pH reading when you need a fast decision.
- Send a lab test if you need phosphorus, potassium, or a fuller nutrient report.
- Check whether nitrogen, phosphorus, and potassium are low, adequate, or excessive.
- Add lime, sulfur, compost, or another amendment only after the result tells you what is missing.
A home kit can answer the pH question. A lab test is better when you need to know whether phosphorus or potassium is actually low, or whether a previous amendment left the bed too high in one nutrient and too low in another.
Common mistakes
Do not plant into compacted or waterlogged soil and hope the roots sort it out later. If a probe barely enters the bed or water still sits after hours, fix that first.
Do not add amendments before you know whether the main issue is pH, nutrients, or drainage. Compost can add organic matter and improve structure, but it does not correct every problem.
Do not judge the whole bed from one corner. Imported fill, a raised bed top layer, and native soil below it can behave very differently.
How do you check soil drainage before planting?
Use a water-in-hole test and time it. Fast drainage points to sandy, low-retention soil, while very slow drainage points to heavy soil or compaction. For many garden beds, water moving at about 1 inch per hour is a workable target, while standing water after 4 hours means you should wait and fix the site.
Dig one hole in the root zone and fill it with water. Refill if needed, then watch how long the water remains visible. Check more than one spot in a larger bed, because drainage can change from one end to the other.
Should I test my soil before planting?
Yes, especially in new beds, raised beds, fruit tree sites, or heavily amended ground. A test before planting keeps you from guessing about pH and nutrients, and it helps you spot drainage or compaction problems before roots are in the ground.
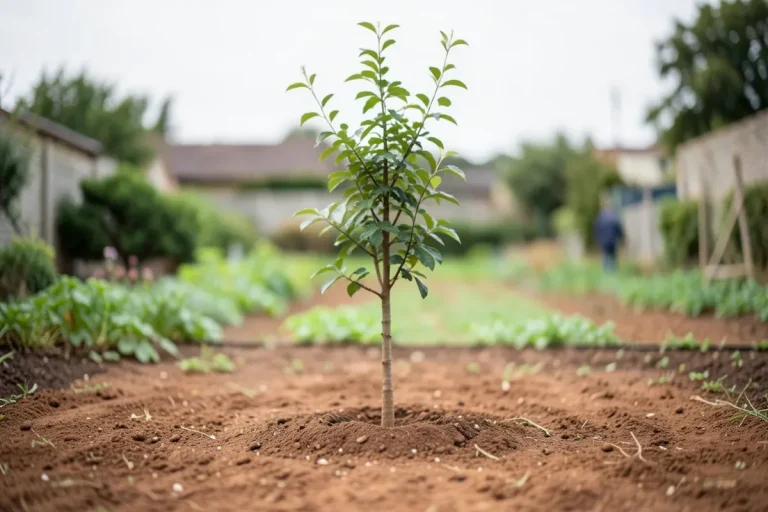
For fruit trees, evaluate the soil before planting rather than after the hole is dug. Tree roots stay in that zone for years, so a bad start is harder to fix later than a vegetable bed that can be rotated or rebuilt.
What should I look for in a soil test before planting?
Start with pH, then check phosphorus and potassium if you need a fuller nutrient picture. For most vegetables, a pH near 6.0 to 7.0 is a useful first target. If the report flags extreme acidity, alkalinity, or a nutrient imbalance, match the amendment to that result instead of adding generic fertilizer.
Use a lab test when the bed has a history you do not know, when plants have struggled before, or when you need a decision on phosphorus and potassium. A home kit is fine for a quick pH check, but it does not replace a detailed lab reading.
What does healthy soil look and feel like?

Healthy soil usually looks crumbly, not rock-hard or loose-grained. It often smells earthy, holds together enough to form crumbs, and lets water move through without puddling. Darker color can point to more organic matter, but you still need the hand test, drainage test, and pH result.
Soil texture can feel gritty, silky, or sticky depending on sand, silt, and clay proportions. That feel helps you predict drainage and water retention, which is why it belongs in the check before planting, not after.
How to tell if your soil is good for planting
Soil is good for planting when it passes the squeeze test, drains at a workable pace, and tests in a useful pH range for the crop. If one factor fails, decide whether to plant, amend, or wait based on the problem type, not on the surface appearance alone.
Vegetables usually need the fastest decision because shallow roots react quickly to compaction and poor drainage. Fruit trees tolerate some repair time before planting, but they should still go in only after the root zone is checked. Raised beds often need extra attention because topsoil, fill, and the layer below may not match.
Frequently asked questions
How do you know if your soil is healthy before planting?
Use three checks: structure, drainage, and nutrients. Healthy soil crumbles, drains without standing water, and tests in a useful pH range for the crop. If one check fails, fix that problem before planting rather than guessing with fertilizer or more water.
How can I test my soil for nutrients?
Send a lab sample if you need nitrogen, phosphorus, and potassium results that can guide amendments. A home kit is fine for pH, but a lab report gives a better read on what to add and what to leave out before planting.
How do I test my soil at home?
Use a trowel, water, a jar, and a home pH kit. Do a squeeze test, a water-in-hole drainage test, and a simple pH reading. If the soil is new or the result is borderline, send a lab sample before you plant.
Can I test my soil myself or do I need a lab?
You can test texture, structure, drainage, and pH yourself. Use a lab when you need phosphorus, potassium, or a more complete nutrient picture. If the bed will hold perennials or trees for years, the lab option is usually worth it.
How do you know if your soil is healthy?
Check the root zone, not just the surface. Healthy soil is workable, drains at a steady pace, and has active life in it. If it is compacted, waterlogged, or far outside the crop’s pH range, do not plant yet.