How to Make Homemade Seeds for Gardening (Diy Methods)
Gardening enthusiasts and sustainable living advocates alike are increasingly interested in taking control of their food sources, reducing costs, and preserving rare or heirloom plant varieties. One powerful way to do this is by making homemade seeds for gardening. Seed saving, once a standard practice among growers worldwide, is experiencing a significant revival. Whether you’re hoping to propagate your healthiest tomato plant, share unique pepper varieties with friends, or simply cut down on annual garden expenses, learning how to produce and preserve your own seeds is a rewarding skill.
Yet, seed saving is more than just collecting what’s left after harvest. It requires a blend of botanical knowledge, practical skills, and careful timing to ensure seeds are viable, true-to-type, and free from disease. In this comprehensive guide, you’ll discover the best DIY methods for making homemade seeds, step-by-step instructions for various crops, preservation techniques, and tips for troubleshooting common challenges. By the end, you’ll be equipped to transform your garden into a self-sustaining ecosystem—one seed at a time.
Key Takeaways
- Homemade seed saving reduces costs, promotes biodiversity, and preserves unique plant varieties.
- Techniques vary by plant type: Dry seeds (beans, peas) differ from wet seeds (tomatoes, cucumbers).
- Seed viability depends on proper harvesting, cleaning, and storage.
- DIY seed production helps prevent genetic erosion and supports local food resilience.
- Practical examples and tables in this guide help you choose and execute the right seed-saving methods.
- Disease prevention and correct labeling are crucial for long-term success.

Credit: www.quarto.com
Understanding Seed Biology And Selection
Grasping the fundamentals of seed biology is the cornerstone of successful seed saving. This section explores plant reproduction, seed types, and how to select the best candidates for homemade seed production.
The Basics Of Plant Reproduction
Plants reproduce in two main ways: sexual reproduction (through seeds) and asexual reproduction (via cuttings or tubers). For most gardeners, seed-based propagation is the simplest and most accessible DIY option. Seeds form after pollination and fertilization, containing a genetic blueprint for the next generation.
Open-pollinated plants produce seeds that closely resemble the parent plant, while hybrid plants (often labeled F1) may yield unpredictable offspring due to mixed genetics. Understanding this distinction is crucial, as saving seeds from open-pollinated plants ensures the next generation retains desirable qualities, while hybrid seeds can lead to unpredictable growth and yield, which may be unsuitable for consistent crop production.
Types Of Seeds
- True-to-type seeds: Come from open-pollinated or heirloom varieties, reliably replicating parent traits. This is especially important for those hoping to develop a stable, self-sustaining garden, as you can count on similar yields, flavors, and resistance to local pests and diseases.
- Hybrid seeds: Result from crossing two distinct varieties; their seeds often do not breed true. While hybrids can offer benefits like increased vigor or disease resistance in the first generation, their offspring may not exhibit the same traits, making them less reliable for seed saving.
- Self-pollinating vs. cross-pollinating: Self-pollinating plants (e.g., beans, tomatoes) are easier for beginners, as they rarely cross with others. Cross-pollinating plants (e.g., corn, squash) can hybridize if grown near other varieties. Understanding the pollination method of your crops helps you determine isolation requirements and avoid accidental cross-pollination, which can affect seed purity.
Selecting Parent Plants
To maximize seed quality:
- Choose plants that exhibit vigorous growth, disease resistance, and high yields. These traits are often visible throughout the growing season, such as consistent fruit set, healthy foliage, and resilience to weather extremes.
- Avoid saving seeds from weak, diseased, or poorly performing plants. Poor-quality parent plants can pass on undesirable traits, such as susceptibility to pests, poor flavor, or low productivity.
- Mark your best specimens during the growing season for later seed harvesting. Use colored ribbons or tags to identify top performers, ensuring you remember which plants to collect seeds from at the end of the season.
The Importance Of Genetic Diversity
Maintaining genetic diversity is essential for robust, adaptable crops. Saving seeds from multiple healthy plants reduces inbreeding and supports long-term plant health. This practice also helps preserve rare varieties that may be unavailable commercially.
Genetic diversity is also critical for building resilience against evolving pests, diseases, and changing climate conditions. For example, by saving seeds from several tomato plants that thrived under different weather patterns, you increase the odds that at least some offspring will succeed in future unpredictable seasons.
Diy Methods For Saving And Producing Seeds
Homemade seed production techniques vary depending on the crop and its pollination method. Here, we break down the most effective DIY methods for different plant types.
Dry-seeded Crops: Beans, Peas, And Lettuce
Dry-seeded crops are some of the easiest for beginners.
- Allow pods (beans, peas) or flower heads (lettuce) to fully dry on the plant. This usually means waiting until the plant has finished its lifecycle and begun to brown or die back naturally.
- Harvest when pods are brown and brittle, or when seeds rattle inside. Delaying harvest until this stage ensures maximum seed maturity and viability.
- Shell pods by hand, remove debris, and spread seeds to dry further in a cool, well-ventilated area. Use shallow trays or screens to increase airflow and prevent mold.
- Store in airtight containers.
Pro Tip: For lettuce, bag flower heads with paper bags before maturity to catch seeds as they drop. This method also protects seeds from wind dispersal and hungry birds.
Wet-seeded Crops: Tomatoes, Cucumbers, And Squash
Wet-seeded crops require additional steps to remove gelatinous coatings that inhibit germination.
- Scoop seeds from ripe fruits. Overripe fruits often yield the best seeds, as they have had more time to fully develop.
- Place seeds in a jar with water and ferment for 2-4 days, stirring daily. This breaks down the protective gel and kills some pathogens. Fermentation mimics the natural decomposition process, which occurs in nature when fruit falls to the ground.
- Rinse seeds thoroughly using a fine sieve. Repeat rinsing until water runs clear and all pulp is removed.
- Spread seeds on a non-stick surface (e.g., glass or parchment) to dry completely. Avoid using paper towels, as seeds may stick.
Example: Tomato seeds are among the most commonly saved using this method, as fermentation improves germination rates. This process also helps separate viable seeds, which sink during rinsing, from non-viable ones that float.
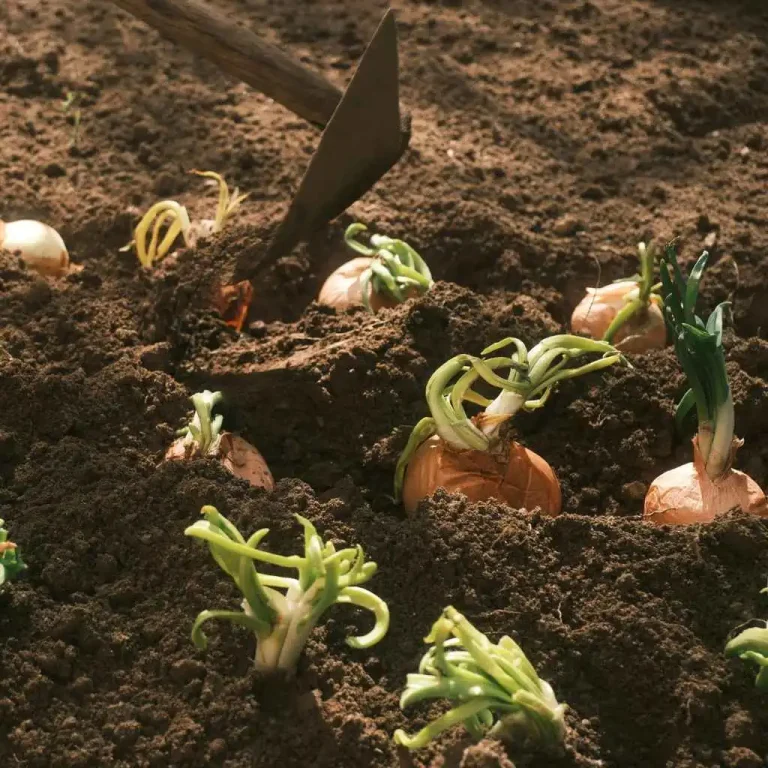
Biennial Crops: Carrots, Beets, And Onions
Biennials require two growing seasons to produce seeds.
- Allow roots to mature during the first season. Only the healthiest, well-formed roots should be selected for replanting.
- Harvest and store roots over winter in a cool, humid environment. Avoid freezing, but keep roots moist enough to prevent shriveling.
- Replant in spring and allow plants to flower and set seed. Flowering can attract beneficial pollinators, contributing to garden biodiversity.
- Harvest seeds once heads are dry.
Note: Isolation from similar crops is vital to prevent cross-pollination. Consider growing only one variety per season or using cages for controlled pollination.
Isolation And Pollination Control
To ensure pure seeds, especially for cross-pollinating crops:
- Separate varieties by distance (often 100 feet or more). Larger distances may be required for wind-pollinated crops like corn.
- Use physical barriers like row covers or bagging flowers. Lightweight fabrics allow sunlight and rain through while excluding unwanted pollen.
- Stagger planting times to prevent simultaneous flowering. This technique works best in regions with long growing seasons.
Cleaning And Processing Seeds
- Winnow dry seeds to remove chaff using wind or a small fan. Pouring seeds between two containers in a gentle breeze allows lighter debris to blow away.
- For tiny seeds (e.g., lettuce), use screens or sieves. Stackable seed cleaning screens can be purchased or homemade using hardware cloth.
- Always ensure seeds are fully dry before storage to prevent mold. Seeds should snap rather than bend when fully dried.

Credit: www.milkwood.net
Step-by-step Seed Saving For Popular Garden Crops
Practical, crop-specific instructions are key to success. Below are detailed guides for saving seeds from some of the most popular home garden vegetables and flowers.
Tomatoes
- Choose fully ripe, disease-free fruits from your healthiest plants.
- Slice open and squeeze seeds and pulp into a jar.
- Add a little water and ferment for 2-3 days, stirring once daily.
- A mold layer forms; remove it and rinse seeds thoroughly.
- Spread seeds on a plate or screen to dry for 1-2 weeks.
- Store in labeled, airtight containers.
To further increase seed quality, repeat the process with several fruits from different plants, ensuring a genetically diverse sample.
Beans And Peas
- Allow pods to dry on the plant until they are brown and split easily.
- Pick and shell pods; inspect for insect damage.
- Dry seeds for an additional week indoors.
- Store in a cool, dark, and dry place.
Hand-shelling preserves seed coats, reducing mechanical damage. If harvesting large quantities, consider using a threshing bag or gentle foot stomping to release seeds.
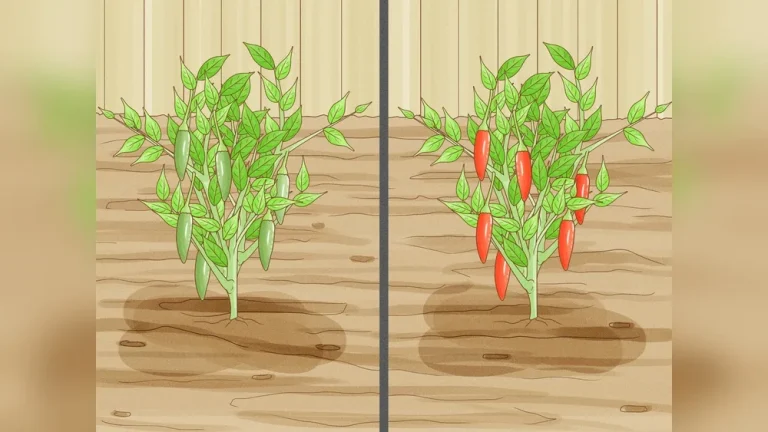
Peppers
- Wait until peppers are fully mature (color deepens).
- Cut open and remove seeds.
- Dry seeds on a non-stick surface for about two weeks.
- Store in paper envelopes or glass jars.
For hot peppers, wear gloves to avoid skin irritation from capsaicin. For extra purity, hand-pollinate flowers and bag them to prevent crossing with other varieties.
Lettuce
- Let lettuce bolt and flower.
- When the flower heads turn fluffy and dry, gently shake or rub seeds into a container.
- Separate seeds from chaff using screens or by blowing gently.
- Dry thoroughly and store.
Harvest seeds regularly as flower heads mature at different times. Periodic collection increases overall yield and reduces seed loss.
Cucumbers
- Allow fruits to over-ripen (yellow and soft).
- Scoop out seeds and place in a jar with water.
- Ferment for 2-3 days, rinse, and dry seeds.
- Store in a labeled envelope.
Fermentation is key for removing germination inhibitors. Only save seeds from non-bitter, high-quality fruits.
Flower Seeds: Marigolds And Sunflowers
- Marigolds: Let flowers dry on the plant; collect and separate seeds from petals. Store seeds in breathable envelopes to prevent moisture buildup.
- Sunflowers: Wait for heads to droop and seeds to harden; cut heads, dry, and rub out seeds.
Harvest sunflowers in stages, as birds and squirrels may target ripening seeds. Hang heads upside down in a dry, well-ventilated area.
Comparison Table: Seed Saving Difficulty By Crop
| Crop | Seed Saving Difficulty | Isolation Needs | Storage Life (Years) |
|---|---|---|---|
| Tomato | Easy | Low | 4-6 |
| Beans | Very Easy | Low | 3-5 |
| Peppers | Easy | Low | 2-4 |
| Lettuce | Moderate | Medium | 2-6 |
| Cucumber | Moderate | High | 5-10 |
| Sunflower | Easy | Medium | 2-5 |
:max_bytes(150000):strip_icc()/herocontainerdiy-54a28baa55284d5784a08ff6155153a3.jpg)
Credit: www.treehugger.com
Storing, Labeling, And Testing Homemade Seeds
Proper storage and accurate labeling are essential for long-term seed viability and garden planning.
Best Practices For Seed Storage
- Store seeds in airtight containers (glass jars with tight lids, plastic vials). This keeps humidity out and prevents pests from accessing your seeds.
- Place containers in a cool, dark, and dry location; ideal temperatures are 32–41°F (0–5°C). Consider using a dedicated seed storage box in your refrigerator or a basement.
- Add silica gel packets or powdered milk to absorb moisture. Replace these desiccants annually for best results.
- Avoid frequent temperature fluctuations, which can reduce germination rates. Consistency is key for seed longevity, so avoid placing seeds near heaters or in sunlit rooms.
Labeling And Record-keeping
- Always label containers with plant name, variety, harvest date, and any special notes. Including the source of the seeds (e.g., “Saved from 2026 best tomato”) helps track seed lineage.
- Consider keeping a seed-saving journal or spreadsheet for tracking. Record germination rates, notes on plant performance, and any observations on disease resistance or flavor.
- Include additional details like parent plant performance or unique traits. This information is invaluable when sharing seeds with friends or seed libraries.
Seed Viability And Germination Testing
- Test old seeds before planting by placing 10 seeds on a damp paper towel, sealing them in a plastic bag, and keeping them warm.
- Check after a week; a germination rate above 70% is considered good.
- Discard or compost seeds with poor germination.
Regular germination testing allows you to plan plantings more accurately and avoid disappointment from non-viable seeds.
Protecting Seeds From Pests And Disease
- Inspect seeds for insect damage before storage.
- Store in pest-proof containers or freeze seeds for several days to kill eggs/larvae.
- Only save seeds from healthy, disease-free plants to prevent spreading pathogens.
If you live in a humid or pest-prone area, consider double-bagging seeds or storing them in metal tins inside the freezer for additional protection.
Table: Seed Storage Methods And Expected Longevity
| Storage Method | Expected Longevity | Recommended Crops |
|---|---|---|
| Room Temperature, Airtight | 1-3 years | Peas, Beans, Lettuce |
| Refrigerator, Airtight | 3-8 years | Tomato, Pepper, Sunflower |
| Freezer, Airtight | Up to 10 years | Cucumber, Squash, Melon |
Preventing Cross-pollination And Maintaining Seed Purity
Preserving true-to-type characteristics is crucial, especially if you want to maintain unique or heirloom varieties.
Strategies For Preventing Cross-pollination
- Spatial isolation: Plant varieties of the same species far apart (minimum distances vary; e.g., 10 feet for beans, ½ mile for corn). Check crop-specific recommendations for the best results.
- Physical barriers: Use mesh bags, cages, or row covers to exclude pollinators. These can be removed for hand pollination to ensure genetic purity.
- Controlled hand pollination: For advanced gardeners, manually transfer pollen and bag flowers to prevent contamination. This technique is essential for crops with high cross-pollination rates, such as squash and corn.
Timing And Planting Techniques
- Staggered planting: Plant different varieties at different times so they do not flower simultaneously. This minimizes the window for cross-pollination.
- Caging: Enclose plants in fine mesh cages; introduce pollinators (e.g., hand pollinate) as needed. This method is especially useful for seed-saving in small urban gardens or greenhouses.
Real-world Example: Community Garden Seed Purity
A community garden in Seattle implemented isolation distances of 200 feet between squash varieties, combined with hand pollination. Their efforts resulted in 98% pure seeds over three seasons, preserving heirloom traits and reducing unwanted hybrids. This demonstrates how simple planning and community cooperation can maintain seed purity even in shared spaces.
Recognizing And Managing Hybridization
- Unusual fruit shapes, colors, or flavors may indicate cross-pollination. If you notice off-type plants, remove them before seed set.
- Remove or rogue off-type plants before seed set to maintain purity. Regular garden monitoring, especially during flowering and fruiting, helps preserve your variety’s integrity.
Legal And Ethical Considerations
- Some patented or protected varieties may not be legally propagated without permission (Wikipedia).
- Always respect local regulations and share seeds ethically. When exchanging seeds, disclose their origin and any known restrictions.
Troubleshooting Common Seed-saving Problems
Even experienced gardeners encounter challenges when producing homemade seeds. Identifying and addressing issues early ensures a successful harvest.
Poor Germination Rates
- Causes: Old seeds, improper storage, incomplete drying, or immature seeds.
- Solutions: Test germination before planting, dry seeds fully, and store in optimal conditions.
If you consistently experience low germination, review your harvesting and storage procedures. Sometimes, immature seeds are inadvertently collected before they have fully developed.
Mold Or Rot During Drying
- Causes: High humidity, inadequate airflow, or seeds stored while still damp.
- Solutions: Use fans or dehumidifiers; spread seeds in thin layers and stir regularly.
In humid climates, consider drying seeds over silica gel or in an oven set to a very low temperature (no higher than 90°F/32°C) to prevent damage.
Insect Or Rodent Damage
- Causes: Seeds stored in thin bags or non-sealed containers.
- Solutions: Use glass jars or sturdy plastic; add bay leaves or diatomaceous earth as deterrents.
Check stored seeds periodically for signs of pests, and repackage if necessary.
Accidental Hybridization
- Causes: Inadequate isolation or pollinator activity.
- Solutions: Increase isolation distances, use physical barriers, and monitor for off-type plants.
Document which varieties were grown nearby each season to identify possible sources of crossing.
Disease Transmission
- Causes: Saving seeds from infected plants or fruits.
- Solutions: Only use healthy plants; consider fermenting wet seeds to kill pathogens.
If you suspect seed-borne disease, consider hot water treatment (submerging seeds in water heated to 122°F/50°C for 25 minutes) to eliminate pathogens, but research crop-specific recommendations first.
Real-world Example: Overcoming Mold In Seed Drying
A gardener in Florida struggled with moldy tomato seeds due to high humidity. By switching to a mesh screen and placing seeds in an air-conditioned room with a fan, they eliminated mold issues and improved seed viability.
Real-world Case Studies: Success Stories In Homemade Seed Production
Learning from others’ experiences can accelerate your own seed-saving journey. Here are a few concrete examples illustrating the impact of homemade seeds.
Case Study 1: A School Garden’s Tomato Seed Legacy
A primary school in Vermont began saving seeds from their healthiest cherry tomato plants each year. Within four seasons, students observed improved yields, earlier ripening, and better disease resistance—a testament to local adaptation through selective seed saving. The project also became a learning opportunity, teaching biology, sustainability, and the importance of heritage varieties.
Case Study 2: Heirloom Bean Preservation Project
A gardening club in Oregon launched a project to preserve rare Jacob’s Cattle beans. By growing out and sharing seeds annually, they increased the local population from 200 seeds to over 10,000 in five years, ensuring the variety’s survival and accessibility. This grassroots effort also fostered community engagement and intergenerational knowledge sharing.
Case Study 3: Urban Seed Library Initiative
A community group in Toronto established a seed library using homemade seeds donated by local gardeners. By cataloging and distributing seeds with detailed notes, they promoted urban food security and biodiversity, inspiring hundreds of new gardeners to participate. The seed library also hosted workshops, further building local expertise.
Advanced Diy Techniques: Seed Cleaning, Storage Innovations, And Scaling Up
As your seed-saving skills grow, you may want to refine your methods or increase your production scale.
Mechanical Seed Cleaning
- Small-scale threshers or seed screens can speed up cleaning for larger crops (e.g., beans, grains).
- Vibrating seed cleaners or air separators help remove chaff and improve seed quality. For larger operations, hand-cranked or electric winnowers are available, making the process more efficient and less labor-intensive.
Innovative Storage Solutions
- Use vacuum-sealed bags for ultra-long-term storage. This method minimizes oxygen and moisture, the two biggest threats to seed longevity.
- Store seeds in dark glass containers to block UV light and reduce aging. Amber glass jars are ideal.
- Digitally catalog your seed collection with QR codes linked to plant profiles. This makes record-keeping easier and facilitates sharing information with other gardeners.
Scaling Up Seed Production
- Join or form local seed cooperatives to share labor, equipment, and knowledge. Cooperatives can pool resources to access specialized tools or bulk storage solutions.
- Rotate crops and seed-saving locations to maintain soil health and reduce disease risk. Crop rotation also helps break pest and disease cycles.
- Partner with local schools or community groups to multiply rare varieties. This not only increases seed stock but also educates others about the value of seed saving.
Table: Diy Vs. Commercial Seeds — A Comparison
| Criteria | Homemade Seeds | Commercial Seeds |
|---|---|---|
| Cost | Minimal (after initial investment) | Varies; recurring annual expense |
| Biodiversity | High (supports rare/heirloom types) | Often limited to popular hybrids |
| Adaptation | Locally adapted over generations | Generalized traits, less local adaptation |
| Legal Restrictions | Few (except for protected varieties) | Some patented/protected seeds |
| Time Investment | Moderate to high | Low (ready to plant) |
Resources For Further Learning And Seed Exchange
To deepen your knowledge and connect with other seed savers, explore these trusted resources:
Books And Guides
- “Seed to Seed” by Suzanne Ashworth: Comprehensive reference on seed-saving techniques.
- “The Seed Garden” by Lee Buttala and Shanyn Siegel: Detailed crop-by-crop guide.
Both books offer in-depth information, diagrams, and troubleshooting tips, making them invaluable for both beginners and advanced seed savers.
Online Organizations
- Seed Savers Exchange: Nonprofit network and marketplace for heirloom seeds.
- Seeds of Diversity: Canadian organization promoting seed biodiversity.
These organizations also host events, webinars, and forums where you can ask questions and share experiences with fellow seed savers.
Seed Libraries And Swaps
- Find local seed libraries via SeedLibraries.net.
- Participate in swaps through gardening clubs, community centers, or online forums.
Swapping seeds locally increases your access to regionally adapted varieties and fosters community connections.
Research And Further Reading
- USDA National Plant Germplasm System: Database of plant genetic resources.
- Garden Organic UK Seed Saving: Practical guides and videos.
Academic and nonprofit resources offer detailed scientific information and up-to-date best practices.
Frequently Asked Questions
How Long Can Homemade Seeds Be Stored Before They Lose Viability?
Most homemade seeds remain viable for 2–5 years if stored in cool, dry, and dark conditions. Some, like cucumbers and melons, may last up to 10 years. Always test older seeds for germination before planting. Proper storage extends seed life, and even older seeds may surprise you with viable plants if stored well.
Can I Save Seeds From Grocery Store Produce?
You can sometimes save seeds from grocery store produce, but results may vary. Many commercial fruits and vegetables are hybrids, meaning their seeds might not produce true-to-type plants. Additionally, some may be treated or sterile. For best results, use open-pollinated or heirloom varieties.
If you experiment with store-bought seeds, be prepared for unexpected results and traits.
What Is The Difference Between Open-pollinated And Hybrid Seeds?
Open-pollinated seeds are produced by natural pollination and breed true to type, making them ideal for seed saving. Hybrid seeds result from crossing two distinct varieties; their offspring may not resemble the parent, so saved seeds can be unpredictable. For those seeking consistency, open-pollinated seeds are the best choice.
How Do I Prevent Disease When Saving Seeds?
Always select seeds from healthy, disease-free plants. Clean seeds thoroughly, ferment wet seeds to kill pathogens, and store them in dry, pest-free containers. Avoid saving seeds from plants that showed signs of wilting, mold, or unusual spots. Monitor your plants regularly and remove any that show disease symptoms.
Is Seed Saving Legal For All Plant Varieties?
Seed saving is legal for most home garden crops, especially open-pollinated and heirloom varieties. However, some commercial varieties are protected by patents or plant variety protection laws. Research the variety before saving seeds to ensure compliance with local regulations. When in doubt, consult seed catalogs or online databases for information on variety status.
Creating your own homemade seeds is not only a practical gardening skill but a powerful act of sustainability and preservation. By following the DIY methods and best practices outlined in this guide, you’ll contribute to biodiversity, save money, and enjoy a deeper connection to your garden.
Each season brings new opportunities to refine your techniques, share seeds with others, and watch your plants—and your gardening knowledge—grow. Happy seed saving!