How to Make Soil Blocks Without a Soil Blocker (DIY Method)
Making soil blocks without a commercial soil blocker is a surprisingly accessible and effective method for gardeners seeking sustainable, affordable seed-starting solutions. Soil blocks offer a powerful alternative to plastic pots and seed trays by creating compact, self-contained cubes of soil that support healthy root development and reduce transplant shock.
While commercial soil blockers are convenient, DIY methods allow gardeners to tailor soil block size, shape, and recipe to their unique needs, all while minimizing costs and plastic waste.
This article will guide you step by step through DIY soil block making, covering materials, soil mixes, shaping techniques, and troubleshooting. You’ll discover how home gardeners, small farms, and urban growers harness this method to scale up propagation while maintaining ecological integrity. We’ll compare soil blocks to traditional seed-starting systems and showcase real-world examples, provide actionable instructions, and highlight expert tips for success. Whether you’re a seasoned grower or a beginner, mastering this technique can transform your approach to seed starting and plant health.
Key Takeaways
- DIY soil blocks can be made without commercial blockers using common household items and simple techniques.
- Soil blocks promote robust root growth, reduce transplant shock, and eliminate plastic waste in seed starting.
- The right soil mix is critical; recipes typically include compost, peat or coco coir, sand, and amendments.
- Homemade block molds can be crafted from cans, containers, and other objects; shaping is easy with practice.
- Soil blocks outperform plastic pots and trays in root health, moisture retention, and sustainability.
- Troubleshooting tips and case studies show how gardeners adapt and scale soil block production.
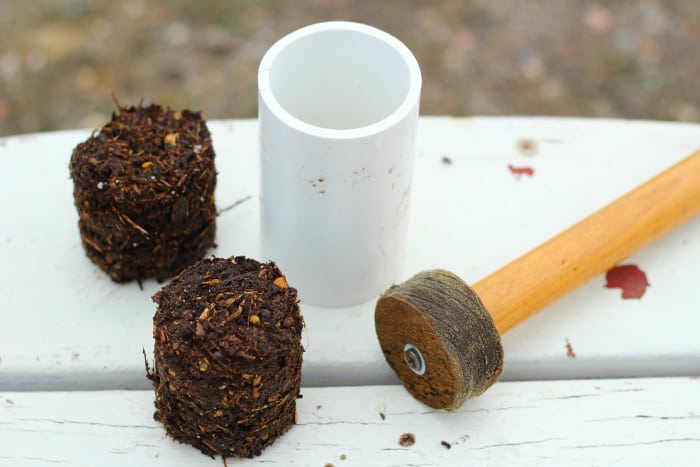
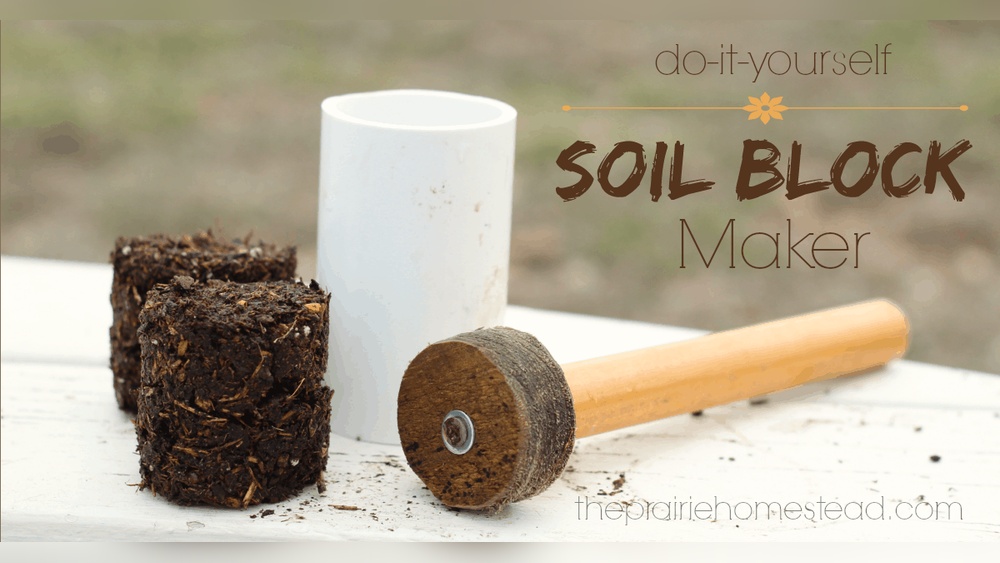
Credit: www.theprairiehomestead.com
The Science Behind Soil Blocks
Soil blocks are more than just cubes of earth—they are engineered for optimal seedling health and successful transplantation. Understanding the science behind soil blocks can help gardeners make informed decisions about their seed-starting process.
Root Development And Air Pruning
One of the most significant benefits of soil blocks is the phenomenon of air pruning. When roots reach the edge of the soil block, they encounter air rather than a hard container wall. This naturally stops growth at the tip and encourages branching, producing a dense, fibrous root system instead of the circling roots seen in pots. According to research published by Wikipedia, air-pruned roots absorb water and nutrients more efficiently and are less prone to transplant shock.
Air pruning not only prevents root circling—a common problem in traditional containers—but also increases the surface area of the root system. This expanded root mass is better equipped to access nutrients and moisture throughout the seedling’s development. The result is a plant that is not only healthier but also more resilient when transplanted into the garden or field.
In fact, studies have shown that air-pruned plants establish themselves more quickly after transplanting, leading to faster growth and improved yields.
Moisture Management
The porous nature of soil blocks allows for even moisture distribution, reducing the risk of overwatering or dry pockets. This is especially useful in seed starting, where consistent moisture is crucial for germination. Soil blocks also minimize fungal diseases like damping-off, which often thrive in waterlogged seed trays.
In traditional plastic pots or trays, water can accumulate at the bottom, creating anaerobic conditions that foster harmful pathogens. Soil blocks, by contrast, release excess moisture through evaporation and allow air to circulate freely around each block. This not only keeps the blocks at the ideal moisture level but also creates a microenvironment that supports seedling vigor.
Gardeners often notice fewer issues with rot and mold, making soil blocks an attractive choice for those seeking robust, healthy seedlings.
Environmental Impact
Soil blocks reduce reliance on single-use plastics in gardening. According to the EPA, the United States generates over 35 million tons of plastic waste annually (EPA Data). By switching to soil blocks, gardeners play a direct role in minimizing plastic pollution.
In addition to reducing waste, soil blocks encourage a closed-loop system where materials such as compost and soil amendments can be locally sourced or homemade. This not only cuts costs but also decreases the carbon footprint associated with transporting plastic goods and potting supplies.
Over time, adopting soil blocks can lead to significant reductions in household and community plastic use, aligning gardening practices with broader environmental goals.
Comparison Table: Soil Blocks Vs Traditional Seed Trays
| Feature | Soil Blocks | Plastic Pots/Trays |
|---|---|---|
| Root Health | Air-pruned, fibrous roots | Root circling, less branching |
| Transplant Shock | Minimal | Moderate to high |
| Plastic Waste | None | High |
| Moisture Control | Even distribution | Uneven, risk of waterlogging |
| Cost | Low (DIY) | Medium to high |

Credit: www.youtube.com
Essential Materials And Soil Mix Recipes
Creating soil blocks without a commercial blocker requires some basic materials and a carefully crafted soil mix. The quality of the soil mix is essential for successful seed germination and seedling health.
Core Ingredients For Soil Mix
A well-balanced soil block mix combines structure, nutrients, and moisture retention. The most common recipe includes:
- Compost: Provides nutrients and beneficial microbes.
- Peat moss or coco coir: Ensures moisture retention and block cohesion.
- Sand or perlite: Enhances drainage and prevents compaction.
- Garden soil: Adds mineral content and structure.
- Lime: Balances pH if using peat moss.
- Fertilizer: Supplies essential nutrients (organic or synthetic).
Each of these components plays a vital role. For example, compost not only feeds young plants but also improves the microbial life in the blocks, which can help seedlings resist disease. Peat moss or coco coir acts as the binding agent, holding the block together while storing water for roots.
Sand or perlite ensures that the blocks remain aerated, so roots can breathe and grow freely.
Diy Soil Mix Recipe
A widely used formula for soil blocks is the Eliot Coleman mix, adapted for home use:
- 2 parts peat moss or coco coir
- 1 part compost
- 1 part garden soil
- 1 part sand or perlite
- 2 tablespoons lime per gallon (if using peat)
- 2 tablespoons organic fertilizer per gallon
Mix ingredients thoroughly, moistening until the texture is similar to wet sand—holding shape when squeezed, but not dripping.
For those new to soil blocks, it’s important to adjust the mix to local conditions. For example, heavy compost may hold more water, requiring extra sand or perlite to prevent the blocks from becoming too dense. Conversely, a lightweight mix may need additional compost or soil to achieve the right consistency.
Sourcing Materials
Most ingredients can be sourced locally or from garden centers. For organic gardening, check product certifications and reviews. Coco coir is a sustainable alternative to peat moss, as highlighted by Royal Horticultural Society.
In urban areas, look for community compost programs or local nurseries that offer bulk materials. For those in rural settings, homemade compost and naturally occurring sand or soil may be sufficient. Always ensure that your materials are free from contaminants, especially when growing food crops.
Alternative Soil Mixes
Depending on your climate and plant needs, you can adapt the recipe. For succulents, increase sand; for heavy feeders, add worm castings or extra compost. Experimentation is encouraged, but always maintain block cohesion.
For example, a gardener in a humid climate might add extra sand to improve drainage, while someone in a dry region could increase the proportion of peat moss or coco coir to retain more moisture. You can also add amendments like rock dust for trace minerals or mycorrhizal inoculant for enhanced root symbiosis.
Comparison Table: Peat Moss Vs Coco Coir
| Property | Peat Moss | Coco Coir |
|---|---|---|
| Sustainability | Non-renewable | Renewable |
| Water Retention | High | High |
| pH | Acidic | Neutral |
| Availability | Widely available | Increasingly available |
| Cost | Moderate | Moderate |
Diy Soil Block Mold Methods
Without a commercial soil blocker, gardeners can use everyday items to shape soil blocks. The goal is to create consistent, sturdy cubes that hold together and provide an ideal environment for seedlings.
Using Cans And Containers
Empty cans (like tuna or soup cans) make excellent molds. Their rigid sides help compress soil, and their uniform shape produces blocks of similar size.
Steps:
- Cut out the bottom of the can for easy soil release.
- Lightly oil or line the inside with plastic wrap if sticking is an issue.
- Fill can with moist soil mix, packing firmly.
- Invert can and gently push out block.
Some gardeners have found that using cans of different sizes allows for the creation of both small and large blocks. For instance, tomato paste cans produce small blocks suitable for starting lettuce or herbs, while soup cans are perfect for tomatoes and peppers.
The flexibility offered by using cans means you can easily adjust block size based on the seed type and available space.
Homemade Wooden Molds
Wooden molds offer customizability and durability. Simple box shapes can be made from scrap wood, sized to your seed needs.
Steps:
- Nail or screw together four sides to create a box, leaving one end open.
- Attach a handle for easy compression.
- Fill with soil mix, press firmly, then push soil block out from open end.
To further customize, add dividers to create multiple blocks at once. Some gardeners use a small piece of dowel or wood to create the seed depression in each block as they’re formed. Wooden molds can be made with leftover lumber, making them both affordable and sustainable.
Plastic Bottle Cutouts
Plastic bottles, especially those with flat sides, can be cut and used as molds. This method recycles household waste and is popular for smaller blocks.
Steps:
- Cut bottle horizontally, creating a “cup” shape.
- Fill with soil mix, compact, and tap out block.
For added versatility, different bottle sizes can be used to create varying block dimensions. The transparency of the plastic also allows you to see if the soil is packed tightly enough, which can help beginners master the technique.
Press-and-shape Method
For those without suitable containers, hand-shaping is a viable approach. The key is moist soil and firm pressure.
Steps:
- Scoop moist soil into your palm.
- Compact tightly, shaping into a cube or rectangle.
- Place on tray for drying.
While this method may not yield perfectly uniform blocks, it allows you to start seeds quickly and with minimal equipment. Some gardeners use a small square piece of wood as a form to press the soil between their hands for better shape consistency.
Real-world Example: Urban Gardeners
In Brooklyn, urban gardeners at a community garden used tuna cans and hand-shaped blocks to start hundreds of seedlings. By customizing block size, they maximized limited tray space and reduced local plastic waste. Their success was featured in a case study by GrowNYC.
This project inspired similar initiatives in neighboring communities, demonstrating how accessible and adaptable DIY soil blocks can be. The gardeners also noted that children and new volunteers found the process engaging, turning seed starting into an educational group activity.

Credit: www.youtube.com
Step-by-step Instructions For Making Soil Blocks
Making soil blocks at home is straightforward with practice. Follow these steps for consistent results.
1. Prepare Your Soil Mix
- Combine all ingredients in a large tub.
- Moisten gradually, mixing until the soil holds its shape when squeezed.
- Let sit for 10 minutes to allow absorption.
If the soil feels dry or crumbly, slowly add water. If it’s too wet and drips when squeezed, add more dry mix. Achieving the right texture is crucial for block stability.
2. Select And Prepare Your Mold
- Choose a can, container, or mold.
- Oil or line mold for easy block removal.
- Place mold on a tray lined with parchment or plastic.
A non-stick surface underneath prevents blocks from sticking as they dry. If making many blocks, consider rotating through several molds to speed up the process.
3. Fill And Compress
- Spoon moist soil mix into mold, packing tightly.
- Use a dowel or handle to apply pressure if needed.
- Level off excess soil for even blocks.
Firm compression helps the block hold together, especially during initial handling. Don’t be afraid to press hard; well-packed blocks are less likely to crumble.
4. Release The Block
- Invert mold and gently push or tap to release soil block.
- Place block on tray, spaced to allow airflow.
If the block sticks, run a butter knife or small spatula around the edges. Handle carefully to avoid breaking the block before it sets.
5. Plant Seeds
- Make a small depression in each block for seeds.
- Sow seeds and cover lightly with soil or vermiculite.
- Mist gently to settle seeds.
For tiny seeds, surface sow and mist lightly to avoid burying them too deeply. Larger seeds can be pressed deeper into the block.
6. Care For Seedlings
- Keep blocks moist but not waterlogged.
- Place tray in a warm, bright location.
- Monitor for germination and growth.
Rotate trays daily for even light exposure, and check moisture levels frequently. If blocks begin to dry or crack, increase humidity by covering with a plastic dome or bag.
Real-world Example: Small Farm In Vermont
At a Vermont CSA farm, homemade wooden molds allowed propagation of over 2,000 seedlings in spring. The farmer reported a 15% reduction in transplant shock and faster establishment in the field compared to plastic pots, as documented by the USDA NRCS.
The farm also found that soil blocks made it easier to manage succession planting, as blocks could be transplanted directly into beds without disturbing roots. This streamlined workflow helped maximize productivity during the busy planting season.
Advantages And Challenges Of Diy Soil Blocks
Understanding the strengths and limitations of DIY soil blocks helps gardeners anticipate success and troubleshoot issues.
Advantages
- Eco-friendly: Eliminates plastic waste.
- Root health: Air pruning promotes strong roots.
- Cost-effective: Uses household items and compost.
- Scalable: Suitable for gardens, farms, and urban spaces.
- Customizable: Block size and soil mix can be tailored.
Soil blocks also foster a closer connection to your gardening process. By crafting your own blocks and soil mixes, you gain hands-on experience with the materials and conditions your plants need to thrive.
Challenges
- Block stability: Blocks may crumble if mix is too dry or loose.
- Moisture management: Overwatering can cause blocks to collapse.
- Labor intensity: Manual shaping is more time-consuming than using a blocker.
- Consistency: Homemade molds may produce varying block sizes.
For large-scale production, the time investment can be significant without some form of assembly-line process or multi-block mold. Ensuring consistent size and density is important for even seedling growth.
Troubleshooting Tips
- Crumbly blocks: Add more water or peat/coir.
- Sticking in mold: Oil, line, or use non-stick containers.
- Uneven blocks: Compact soil firmly and level off excess.
- Drying out: Mist regularly and cover tray to retain humidity.
If you notice algae or mold on the surface, increase air circulation and reduce humidity. For persistent crumbling, revisit your soil mix ratios or try a different binding agent.
Case Study: School Garden Project
A school garden in California used plastic bottle molds to start native wildflowers. Despite initial issues with block crumbling, adjusting the soil mix and moisture solved problems. Students learned about sustainability and plant health, and the project was recognized by California Foundation for Agriculture in the Classroom.
The hands-on project also sparked student interest in recycling and composting, showing how DIY soil blocks can be integrated into broader educational initiatives around sustainability.
Scaling Up: Tips For Large-scale Diy Soil Block Production
For gardeners and farmers looking to propagate hundreds or thousands of seedlings, efficiency and consistency become critical. Here’s how to scale up your DIY soil block operation.
Batch Mixing
- Use wheelbarrows or large tubs for mixing soil.
- Mix in batches to ensure uniform moisture and texture.
- Assign roles: One person mixes, another shapes blocks.
Investing in a sturdy tarp or mixing table can speed up production and reduce strain on your back. For very large batches, a cement mixer (used only for soil, not concrete!) Can be repurposed to blend ingredients thoroughly.
Mass Molding Techniques
- Construct multi-block wooden molds (e.g., 4×4 grid).
- Use large trays for block placement.
- Employ assembly-line methods for speed.
These molds can be built with simple hand tools and are reusable for years. Some growers add a hinged press to create depressions for seeds as part of the molding process, saving time on individual seed planting.
Block Storage And Handling
- Place blocks on mesh trays for air circulation.
- Use racks to maximize space in greenhouses or grow rooms.
- Monitor humidity to prevent drying or collapse.
Mesh trays or greenhouse benches allow excess moisture to drain away, keeping blocks at the optimal dampness for seedling health. Stacking trays vertically increases production capacity in limited spaces.
Automation Options
- Homemade lever or press systems can reduce manual labor.
- Incorporate foot-operated molds for faster block production.
Some resourceful gardeners use hydraulic or mechanical presses to create uniform blocks quickly. While these require initial effort to design and build, they dramatically increase output for market farms or large-scale operations.
Data Table: Scaling Diy Soil Blocks
| Production Scale | DIY Method | Time per 100 Blocks | Labor Required |
|---|---|---|---|
| Small (50-100) | Hand-shaped, single molds | 1 hour | 1 person |
| Medium (500-1000) | Multi-block wooden molds | 2-3 hours | 2-3 people |
| Large (2000+) | Press/lever systems | 4-6 hours | 3-5 people |
Example: Market Farm Efficiency
A market farm in Oregon used custom multi-block wooden molds to produce 5,000 soil blocks weekly. By batching soil mix and employing three-person teams, they cut labor time by 40% compared to hand-shaping. This allowed rapid scaling without the cost of commercial blockers or trays, as highlighted by Oregon Department of Agriculture.
The farm also improved plant uniformity and transplant survival rates, which translated into higher yields and increased profit margins. Their experience demonstrates that even larger operations can embrace DIY techniques for significant benefits.
Best Practices For Healthy Seedlings
Ensuring robust seedlings involves more than block making. Follow these best practices for optimal growth and transplant success.
Watering And Humidity
- Mist blocks regularly; avoid waterlogging.
- Cover trays with clear lids or plastic to retain humidity during germination.
- Bottom water if blocks dry out, but monitor closely.
Watering can be tricky—soil blocks dry faster than pots, especially in warm, dry environments. Using a humidity dome or plastic wrap helps retain moisture during the critical germination phase. Once seedlings emerge, gradually remove the cover to prevent fungal growth.
Light And Temperature
- Place trays in bright, indirect light or under grow lights.
- Maintain temperatures between 65-75°F for most seeds.
- Use heat mats for warmth-loving crops.
Good light is essential for strong, stocky seedlings. Without it, plants may become leggy or weak. Rotate trays daily or use reflective surfaces to ensure even growth.
Fertilization
- Soil mix should contain slow-release nutrients.
- If seedlings pale, apply diluted liquid fertilizer.
As seedlings grow, their nutrient needs increase. Monitor for signs of deficiency (yellowing leaves, slow growth), and supplement as needed with organic or synthetic fertilizers.
Transplanting
- Transplant when roots fill block and seedlings have 2-4 true leaves.
- Handle blocks gently to avoid crumbling.
- Plant directly into beds; no pot removal needed.
Soil blocks minimize root disturbance, making transplanting less stressful for young plants. Water blocks before transplanting to help them hold together and encourage rapid root establishment.
Disease Prevention
- Use clean compost and soil.
- Avoid overwatering and crowding.
- Rotate trays to prevent fungal buildup.
Regularly sanitize trays and tools, and remove any unhealthy seedlings promptly. Good air circulation and spacing reduce the risk of disease outbreaks.
Case Study: Community Greenhouse
A community greenhouse in Chicago used soil blocks for all vegetable starts. By maintaining optimal humidity and light, they achieved a 98% germination rate and reduced damping-off disease by 60%, according to a report in Chicago Botanic Garden.
The greenhouse also noted that the block method made it easier to teach volunteers and students proper seed-starting techniques, emphasizing the value of hands-on, sustainable practices.
Comparing Diy Soil Blocks To Commercial Blockers And Other Methods
How does the DIY approach stack up against commercial soil blockers and other seed-starting systems? Here’s a data-driven comparison.
Cost Analysis
- DIY soil blocks: Cost is minimal, limited to soil ingredients and household molds.
- Commercial blockers: $30–$80 per tool, plus ongoing soil mix costs.
- Plastic trays/pots: $10–$50 per season, plus disposal/replacement.
Over several seasons, the savings from DIY methods can be significant, especially for large-scale growers or community projects.
Performance
- DIY blocks offer similar root health and transplant results as commercial blockers.
- Commercial blockers produce more consistent block sizes, aiding large-scale uniformity.
- Plastic pots/trays underperform in root health, moisture control, and sustainability.
While commercial blockers save time and effort, especially for high-volume operations, the DIY approach is highly adaptable and nearly as effective when attention is paid to technique and materials.
Sustainability
- DIY and commercial soil blocks both eliminate plastic waste.
- Commercial blockers require an initial investment but last for years.
- Plastic pots/trays contribute to landfill and microplastic pollution.
The environmental advantages of soil blocks—whether DIY or commercial—make them a top choice for gardeners committed to sustainable practices.
Table: Method Comparison
| Method | Cost | Root Health | Sustainability | Labor |
|---|---|---|---|---|
| DIY Soil Blocks | Low | Excellent | High | Medium |
| Commercial Blocker | Medium | Excellent | High | Low |
| Plastic Pots/Trays | Medium | Good | Low | Low |
External Resources
For more details on commercial blockers and soil block research, visit Johnny’s Selected Seeds and NCBI Research.
Frequently Asked Questions
What Is The Ideal Soil Mix For Soil Blocks?
The ideal soil mix combines peat moss or coco coir, compost, garden soil , sand or perlite, lime (if using peat), and organic fertilizer. The mix should be moist enough to hold shape but not soggy. Adjust the proportions based on plant needs and local materials.
How Do I Prevent My Soil Blocks From Crumbling?
Ensure the soil mix is adequately moist and contains enough binding agents like peat or coco coir. Pack the soil firmly in the mold and avoid moving blocks until they’ve set. If blocks are still crumbly, increase moisture or add more peat/coir.
Can I Use Soil Blocks For All Types Of Seeds?
Most vegetables, herbs, and flowers thrive in soil blocks. However, very small seeds may need finer soil mixes or surface sowing. Large seeds can be planted deeper. Experiment with different block sizes and recipes for best results.
How Do I Water Soil Blocks Without Causing Collapse?
Mist blocks gently with a spray bottle to maintain moisture. Alternatively, bottom-water trays so blocks absorb water from below. Avoid flooding or overwatering, which can cause blocks to fall apart.
Are Soil Blocks More Sustainable Than Plastic Pots?
Yes. Soil blocks eliminate the need for single-use plastic pots and trays, reducing environmental impact. They also support healthier root systems and minimize transplant shock, making them a preferred choice for sustainable gardeners.
After exploring the DIY method for soil blocks, it’s clear that gardeners of all skill levels can craft effective, eco-friendly seed-starting cubes using materials at hand. By understanding the science, mastering soil mixes, and applying practical molding techniques, you can enjoy robust seedlings, reduce plastic waste, and contribute to a more sustainable gardening future.
Embrace experimentation, adapt to your needs, and share your successes—soil blocks are a transformative tool for gardeners everywhere.