How to Troubleshoot a Sprinkler Zone That Will Not Turn on
To troubleshoot a sprinkler zone that will not turn on, start with the controller, then check the field wire and common wire, then the solenoid, then the manual bleed and diaphragm, then water pressure and head coverage. Stop at the first confirmed fault instead of replacing parts. Skipping steps wastes time, can damage valves and controllers, and may leave turf dry long enough to stress roots. This guide follows that order with checks you can do at home.
Start with the controller


Begin here because a dead zone can come from a programming mistake, a failed terminal output, or a bad timer before anything in the yard is at fault. Most residential systems contain 4 to 8 zones, so one bad station is common enough to justify a careful check. If every other zone works, do not skip the controller just because the problem looks local.
Check zone programming and active schedules
Verify that the affected station has a run time, is not skipped by a seasonal adjustment, and is not disabled by an odd program copy. A zone that misses its schedule can point to programming or sensor input, not the valve. If the controller has more than one program, confirm the station belongs to the active one.
Confirm manual zone activation and terminal output
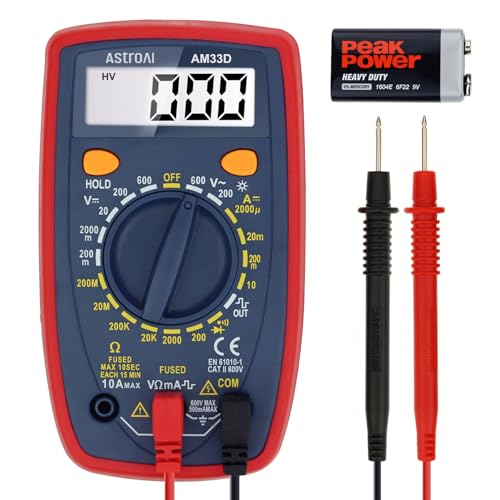
Use manual zone activation first. If the controller starts the station on demand but not on schedule, the problem often sits in programming, sensor input, or schedule logic rather than the valve. If it will not start manually either, test the controller output with a multimeter before moving to the yard.
Look for controller or timer faults
A controller can fail at the zone terminal, at the common terminal, or inside the timer itself. Standard 24 VAC solenoid systems require a signal between 22 and 28 VAC, so a reading outside that range points to a controller output problem or a wiring issue, not a healthy valve. Check the common wire terminal as well as the zone terminal. Stop here if the controller output is not in range.
What you need before testing
Bring a multimeter, a screwdriver for the valve box, and a clear way to shut off water if a valve sticks open. Zone troubleshooting checks the controller output, field wiring, solenoid valve operation, lateral piping, and heads. Have the right tools ready before you open a box or loosen a wire nut.
Multimeter setup for voltage, ohms, and continuity
Set the meter to AC volts for live controller output, then to ohms for solenoid resistance, and to continuity for wire checks if your meter has that mode. A healthy solenoid reads approximately 20–60 ohms. An open circuit means infinite resistance, and a short circuit shows near-zero resistance. Stop here if the coil reading is open or near-zero.
Valve box access and basic safety checks
Open the valve box carefully and keep dirt out of the wiring splice area. If water is running unexpectedly, know where the main shutoff is before you touch the valve body. Do not pull on buried wire or yank a solenoid lead free unless you are ready to reconnect it correctly.
What to record before you change anything
Write down the station number, what the controller display shows, whether manual start works, and whether any heads move at all. Note if the zone is dead, weak, or stuck on. A common first-timer mistake is replacing the valve before confirming whether the controller is sending 24 VAC.
How do you tell if the problem is wiring or the valve?
Test the solenoid circuit with a multimeter first, because wire faults and coil faults can look similar from the controller. A good 24 VAC signal at the controller does not prove the valve is good, and a bad resistance reading at the solenoid does not prove the wire is intact. Test them separately and stop if the fault appears at this stage.
Test the solenoid circuit with a multimeter
- Shut off the station. Make sure the controller is idle so the meter reads the coil, not live output. Disconnect one solenoid lead if needed so the coil is isolated from the rest of the circuit.
- Measure coil resistance. Put the meter on ohms and read across the two solenoid leads. A healthy coil is typically 20–60 ohms; infinite resistance points to an open coil, while near-zero resistance points to a shorted coil.
- Check live voltage. Put the meter on AC volts and command the zone on at the controller. A reading between 22 and 28 VAC is the expected range for standard 24 VAC solenoid systems.
If the coil resistance is good but the controller output is not in range, the problem is upstream. If the controller output is correct but the coil reads open, the solenoid is likely failed. Stop here if the electrical readings do not match the expected range.
Check field wire continuity for opens and shorts
- Isolate the circuit. Disconnect the zone wire and common wire from the controller and from the valve side if needed. This keeps other stations from affecting the reading.
- Test for continuity. Measure continuity across the field wire path. A buried wire break often shows as an open circuit, which on an ohms test appears as very high or effectively infinite resistance.
- Look for shorts. Check zone wire to common wire and each conductor to ground if your meter supports it. A short circuit shows near-zero resistance and can prevent the zone from energizing correctly.
If the station works after a temporary bypass with a known good wire path, the buried wire is the likely fault. Stop here if continuity fails, because buried wire repairs can require locating the open before any trench work begins.
Suppose a zone reads 26 VAC at the controller but never opens the valve. That points away from the timer and toward the solenoid, wire splice, or coil circuit. If the same zone still fails after a coil swap, the buried wire or valve body deserves a closer look.
Use the manual bleed screw to isolate the fault
The manual bleed screw separates electrical faults from hydraulic ones. If the valve opens with manual bleed but not with a signal from the controller, the solenoid or wiring is suspect. If it still will not open, the valve body, diaphragm, or water supply may be the issue. Stop here if manual bleed does not produce flow.
Manual flow that starts the zone
Open the manual bleed screw slowly and watch the heads. If water flows and the zone starts, the valve diaphragm can move and the downstream piping likely has water. That result shifts attention to the solenoid, coil circuit, or controller signal rather than the pipe itself.
Valve that sticks open after shutdown
If the zone will not shut off after closing the bleed screw or after the controller stops the station, debris may be lodged in the valve diaphragm or the diaphragm may be damaged. A stuck-open valve can waste a substantial amount of water overnight if undetected. Shut the water off at the main if needed.
Diaphragm debris versus failed solenoid coil
A solenoid can fail closed and prevent the valve from opening even when the diaphragm is fine. A diaphragm can also stick open because grit sits under the seal or because the assembly is worn. Cleaning the diaphragm and replacing the diaphragm assembly can fix a stuck valve without replacing the whole valve body. Stop here if cleaning and reassembly restore normal shutoff.
Picture a valve that hums at the box but no heads rise. If manual bleed opens the zone right away, the valve body can pass water and the electrical side is the better suspect. If manual bleed does nothing, do not keep swapping solenoids before checking pressure and the diaphragm.
Why does a sprinkler zone run out of schedule?
A zone that turns on when it should not, or that runs when another zone is active, often points to controller settings, sensor input, or wiring faults. Rain or freeze sensors can keep a zone off if they are stuck closed, while cross-talk or shared wiring can make one station behave like another. Start at the controller before blaming the valve.
Rain or freeze sensor stuck closed
Check whether the sensor is telling the controller to block watering. A stuck closed sensor can stop a programmed cycle or make the station act inconsistently across schedules. If the controller has a sensor bypass, use it only as a test, then restore the normal setting.
Controller settings that override zone timing
Review start times, seasonal adjust, odd or even day rules, and any rain delay function. A station that looks dead may simply be set to zero run time or excluded by a custom schedule. Confirm manual start still works after those settings are corrected.
Cross-talk between stations and common wiring issues
If one zone runs when another is on, look for a shared common wire fault, a miswired terminal, or water intrusion in a splice. Commercial and HOA properties routinely operate 12 to 30 or more zones, so wiring errors can hide in crowded cabinets. Verify each station wire lands on its own terminal.
Zone pressure and head problems
Once the controller, solenoid, and valve pass their checks, move downstream. Residential drip and rotor systems typically require 25–45 PSI at operating heads, so weak spray can be a pressure or piping issue rather than an electrical one. Head behavior often tells you where the problem starts. Stop here if pressure or coverage is clearly off.
Weak spray and low pressure at the first head
If the first head in the zone has weak spray, pressure may be low before water reaches the rest of the lateral line. That can point to pipe damage, a clogged line, a partially closed valve, or a zone length that exceeds what the system can supply well. Check dynamic pressure at the first head if you have the right gauge.
Some heads work and others do not
If some heads pop up and others do not, inspect arc consistency, radius, pop-up height, and obvious clogging or tilt. A clogged nozzle or low pop-up can make one head look dead even when the zone has enough pressure for the others. Compare the first head with the last head in the run.
Lateral piping limits and visible pipe damage
Cracked pipe, root intrusion, or a long lateral run can reduce pressure enough to leave part of the zone weak. If the heads near the valve work and the far heads do not, look for a pressure loss pattern along the lateral line. A damaged pipe can masquerade as a bad valve for a long time.
Sprinkler zone troubleshooting table
| Symptom | Test | Expected result | Likely fault | Next action |
|---|---|---|---|---|
| No zone activation | Start the station manually and measure controller output | Controller sends 22–28 VAC and the station starts | Controller output fault or programming error | Fix schedule or replace controller if output stays out of range |
| Manual works but electric does not | Use manual bleed, then compare to scheduled start | Valve opens with bleed and not with automation | Solenoid circuit, field wire, or controller timing fault | Test coil resistance and wire continuity |
| Zone will not shut off | Close the bleed screw and observe the valve | Flow stops after the controller is off and the bleed screw is closed | Debris under diaphragm, damaged diaphragm, or solenoid that is not closing | Clean or replace diaphragm assembly; shut off water if needed |
| Some heads work and others do not | Walk the zone and compare heads for spray and pop-up height | Similar arc and radius across the run | Clogged or tilted heads, local pipe restriction | Clean heads and inspect the lateral line |
| Zone runs out of schedule | Check sensor input and schedule settings | Station runs only when programmed | Rain or freeze sensor stuck closed, controller programming fault | Bypass the sensor for a test and correct settings |
| Weak spray | Check pressure at operating heads | 25–45 PSI for typical residential rotor and drip systems | Low supply pressure, pipe loss, or zone length issue | Inspect for leaks, restrictions, or undersized zone design |
| Low pressure at first head | Observe the first head when the zone starts | Strong spray at the first head and normal carry to the rest of the zone | Valve restriction, damaged lateral, upstream blockage | Check valve passage, then inspect the line |
| Suspected wiring break | Test continuity across zone and common wires | Continuity present, no open circuit | Buried wire break or bad splice | Locate the open, then repair the splice or cable |
Frequently asked questions
Why would one sprinkler zone not turn on?
One zone can fail while others still work because the fault sits on that station’s path only. The usual chain is controller output, field wire, solenoid, valve diaphragm, then pressure or head problems. Testing in that order keeps you from replacing a good part before confirming the bad one.
How do I know if the sprinkler controller is bad?
A controller is suspect if the station has no manual start, the terminal output is outside 22–28 VAC, or the same problem follows the controller settings rather than the valve hardware. Check programming first. If the timer powers other zones normally but not one output, the station output may have failed.
How do I test a sprinkler solenoid with a multimeter?
Disconnect the solenoid leads, set the meter to ohms, and measure across the coil. A healthy solenoid reads approximately 20–60 ohms. Infinite resistance means an open coil, and near-zero resistance means a short. Then check for 22–28 VAC at the controller when the zone is commanded on.
What voltage should a sprinkler valve get?
Standard 24 VAC solenoid systems require a signal between 22 and 28 VAC. If the controller sends less than that, the valve may not open reliably even if the coil is fine. If the voltage is correct at the controller but not at the valve, suspect a wire break, bad splice, or terminal issue.
When should I call a sprinkler repair professional?
Call for help if buried wire repair needs locating and trenching, if the valve leaks internally after diaphragm cleaning, if multiple zones fail at once, or if pressure problems suggest a supply or mainline issue. A technician is also a good choice when the controller output is wrong and replacement parts are not obvious.