How to Connect Irrigation Lines to a Rain Sensor
Connect a rain sensor only if your controller has a rain-sensor input or a bypass jumper. Wire the sensor’s two leads to those terminals, then confirm it stops watering. If compatibility is wrong or the wires land on the wrong posts, the controller may water in rain or fail to start. This guide covers the terminal check, the wiring path, and a quick pause test before you trust the schedule.
What you’ll need


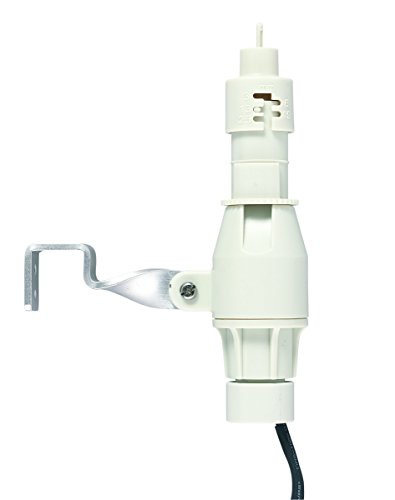
- Rain sensor or rain/freeze sensor
- Compatible wireless receiver kit, if your controller has no direct sensor input
- Small screwdriver
- Wire strippers
- Waterproof wire connectors
- Controller manual
- App login for a smart irrigation platform, if the controller uses cloud setup
Does your controller have a sensor terminal?
Start here. If the controller has a rain-sensor terminal or sensor input, you can usually wire a sensor directly. If it does not, use a wireless receiver path or a smart-controller app integration. On many systems, that input stops automatic watering when the sensor opens or closes the circuit.
Check the input type
Open the controller manual and look for sensor, rain sensor, or closed-circuit timer language. Wired rain sensors work with closed-circuit timers, while some controllers need a bypass jumper removed before the sensor can take control. If the terminal block has no sensor input, direct wiring is the wrong path.
Say your controller has a labeled sensor terminal and a factory jumper between two posts. That usually means the sensor circuit is meant to interrupt watering until the jumper comes out and the sensor leads replace it. If the manual does not mention that jumper, stop and confirm the terminal map first.
Which connection path fits your system?
The right path depends on the controller, not on the sensor box. A direct wired sensor fits a controller with a rain-sensor terminal. A wireless sensor needs a receiver or module. A smart controller may use app or cloud setup instead of a hardwired sensor input. Pick one path and follow only that method.
| Controller type | Best install path | What to check | What you should expect |
|---|---|---|---|
| Standard controller with sensor input | Direct wired connection to the rain-sensor terminal | Closed-circuit input, jumper removal, terminal labels | Automatic watering pauses when the sensor trips |
| Controller without sensor input | Wireless sensor paired through a receiver or module | Receiver power, pairing steps, controller input on the module | Receiver interrupts the controller signal when rain is detected |
| Smart controller | App or cloud integration | Account setup, device pairing, supported sensor model | Automation skips watering when rain is detected |
Pick the right sensor style
Rain-only models stop irrigation during wet weather. Rain/freeze models add freeze protection, and some are set to stop startup at 37°F or below. Flat and gutter mounting are both common, so choose the mounting style that fits the roofline or a level outdoor surface near the controller wiring path.
How do you wire or pair the sensor?
Mount the sensor first, then connect or pair it. For a wired model, run the two sensor leads to the controller’s sensor input and tighten the terminals firmly. For a wireless kit, pair the transmitter and receiver before you expect any pause function. Then enable rain-sensor pause or skip-watering in the controller menu.
Mount the sensor correctly
- Place a flat-mount sensor on a level, outdoor surface with clear exposure to rainfall.
- Use gutter mounting only where the sensor can catch rainfall without roof runoff blocking the opening.
- Keep the sensor away from sprinkler spray, tree drip, and overhangs that can alter its response.
Wire or pair it
- Turn off power at the controller.
- Remove the jumper from the sensor input, if the manual calls for one.
- Attach the two sensor wires to the rain-sensor terminal.
- If the kit is wireless, pair the transmitter to the receiver using the kit’s pairing button or sequence.
- Restore power and enable the rain delay, sensor pause, or skip-watering option in the menu or app.
Suppose a homeowner has a controller with six sprinkler zones and one drip zone. A properly wired sensor should stop the schedule for all programmed watering unless the manual says manual watering can bypass the sensor. That difference matters, because manual runs and automatic runs do not always behave the same way.
Rain sensor checklist
Compatibility checklist: controller type to install path
| Check | Yes | No | What to do next |
|---|---|---|---|
| Controller has a rain-sensor terminal | Direct wired path | Use receiver or smart integration | Open the manual and locate the sensor input |
| Controller is a closed-circuit timer | Wired sensor fits | Check for module or app support | Wire the sensor into the input circuit |
| Controller has no sensor terminal | Receiver path | Direct wire is not the right path | Install the universal receiver kit |
| Controller uses app or cloud control | Smart integration path | Local wiring may not be needed | Sign in and add the rain sensor in the app |
| You need freeze protection | Choose a rain/freeze model | Rain-only model may be enough | Check the low-temperature cutoff in the manual |
Troubleshooting table: symptom, likely cause, fix
| Symptom | Likely cause | Fix |
|---|---|---|
| Controller keeps watering after rain | Sensor is not on the correct terminal | Move the leads to the rain-sensor input and remove any bypass jumper |
| Controller will not start any automatic program | Open circuit, loose wire, or bad receiver pairing | Re-seat the terminals, check the pairing, and confirm the sensor is dry enough to release |
| Wireless kit does nothing | Receiver not paired or out of range | Repeat the pairing steps and move the receiver closer if the kit allows it |
| Only some zones run | Zone program settings differ or manual run bypasses the sensor | Check each schedule in the controller menu and test automatic mode, not just manual watering |
5-step post-install test sequence
- Set about one short automatic run for a sprinkler zone and one drip zone, if both exist.
- Confirm the controller is in automatic mode, not manual start mode.
- Trigger the sensor with water only as directed by the manufacturer or wait for a dry, natural release after installation.
- Run the schedule again and verify the controller skips the start or stops the active cycle.
- Reset the sensor, then confirm normal watering resumes on the next scheduled run.
Common first-timer mistake is testing only one zone. If a sprinkler zone pauses but a drip program still runs, the controller may be set to pause only part of the schedule. Check every active program before you assume the sensor is working for the whole system.
Keep the sensor clean and mounted where it can read weather, not runoff or sprinkler spray. A clogged or poorly placed sensor can delay release and block watering longer than intended.
Common mistakes
Wiring to the wrong terminal is the most common failure. Leaving the factory jumper in place can block sensor control, while wiring into a zone terminal can create unpredictable behavior. If the controller has no sensor input, do not force a direct wire connection.
Wireless kits fail when the receiver is skipped or not paired. Another common miss is assuming the controller pauses every zone the same way. Some systems stop automatic schedules but still allow manual watering. Test both paths if the manual offers that option.
For cold climates, do not assume every sensor has freeze protection. Rain/freeze models are the ones to check for 37°F or below behavior. Rain-only sensors do not add that function.
Frequently asked questions
How do I connect a rain sensor to my irrigation controller?
Turn off power, locate the rain-sensor input, remove any jumper the manual specifies, and connect the sensor’s two wires to that terminal pair. Then turn the controller back on and run an automatic test. If the schedule still runs, recheck the input type and the terminal labels.
Does a rain sensor need to be wired to a specific terminal?
Yes, if the controller uses a direct wired sensor. The sensor should go to the rain-sensor or sensor input, not to a zone terminal or pump output. A closed-circuit timer typically expects the sensor to interrupt that specific loop, so the manual’s terminal map matters.
Will a wireless rain sensor work with my current sprinkler system?
It can, if the system uses a wireless receiver or module that matches the controller path. K-Rain says its wireless rain sensor kit uses a universal receiver, but pairing and range still matter. Without the receiver, a wireless transmitter has nothing to talk to.
How do I know if my controller is compatible with a rain sensor?
Check for a sensor input in the manual or on the terminal strip, then look for closed-circuit support or smart integration. If the controller is listed by the platform, such as Pro-HC or HCC on Hydrawise-supported models, the sensor path may be app-based instead of hardwired.
Can I add a rain sensor to an existing irrigation system?
Yes. Existing systems can usually take a sensor if the controller has a sensor terminal, a receiver option, or a smart platform that accepts one. Greenway says sensors can be added to an existing system, so the decision is mostly about the controller path, not the age of the piping.
What happens when the rain sensor detects rain or freezing temperatures?
The controller stops automatic watering while the sensor is active. The same source says rain sensors can stop watering during rain and/or freeze periods, and some rain/freeze models stop startup at 37°F or below. That pause can apply to sprinkler zones, drip zones, or the whole schedule depending on the controller.
Do rain sensors work with smart irrigation controllers?
Yes, if the platform supports them. Hydrawise supports rain sensors connected to the controller and gives automation for skipping watering when it rains. That setup usually depends on app or cloud account access, so the sensor may be configured in software instead of on the terminal strip.
How do I test whether the rain sensor is actually pausing watering?
Set a short automatic cycle, trigger the sensor or wait for its release point, and confirm the controller skips the run. Then reset the sensor and confirm the next schedule starts normally. If the controller still waters, recheck the jumper, receiver pairing, and sensor menu setting.