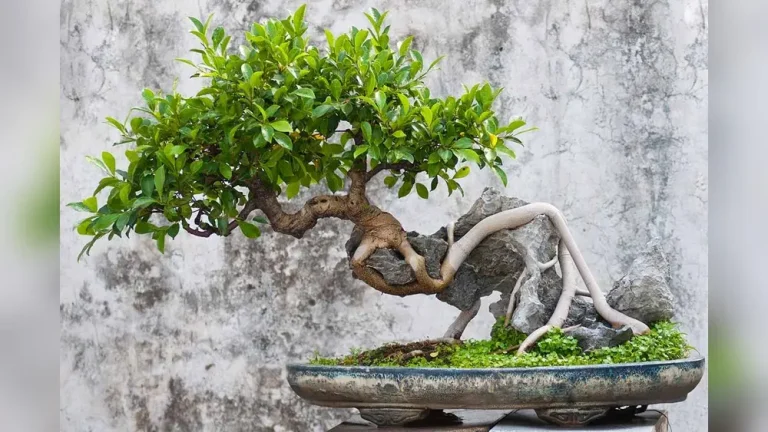
How to Repot a Bonsai Tree Without Killing It Safely
Repot a bonsai in early spring as buds begin to swell. Trim no more than one-third of the roots, use a shallow pot with fast-draining soil, and anchor the trunk firmly. Bad timing or heavy root loss can stall growth, weaken recovery, and kill fine feeder roots. I use this timing because roots rebound faster when top growth has not started hard yet. This guide shows how to judge timing, choose the right pot and soil, prune roots safely, secure the tree, and handle aftercare.
This guide is part of our Bonsai tree care guide series.
When should you repot a bonsai tree?

The best time is usually early spring, just as buds swell and before strong top growth starts. That timing gives roots a warm recovery window, which is why repotting can be done in spring for quicker recovery. Root rot is the exception: if the root system is failing, repot immediately instead of waiting for the ideal season.
Repotting is not a bigger-pot upgrade. For bonsai, the goal is root-health reset and stability, not extra room for unchecked growth. A tree may stay in the same pot, move into a slightly larger one, or receive a fresh root trim in the same shallow container if the style and root mass still fit.
Signs the roots are outgrowing the pot
A bonsai usually needs routine repotting when water runs through too fast, the root ball lifts as a dense mat, or the tree seems to dry unevenly even after soaking. Roots circling the inside of the pot, a hard root mass that resists water entry, and slowed extension growth are common signs.
When indoor tropical bonsai follow a different schedule
Indoor tropical bonsai often follow their own timing because they are not tied to outdoor bud break. Stable warmth matters more than calendar date. A ficus retusa bonsai dislikes drafts and cold water, so repotting should happen only when the tree is warm, active, and protected from stress. Portulacaria afra bonsai needs almost no watering, so its aftercare must be especially careful.
Outdoor temperate bonsai usually wait for early spring. Indoor tropicals can be repotted when growth is active and room temperatures stay steady. If a tree is weak, yellowing, or recovering from another stress, wait unless the root system is collapsing.
When root rot means you should repot sooner
Root rot changes the rules. If roots smell sour, feel mushy, or break apart easily, repot immediately and remove failing tissue. That is not cosmetic work. It is an emergency response to save healthy roots before decay spreads through the root ball.
How much roots can you remove safely?

Safe root removal depends on tree vigor, age, and species response. A vigorous tree can tolerate more root reduction than a slow grower or a recently stressed specimen. For routine repotting, keep pruning selective. For emergency root rot cleanup, remove only dead and failing roots, then stop before the root system is stripped bare.
Routine repotting versus emergency root work
Routine repotting usually means teasing apart circling roots, thinning the mat, and removing a modest amount of older roots so fresh feeder roots can develop. Emergency work is different. If rot is present, cut back to firm tissue and clean the remaining roots carefully, even if that leaves a smaller mass than usual.
For a healthy tree, avoid removing too much of the root mass at once; around one-third or less is a cautious limit. For a weak tree, reduce less. For a slow grower, keep the cuts conservative. For a sensitive species, treat the root ball like a reserve tank, not disposable material.
What to do with thick roots and fine feeder roots
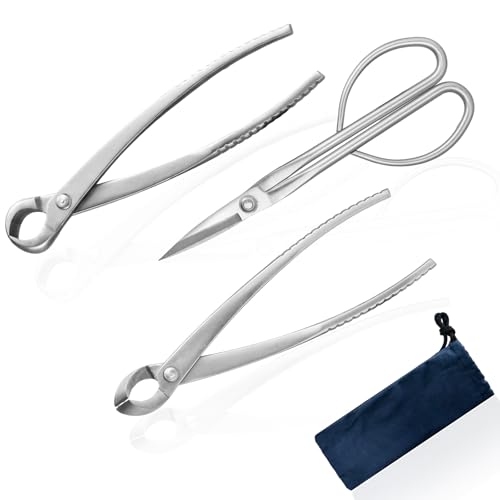
Use clean, sanitized bonsai shears for thick roots. That gives a clean cut and reduces ragged tissue that can rot. A root rake or chopstick is for loosening circling roots and reducing matting, not for ripping through the root ball.
Fine feeder roots do most of the work after repotting. They should be preserved whenever possible. If a thick root blocks the tree from fitting in the pot or forces an ugly bend, shorten it. If a fine root is healthy and flexible, keep it.
When to stop and wait instead
Stop if the root mass is already sparse, the tree was recently stressed, or the species is known for slow recovery. Waiting is safer than forcing a dramatic reduction on a tired tree. A bonsai can sit another season if the root system is still functioning and the soil has not failed.

What pot and soil should you use?

Use a pot with drainage holes, a stable size match to the root mass, and a soil mix that drains fast while holding enough air around the roots. For bonsai, the pot choice affects both health and style. The tree may stay in the same training pot or move only slightly larger, depending on root mass and design. (wikihow.com)
Training pot, slightly larger pot, or same pot
A shallow training pot is common when the goal is root control and branch development. A slightly larger container can help a newly repotted tree recover if the root mass has increased and the tree needs more buffer. The standard shift is modest: choose a pot 1 to 2 inches larger in diameter and depth when a change is needed.
The same pot is often right when the tree already fits the design and only the root pad needs renewal. Oversized pots are poor bonsai choices because they slow drying and encourage roots to grow beyond the scale of the tree.
Drainage holes, screen, and why the pot must stay stable
Drainage holes are necessary to prevent water from sitting in the pot. Cover those holes with drainage screen or mesh so the soil stays in place while excess water can drain freely. Then anchor the tree through the drainage holes with wire or ties. Movement in the pot can tear new roots before they re-establish.
Ceramic, terra cotta, and plastic differences
Ceramic pots are heavier and often better for display or for trees that need visual stability. Terra cotta dries faster and can suit trees that dislike wet feet. Plastic is lighter and useful for training or for trees that need extra moisture retention during recovery.
| Pot material | Moisture behavior | Best use | Stability |
|---|---|---|---|
| Ceramic | Moderate drying | Display and stable training | High |
| Terra cotta | Faster drying | Trees that need more airflow at the root zone | Moderate |
| Plastic | Slower drying | Training and recovery when moisture must be watched closely | Moderate to high, depending on pot shape |
Bonsai soil mix, particle size, and pre-wetting
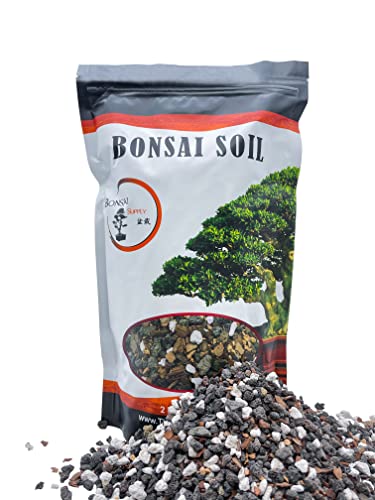
Use a bonsai soil mix with a fast-draining structure and particles that leave air space around roots. That is the main difference from generic houseplant potting mix. Roots need oxygen after repotting, and compact soil cuts off that air supply.
Pre-wet dry mix before use when dust would otherwise fill the gaps or when the particles repel water at first. Dry handling is fine for some mixes during dry fitting and layout, but the finished pot should be watered thoroughly so the mix settles around the roots without packing hard.
The bonsai repotting checklist: routine, emergency, or wait
Classify the tree before touching the roots. Routine repot means the tree is healthy, rootbound, or due for soil refresh. Emergency repot means root rot or severe failure. Wait means the tree is too weak, recently stressed, or still functioning well enough to postpone work. The classification determines how much root pruning, light, watering, and recovery time are appropriate.
- Routine repot: healthy tree, crowded roots, old soil breaking down, firm root ball
- Emergency repot: sour smell, mushy roots, standing moisture, root rot
- Wait: weak growth, recent stress, sparse roots, sensitive species not ready
Routine repot
Use selective root pruning and remove only enough to refresh the structure. Keep the tree in bright shade or reduced direct sun for a short recovery period. Water when the mix starts to dry, not on a fixed schedule. Recovery is often measured in weeks rather than days.
Emergency repot
Cut back to firm, healthy tissue and remove decayed roots immediately. Reduce root work to what is needed to save the tree, then keep light low, wind low, and watering careful. Recovery may take longer because the tree has already lost functional roots.
Wait
If the tree is weak but not failing, hold off. Keep the current pot stable, monitor moisture, and repot only when growth returns. A postponed repot is often safer than forcing a weak bonsai through root loss it cannot support.
Species notes for fast growers, slow growers, and sensitive trees
Fast growers usually recover faster and can handle more routine root reduction. Slow growers need lighter cuts and longer patience. Indoor tropical bonsai often recover differently from outdoor temperate bonsai because they are less tied to seasonal bud break. Sensitive species need gentler handling, especially if the root ball is already compacted.
How do you repot the tree step by step?
Repot a bonsai by preparing the pot, protecting the drainage holes, loosening the root ball, pruning only what is needed, and anchoring the tree so it cannot move. The process is fast once the tree is out of the pot. The main mistake is rushing and breaking fine roots during handling.
- Prepare the new or cleaned pot with drainage screen or mesh over the holes.
- Thread wiring or ties through the drainage holes before the tree goes in.
- Remove the tree from the old pot and gently tease apart circling roots with a root rake or chopstick.
- Trim thick, damaged, or overly long roots with sanitized bonsai shears.
- Set the tree at the same planting depth, or slightly higher if the surface roots need more room.
- Backfill with pre-wetted bonsai soil mix, working it into gaps with a chopstick.
- Anchor the trunk firmly so the tree does not wobble.
- Water thoroughly until the mix is settled and excess water drains away.
Preparing and cleaning the pot
Clean out old soil and salt buildup before reuse. Check that the pot is stable, the drainage holes are open, and the screen sits flat. A good repot starts with a pot that drains and holds the tree without shifting.
Removing the tree and loosening the root ball
Slide the root mass free with care. If the roots are dense, work from the edges inward. Do not tear the center open unless it is a rot cleanup. The goal is to open the mass enough for fresh soil to contact the roots.
Backfilling, anchoring, and watering correctly
Hold the tree steady while soil is added. Tie it down through the drainage holes so the trunk does not rock. Water until the whole root zone is wet and the fines settle. If the mix sinks, top up the surface and water again lightly.
How do you prevent transplant shock after repotting?
Prevent transplant shock by lowering light and wind, watering with more caution than usual, and pausing fertilizer until the tree shows new growth or clear recovery. After repotting, the root system is smaller and more fragile. The tree needs stability, not a push to grow before it can absorb water reliably.
Light, wind, and temperature control
Move the bonsai out of harsh sun and strong wind for the first recovery period. Reduced light lowers water demand while roots rebuild. Outdoor temperate bonsai often do well in bright shade. Indoor tropical bonsai should stay away from drafts and sudden temperature swings.
How watering changes after repotting
Water thoroughly at the time of repotting, then adjust to the new drying rate of the mix. Overwatering a freshly repotted bonsai is a common mistake. The pot must drain well, but the root zone should not stay soggy. Check the top layer and the pot weight before watering again.
When to wait before fertilizing
Avoid fertilizing right after a major root reduction or an emergency repot. Fertilizer is for active roots, and fresh cuts need time first. Wait until the tree shows recovery growth or solid root function. A weak tree cannot use a feeding program effectively and may be stressed further by it.
What recovery looks like over the next few weeks
Some temporary slowdown is normal. Leaves may hold steady, new growth may pause, and the tree may look less eager than before. That is not always failure. If the foliage stays turgid, the soil drains properly, and the pot remains stable, the repot is usually on track.
Frequently asked questions
How do I repot a bonsai tree without killing it?
Repot in early spring for most outdoor temperate bonsai, use a shallow pot with drainage holes, keep root pruning conservative, and anchor the tree so it cannot move. The main risks are root loss, poor drainage, and bad aftercare. Gentle handling and stable recovery conditions matter more than speed.
When is the best time to repot a bonsai tree?
Early spring is usually best because buds swell as roots begin active growth, which supports faster recovery. Indoor tropical bonsai can follow a warmer, growth-driven schedule instead. If root rot is present, timing changes immediately and the tree should be repotted at once.
How often should a bonsai be repotted?
There is no single fixed bonsai repotting schedule. Some trees need routine repotting more often when young or fast-growing, while mature trees can go longer between sessions. The real trigger is root mass, soil breakdown, and drainage, not a strict yearly cycle.
What pot size should I use when repotting a bonsai?
Use a pot that fits the root mass and the design, often only 1 to 2 inches larger in diameter and depth when a larger pot is needed. Many bonsai stay in the same shallow training pot. Oversized pots usually work against bonsai scale and root control.
How much roots should I prune when repotting bonsai?
For a healthy routine repot, keep root pruning selective and conservative, with no more than one-third removed. For emergency rot cleanup, remove dead and failing roots only until firm tissue remains. Slow growers and sensitive species should receive lighter cuts and a longer recovery window.
Should I repot a bonsai if I suspect root rot?
Yes. Root rot is an emergency case, not a normal repotting cycle. Remove the tree, cut away mushy or sour roots, replace the failing soil, and reset the pot with free drainage and firm anchoring. The sooner the rot is addressed, the better the chance of saving healthy roots.