How to Plant Grass Seed Without Tilling Your Lawn
Transforming a patchy or tired lawn into a lush green carpet is a goal for many homeowners, but the traditional approach of tilling can be disruptive, costly, and time-consuming. Fortunately, planting grass seed without tilling—often called overseeding—offers a less invasive alternative. Whether you want to fill in bare spots, rejuvenate an aging lawn, or establish new grass without destroying your existing turf, this method is both effective and environmentally friendly.
Recent trends in sustainable landscaping emphasize soil health and minimal disturbance, making no-till seeding more popular than ever. According to the National Association of Landscape Professionals, over 60% of homeowners now seek eco-friendly lawn solutions. With the right tools, preparation, and timing, you can achieve a stunning lawn without ever picking up a rototiller. This comprehensive guide will walk you through every step, backed by expert insights, case studies, and actionable tips to ensure your grass seed thrives.
Key Takeaways
- No-till seeding preserves soil structure, reduces erosion, and saves time compared to traditional tilling.
- Preparation is crucial: Remove debris, mow low, and address weeds for optimal seed-to-soil contact.
- Selecting the right grass seed for your region and lawn conditions greatly impacts success.
- Proper watering, fertilization, and aftercare are essential for seed germination and robust growth.
- Common challenges like birds, weeds, and uneven germination can be managed with targeted strategies.
- Overseeding is suitable for both lawn repair and complete renovation, supporting sustainable lawn care.
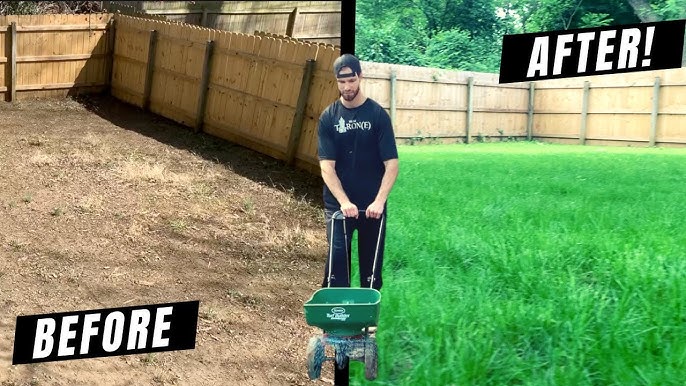
Credit: www.youtube.com
Understanding The No-till Lawn Seeding Method
Planting grass seed without tilling isn’t just about scattering seed and hoping for the best. It’s a systematic process designed to maximize seed-to-soil contact while minimizing disturbance to your existing lawn ecosystem.
What Is No-till Lawn Seeding?
No-till lawn seeding (or overseeding) involves sowing grass seed directly onto the soil surface, often through the existing turf. This approach avoids mechanical tilling, which can disrupt beneficial soil microbes, expose weed seeds, and contribute to soil compaction or erosion.
Benefits include:
- Preserving soil structure: Maintains natural layers and beneficial organisms, supporting long-term lawn health and resiliency.
- Reducing erosion: Soil remains anchored by existing roots, which is especially important on sloped sites or areas prone to runoff.
- Saving time and labor: Eliminates heavy machinery and extensive prep work, making the process accessible even for DIYers.
- Environmentally friendly: Supports organic matter and reduces carbon footprint, aligning with the principles of regenerative landscaping.
By working with nature instead of against it, no-till seeding fosters a more balanced ecosystem in your yard, encouraging diverse soil microbes and beneficial insects that help naturally suppress pests and diseases.
How No-till Seeding Compares To Traditional Tilling
Let’s compare key aspects of both methods:
| Aspect | No-Till Seeding | Traditional Tilling |
|---|---|---|
| Soil Disturbance | Minimal | High |
| Setup Time | Short | Long |
| Equipment Needed | Lawn mower, rake, spreader | Tiller, mower, spreader |
| Soil Health | Preserved | Disrupted |
| Cost | Low | Medium/High |
Tilling can expose dormant weed seeds, which may result in a flush of unwanted plants after seeding. No-till methods help maintain weed suppression by leaving soil layers undisturbed. Additionally, tilling can lead to soil compaction beneath the tilled layer (a phenomenon known as “plow pan”), which can stunt root growth and reduce water infiltration over time.
When To Use No-till Seeding
This method is ideal for:
- Reviving thinning lawns where healthy grass is still present but needs thickening.
- Repairing bare spots caused by pet activity, foot traffic, or minor disease/insect damage.
- Establishing new lawns on lightly vegetated or bare soil where the underlying soil is in good condition but lacks a dense turf cover.
- Eco-conscious homeowners who want to avoid soil disturbance, minimize chemical inputs, and support pollinators and soil life.
No-till seeding is also well suited for rental properties or public spaces where minimizing disruption and downtime is a priority.
Limitations Of No-till Seeding
While effective for most lawns, no-till seeding may not be suitable for:
- Severely compacted soils (aeration may be needed for roots and water to penetrate).
- Lawns overrun with invasive weeds that would crowd out new seedlings; these situations may require more aggressive renovation.
- Areas with heavy thatch layers (>0.5 inches), as seeds may not reach the soil and fail to germinate.
In these cases, extra preparation such as dethatching or core aeration is recommended. For lawns that have suffered from years of neglect, chemical spills, or construction compaction, a combination of soil improvement strategies may be needed before overseeding.

Credit: lawnsynergy.com
Preparing Your Lawn For No-till Seeding
Proper preparation is the foundation for successful grass seed germination and establishment. Skipping or rushing this stage can lead to disappointing results and wasted seed.
Assessing Lawn Conditions
Start by evaluating:
- Existing grass health: Identify areas that are thin, bare, or suffering from disease.
- Weed presence: Survey for broadleaf or grassy weeds. Persistent issues should be addressed prior to seeding.
- Soil compaction and drainage: Observe water pooling after rain and test compaction with a screwdriver or garden fork.
- Thatch thickness: Thatch is a dense layer of organic matter between soil and green grass. Measure with a ruler after removing a small plug of turf.
If you’re unsure, a simple screwdriver test can reveal compaction—if it’s hard to push the screwdriver 4–6 inches into the soil, consider core aeration. Testing several spots across the lawn provides a more accurate picture of overall conditions.
Removing Debris And Mowing Low
- Clear leaves, sticks, and rocks to expose as much soil as possible. Organic debris can prevent seeds from making contact with soil and may harbor pests or diseases.
- Mow the lawn very short (1–1.5 inches). This reduces competition and helps seeds reach the soil. Lowering the mowing height in stages over several mowings prevents scalping and lawn stress.
- Bag the clippings to prevent thatch buildup and ensure an even seed bed.
For lawns with excessive moss, remove as much as possible before seeding, as moss can outcompete new grass.
Addressing Thatch And Compaction
- Dethatch if the layer exceeds 0.5 inches. Use a dethatching rake or rent a dethatcher. Dethatching encourages better water, air, and seed penetration.
- Aerate compacted areas with a manual or mechanical aerator. This process pulls plugs of soil, improving air, water, and seed penetration. Aeration holes also create microclimates ideal for seed germination.
If you suspect compaction but don’t have access to an aerator, even using a garden fork to poke holes in small areas can help.
Managing Weeds
- Spot treat broadleaf weeds with a selective herbicide several weeks before seeding. Always follow label instructions and avoid seeding until the recommended interval has passed.
- Avoid using pre-emergent herbicides, as they can inhibit grass seed germination. If pre-emergents have been recently applied, wait the appropriate period before overseeding (usually 8–12 weeks).
- For large infestations, consider a lawn renovation or consult a professional. Persistent perennial weeds may require a combination of chemical and mechanical control.
Addressing weeds prior to seeding gives your new grass a head start and reduces competition for water and nutrients.
Amending The Soil (if Needed)
- Test your soil with a home kit or through your local extension office. Knowing your soil’s pH and nutrient levels allows for targeted amendments, saving time and money.
- Amend based on results:
- Lime for acidic soils (pH < 6), which is common in rainy regions.
- Sulfur for alkaline soils (pH > 7.5), which may be found in arid or calcareous areas.
- Compost or organic matter for poor fertility or structure. A half-inch layer of well-aged compost improves both sandy and clay soils.
Refer to the table below for ideal soil characteristics:
| Parameter | Ideal Range | Adjustment |
|---|---|---|
| pH | 6.0–7.0 | Lime or sulfur |
| Organic Matter | 4–6% | Compost |
| Drainage | Well-drained | Sand or organic matter |
Adding a small amount of slow-release starter fertilizer at this stage can further boost early seedling vigor.
Credit: mikesbackyardnursery.com
Choosing The Right Grass Seed
Selecting the optimal grass seed for your climate, soil, and usage is a critical decision. The wrong grass species can lead to repeated failures and ongoing maintenance headaches.
Cool-season Vs. Warm-season Grasses
Cool-season grasses (fescue, bluegrass, ryegrass) thrive in northern regions and grow best in spring and fall. They stay green longer in cool weather but may go dormant during summer heat.
Warm-season grasses (Bermuda, zoysia, centipede) excel in the southern U.S. and peak in summer. They tolerate heat and drought better but may brown during winter dormancy.
Selecting the right category ensures your lawn performs well throughout the year.
Factors To Consider
- Climate zone: Match seed to your USDA hardiness zone for winter survival and summer performance.
- Sunlight: Assess each lawn area for full sun, partial shade, or deep shade. Some species, like fine fescue, excel in shade, while others, like Bermuda, require full sun.
- Traffic: High-traffic lawns need durable varieties like tall fescue or Bermuda. For play areas or pet zones, opt for blends labeled as “high traffic.”
- Maintenance: Some grasses, such as Kentucky bluegrass, need frequent mowing and fertilizing, while others, like buffalograss, require less care.
Popular Grass Seed Varieties
| Grass Type | Region | Sun/Shade | Durability |
|---|---|---|---|
| Kentucky Bluegrass | Cool-season/North | Full Sun | High |
| Tall Fescue | Cool-season/Transition | Sun to Partial Shade | Very High |
| Perennial Ryegrass | Cool-season/North | Full Sun | Medium |
| Bermuda | Warm-season/South | Full Sun | High |
| Zoysia | Warm-season/Transition | Sun to Partial Shade | High |
Certified Vs. Uncertified Seed
- Certified seed guarantees purity and germination rates. Always opt for certified when possible.
- Read the label for weed seed percentage and germination rates—higher is better.
Certified seed has been tested for purity and germination rates, and is less likely to introduce new weeds to your lawn. Avoid seed blends with high percentages of inert matter or “other crop” seed.
Specialty Mixes
- Use shade-tolerant blends for tree-covered areas or the north side of buildings.
- For high-traffic zones, choose mixes with tall fescue or Bermuda.
- For drought-prone regions, look for water-wise blends featuring species such as buffalograss or fine fescue.
- Consult your local extension service for region-specific recommendations (USDA NIFA).
Remember, the right seed is only half the equation—proper preparation and aftercare are equally important for success.
Step-by-step Guide To Planting Grass Seed Without Tilling
This section breaks down the entire no-till seeding process, from initial prep to first mowing.
Step 1: Mow And Prepare The Lawn
- Mow grass to 1–1.5 inches and bag clippings. This exposes more soil and reduces competition.
- Remove all debris and dead grass, including fallen twigs and leaves.
- Dethatch and aerate if necessary, focusing on areas with visible compaction or thick thatch.
Step 2: Loosen The Soil Surface
- Lightly rake the soil with a metal rake or lawn dethatcher. This creates shallow grooves for seed contact without tilling. Multiple passes in different directions can improve results.
- In compacted areas, use a manual aerator to create small holes. If possible, make holes 2–4 inches deep, spaced 3–4 inches apart.
Step 3: Apply Grass Seed
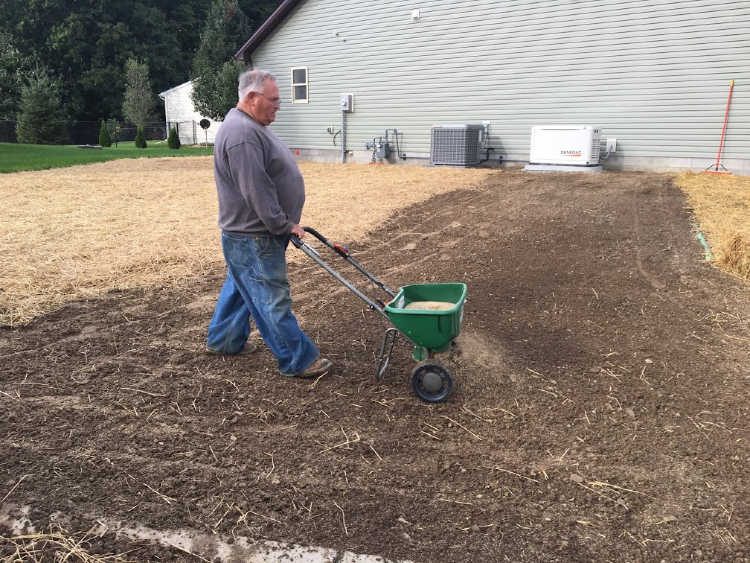
- Use a broadcast or drop spreader for even coverage, walking at a steady pace to avoid over- or under-seeding.
- Follow the recommended seeding rate on the bag—typically 3–6 lbs per 1,000 sq. Ft. for overseeding.
- For bare spots, apply at the higher rate and lightly press seed into soil with the back of a rake or by gently walking over the area.
Step 4: Add A Thin Layer Of Topdressing
- Sprinkle ¼ inch of compost or screened topsoil over seeded areas. This helps retain moisture, improves seed-to-soil contact, and can add beneficial microbes.
- Avoid heavy coverage, which can smother seedlings. Use a leaf rake to distribute the material evenly.
Step 5: Fertilize
- Apply a starter fertilizer high in phosphorus (the middle number in N-P-K ratios) to support root development. Look for products labeled as “starter” or with an analysis like 10-18-10.
- Avoid high-nitrogen fertilizers at this stage, as too much nitrogen can push top growth at the expense of roots.
Step 6: Water Properly
- Water lightly and frequently—2–3 times per day for the first two weeks, keeping the surface consistently moist.
- Gradually reduce frequency as grass establishes, shifting to deeper, less frequent watering. Consistent moisture is crucial for germination, especially during warm or windy weather.
Step 7: Protect And Monitor
- Use straw or biodegradable mulch to retain moisture and deter birds. Apply just enough to barely cover the soil—too much can block light.
- Monitor for weeds and gently remove by hand if necessary. Mark seeded areas with stakes or string to remind family and pets to stay off.
- Keep foot traffic off the lawn until seedlings are well established, which may take 3–4 weeks.
Step 8: First Mow
- Wait until new grass reaches 3–4 inches before mowing. Mowing too soon can pull out tender seedlings.
- Use sharp mower blades and remove no more than 1/3 of the grass height. Collect clippings for the first few mowings to reduce disease risk.
Real-world Examples And Case Studies
Seeing results from actual lawns brings theory to life. Here are three case studies highlighting no-till seeding success:
Case Study 1: Suburban Lawn Renovation, Ohio
Background: A homeowner in Columbus, OH, faced a thinning bluegrass lawn after a harsh summer drought. Instead of tilling, they opted for no-till overseeding.
Process: After mowing and aerating, a blend of Kentucky bluegrass and perennial rye was applied with a broadcast spreader. A thin layer of compost and regular watering followed.
Result: Within 6 weeks, over 90% of the bare spots filled in, and by spring, the lawn was thicker and more resilient. The homeowner noted fewer weeds and less soil erosion the following year, and the soil structure improved with ongoing no-till practices.
Case Study 2: Shaded Urban Lawn, Seattle
Background: A shaded backyard suffered due to moss and patchy grass. The owner dethatched and overseeded with a fine fescue blend.
Process: After removing moss and debris, they raked the soil, applied a shade-tolerant mix, and topdressed with compost.
Result: After 2 months, the lawn had a dense, green appearance with significantly reduced moss. The owner reported improved drainage and less need for supplemental watering due to the healthy, deep-rooted grass.
Case Study 3: Southern Sunbelt Rejuvenation, Texas
Background: A Bermuda grass lawn in Dallas was thinning from heavy foot traffic and compacted soil.
Process: The owner aerated, overseeded with Bermuda, and covered the seed with a thin layer of sand and compost.
Result: New grass emerged in 10 days, and after 8 weeks, the lawn was fully restored for summer activities. The homeowner noticed a dramatic reduction in bare patches and better tolerance to drought stress through the hottest months.
Maximizing Germination And Early Growth
Proper aftercare is vital for transforming seeds into a healthy, lasting lawn. Early attention to detail pays off for years to come.
Watering Best Practices
- Initial 2–3 weeks: Light, frequent watering (¼ inch per session, 2–3 times per day) ensures the seedbed stays moist but not soggy. Early morning and early evening are the best times to water.
- After establishment: Deep, infrequent watering (1 inch/week) encourages deep root development, leading to a more drought-tolerant lawn.
- Use a rain gauge to monitor total water applied, including rainfall. Adjust for weather conditions—more frequent watering may be needed during hot, dry, or windy periods.
Fertilizing And Feeding
- Starter fertilizer at seeding provides phosphorus and potassium for root growth.
- First follow-up feeding 4–6 weeks later with a balanced, slow-release fertilizer supports continued development.
- Avoid over-fertilizing, which can burn young grass and encourage weed growth. Always follow label rates and application instructions.
Mowing And Traffic Management
- Wait until seedlings reach 3–4 inches before first mowing. Mowing too early can uproot fragile grass.
- Set mower to highest setting initially to minimize stress. Gradually lower as the lawn matures.
- Limit foot and pet traffic for at least 4 weeks. Temporary fencing or signage can help protect sensitive areas.
Managing Pests And Weeds
- Birds: Use netting, straw mulch, or even reflective tape to deter feeding. In larger areas, scare devices may be helpful.
- Weeds: Hand-pull or spot treat; avoid broad-spectrum herbicides for 8–10 weeks after seeding to prevent harming seedlings.
- Fungal diseases: Water early in the day to avoid prolonged leaf wetness. Remove excess thatch and avoid overwatering to reduce disease risk.
Troubleshooting Common Challenges
Even with meticulous care, you may encounter issues. Here’s how to address the most common hurdles:
Uneven Germination
- Problem: Patchy grass or bare spots after seeding can result from uneven seed application, poor seed-to-soil contact, or inconsistent watering.
- Solution: Reseed thin areas, ensure good seed-to-soil contact, and maintain moisture. Double-check spreader calibration before reapplying seed.
Weeds Overtaking New Grass
- Problem: Weeds grow faster than grass seedlings, especially in disturbed or nutrient-rich soils.
- Solution: Mow high to shade out weeds, hand-pull, or use selective post-emergent herbicides once grass is established (generally after the third mowing).
Birds Eating Seed
- Problem: Birds consume broadcast seed, resulting in thin germination.
- Solution: Apply mulch, netting, or use coated seed varieties that deter feeding. Reapply seed as necessary to ensure adequate coverage.
Thin Or Weak Seedlings
- Problem: Grass appears spindly or pale, often due to insufficient nutrients, water, or light.
- Solution: Check watering schedule, ensure adequate fertilizer, and monitor for disease. Adjust mowing practices if needed to encourage thicker growth.
Poor Growth In Shady Areas
- Problem: Grass fails to thrive under trees or next to buildings.
- Solution: Use shade-tolerant varieties, thin tree branches for more light, and reduce competition from tree roots by mulching or careful irrigation.
Excessive Thatch
- Problem: Seed fails to contact soil due to thick thatch.
- Solution: Dethatch before seeding, and avoid excessive fertilizer and watering that promote thatch buildup. Consider annual dethatching for lawns prone to thatch.
Long-term Lawn Care After Seeding
Establishing your new grass is just the beginning. Consistent, thoughtful maintenance will keep your lawn healthy and vibrant for years.
Regular Mowing
- Mow at the proper height for your grass type (typically 2–3 inches for cool-season, 1–2 inches for warm-season). Adjust the height seasonally—higher in summer to reduce stress.
- Always use sharp blades to prevent tearing grass, which can increase disease susceptibility.
- Mow frequently enough to avoid removing more than 1/3 of the blade at a time, which reduces stress and encourages dense turf.
Proper Watering
- Water deeply and infrequently to encourage deep root growth, making your lawn more drought-resistant.
- Adjust for rainfall, avoiding both drought stress and waterlogging, which can promote disease and root rot.
- Use smart irrigation systems or timers to optimize watering schedules.
Fertilization Schedule
- Feed cool-season lawns in fall and spring, when growth is most active.
- Feed warm-season lawns in late spring and summer, avoiding fertilization during dormancy.
- Use slow-release fertilizers and follow label instructions. Consider organic options to support soil life.
Aeration And Overseeding
- Core aerate annually to reduce compaction and improve air/water flow. Fall is ideal for cool-season lawns; late spring for warm-season.
- Overseed thin areas every 1–2 years to maintain density. Overseeding helps prevent weed encroachment and keeps the lawn looking lush.
Integrated Pest Management
- Scout regularly for signs of pests and disease. Early intervention prevents widespread issues.
- Use organic or chemical controls only as needed, targeting specific problems.
- Encourage beneficial insects and healthy soil biology by minimizing pesticide use and promoting plant diversity at the lawn’s edges.
Sustainability And Environmental Benefits Of No-till Seeding
No-till seeding isn’t just easier—it’s better for the planet.
Soil Health And Biodiversity
- Minimizes disruption of beneficial microbes and earthworms, which are vital for nutrient cycling and pest suppression.
- Preserves organic matter and soil structure, leading to long-term soil fertility and resilience.
Reduced Erosion And Runoff
- Existing turf anchors soil, preventing loss during heavy rains. This is especially beneficial on sloped properties or near waterways.
- Less sediment and fertilizer runoff into waterways, supporting cleaner rivers and streams.
Lower Carbon Footprint
- Eliminates the need for gas-powered tillers and reduces soil carbon loss. Healthy, undisturbed soil acts as a carbon sink.
- Supports carbon sequestration in healthy turf, making your lawn a contributor to climate mitigation.
Water Conservation
- Dense turf established through no-till methods holds moisture better, reducing irrigation needs. Improved soil structure also increases water infiltration and retention.
By adopting no-till seeding, you contribute to a more sustainable landscape while enjoying a beautiful lawn.
For more on sustainable lawn care, see EPA Healthy Lawns and Gardeners Supply Company.
Frequently Asked Questions
What Is The Best Time Of Year To Plant Grass Seed Without Tilling?
The optimal time depends on your grass type. For cool-season grasses, early fall is ideal (soil is warm, weeds are less active, and rainfall is common). Spring is a secondary option. For warm-season grasses, late spring to early summer works best, when soil temperatures reach 65–70°F. Always avoid seeding during extreme heat or drought.
Can I Overseed An Existing Lawn Without Removing Old Grass?
Yes, overseeding directly into your existing lawn is a core principle of no-till seeding. Mow the grass short, remove debris, and lightly rake the soil to enhance seed-to-soil contact. This method thickens your lawn and fills in bare spots without removing old turf.
How Do I Keep Birds From Eating The New Grass Seed?
To deter birds:
- Lightly cover seeds with compost or straw mulch (just enough to hide the seed from view)
- Use bird netting for small areas
- Choose coated or pelletized seed that’s less attractive to birds
How Soon Can I Mow After Planting New Grass Seed?
Wait until the new grass reaches 3–4 inches in height and is well-rooted. Mow with sharp blades, set the mower at the highest setting, and avoid scalping. Generally, this is about 3–4 weeks after seeding, depending on growth rates.
Is Core Aeration Necessary Before Overseeding Without Tilling?
Core aeration is not always required but is highly beneficial if your soil is compacted or you have a heavy thatch layer. Aeration improves seed-to-soil contact, water infiltration, and root growth. For healthy, loose soils with minimal thatch, aeration may be skipped.
Additional Resources And References
- Turfgrass Producers International: Lawn Care Tips
- Gardening Know How: No-Till Lawn Seeding
- Clemson Extension: Lawn Renovation
A beautiful, resilient lawn is well within reach—no tiller required. By understanding your lawn’s needs, choosing the right seed, and following best practices for no-till seeding, you’ll enjoy healthier turf with less effort and a lighter environmental impact. With a little patience and proper care, your no-till lawn will be the envy of the neighborhood for years to come.