How to Plant Grass Seed in Bare Spots for Quick Recovery
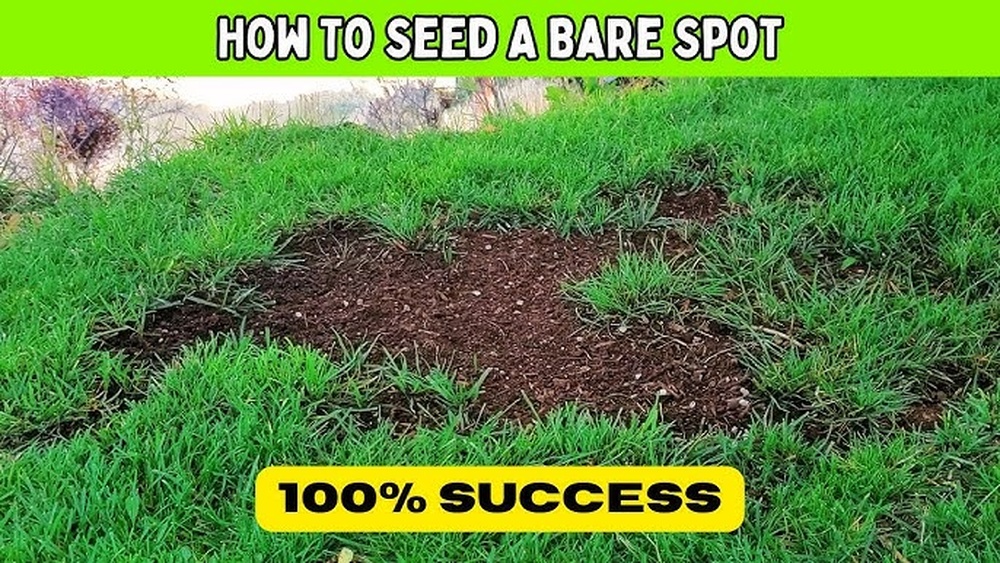
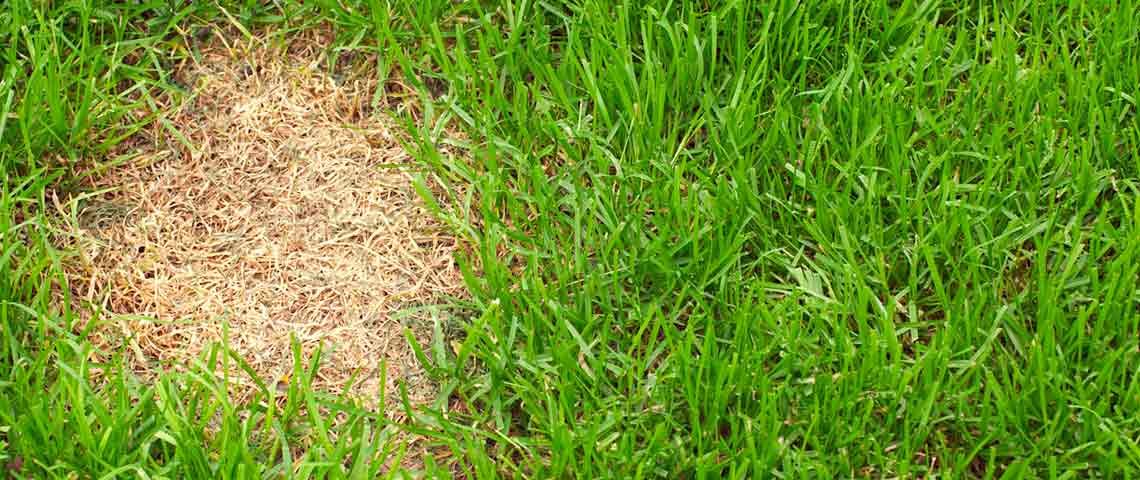
Bare patches in a lawn can be an eyesore, undermining the visual appeal of your landscape and giving weeds a chance to take over. Whether caused by heavy foot traffic, pet activity, disease, or drought, these bare spots are a common problem for homeowners striving for a lush, uniform lawn. The good news: with the right approach, it’s possible to repair these patches efficiently and restore your grass to its former glory.
Planting grass seed in bare spots isn’t as simple as sprinkling seed and hoping for the best. Success hinges on timing, preparation, seed selection, and diligent aftercare. This guide takes you step by step through the process of patching bare spots for quick recovery, integrating expert advice, real-world examples, and data-driven comparisons to help you achieve the best possible results.
Key Takeaways
- Soil preparation and seed-to-soil contact are critical for fast, successful grass seed germination in bare spots.
- Choosing the right grass seed based on your region and lawn conditions ensures long-term recovery and resilience.
- Proper watering and aftercare are essential to encourage deep rooting and healthy turf establishment.
- Timing your overseeding for your grass type (cool vs. warm season) maximizes germination rates and minimizes weed competition.
- Real-world examples demonstrate that following best practices can yield visible improvements in as little as 2-4 weeks.
Understanding Bare Spots: Causes And Assessment
Bare spots don’t just appear without reason. Identifying the root cause of these patches is the first step to ensuring your efforts yield lasting results.
Common Causes Of Bare Spots
- Foot traffic: Frequent walking or playing compresses soil, damaging grass roots and making it difficult for grass to recover. High-traffic areas, such as those near walkways or children’s play spaces, are especially susceptible.
- Pet urine: High nitrogen content burns grass, leaving discolored or dead patches that often reoccur in the same spots.
- Pest damage: Grubs, chinch bugs, or other insects eat roots, causing die-off. Infestations can sometimes be spotted by gently pulling up affected turf—it lifts easily if roots are missing.
- Fungal diseases: Issues like brown patch or dollar spot rapidly thin turf, especially during periods of high humidity or excessive moisture.
- Drought stress: Extended dry spells weaken grass, making it prone to thinning and eventual bare spots, particularly if the lawn is not irrigated during dry periods.
- Improper mowing: Cutting too short or with dull blades can scalp and stress grass, leading to weakened plants that can’t compete with weeds or recover from damage.
Assessing The Extent Of Damage
Before reseeding, evaluate:
- Size and depth of bare patches. Small, shallow spots may recover quickly, while larger areas may need more intensive preparation.
- Soil compaction and drainage in affected areas. Compacted soil resists root growth and water infiltration.
- Presence of thatch, weeds, or debris. Excessive thatch (over ½ inch) can prevent seeds from reaching the soil.
- Signs of ongoing issues (e.g., pests, disease symptoms). Addressing underlying causes prevents repeat problems.
A thorough assessment helps tailor your approach and prevents recurring problems. For instance, simply overseeding without correcting compacted soil or managing pests may yield short-lived results.
Soil Health Evaluation
Testing your soil is invaluable. Use a home soil test kit or send a sample to your local extension office. Key metrics:
- PH level (most grasses prefer 6.0–7.0). A pH outside this range can lock up nutrients, even if they are present in the soil.
- Nutrient content (nitrogen, phosphorus, potassium). Deficiencies in these primary nutrients can slow or prevent new grass establishment.
- Organic matter percentage. Healthy soil contains 3–5% organic matter, which improves water retention and nutrient availability.
Addressing underlying soil deficiencies ensures your new grass seed has the best chance to thrive. For more on soil testing, see this Texas A&M Soil Testing Lab resource.
Case Example: Diagnosing A Shaded Bare Patch
A homeowner in Ohio noticed a persistent bare area beneath a tree. Soil tests showed acidic soil (pH 5. 2) and compaction from foot traffic. The combination of low pH, compaction, and heavy shade explained the lack of grass growth.
Correcting these issues—by liming the soil, aerating, and choosing a shade-tolerant seed—led to full recovery within six weeks. This case highlights the importance of not just reseeding, but thoroughly diagnosing and addressing all environmental and soil-related factors.
:max_bytes(150000):strip_icc()/repair-bare-patch-on-lawn-2153035-hero-01-a629a49f75964418b9ee88a50a601391.jpg)
Credit: www.thespruce.com
Choosing The Right Grass Seed For Quick Recovery
Selecting the best grass seed is crucial for rapid germination and strong establishment. The ideal seed blend depends on your region, sunlight, and lawn use.
Cool-season Vs. Warm-season Grasses
Understanding grass types ensures you pick the most suitable variety:
| Grass Type | Best Regions | Optimal Planting Time | Recovery Speed |
|---|---|---|---|
| Kentucky Bluegrass | Cool, northern states | Early fall or spring | Moderate (2-4 weeks) |
| Perennial Ryegrass | Cool, northern states | Early fall or spring | Fast (7-14 days) |
| Fescue (tall/fine) | Transitional, some cool | Early fall or spring | Moderate (10-21 days) |
| Bermudagrass | Warm, southern states | Late spring/early summer | Fast (7-14 days) |
| Zoysiagrass | Warm, southern states | Late spring/early summer | Slow (14-21 days) |
Matching Seed To Lawn Conditions
- Full sun: Most bluegrass, rye, and bermudagrass varieties thrive. Full sun areas can get hot, so drought-tolerant varieties are helpful in these spots.
- Partial shade: Fine fescues or shade-tolerant mixes are ideal. Red fescue and creeping fescue are top choices for dappled light.
- High traffic: Perennial ryegrass and tall fescue recover quickly and resist wear. These varieties are often used in sports fields and playgrounds for this reason.
Refer to the Turfgrass Producers International for detailed grass variety information.
Seed Coatings And Enhanced Germination
Many premium seeds include coatings to improve moisture retention and deter birds. While slightly pricier, they can boost establishment rates by up to 30%. These coatings may also include fungicides or starter fertilizers, further increasing the odds of successful germination, especially in challenging conditions.
Real-world Example: Fast Recovery With Perennial Ryegrass
A school playground in Chicago experienced heavy wear, leaving large bare spots. By overseeding with perennial ryegrass—a fast-germinating, traffic-tolerant grass—visible greening occurred within 10 days, and full coverage was restored in three weeks, minimizing downtime for students. In addition, the ryegrass helped crowd out weeds and provided a lush, safe surface for play.
Buying Quality Seed
- Certified seed: Look for the blue tag indicating purity and germination rate. Certified seed guarantees minimal weed content and high viability, which is vital for dense turf.
- Blend or mix: Use a blend for species diversity and better resilience to disease and drought. Blends can adapt to microclimates within your lawn, such as sunny and shady areas.
- Avoid cheap “contractor’s mix” with low germination rates or weed seeds. These mixes may seem cost-effective but often introduce problems like weed infestations and thin, patchy growth.

Credit: www.youtube.com
Preparing The Bare Spot For Seeding
Proper preparation is the foundation for successful grass seed establishment. Skipping these steps can reduce germination rates by over 50%.
Clearing Debris And Weeds
- Rake out dead grass, leaves, and debris. Removing all organic litter ensures seed contacts the soil, not a mat of decomposing material.
- Remove any visible weeds by hand or with a non-residual herbicide at least two weeks before seeding. Persistent weeds like crabgrass and dandelion should be pulled from the root.
- Break up thatch thicker than 1/2 inch with a dethatching rake. Excessive thatch prevents water, nutrients, and seed from penetrating to the soil.
Loosening And Amending Soil
- Loosen soil to a depth of 2–3 inches using a garden fork or cultivator. This creates a friable seedbed for roots to penetrate.
- Incorporate compost or topsoil to improve fertility and drainage if existing soil is poor. Compost adds organic matter, increases microbial activity, and helps retain moisture.
- Level the area so new grass will blend seamlessly with the surrounding lawn. Use a rake to smooth out bumps and fill low spots.
Soil Testing And Amendment
If your earlier soil test revealed deficiencies:
- Add lime if pH is below 6.0. Lime raises pH and unlocks nutrients, but apply only as recommended by your soil test.
- Incorporate starter fertilizer high in phosphorus to support root growth. Phosphorus is essential for seedling root development.
- Top-dress with organic matter to improve structure in sandy or clay soils. Well-structured soil holds moisture but drains excess water, creating ideal conditions for germination.
Ensuring Good Seed-to-soil Contact
Firm the soil gently with your foot or a lawn roller. This prevents the seed from sinking too deeply and promotes even germination. Pressing the seed into the soil improves contact, which is crucial for water uptake and rapid sprouting.
Case Study: Soil Preparation Impact
A Virginia homeowner tested two approaches on adjacent bare spots: one was lightly raked and seeded, the other deeply loosened, amended, and rolled before seeding. After three weeks, the well-prepared area had 60% more grass coverage and denser growth than the minimally prepared patch. This dramatic difference underscores the importance of thorough preparation for lasting lawn health.
Credit: www.pennington.com
Seeding Techniques For Maximum Germination
Even the best seed won’t thrive without proper sowing techniques. Attention to detail here can cut recovery time in half.
Calculating Seed Rate
- Follow package recommendations for overseeding or bare spot repair (usually 2–4 pounds per 1,000 sq. Ft. for cool-season grasses).
- Use less seed for small spots—overseeding too densely wastes seed and can lead to weak, spindly growth. Excess seed may also promote fungal problems due to crowding.
Spreading Seed Evenly
- Small patches: Scatter by hand, aiming for even coverage. Lightly tamp the area with your hand or the back of a rake to ensure seeds make contact with the soil.
- Larger areas: Use a handheld or drop spreader for accuracy. Calibrate your spreader to avoid over- or under-application.
Raking And Covering Seed
- Lightly rake the seeded area to incorporate seed into the top 1/4 inch of soil. This shallow covering protects the seed while allowing sunlight to reach it.
- Top-dress with a thin layer (1/8–1/4 inch) of compost or peat moss to conserve moisture, deter birds, and protect seed. This layer also helps moderate soil temperature and reduce erosion.
Mulching For Moisture Retention
- Use straw, seed blankets, or mulch mats for larger patches. These coverings help retain moisture, especially in windy or sunny conditions.
- Avoid heavy layers that block sunlight and air. Too much mulch can smother seedlings and reduce germination rates.
Step-by-step Summary
- Loosen soil and level.
- Apply starter fertilizer if needed.
- Spread seed evenly.
- Lightly rake and top-dress.
- Mulch as appropriate.
Real-world Example: Straw Vs. Compost Covering
A Michigan gardener tested straw and compost on two adjacent bare spots. The compost-covered area retained moisture better and achieved 85% germination versus 70% under straw. However, straw was better for large, sloped patches prone to erosion. The gardener ultimately used a combination of both methods for optimal results, proving that adapting your technique to the specific area can pay dividends.
Watering And Aftercare For Rapid Establishment
Water management is the single most important aftercare factor. New seed can desiccate and die within hours if neglected.
Initial Watering Schedule
- First 14 days: Keep the top 1 inch of soil consistently moist. Water lightly (5–10 minutes) 2–3 times daily, avoiding puddling.
- After germination: Water once daily, increasing duration to help roots grow deeper. Deep watering encourages roots to grow down, making the grass more drought-resistant.
Transition To Deep Watering
- After 2–3 weeks: Water less often but more deeply (20–30 minutes, 2–3 times per week) to encourage deep rooting. Deep roots help the lawn withstand dry spells and reduce the need for frequent watering.
Avoiding Overwatering
- Too much water can cause seed rot and promote disease. Soggy soil is a breeding ground for fungal pathogens.
- Monitor rainfall: Reduce supplemental watering during wet weather. Use a rain gauge or moisture meter to avoid overwatering.
Fertilization After Seeding
- Apply starter fertilizer at seeding if soil test recommends. A balanced starter fertilizer provides essential nutrients for young seedlings.
- Avoid high-nitrogen fertilizers until grass is well established (about 6–8 weeks post-germination). Excess nitrogen can burn young roots and encourage weed growth.
Protecting New Grass
- Limit foot and pet traffic on newly seeded areas for at least 3–4 weeks. Heavy use can compact soil and damage fragile seedlings.
- Use temporary fencing or lawn signs if necessary. This is especially important in areas with children or pets.
Mowing New Grass
- First mow: Wait until new grass reaches 3–4 inches. This allows the young plants to establish strong roots.
- Use sharp mower blades and remove only the top 1/3 of the height. Dull blades can tear seedlings, making them vulnerable to disease.
- Bag clippings the first time to avoid smothering fragile seedlings. After the first mowing, you can resume mulching clippings to return nutrients to the soil.
Common Aftercare Mistakes
- Letting soil dry out: Most common cause of seeding failure.
- Mowing too early: Can uproot or damage new sprouts.
- Over-fertilizing: Burns young roots and encourages weeds. Always follow label directions and soil test recommendations.
Case Study: Watering Frequency And Germination
A university turf trial in Maryland compared daily vs. twice-weekly watering of newly seeded Kentucky bluegrass. Daily light watering led to 90% germination in 12 days; the twice-weekly group reached only 55% germination in the same period (University of Delaware Extension). This highlights the importance of consistent moisture for rapid, uniform establishment.
Timing Your Seeding For Maximum Success
When you plant is as important as how you plant. Seeding at the wrong time can result in poor germination or new grass lost to heat, frost, or weeds.
Cool-season Grass Timing
- Best window: Late summer to early fall (mid-August to mid-September in most regions). Warm soil and cooler air temperatures promote rapid growth.
- Second best: Early spring (before soil warms above 65°F). Spring seeding can be successful if you avoid late frosts and provide adequate moisture.
- Why fall is best: Cooler temps, less weed competition, more consistent moisture. Young grass has time to establish before the stress of summer.
Warm-season Grass Timing
- Best window: Late spring to early summer (soil temps above 65°F). Warm-season grasses thrive when soil and air temperatures are high.
- Avoid fall seeding for warm-season grasses—young plants may not survive winter. Late planting can result in poor establishment and winter kill.
Temperature And Weather Considerations
- Optimal soil temp for germination: 50–65°F for cool-season, 65–70°F for warm-season grasses. Use a soil thermometer for accuracy.
- Avoid seeding before heavy rains (can wash away seed) or during droughts. Monitor weather forecasts and plan accordingly.
Local Climate Adjustments
Consult your state’s extension service for precise timing in your area. For regional planting calendars, see the Clemson University Extension.
Real-world Example: Spring Vs. Fall Seeding
A homeowner in Colorado seeded similar bare spots in both April and September. The fall-seeded area established quickly and survived winter, while the spring-seeded patch struggled with summer heat and weed invasion, requiring reseeding the following fall. This underscores the value of matching your seeding to the natural rhythms of your region.
Troubleshooting Common Problems In Bare Spot Repair
Even with the best practices, issues can arise. Early identification and correction are key to quick recovery.
Poor Germination
- Causes: Dry soil, old seed, poor seed-to-soil contact, incorrect timing. Sometimes, birds or heavy rains may also reduce seed numbers.
- Solutions: Re-water consistently, use fresh seed, gently rake to improve contact. Consider using seed blankets in problem areas.
Seed Washed Away
- Causes: Heavy rain or overwatering. Sloped areas are especially vulnerable.
- Solutions: Use erosion control blankets, straw, or mulch; reseed as needed. For severe slopes, use specialized seed mats to hold seed in place.
Weeds Outcompeting New Grass
- Causes: Seeding too late in spring/fall; weed seeds in soil or seed mix. Disturbed soil brings weed seeds to the surface.
- Solutions: Use quality, certified seed; apply pre-emergent herbicide once grass is established; hand-pull early weeds. Maintain a thick lawn to minimize weed invasion.
Disease Or Mold Growth
- Causes: Overwatering, poor drainage, high humidity. Dense or shaded areas are more prone to fungal problems.
- Solutions: Reduce watering frequency, improve soil drainage, avoid evening irrigation. Remove debris to improve air circulation.
Patchy Growth
- Causes: Uneven seed distribution, inconsistent watering, variable sunlight. Pets or wildlife may also disrupt seed.
- Solutions: Spot reseed as needed, adjust irrigation, consider overseeding with a different variety for shaded spots. Keep a close eye on new growth and address thin spots quickly.
Data Table: Common Bare Spot Repair Issues And Solutions
| Problem | Common Cause | Recommended Solution |
|---|---|---|
| Poor Germination | Dry soil, old seed | Improve watering, use fresh seed |
| Seed Washout | Heavy rain, sloped area | Mulch or erosion blanket |
| Weed Invasion | Seeding during peak weed season | Pre-emergent herbicide post-establishment |
| Patchy Growth | Uneven seeding/watering | Spot reseed and adjust irrigation |
When To Call A Professional
If repeated attempts fail, consider hiring a lawn care professional. They can diagnose persistent issues (e. g. , soil pathogens, compaction, severe nutrient deficiencies) and recommend advanced solutions like hydroseeding or soil amendments.
For a directory of certified lawn care pros, visit the American Society of Plant Biologists.
Maintaining A Healthy, Uniform Lawn After Repair
Once your bare spots are filled, focus on keeping your lawn dense and resilient to prevent future problems.
Regular Mowing Practices
- Mow at the recommended height for your grass type (usually 2.5–3.5 inches). Taller grass shades soil, conserves moisture, and suppresses weeds.
- Never remove more than one-third of blade height in a single mowing. This reduces stress and keeps the lawn healthy.
- Sharpen mower blades regularly for clean cuts. Ragged cuts can make grass vulnerable to disease.
Fertilization And Soil Health
- Apply fertilizer based on soil test recommendations. Excess fertilizer can harm grass and local water sources.
- Top-dress with compost annually to boost organic matter. Compost supports beneficial soil microbes and improves soil structure.
- Aerate compacted areas every 1–2 years to improve root growth. Aeration alleviates compaction, allowing water and nutrients to reach roots.
Watering Wisely
- Water deeply and infrequently (1–1.5 inches per week, including rainfall). Deep watering encourages drought-resistant roots.
- Early morning watering minimizes evaporation and disease risk. Watering at night leaves grass wet, increasing disease risk.
Managing Pests And Diseases
- Scout for early signs of grubs, chinch bugs, or fungal patches. Check for discolored, wilting, or easily pulled-up turf.
- Use integrated pest management (IPM) practices to minimize chemical use. Encourage beneficial insects and use targeted treatments only when necessary.
Overseeding For Ongoing Density
- Overseed thin areas every 1–2 years, particularly in high-traffic zones. Regular overseeding helps maintain a thick, healthy lawn.
- Use a blend of compatible grasses for disease and drought resilience. Blends adapt to changing conditions better than single varieties.
Lawn Maintenance Calendar Example
| Month | Key Tasks |
|---|---|
| March–April | Test soil, apply pre-emergent herbicide, overseed if needed |
| May–June | Mow regularly, fertilize as needed, spot-treat weeds |
| July–August | Water deeply, monitor for pests/disease |
| September–October | Core aerate, overseed, fertilize, top-dress |
| November–February | Minimal mowing, remove debris, plan repairs |
Resources For Ongoing Lawn Health
For more detailed guides, visit the Rutgers Lawn Care site or the EPA’s Soil Quality Resource.
Frequently Asked Questions
How Soon Will I See New Grass After Seeding Bare Spots?
Most grass seed germinates in 7–21 days depending on type, temperature, and care. Perennial ryegrass is one of the fastest, often sprouting in as little as 7 days. Cooler temperatures or poor soil preparation can slow emergence. For best results, maintain consistent moisture and avoid disturbing the seeded area.
Should I Use Straw, Mulch, Or A Seed Blanket To Cover New Seed?
Light coverings (like straw, compost, or seed blankets) help retain moisture, deter birds, and prevent seed washout. Avoid thick layers, which can block sunlight and inhibit germination. Seed blankets are especially useful on slopes and for larger repairs, as they provide both protection and a stable environment for seedlings.
Can I Seed Bare Spots In Summer?
Summer seeding is risky due to heat and drought stress. If you must seed in summer, choose drought-tolerant varieties, water diligently, and consider temporary shading. For best results, aim for spring or fall planting, when temperatures are milder and rainfall is more consistent.
How Can I Prevent Weeds From Taking Over New Grass?
Use certified, weed-free seed, prepare soil thoroughly, and avoid seeding during peak weed germination periods. Once new grass is established (after about 6–8 weeks), consider applying a pre-emergent herbicide if weeds are a persistent problem. Maintaining a thick, healthy lawn is your best defense against weed invasion.
Do I Need To Fertilize After Seeding Bare Spots?
A starter fertilizer high in phosphorus is beneficial at seeding, but avoid high-nitrogen fertilizers until the new grass is well rooted. Always follow soil test recommendations and local regulations regarding fertilizer use. Over-fertilizing can harm both your lawn and the environment.
Restoring bare spots with grass seed is a straightforward, rewarding process when executed with care and attention to detail. By understanding your lawn’s needs, choosing the right seed, preparing soil properly, and providing consistent aftercare, you can achieve quick, visible results and enjoy a healthier, more resilient lawn for seasons to come.
With the strategies outlined in this guide, those unsightly patches can become a thing of the past, ensuring your yard looks its best all year long.