How to Save Squash Seeds for Planting Next Season Easily
Saving squash seeds for planting next season is a rewarding, cost-effective, and surprisingly simple way to perpetuate your favorite varieties. Whether you’re a beginner gardener or a seasoned horticulturist, mastering the art of seed saving helps you take control of your garden’s future, adapt plants to your local climate, and preserve unique squash varieties for generations to come.
With the growing global interest in seed sovereignty and sustainable gardening, learning how to save squash seeds has never been more relevant.
Unlike store-bought seeds, home-saved seeds can be selected for traits that thrive in your particular garden—better flavor, increased disease resistance, or earlier harvests. However, not all seeds are created equal, and the process has a few critical steps you can’t skip if you want healthy, viable plants next season.
In this comprehensive guide, you’ll discover the science behind seed saving, step-by-step instructions, tips for every climate, and real-world examples to make the process as easy and successful as possible.
Key Takeaways
- Seed saving allows you to preserve squash varieties, reduce gardening costs, and select for desirable traits.
- Choose open-pollinated or heirloom squash varieties for reliable results; hybrids often don’t grow true to type.
- Properly harvesting, cleaning, and drying squash seeds is essential for high germination rates.
- Storage conditions—cool, dark, and dry—greatly affect seed viability for the next season.
- Preventing cross-pollination ensures your seeds grow into plants similar to the parent.
- Real-life case studies show home seed saving can lead to stronger, more resilient squash crops.

Credit: www.youtube.com
Understanding Squash Genetics And Pollination
Saving seeds from your squash plants starts with understanding the basics of squash genetics and pollination. Not all squash varieties are suitable for seed saving, and knowing the difference is crucial to success.
Types Of Squash: Summer Vs. Winter
Squash falls into two major categories:
- Summer squash: Includes zucchini, pattypan, and yellow squash. Harvested immature; thin skins.
- Winter squash: Includes butternut, acorn, spaghetti, and pumpkins. Harvested mature; thick, hard skins.
These categories not only influence how the squash is grown and harvested but also how the seeds are saved. Summer squash are picked young for eating, but for seed saving, you must let them mature fully on the plant. Winter squash, on the other hand, are already harvested at maturity, making them easier candidates for seed saving.
Beyond these basic distinctions, each squash variety has unique characteristics regarding fruit shape, color, flavor, and growth habit. For example, butternut squash (C. moschata) is favored for its sweet, nutty flavor and resistance to vine borers, while acorn squash (C.
pepo) is valued for its small size and rapid growth. Understanding these traits can help you decide which varieties are best suited for your garden and seed-saving goals.
Open-pollinated Vs. Hybrid Varieties
- Open-pollinated (OP) and heirloom squash produce seeds that will reliably grow into plants like the parent. These are ideal for seed saving.
- Hybrid (F1) varieties are bred for specific traits but do not produce true-to-type offspring. Seeds saved from hybrids may yield unpredictable results.
The distinction between open-pollinated and hybrid varieties is critical. Open-pollinated squash, including many heirloom types, are bred to reproduce consistently, preserving their unique features over generations. Heirlooms are often prized for their flavor, adaptability, and historical significance. Hybrids, while often vigorous and productive, are developed for commercial production and usually revert to unpredictable forms if their seeds are saved.
For gardeners interested in preserving unique traits, open-pollinated varieties are the clear choice.
According to the Wikipedia entry on squash, there are four main cultivated species—Cucurbita pepo, C. maxima, C. moschata, and C. argyrosperma—each with unique characteristics and pollination requirements. Understanding which species your squash belongs to will help you prevent unwanted cross-pollination and maintain seed purity.
Pollination Mechanics And Cross-pollination Risks
Squash plants are monoecious, meaning they have separate male and female flowers on the same plant, and are primarily pollinated by insects like bees. Different species rarely cross with each other, but varieties within the same species can easily cross-pollinate.
For example, zucchinis and pumpkins (both C. pepo) can cross, leading to unpredictable offspring.
Squash pollination is a fascinating process. Bees are the primary pollinators, transferring pollen from male to female flowers. Because squash flowers are large and attractive, bees visit them frequently, increasing the risk of cross-pollination when multiple varieties are grown nearby.
Hybridization can result in fruits with unusual shapes, colors, or flavors—sometimes fun, but often undesirable if you’re trying to preserve a specific variety.
Key Factors Affecting Seed Purity
- Species: Only varieties within the same species cross.
- Distance: Bees can carry pollen over long distances; recommended isolation is 0.5 to 1 mile for absolute purity.
- Physical barriers: Using row covers or hand-pollination can prevent unwanted crosses.
Isolation is essential if you want to save seeds true to type. If space is limited and you can’t separate varieties by distance, consider using physical barriers such as row covers or mesh bags to exclude insects from flowers before pollination.
In smaller gardens, hand-pollination is often the best option for maintaining genetic integrity.
Real-world Example: Cross-pollination In Action
In a New England community garden, two neighboring gardeners grew zucchinis and acorn squash (both C. pepo). The following season, seeds saved from the zucchinis produced odd-shaped, less flavorful fruits—a classic sign of cross-pollination. This underscores the importance of species awareness and pollination management when saving squash seeds.
This scenario is common in urban and suburban gardens where space is tight and many gardeners cultivate different squash varieties. It demonstrates why understanding pollination mechanics and species relationships is fundamental to successful seed saving. With careful isolation and pollination control, you can avoid such surprises and maintain the qualities you value in your squash.

Credit: www.youtube.com
Selecting The Right Squash And Preparing For Seed Saving
Not every squash is suitable for seed saving. Choosing the right fruit and preparing your plants is half the battle.
Identifying Suitable Plants And Fruits
- Health: Only select seeds from the healthiest, most vigorous, and disease-free plants.
- Maturity: The squash must be fully mature—usually much older than eating stage for summer squash.
- Open-Pollinated Varieties: Confirm your squash is not a hybrid (check seed packets or catalogs).
Careful selection of the parent plant is the foundation of seed saving. Choose plants that exhibit your desired traits: robust growth, high yield, tasty fruit, and resistance to pests or diseases. Avoid using fruit from plants that have struggled or shown signs of disease, as these issues can be perpetuated in future generations.
For summer squash, allowing the fruit to mature fully on the vine is key. The skin should become tough, and the color deepens. For winter squash, the fruit is naturally harvested at maturity, but curing it for several weeks before seed extraction improves seed quality.
Hand-pollination Techniques
To ensure genetic purity, many gardeners use hand-pollination:
- Identify male and female flowers (female flowers have a tiny fruit at the base).
- Cover both flower types with a small bag the evening before they open.
- In the morning, use a male flower to pollinate the female by gently rubbing the pollen onto the stigma.
- Re-cover the flower for a day to prevent bee interference.
- Tag the pollinated fruit for future seed saving.
Hand-pollination is a reliable method for preventing cross-pollination. It requires attention to timing—flowers must be pollinated early in the morning, before bees arrive. Use small mesh bags or paper pollination bags to cover flowers and keep them isolated. Tagging the pollinated fruit is crucial; it ensures you remember which fruit is reserved for seed saving and prevents accidental harvesting.
Hand-pollination also allows you to select specific plants for breeding, giving you control over the traits passed to the next generation. By combining pollen from the healthiest plants, you can create squash with improved vigor, flavor, or disease resistance.
Timing For Seed Harvest
- Summer squash: Allow fruits to remain on the plant until skins are hard and color deepens—often 4-6 weeks past eating stage.
- Winter squash: Harvest when the vine dies back and the stem hardens. Cure in a warm, dry place for 3-4 weeks before extracting seeds.
Timing is essential for seed maturity. Immature seeds are often less viable and produce weak seedlings. For summer squash, patience is required—leave fruits on the plant well past the usual picking stage. For winter squash, curing helps harden the skin and ensures seeds reach full maturity.
Case Study: Heirloom Seed Saving Success
In 2026, a small farm in Oregon saved seeds from their favorite open-pollinated butternut squash. By selecting the best fruits and hand-pollinating, the next season’s crop showed improved uniformity and earlier harvests, demonstrating the power of selective seed saving.
This farm’s experience highlights the benefits of careful selection and pollination techniques. Over several seasons, they observed increased resistance to regional pests and more consistent fruit quality. Such improvements are possible when you save seeds from plants well adapted to your local conditions.

Credit: www.southernliving.com
Harvesting, Extracting, And Cleaning Squash Seeds
The process of harvesting and preparing squash seeds is straightforward but requires attention to detail for the best results.
Step-by-step Seed Extraction
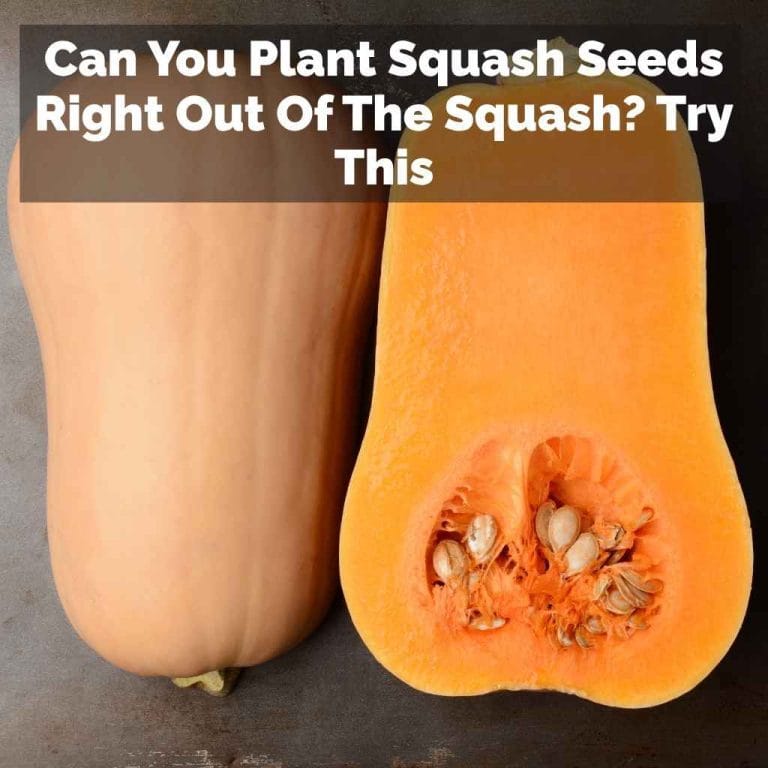
- Cut open the mature squash lengthwise.
- Scoop out seeds and pulp with a spoon into a bowl.
- Separate seeds from the stringy pulp. For winter squash, seeds are often embedded in a fibrous mass.
- Rinse seeds thoroughly in a colander under cool water to remove all pulp.
Take care when extracting seeds to avoid damaging them. The pulp can be sticky, especially in winter squash, so gentle rinsing is necessary. Some gardeners use their hands to squeeze and separate seeds, while others prefer a spoon for easier handling.
The key is to remove as much pulp as possible, as leftover pulp can harbor pathogens and encourage mold during drying.
Fermentation Method (optional For Disease Control)
For certain squash (especially if you’ve had issues with disease), fermenting seeds for 1-3 days in water helps remove germination-inhibiting substances and kills some pathogens.
- Place seeds and pulp in a jar with enough water to cover.
- Stir daily. When seeds sink and water smells slightly sour, they’re ready.
- Pour off floating debris, rinse seeds thoroughly.
Fermentation is an extra step that can improve seed quality, especially if you’ve battled fungal diseases. It mimics the natural process that occurs when fruit rots in the field, breaking down the gel coating around seeds and destroying some pathogens.
However, avoid over-fermentation, which can harm the seeds.
Drying Squash Seeds
Proper drying is critical for seed longevity:
- Spread cleaned seeds in a single layer on a screen, paper towel, or plate.
- Place in a well-ventilated, cool, and shaded area.
- Stir daily to prevent clumping and ensure even drying.
- Dry for 1-2 weeks until seeds snap, not bend, when flexed.
Drying seeds thoroughly prevents mold and preserves viability. Avoid drying seeds in direct sunlight or areas with fluctuating temperatures. A fan or air movement can help, but excessive heat can damage seeds. Some gardeners use dehydrators set to low temperatures, but air drying is generally sufficient.
Data Table: Seed Extraction And Drying Overview
| Step | Summer Squash | Winter Squash |
|---|---|---|
| Harvest Timing | 4-6 weeks past eating stage | When vine and stem are fully mature |
| Seed Extraction | Scoop out, separate from pulp | Scoop out, remove fibrous mass |
| Cleaning | Rinse thoroughly | Rinse, consider fermentation |
| Drying Time | 7-14 days | 7-14 days |
Real-world Example: Home Seed Drying
A gardener in Texas found that air-drying seeds in an air-conditioned room led to a 95% germination rate the following spring, compared to only 70% when seeds were dried in a humid garage. This illustrates the importance of low humidity and good airflow during the drying process.
This example shows that even small changes in drying conditions can dramatically affect seed viability. If you live in a humid climate, consider drying seeds indoors or using a dehumidifier to create optimal conditions.
Storing Squash Seeds For Maximum Longevity
Once your seeds are clean and dry, proper storage is essential to maintain viability until next season—and even beyond.
Best Storage Containers
- Paper envelopes: Allow moisture to escape but are less protective.
- Glass jars with tight lids: Excellent barrier against moisture and pests.
- Plastic bags: Can work if thoroughly dry, but risk of condensation if not.
Label all containers with variety name, species, and harvest year for future reference.
For long-term storage, glass jars with airtight lids are preferred. They protect seeds from moisture, pests, and temperature fluctuations. Paper envelopes are suitable for short-term storage or if you plan to use seeds within a year. Always label containers clearly to avoid confusion later.
Storage Environment
Seeds last longest in conditions that are:
- Cool: Ideal temperature is 32°F–50°F (0°C–10°C).
- Dry: Relative humidity below 40% is best.
- Dark: Light can degrade seed quality.
A common rule: the sum of temperature (°F) and relative humidity (%) should not exceed 100 for optimal storage.
If you have access to a refrigerator or freezer, these environments are excellent for long-term seed storage. Place seeds in airtight containers and include desiccants to absorb any moisture. Avoid storing seeds in areas exposed to sunlight, heat, or humidity, such as kitchens or bathrooms.
Longevity Data For Squash Seeds
According to the Seed Savers Exchange, squash seeds typically remain viable for 4-6 years under proper conditions.
| Storage Condition | Expected Viability (Years) |
|---|---|
| Room Temperature, Humid | 1-2 |
| Cool, Dry, Dark | 4-6 |
| Freezer (Airtight) | 6-10 |
Pest And Mold Prevention
- Add a silica gel packet or a tablespoon of dry rice to absorb moisture.
- Avoid storing in areas with temperature fluctuations (e.g., garages, sheds).
Silica gel packets are inexpensive and highly effective at maintaining low humidity. If you don’t have silica gel, uncooked rice works as a desiccant. Check stored seeds periodically for signs of mold or pests.
Case Study: Long-term Storage Success
A community garden in Michigan stored squash seeds in glass jars inside a basement refrigerator. After five years, germination tests still showed 85% viability—a testament to the power of proper storage.
This case study illustrates that with careful storage, seeds can remain viable for years, reducing gardening costs and ensuring a steady supply of high-quality seeds.
Ensuring Seed Purity And Preventing Cross-pollination
Maintaining the genetic integrity of your squash seeds is key, especially if you grow multiple varieties.
Isolation Distances
- Same species: 800 feet to 1 mile for complete purity (less for home use).
- Different species: No isolation needed; they won’t cross.
Isolation distances are recommendations, not absolute rules. For home gardens, shorter distances may suffice if you’re not distributing seeds widely. If you plan to share seeds with others or participate in seed exchanges, strive for maximum isolation.
Physical Barriers And Bagging
- Use row covers or mesh bags to cover flowers until hand-pollinated.
- Remove covers after pollination to allow fruit development.
Row covers are particularly useful in small gardens or urban settings. They can be removed after pollination, allowing normal fruit growth.
Staggered Planting
Plant different varieties at different times to avoid overlapping flowering periods, reducing the risk of cross-pollination.
This technique is effective if your growing season allows. By staggering plantings, you ensure only one variety is flowering at a time, minimizing the chances of cross-pollination.
Record Keeping
Maintain detailed notes on:
- Varieties grown
- Pollination methods used
- Isolation distances
This documentation is vital for tracking seed lineage and sharing with other gardeners.
Good record keeping is essential for serious seed savers. It allows you to track improvements, share accurate information, and troubleshoot issues in future seasons.
Real-world Example: Urban Isolation Solutions
In a densely populated city garden, one grower successfully isolated varieties by hand-pollinating and bagging flowers, achieving true-to-type squash despite other cucurbit growers nearby.
This example demonstrates that even in challenging environments, careful management can produce pure seeds.
Testing Seed Viability And Germination Rates
Before planting saved seeds, it’s smart to check their viability. This ensures you start with strong, reliable seeds and can adjust planting density if necessary.
Simple Germination Test
- Place 10 seeds between damp paper towels.
- Seal in a plastic bag and keep at room temperature.
- Check after 7 days; count sprouted seeds.
Germination rate (%) = (Number sprouted / 10) x 100
A germination rate above 80% is excellent; below 60% suggests seeds are aging or were not stored properly.
Testing viability is a simple step that can save frustration and wasted effort in the garden. If germination rates are low, you can compensate by sowing more seeds or purchasing fresh ones. Some gardeners test seeds from each storage batch, ensuring consistency.
Data Table: Germination Rate Interpretation
| Germination Rate (%) | Seed Quality | Recommended Action |
|---|---|---|
| 80-100 | Excellent | Plant as normal |
| 60-79 | Good | Increase seeding rate |
| 40-59 | Fair | Use only if necessary |
| <40 | Poor | Replace with new seeds |
Reviving Old Seeds
If you have older seeds with lower germination, try:
- Soaking seeds for 12 hours before planting
- Using a heat mat to improve soil temperature
- Planting extra seeds to compensate for low viability
These techniques can help maximize germination from older or marginal seeds. Soaking softens the seed coat, and warmer soil speeds up sprouting.
Real-world Example: Seed Viability Test
A gardener in Florida tested three-year-old butternut squash seeds using the paper towel method. With a 70% germination rate, they simply sowed extra seeds per hill and still enjoyed a bountiful harvest.
This practical approach shows that even older seeds can be productive if you adjust your planting strategy.
Troubleshooting Common Issues In Squash Seed Saving
Even with careful planning, problems can arise. Here’s how to handle the most frequent challenges.
Moldy Seeds
- Cause: Insufficient drying or storage in humid conditions.
- Solution: Discard moldy seeds; ensure thorough drying before storage.
Mold is a common issue, especially in humid climates. Prevent it by drying seeds completely and storing them with desiccants.
Poor Germination
- Cause: Immature seeds, poor storage, or old seeds.
- Solution: Only save from fully mature fruits; store in optimal conditions; test viability before planting.
If you consistently experience poor germination, review your harvest and storage practices. Sometimes, simply improving drying or switching storage locations makes a big difference.
Off-type Fruits
- Cause: Cross-pollination between different varieties within the same species.
- Solution: Use hand-pollination, increase isolation distances, or grow only one variety per species.
Off-type fruits can be disappointing if you’re aiming for specific traits. Careful pollination and isolation are the solution.
Pests In Storage
- Cause: Storage in areas accessible to rodents or insects.
- Solution: Use airtight glass jars and inspect seeds before use.
Pests can destroy your seed stock quickly. Store seeds in secure, pest-proof containers and locations.
Data Table: Common Problems And Solutions
| Problem | Likely Cause | Solution |
|---|---|---|
| Mold | Inadequate drying | Dry seeds thoroughly, use desiccants |
| Poor germination | Immature or old seeds | Harvest at full maturity, store cool & dry, test viability |
| Off-type fruit | Cross-pollination | Hand-pollinate or isolate varieties |
| Pests in seeds | Poor container or location | Use glass jars, check regularly |
Real-world Example: Mold Prevention
A gardener in Louisiana lost an entire season’s seeds to mold after storing them in a damp basement. Switching to silica gel and airtight jars stored in a closet fixed the issue for the following year.
This underscores the importance of environmental control in seed storage. Mold can ruin even well-saved seeds, so prevention is essential.
The Broader Impact: Biodiversity, Community, And Food Security
Saving squash seeds isn’t just about next year’s garden—it’s part of a movement to protect biodiversity and promote food security.
Biodiversity Conservation
By saving and sharing seeds, gardeners help preserve rare and heirloom squash varieties that might otherwise disappear. The FAO International Treaty on Plant Genetic Resources underscores the global importance of maintaining genetic diversity for future generations.
Biodiversity is vital for adapting to changing climates, resisting new pests and diseases, and ensuring a resilient food system. Home gardeners play an essential role by saving, exchanging, and growing diverse squash varieties, some of which may not be available commercially.
Community Seed Sharing
Seed libraries, swaps, and community gardens benefit from home-saved squash seeds. Sharing seeds locally helps adapt varieties to specific climates and build resilient food systems.
Community seed sharing fosters connections between gardeners, increases access to locally adapted varieties, and encourages experimentation. Many local organizations host annual seed swaps, where gardeners exchange seeds, stories, and growing tips.
Self-sufficiency And Sustainability
Home seed saving reduces reliance on commercial seed companies, cuts gardening costs, and fosters a deeper connection with your food. As highlighted by the Seed Savers Exchange, empowering gardeners to save seeds is a critical step toward sustainable agriculture.
Sustainability is at the core of seed saving. By closing the loop—growing, harvesting, and saving your own seeds—you reduce waste, increase resilience, and promote environmentally friendly practices.
Real-world Example: Community Seed Library
The Richmond Grows Seed Lending Library in California features dozens of locally adapted squash varieties, thanks to contributions from home gardeners. This living seed bank ensures that the region’s unique climate and cultural preferences are reflected in the available seeds.
Locally adapted seeds are more likely to thrive, withstand local pests, and produce reliable yields. Seed libraries are a practical way to preserve and distribute these valuable resources, strengthening food security in the community.
Frequently Asked Questions
How Do I Know If My Squash Is Ready For Seed Saving?
Squash is ready for seed saving when it has reached full maturity. For summer squash, wait until the fruit is hard and the color deepens, often long past the edible stage. For winter squash, harvest when the vine dies back and the skin is tough; then cure for 3-4 weeks before extracting seeds.
Can I Save Seeds From Store-bought Squash?
You can, but it’s not recommended unless you know the squash is from an open-pollinated (not hybrid) variety and has not been cross-pollinated. Most store-bought squash are hybrids or may have been grown near other varieties, leading to unpredictable offspring.
How Can I Prevent My Squash From Cross-pollinating?
Prevent cross-pollination by growing only one variety per species, using hand-pollination with bagged flowers, or maintaining sufficient isolation distances (800 feet to 1 mile) between varieties of the same species.
How Long Do Saved Squash Seeds Remain Viable?
When stored in cool, dry, and dark conditions, squash seeds typically remain viable for 4-6 years. Freezing seeds in airtight containers can extend their life to 6-10 years.
Why Is It Important To Save Seeds From Healthy Plants?
Seeds from healthy, disease-free plants are more likely to produce vigorous, productive offspring. Saving seeds from weak or diseased plants can perpetuate undesirable traits and reduce future crop quality.
Growing your own squash from home-saved seeds is a powerful way to tailor your garden to your tastes, protect heirloom varieties, and participate in the global movement for food sovereignty. With a little care and attention to detail, anyone can master the art of squash seed saving.
Start this season, and watch your garden—and your gardening skills—flourish for years to come.
For more detailed information and community resources, check out the Garden Organic Seed Saving Guidelines, and explore seed-saving networks such as the Seeds of Diversity Canada and the USDA Seed Saving Resources. Happy gardening and seed saving!