How to Preserve Pumpkin Seeds for Planting (Simple Guide)
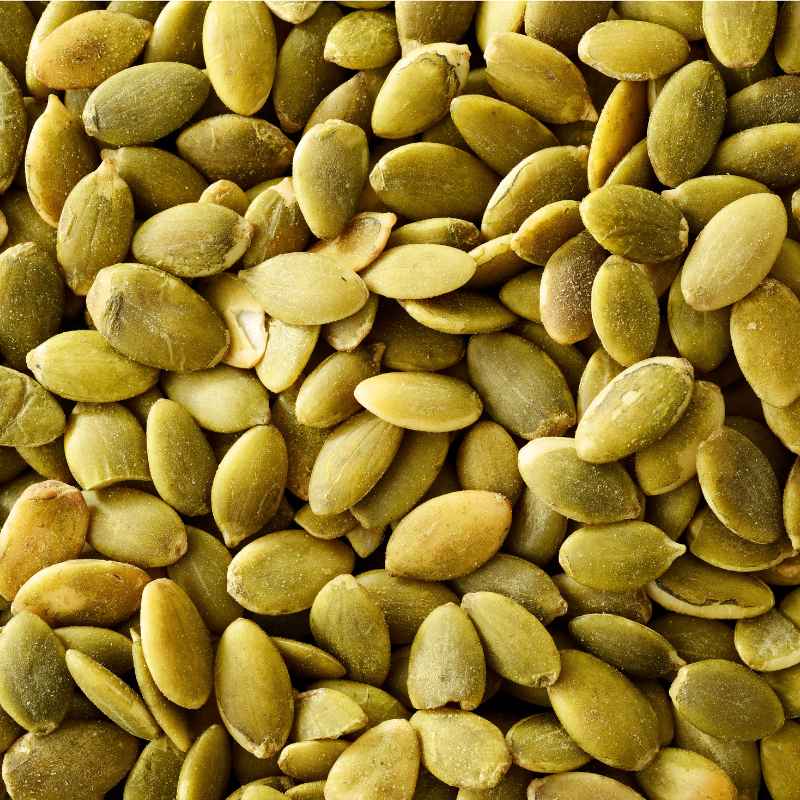
Preserving pumpkin seeds for planting is a simple yet essential skill for any gardener who wants to save money and grow reliable crops year after year. In this guide, you will learn the exact steps to clean, dry, and store pumpkin seeds so they remain viable for the next growing season.

Sow Right Seeds
Sow Right Seeds - Small Sugar Pumpkin…
- Beautiful - Large full-color packet of Small Sugar Pumpkin (Cucurbita pepo) seeds. This standard pie pumpkin is also popular as a…
- Productive - Pumpkin germinates in 6-12 days when soil temps are 70-85°F. Plant 1” deep and space 15-20’ apart in an area with ful…
- Versatile - This fast growing pumpkin will amaze your children as they watch it grow. Plants have large green leaves and grow rapi…
As an Amazon Associate I earn from qualifying purchases.
Simply put, preserving pumpkin seeds for planting means cleaning off the pulp, drying them slowly with good airflow, and storing them in a cool, dark place inside a breathable container. Seeds stored this way can stay viable for up to four years, but first-year germination rates are the highest.
Key Takeaways
- Preserving pumpkin seeds for planting requires proper cleaning, thorough drying, and cool, dark storage.
- Seeds must be fully dry before storage to prevent mold and rot.
- Use paper envelopes or glass jars with desiccants, not plastic bags.
- Label every batch with the variety and harvest year.
- Test germination rates before planting stored seeds.
Why Proper Preservation Matters for Pumpkin Seeds
Pumpkin seeds are living embryos wrapped in a tough outer coat. If you do not preserve them correctly, they can lose viability quickly. According to the University of Illinois Extension, properly stored pumpkin seeds can maintain a 90% germination rate for up to four years, while poorly stored seeds can drop to 50% or lower within a single season.
The main threats to seed viability are moisture, heat, and light. Moisture encourages mold and premature sprouting. Heat speeds up the metabolic rate inside the seed, draining its stored energy.
Light, especially direct sunlight, can break down the seed coat over time.
Beyond viability, proper preservation helps you save money. A pack of pumpkin seeds costs three to five dollars at a garden center. By preserving your own seeds from a single pumpkin, you can produce hundreds of seeds for free.
That is a return of roughly 50x your initial investment.
Key benefits of preserving your own pumpkin seeds include:
- Cost savings — no need to buy new seeds each spring
- Adaptation — seeds from your garden are already adapted to your local soil and climate
- Variety control — you can save seeds from your favorite heirloom or hybrid varieties
- Self-sufficiency — you are not dependent on seed suppliers
- Gift potential — saved seeds make thoughtful gifts for fellow gardeners
The process itself takes about a week from start to finish. Most of that time is passive drying, so it does not require daily effort. With the right techniques, you can build a seed bank that lasts for years.
What You Need to Preserve Pumpkin Seeds for Planting
Before you begin, gather the right tools and materials. Using the correct equipment makes the job faster and reduces the risk of seed damage. You probably already own most of these items.
Here is a checklist of everything you will need:
- A ripe, healthy pumpkin (harvested at full maturity)
- A sharp knife for cutting the pumpkin open
- A large spoon or scoop for removing seeds
- A colander or mesh strainer for rinsing
- Clean water (room temperature, not hot)
- Paper towels or a clean kitchen towel
- A baking sheet or flat tray lined with parchment paper
- A fan (optional but recommended for airflow)
- Small paper envelopes or glass jars for storage
- A permanent marker for labeling
- Silica gel packets or uncooked rice as desiccants (optional)
Tip: Use a pumpkin that has been fully ripe on the vine for at least a week after the skin hardened. Seeds from underripe pumpkins have lower germination rates.
The quality of your starting pumpkin directly affects seed viability. Pumpkins that show signs of rot, frost damage, or disease should not be used for seed saving. A healthy pumpkin produces healthy seeds.
If you are saving seeds from multiple pumpkin varieties, you will need separate containers for each variety. Cross-pollination between squash types is common, so label everything clearly from the start.
| Item | Purpose | Alternative |
|---|---|---|
| Mesh strainer | Separate seeds from pulp | Cheesecloth or fine sieve |
| Parchment paper | Non-stick drying surface | Wax paper or clean towel |
| Paper envelopes | Breathable storage | Glass jar with ventilation holes |
| Silica gel packet | Control moisture in storage | Uncooked rice in a cloth pouch |
Having these items ready before you start speeds up the entire process and reduces handling time, which is better for the seeds.
How to Clean Pumpkin Seeds Before Storage
Cleaning is the first active step in preserving pumpkin seeds for planting. The goal is to remove all the stringy pulp and membrane that cling to the seeds. Leftover pulp can hold moisture and cause mold during storage.
Start by cutting the pumpkin open carefully. Use a sharp knife and cut around the stem in a circle, then lift the top off. Scoop out all the seeds and pulp into a large bowl.
Do not worry about getting every last seed at this point.
Follow these steps to clean the seeds thoroughly:
- Place the seeds and pulp into a colander or mesh strainer.
- Run cool water over the seeds while rubbing them gently between your fingers.
- Pick out large pieces of pulp and discard them.
- Continue rinsing until the water runs clear and seeds feel clean to the touch.
- Transfer clean seeds to a bowl of cool water and let them soak for five minutes.
- Drain the water and inspect seeds one more time for remaining pulp.
Warning: Do not use soap, detergent, or bleach to clean pumpkin seeds. Chemicals can damage the seed coat and reduce germination rates significantly.
Some gardeners prefer to soak seeds in a bowl of water for 30 minutes before cleaning. This softens the pulp and makes it easier to remove. If you choose this method, change the water once during soaking to prevent fermentation.
After cleaning, spread the seeds on a paper towel and pat them dry gently. Remove as much surface moisture as possible before moving to the drying phase. Seeds that go into the drying stage still dripping wet take much longer to dry evenly.
How to Dry Pumpkin Seeds Properly
Drying is the most critical step in preserving pumpkin seeds for planting. Seeds that are not fully dry will mold inside the storage container. Seeds that are dried too fast with high heat can crack or lose viability.
The ideal drying method uses slow, steady airflow at room temperature. Here is the recommended process:
- Spread cleaned seeds in a single layer on a baking sheet lined with parchment paper.
- Make sure seeds are not touching or overlapping each other.
- Place the baking sheet in a well-ventilated area out of direct sunlight.
- Set up a small fan nearby on low speed to circulate air over the seeds.
- Let seeds dry for 5 to 7 days, turning them once daily with your hand.
Important: Test seed dryness by trying to bend a seed. A fully dry seed will snap cleanly in half. A seed that bends without breaking needs more drying time.
How do you know when pumpkin seeds are dry enough? Look for these signs:
- Seeds feel hard and brittle when pressed between your fingers
- The seed edges are slightly curled inward
- Seeds rattle when shaken in a container
- The outer seed coat has a dull, matte appearance (not shiny)
- No moisture condenses on the inside of a glass jar after 24 hours
Do not use an oven, microwave, or dehydrator on high heat to speed up drying. Temperatures above 100°F (38°C) can damage the embryo inside the seed. If you must use a dehydrator, set it to the lowest possible temperature, ideally below 95°F (35°C), and check seeds every few hours.
According to the Seed Savers Exchange, seeds dried properly at room temperature have a 95% or higher germination rate in the first year. Rushed drying can drop that number to 60% or less.
How to Store Pumpkin Seeds for Maximum Viability
Once seeds are fully dry, move them into storage containers immediately. Exposure to humid air can reintroduce moisture and undo your drying work. Work quickly and seal containers as soon as they are filled.
The best containers for storing pumpkin seeds include:
- Paper envelopes — ideal for breathability; stack them inside a glass jar for extra protection
- Glass jars with tight lids — excellent for blocking moisture and pests; add a silica gel packet
- Mylar bags with oxygen absorbers — best for long-term storage of 3 years or more
- Coin envelopes — small, cheap, and easy to label; store them in a tin or jar
Tip: Write the variety name, harvest date, and any notes (like “huge fruit” or “good disease resistance”) on each envelope. This information is invaluable in future seasons.
Where should you store preserved pumpkin seeds? The three conditions to remember are cool, dark, and dry.
| Storage Location | Temperature Range | Humidity Level | Expected Viability |
|---|---|---|---|
| Refrigerator (crisper drawer) | 35-40°F / 2-4°C | Low | 4-5 years |
| Cool basement or cellar | 50-60°F / 10-15°C | Moderate | 2-3 years |
| Indoor cupboard (dark) | 65-75°F / 18-24°C | Variable | 1-2 years |
| Freezer (if well-sealed) | 0°F / -18°C | Very Low | 5+ years |
The refrigerator is the best option for most home gardeners. It provides stable cold temperatures and low humidity. Just make sure seeds are in an airtight container to protect them from moisture inside the fridge.
Do not store seeds in a garage or shed. Temperature swings in those spaces can cause condensation inside the container, which ruins seeds quickly.
How Long Can You Preserve Pumpkin Seeds for Planting?
Pumpkin seeds have a naturally long shelf life compared to many other garden seeds. Under ideal storage conditions, they remain viable for four to five years. However, germination rates decline steadily each year.
Here is a realistic look at viability over time based on data from the USDA Seed Bank:
- Year 1: 90-95% germination rate under proper storage
- Year 2: 80-85% germination rate
- Year 3: 65-75% germination rate
- Year 4: 50-60% germination rate
- Year 5: 30-40% germination rate (still usable, but plant extra seeds)
These numbers assume seeds were cleaned, dried, and stored correctly. If any step was skipped or done poorly, viability drops faster. Seeds stored in a warm kitchen cabinet might only last one or two years.
Important: Always plant more seeds than you need when using older seed stock. For year-three seeds, plant double the number you would normally use. For year-four seeds, plant triple.
The pumpkin variety also affects longevity. Heirloom varieties tend to have slightly harder seed coats that protect the embryo longer. Hybrid varieties may have thinner coats and lose viability a year earlier on average.
If you are saving seeds from a pumpkin you bought at a grocery store, keep in mind that many commercial pumpkins are hybrids. They may not produce fruit identical to the parent, but the seeds themselves are still viable for planting if preserved correctly.
Common Mistakes When Preserving Pumpkin Seeds
Even experienced gardeners make errors when preserving pumpkin seeds for planting. Knowing the most common mistakes helps you avoid them and get better results.
Here are the top mistakes to watch out for:
- Storing seeds while still damp — This is the number one killer of saved seeds. Always test for dryness by snapping a test seed before sealing.
- Using plastic bags for long-term storage — Plastic traps any residual moisture and promotes mold. Use paper envelopes or glass jars instead.
- Skipping the labeling step — Unlabeled seeds become mystery seeds. After a year, you will not know the variety or harvest date.
- Drying seeds in direct sunlight — UV rays damage the seed embryo and reduce germination rates significantly.
- Saving seeds from diseased fruit — Diseases can survive on the seed surface and infect next year’s crop.
- Mixing varieties in one container — Different varieties may have different moisture levels and spoil the whole batch.
- Storing seeds in a warm location — Every 10°F increase in temperature cuts seed lifespan roughly in half according to seed scientists.
Warning: Do not store pumpkin seeds near ripening fruit like apples or bananas. These fruits release ethylene gas, which can reduce seed viability over time.
Another lesser-known mistake is not allowing the pumpkin to fully mature on the vine. Seeds from a pumpkin picked green have lower stored energy and shorter shelf life. Let the pumpkin stay on the vine until the skin is hard and the stem starts to crack.
Finally, do not wash seeds with hot water. Hot water can damage the seed coat and reduce germination. Always use cool or room temperature water for cleaning.
How to Test Seed Viability Before Planting
Before you plant your preserved pumpkin seeds, run a quick germination test. This tells you exactly how many seeds are still alive and saves you from wasting time planting dead seeds in the garden.
Here is a simple home germination test you can do:
- Count out 10 seeds from your stored batch.
- Dampen a paper towel so it is moist but not soaking wet.
- Place the 10 seeds on half the paper towel, spaced apart.
- Fold the other half over the seeds.
- Slide the paper towel into a ziplock bag and seal it most of the way, leaving a small opening for air.
- Place the bag in a warm spot, around 75-85°F (24-29°C).
- Check after 5 days and again after 10 days.
- Count how many seeds sprouted. Multiply by 10 to get your germination percentage.
Tip: If 8 out of 10 seeds sprout, you have an 80% germination rate. Plant 10 seeds per hill to get about 8 plants. Adjust your planting density based on test results.
Germination tests are especially important for seeds that have been stored for two or more years. Even well-preserved seeds lose some viability over time. A quick test takes only a few minutes and prevents disappointment later.
If your test shows low germination rates, you can still plant the seeds — just plant more of them. Seeds that germinate slowly or have weak sprouts can still produce healthy plants if you give them extra care during the seedling stage.
According to the Oregon State University Extension, seeds that show 60% or higher germination in a test are worth planting. Below 50%, you are better off buying fresh seeds for that season.
Frequently Asked Questions
Can you preserve pumpkin seeds from a store-bought pumpkin?
Yes, you can preserve seeds from a store-bought pumpkin. However, many store-bought pumpkins are hybrids, meaning the seeds may not produce fruit identical to the parent. The seeds will still grow into healthy pumpkin plants with good fruit.
How do you know when pumpkin seeds are dry enough for storage?
A fully dry pumpkin seed will snap cleanly in half when you try to bend it. If the seed bends without breaking, it needs more drying time. Seeds should also feel hard and have a dull, matte appearance on the outer coat.
What is the best container for storing pumpkin seeds long-term?
Glass jars with tight lids are the best containers for long-term storage. Add a silica gel packet to control moisture. For extra protection, store seeds in paper envelopes inside the jar.
Plastic bags are not recommended because they trap moisture.
How long can you store pumpkin seeds for planting?
Under ideal conditions (cool, dark, and dry), pumpkin seeds remain viable for 4 to 5 years. Germination rates decline each year, starting at 90-95% in year one and dropping to 30-40% by year five. Refrigeration extends viability the most.
Do you need to ferment pumpkin seeds before drying?
Fermentation is optional, not required. Some gardeners ferment seeds to kill surface pathogens and separate good seeds from bad ones. If you choose to ferment, soak seeds in water for 24-48 hours, then rinse and dry.
Most home gardeners skip this step with good results.
Final Thoughts
Preserving pumpkin seeds for planting is a straightforward process that rewards you with free seeds year after year. Focus on three things: clean the seeds well, dry them slowly with good airflow, and store them in a cool, dark place. With these steps, you can build a reliable seed bank that keeps your garden growing season after season.
Start with one pumpkin this year and see how easy it is.
Related pick: Check today's price on Amazon