When Should You Plant Pumpkin Seeds for a Big Harvest?
Pumpkins capture the imagination of gardeners and food lovers alike, from festive jack-o’-lanterns to hearty autumn soups. Yet, achieving a bountiful pumpkin harvest is much more than dropping seeds in the ground and hoping for the best. The timing of when you plant pumpkin seeds is a critical factor that can mean the difference between lush, sprawling vines loaded with fruit and a disappointing, stunted crop. Understanding the ideal planting window, climate considerations, and practical gardening strategies is essential for anyone aiming for a truly impressive pumpkin harvest.
Whether you’re a home gardener dreaming of prize-winning pumpkins or a market grower targeting peak season sales, your approach to planting timing can dramatically impact yield size, fruit quality, and disease resistance. This comprehensive guide breaks down the science and art of planting pumpkin seeds for maximum results—drawing on expert insights, regional data, and real-world examples.
By the end, you’ll have all the tools you need to schedule your planting perfectly and set yourself up for a bumper crop.
Key Takeaways
- Plant pumpkin seeds after the last frost date, when soil consistently reaches at least 65°F (18°C).
- Timing varies by region—northern climates plant later (late May–early June), while southern regions may plant as early as late April.
- Starting seeds indoors can extend the growing season and boost yields in short-season areas.
- Soil temperature, moisture, and day length all influence optimal planting time and harvest success.
- Consistent care, from thinning seedlings to managing pests, is essential for maximizing pumpkin size and quantity.
Credit: www.victoriawade.co.uk
Understanding The Pumpkin Growth Cycle
To plant at the right time, it’s crucial to grasp the pumpkin life cycle—from seed to mature fruit. This cycle impacts everything from harvest timing to disease susceptibility.
Seed Germination And Early Growth
Pumpkin seeds require warm soil (minimum 65°F/18°C) to germinate. Cold, wet soils can cause seeds to rot before they even sprout. Seedlings emerge 5–10 days after planting in optimal conditions and quickly develop their first true leaves.
It’s important to note that pumpkin seeds are sensitive to soil conditions during this stage. If soil is too cool or saturated, germination rates may drop dramatically. Some gardeners use black plastic mulch to warm the soil before planting, ensuring quicker emergence and healthier seedlings.
Additionally, pre-soaking seeds for a few hours can sometimes help speed germination.
Vine And Flower Development
Within 3–4 weeks, vigorous vines sprawl across the ground, and flower buds start to form. Pumpkins produce both male and female flowers; pollination—mainly by bees—is critical for fruit set. Early-planted vines have more time for robust growth and multiple fruit.
The first flowers to appear are usually male, followed by female blossoms a week or two later. This staggered flowering ensures pollen is available when female flowers open. Bees and other pollinators are essential, so avoid applying insecticides during flowering, as this can reduce pollinator activity and fruit set.
Gardeners often observe that healthy vines produce a higher ratio of female flowers, directly increasing fruit yield.
Fruit Set And Maturation
After pollination, fruits develop over 45–55 days, maturing fully in 90–120 days depending on the variety. The timing of planting directly influences when your pumpkins will ripen—too early, and they may rot in the field; too late, and the first frost may cut the season short.
During maturation, pumpkins transition from green to their mature color (orange, white, or specialty hues). The fruit’s skin thickens and sugars accumulate, improving flavor and storage life. It’s critical to avoid overwatering during this stage, as excessive moisture can cause splitting and reduce shelf life.
Monitoring for pests like squash vine borers is also important, as their damage can halt fruit development.
Case Example: Northern Vs. Southern Us
In Minnesota (northern US), pumpkins planted before mid-May often succumb to cold. In Texas (southern US), planting after late May risks heat stress and shortens the growing window. Understanding your local climate is key.
For example, northern growers sometimes use row covers to protect seedlings during chilly spring nights, while southern growers may mulch heavily to keep soil cool and retain moisture. These adaptations demonstrate how climate shapes the growth cycle and the importance of timing.

Credit: sowrightseeds.com
Factors That Influence The Best Time To Plant Pumpkin Seeds
The ideal planting date isn’t one-size-fits-all. Several variables affect the decision—let’s break down the most important.
Climate And Usda Hardiness Zone
Pumpkins are highly sensitive to frost and thrive in USDA Zones 3–10. The last spring frost date is your primary benchmark. Find your zone and frost dates on the USDA Plant Hardiness Map.
- Northern US (Zones 3–5): Plant late May to early June.
- Midwestern/Temperate (Zones 6–7): Plant mid-May to early June.
- Southern US (Zones 8–10): Plant late April to mid-May.
Microclimates within your region can also influence planting time. Urban gardens may warm up faster, while rural sites at higher elevations remain cooler longer. Observing garden trends from previous years can help fine-tune timing.
Soil Temperature And Moisture
Optimal soil temperature for pumpkin seed germination is 65–95°F (18–35°C), with 85°F (29°C) ideal. Use a soil thermometer to measure several inches down. Avoid planting in soggy conditions, which promote rot.
Gardeners in wet climates often build raised beds or hills to ensure proper drainage. Amending soil with sand or organic matter can further improve moisture balance. If heavy rains are expected, delaying planting by a few days can prevent seed rot and boost overall emergence rates.
Day Length And Growing Season
Pumpkins need 90–120 frost-free days to mature. Short-season regions may need to start seeds indoors or choose fast-maturing varieties.
Longer days during the summer support vigorous vine growth and larger fruit. In high-altitude or far-north areas, gardeners sometimes supplement with grow lights or reflective mulch to maximize photosynthesis. Conversely, in southern areas, planting early ensures fruit matures before days shorten and temperatures drop.
Variety Selection
Some pumpkins mature in as little as 85 days (e. g. , ‘Early Sweet Sugar Pie’), while giant varieties may need 125–150 days. Match your variety to your local growing window.
Hybrid varieties bred for disease resistance or compact growth may offer additional flexibility. For example, ‘Baby Bear’ pumpkins are ideal for tight spaces and short seasons, while ‘Atlantic Giant’ requires an extended season and ample room.
Local Weather Patterns
Unusually cold or wet springs may delay planting. Watch local forecasts and adjust as needed.
In regions prone to spring storms, planting a week later can make a substantial difference in seedling survival. Some growers use weather apps and historical data to track trends and optimize planting dates year-to-year.
Regional Planting Calendars And Real-world Examples
Timing is everything—here’s how planting dates shift across the US, plus real-life results from gardeners.
Regional Planting Table
| Region | Recommended Planting Dates | Average First Frost | Days to Maturity |
|---|---|---|---|
| Northern (Zone 3-5) | May 25 – June 10 | Oct 1 – Oct 15 | 90–120 |
| Midwest (Zone 6-7) | May 10 – May 31 | Oct 15 – Nov 1 | 90–120 |
| South (Zone 8-10) | Apr 20 – May 15 | Nov 1 – Nov 15 | 80–110 |
| Pacific NW | May 15 – June 1 | Oct 10 – Oct 25 | 90–110 |
Case Study: Oregon Grower Success
A small farm in Willamette Valley, Oregon planted ‘Howden’ pumpkins on May 20. With ample early summer rainfall and warm soil, their vines produced over 2,000 pounds of fruit per acre—compared to just 1,400 pounds from a neighbor who planted three weeks later.
This result highlights the impact of planting within the recommended window. The earlier-planted pumpkins benefited from longer days, optimal soil warmth, and more pollinator activity. The farm also used organic compost and mulched heavily, which contributed to healthy vines and robust fruit set.
Case Study: Early Planting Pitfalls
A home gardener in Michigan sowed seeds outdoors in late April, two weeks before the last frost. A surprise cold snap killed 80% of seedlings, costing valuable time and requiring replanting in late May.
The gardener learned to use a soil thermometer and consult local extension forecasts for future plantings. Additionally, switching to indoor seed starting minimized risk in subsequent years.
How To Find Your Local Frost Dates
Use the Old Farmer’s Almanac Frost Date Calculator to determine the average last spring frost and first autumn frost for your zip code.
These tools help you accurately plan your planting window and avoid the most common timing mistakes. Local extension offices may also provide customized calendars and advice specific to your region.

Credit: sowrightseeds.com
Indoor Vs. Direct Sowing: Which Method Yields Bigger Pumpkins?
Your planting method can affect harvest size, especially in regions with short growing seasons.
Starting Seeds Indoors
Advantages:
- Jumpstarts the growing season by 2–3 weeks.
- Protects seedlings from cold snaps and pests.
- Increases chances for larger fruit in cool climates.
How-To:
- Start seeds in peat pots 2–3 weeks before outdoor planting time.
- Keep soil at 70–85°F (21–29°C) and ensure bright light.
- Harden off seedlings for 7 days before transplanting outside.
Seedlings should be acclimated gradually to outdoor conditions by placing them outside for a few hours each day, increasing time and exposure over a week. This reduces transplant shock and promotes sturdy growth.
Drawbacks:
- Transplants can suffer shock if roots are disturbed.
- Requires more effort and indoor space.
Choosing biodegradable pots minimizes root disturbance during transplant. Regular monitoring for damping-off (fungal disease) is essential; maintaining good air circulation helps prevent this issue.
Direct Sowing Outdoors
Advantages:
- Less labor-intensive and no transplant shock.
- Seeds germinate in place, adapting to local soil conditions.
Best Practice:
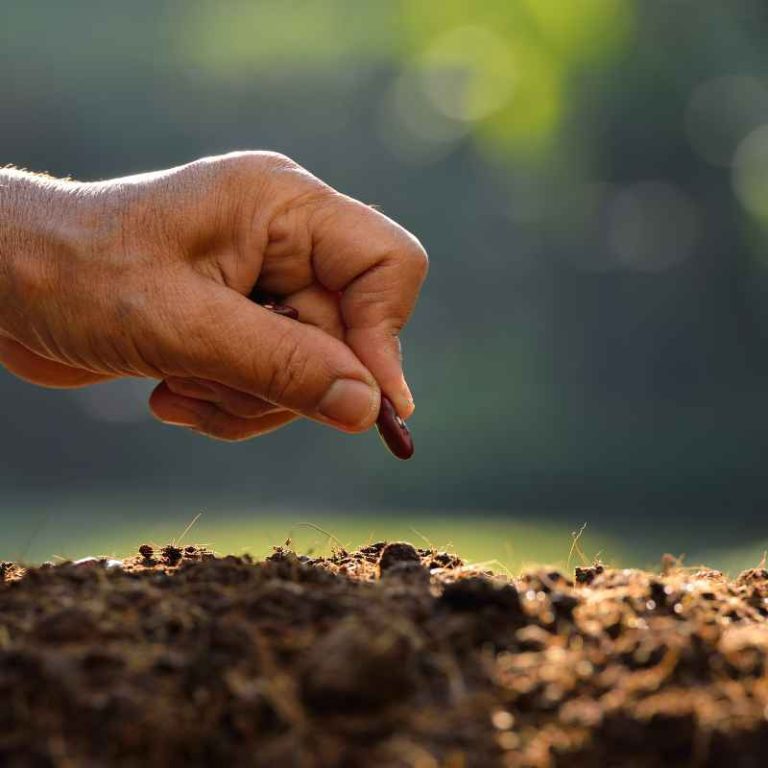
- Plant seeds 1 inch deep, 4–5 feet apart, after soil is consistently warm.
Direct sowing allows roots to penetrate deeply and vines to establish quickly. In regions with reliable spring weather, this method is preferred for its simplicity.
Drawbacks:
- Vulnerable to weather, pests, and erratic spring conditions.
- Later start may limit fruit size in northern regions.
To mitigate risks, consider using row covers until seedlings are established. In areas with heavy pest pressure, direct sowing may require more frequent monitoring.
Comparison Table: Indoor Vs. Direct Sowing
| Method | Ideal For | Pros | Cons |
|---|---|---|---|
| Start Indoors | Short-season, cool climates | Earlier harvest, larger fruit, protected seedlings | Labor, space, risk of transplant shock |
| Direct Sow | Long, warm seasons | Simple, no transplant shock | Later harvest, weather risk |
Case Example: New England Giant Pumpkins
Competitive growers in Maine routinely start seeds indoors by mid-April and transplant after Memorial Day, often producing 1,000+ lb. pumpkins—a feat impossible with direct sowing in their short season.
These growers also use heated germination mats and supplemental lighting to maximize early growth. They carefully monitor soil temperature outdoors before transplanting, ensuring optimal conditions for rapid vine development.
Step-by-step Guide: When And How To Plant For Maximum Yields
Proper timing is only part of the equation—how you plant matters, too. Here’s a detailed walkthrough.
Step 1: Plan Your Timing
- Find your last spring frost date and count back 2 weeks for indoor starting, or wait until 2 weeks after for direct sowing.
- Choose a variety suited to your climate and desired harvest window (e.g., Halloween, Thanksgiving).
Experienced growers often keep a garden journal to track planting dates, weather patterns, and harvest outcomes, helping refine timing each season.
Step 2: Prepare The Planting Site
- Select a site with full sun (at least 6–8 hours daily).
- Pumpkins need rich, well-drained soil with pH 6.0–6.8.
- Work in 2–4 inches of compost or aged manure before planting.
- Form mounds or hills 4–6 feet apart to improve drainage and root warmth.
If your soil is heavy clay, amend with coarse sand and organic matter. Testing pH and nutrient levels before planting helps correct deficiencies and optimize growth.
Step 3: Plant Seeds
Direct Sow:
- Plant 4–5 seeds per hill, 1 inch deep.
- Thin to the strongest 1–2 seedlings per hill after emergence.
Indoors:
- Sow 1–2 seeds per peat pot.
- Transplant outdoors when seedlings have 2–3 true leaves and soil is reliably warm.
For direct sowing, spacing is crucial—crowded hills lead to smaller, less healthy fruit. If growing multiple varieties, label hills clearly to track performance.
Step 4: Care And Maintenance
- Water deeply but avoid wet foliage (1–2 inches/week).
- Mulch to retain moisture and suppress weeds.
- Fertilize with balanced, slow-release fertilizer at planting; side-dress with high-potassium fertilizer at fruit set.
Frequent, shallow watering encourages weak roots; instead, water thoroughly to promote deep, resilient root systems. Organic mulches like straw or shredded leaves not only retain moisture but also deter weeds and keep fruit clean.
Step 5: Monitor Growth And Protect Your Crop
- Scout for pests (squash bugs, cucumber beetles) and diseases (powdery mildew).
- Use floating row covers early, but remove when flowers appear for pollination.
Integrated pest management—combining cultural, biological, and organic controls—can minimize losses. Companion planting with nasturtiums or marigolds may deter some pests naturally.
Step 6: Harvest At The Right Time
- Pick pumpkins when they’re fully colored, skin is hard, and vines begin to die back.
- Cut stems with a sharp knife, leaving 2–4 inches attached for longer storage.
Curing pumpkins in a warm, dry location for 10–14 days after harvest improves skin hardness and storage potential. Avoid bruising or dropping fruit, as this can introduce rot.
Example Timeline: Midwest Home Garden
- Last frost: May 10
- Start seeds indoors: April 25
- Transplant outdoors: May 15
- Harvest window: September 10–October 15
Adjust timelines based on actual weather conditions; flexible scheduling ensures you respond to unexpected heatwaves or cold snaps.
Common Pitfalls And How To Avoid Them
Timing mistakes can cost you your harvest. Here’s what to watch out for.
Planting Too Early
- Risk: Cold soil and late frosts can kill seedlings or stunt growth.
- Solution: Wait until soil is consistently warm; use cloches or row covers if an early start is needed.
Early planting may tempt gardeners eager for a jump on the season, but patience pays off. If frost threatens after planting, covering seedlings overnight with buckets or frost blankets can offer protection.
Planting Too Late
- Risk: Not enough time to mature before frost; small or green pumpkins at season’s end.
- Solution: Choose faster-maturing varieties or start seeds indoors in short-season areas.
Late plantings often result in unripe fruit or reduced yields. Tracking previous years’ frost dates can help avoid this mistake. In long-season climates, later plantings may still yield, but fruit size and quality often diminish.
Ignoring Soil Temperature
- Seeds may rot or fail to germinate in cold, wet soil.
- Always test soil temperature at 2-inch depth before planting.
Many extension offices recommend waiting until daytime soil temperatures consistently reach 65°F for best results. In northern regions, warming soil with clear plastic for a week before planting can expedite readiness.
Overcrowding
- Crowded plants compete for light, water, and nutrients, resulting in fewer, smaller fruits.
- Space hills and rows generously (4–6 feet apart).
Some gardeners mistakenly plant too many seeds per hill, hoping for a bigger harvest. Thinning is essential for healthy, robust vines and fruit.
Neglecting Pollination
- Poor fruit set can result from low bee activity or excessive row cover use.
- Hand-pollinate if necessary, or plant companion flowers to attract pollinators.
If bee populations are low, gently transferring pollen from male to female flowers with a small brush can ensure fruit set. Planting bee-friendly flowers near your pumpkin patch encourages natural pollination.
Case Study: Late Planting In Georgia
A school garden in Atlanta planted ‘Jack Be Little’ pumpkins in late June. Early summer heat stressed young vines and the crop failed to mature before the first frost—demonstrating the hazards of pushing the planting window.
The school later adjusted their schedule, planting in early May and adding mulch to protect roots from summer heat, resulting in a successful harvest.
Maximizing Your Harvest: Advanced Tips And Data
Once you’ve nailed the planting date, these advanced strategies can help you achieve truly spectacular results.
Soil Amendments And Fertility
- Pumpkins are heavy feeders. Incorporate plenty of organic matter, such as compost or manure, before planting.
- Use slow-release or organic fertilizers high in phosphorus and potassium to support flowering and fruit set.
- Test soil annually and adjust nutrients accordingly—see recommendations from University of Minnesota Extension.
Cover cropping with legumes in the off-season can add nitrogen naturally, further enriching soil for future plantings. Balancing micronutrients like calcium and magnesium ensures strong vines and healthy fruit.
Water Management
- Consistent moisture is essential, especially during flowering and fruit expansion.
- Drip irrigation or soaker hoses are ideal to prevent foliage diseases.
Avoid overhead watering, which can promote mildew and other foliar diseases. Deep watering encourages roots to penetrate and access nutrients efficiently.
Mulching And Weed Control
- Apply a 3-inch layer of straw or leaf mulch to retain moisture, suppress weeds, and keep fruit clean.
- Avoid plastic mulches in hot climates, which can overheat roots.
Living mulches, such as clover, can provide weed suppression and improve soil structure. However, monitor for competition with pumpkin roots.
Pest And Disease Prevention
- Rotate crops annually to prevent buildup of soil-borne diseases.
- Scout weekly for insects and apply organic controls (e.g., neem oil) as needed.
- Remove diseased vines promptly.
Integrated pest management strategies—like using beneficial nematodes or attracting predatory insects—can reduce pest populations naturally.
Pruning And Training
- Prune secondary vines to focus energy on fewer, larger fruits.
- Gently turn pumpkins as they grow to encourage symmetrical shape and even color.
Pruning also improves air circulation, reducing disease pressure. Training vines along trellises or supports can help manage space in smaller gardens.
Case Example: Giant Pumpkin Growers
Competitive growers targeting Atlantic Giant pumpkins routinely prune all but the main vine and limit fruit to one per plant. With intensive feeding and watering, they often produce fruits over 1,500 lbs—a feat requiring meticulous timing and care.
Detailed record-keeping and regular soil testing are hallmarks of these growers, allowing them to optimize every aspect of the growth cycle.
Harvest And Storage Data Table
| Harvest Time | Fruit Size Range | Storage Life (at 50-55°F) | Notes |
|---|---|---|---|
| Early (Sept 1–15) | 5–15 lbs (small/medium) | 2–3 months | Ideal for pies, small markets |
| Main (Sept 15–Oct 15) | 10–30 lbs (jack-o’-lantern) | 3–6 months | Best for Halloween, storage |
| Late (Oct 15–Nov 1) | 10–50+ lbs | 1–2 months | Risk of frost damage, shorter storage |
Timing Pumpkin Planting For Specific Goals
Not all pumpkin growers have the same objectives. Here’s how to adjust your planting strategy based on your ultimate goal.
Growing For Halloween
- Plant so that pumpkins reach full color and maturity by early to mid-October.
- For 100-day varieties, sow seeds between late May and early June in most regions.
Consider the specific requirements of your chosen pumpkin—some types may require additional curing time after harvest to reach ideal color and hardness.
Prize-winning Giant Pumpkins
- Start seeds indoors 3–4 weeks before the last frost for the longest possible season.
- Choose varieties like ‘Atlantic Giant’ and allow only one fruit per vine for maximum size.
These growers often supplement with foliar feeds and monitor soil moisture daily, using digital sensors and regular field walks to ensure optimal conditions.
Pie And Culinary Pumpkins
- Select varieties bred for flavor and texture (e.g., ‘Sugar Pie’, ‘Cinderella’).
- Plant according to the variety’s days to maturity and desired harvest date.
Some culinary varieties perform best when planted a bit earlier, allowing fruit to fully develop sugars before harvest.
Succession Planting
- In long-season regions, stagger plantings 2–3 weeks apart to extend harvest and market window.
- Use early, mid, and late-maturing varieties for a continuous supply.
Farmers markets benefit from succession planting, ensuring a steady flow of pumpkins from early September through November.
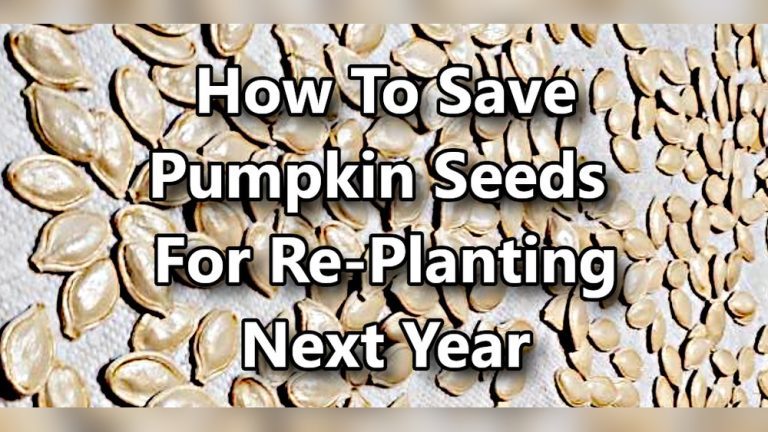
Seed Saving
- Allow select fruits to mature fully on the vine; harvest before frost.
- Cure and store for 3–4 weeks before extracting seeds for next year.
Proper seed drying and storage in cool, dry conditions ensures viability for future plantings.
Tools, Resources, And Further Reading
Whether you’re a beginner or a serious grower, leveraging expert resources can boost your success.
- Soil thermometers: Essential for checking planting temperature.
- Regional extension offices: Offer local frost dates, pest alerts, and variety recommendations.
- Seed catalogs: Provide days to maturity, planting tips, and disease resistance info.
Explore further:
- Gardening Know How: Planting Pumpkin Seeds
- Penn State Extension: Pumpkin Production
- Old Farmer’s Almanac: Pumpkin Planting Guide
- GrowVeg: How to Grow Pumpkin
Frequently Asked Questions
When Is The Absolute Latest I Can Plant Pumpkin Seeds And Still Get A Harvest?
The latest planting date depends on your local first fall frost and the pumpkin variety’s days to maturity. Count backward from your average first frost date by the number of days your variety requires (e.g., 100 days for most jack-o’-lantern types). Planting later than this risks having immature, green pumpkins when frost arrives.
Can I Plant Pumpkin Seeds In Containers Or Raised Beds?
Yes, pumpkins can thrive in large containers (at least 20 gallons) or raised beds, as long as they have ample space to spread their vines. Use rich, well-draining soil and water consistently. Choose bush or dwarf varieties for small spaces.
If growing in containers, ensure drainage holes are present and avoid crowding. Container-grown pumpkins may need more frequent watering and feeding due to limited root space.
How Do I Know If My Soil Is Warm Enough For Planting?
Use a soil thermometer to measure temperature at a 2-inch depth in the morning. Wait to plant pumpkin seeds until soil consistently reaches at least 65°F (18°C) for optimal germination and growth.
Checking several spots in your garden can help identify microclimates and choose the best area for early planting.
What Are The Best Pumpkin Varieties For Short Growing Seasons?
Look for varieties with short days to maturity (75–90 days), such as ‘Early Sweet Sugar Pie’, ‘Baby Bear’, or ‘Jack Be Little’. These are ideal for northern regions or areas with unpredictable weather.
Consult local extension offices for region-specific recommendations, as some hybrids may offer improved disease resistance and performance in challenging climates.
Can I Save Seeds From My Pumpkins To Plant Next Year?
Yes, you can save seeds from open-pollinated (heirloom) varieties by allowing fruits to mature fully, curing them, and cleaning the seeds. Avoid saving seeds from hybrids, as they may not breed true.
Properly dried seeds should be stored in a cool, dry place in a paper envelope or glass jar. Label seeds with the variety and harvest date for future reference.
Pumpkin planting is both a science and an art, and the rewards are well worth the effort. By aligning your planting dates with local climate data, soil temperatures, and your harvest goals, you can consistently produce big, beautiful pumpkins year after year.
Use the strategies and resources in this guide to fine-tune your timing and maximize your yields—your future autumn harvest will thank you.