How to Design Landscape Lighting for Entryways
A common approach is to plan entryway lighting in three layers—a low path, a brief pause at the door, and a brighter reveal at the threshold—using roughly 2700K to 3000K fixtures and glare control. Bad spacing or bare bulbs create dark gaps, harsh glare, and a front entry that feels unsafe instead of welcoming. This guide covers fixture placement, beam spread, step and path lighting, driveway balance, and simple design rules for a front approach.
Design the arrival sequence


Map the path, pause, and reveal
Start with goals before fixtures. Decide where foot traffic should feel guided, where a person should slow down, and which parts of the facade should read clearly from the street. Front entryways are one of the areas to assess after sunset, and walkways and driveways are priority zones in many lighting plans.
The path should read first. The pause should feel calm and visible. The reveal should bring the front door, house numbers, and nearby facade into view without flooding the entrance with light.
Choose the front entry focal point
Pick one primary focal point at the entry, usually the door surround, stoop, sidelights, or a strong architectural feature such as columns. A timeless entryway option is sculptural lighting to draw out architectural strengths, but only when the fixture shape and output suit the scale of the facade.
A front entry focal point should not compete with the walk. If the door glow becomes the brightest thing in the scene, the approach loses depth and the eye loses its route.
Balance welcome light with safe footing
Entry lighting should improve curb appeal, safety, and security, but the entry sequence works only when those goals stay in order. Safe footing comes first on the walk and steps. The welcoming effect comes from controlled brightness at the threshold, not from lighting every surface evenly.
Keep the lighting layered. Use path lights for guidance, a restrained accent at the entry, and downlighting or uplighting only where each one solves a specific visual problem.
What lights belong at the front door?
Use path lights to lead people to the entry, then add a focused accent at the threshold so the door reads clearly without glare. Skip exposed lamps at eye level, especially beside glass sidelights or reflective stone. The front door should feel readable before it feels bright.
Use path lights for the approach
Path lighting is used to improve visibility along sidewalks and garden paths. At an entry, that means low fixtures that mark the route, define edges, and help people judge grade changes. Kichler describes a path and spread technique for sidewalks, stone paths, and lawn walkways, which is useful when the route bends or widens near the house.
Keep the light on the walking surface, not in the face. A low fixture with a controlled beam helps the eye follow the route while keeping the source out of direct view.
Use accent light at the threshold
The threshold needs a brief pause, not a washout. A soft fixture aimed at the porch floor, column face, or door surround can mark the entry without blasting the door itself. Homes and Gardens recommends a layered approach to entryway lighting, and this is the point where that layering matters most.
Use the threshold light to signal arrival. Let the front door stand out because it is the brightest architectural detail in a small zone, not because it is flooded with light.
Skip fixtures that create eye-level glare
Glare becomes a problem fast at a front door. Bare bulbs, open-faced sconces aimed straight outward, and bright lamps mounted near sidelight glass can hit the eye before the path is even clear. Entry lighting should avoid excess brightness because it creates glare.
Shield the source, aim the beam down or across a surface, and keep the brightest points out of direct sightlines from the walk, driveway, and stoop.
Entryway lighting decision grid
Use this grid to match the front-entry condition to the fixture, mounting height, beam direction, and glare risk. The last column shows what to avoid when eye-level comfort matters. This is the fastest way to avoid random placement.
| Scenario | Fixture type | Mounting height | Beam direction | Risk note | Do not use |
|---|---|---|---|---|---|
| Straight walk | Low path lights | Low to the ground | Down and slightly along the route | Keep spacing even to avoid dark gaps | Tall fixtures that throw light into the eyes |
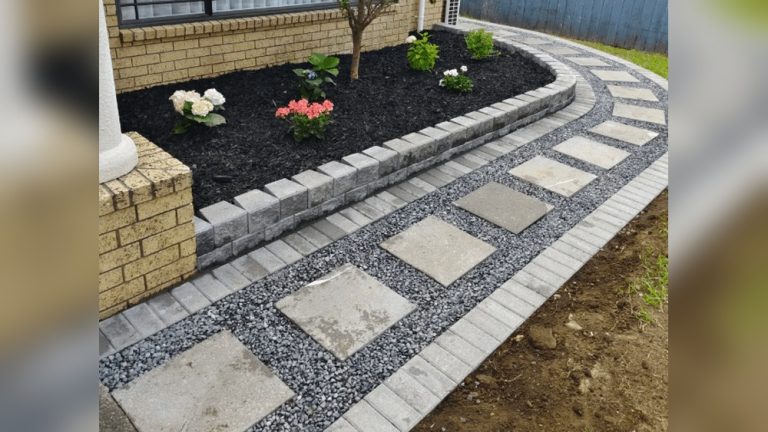
| Curved walk | Path lights with tighter spread | Low to the ground | Follow the curve and aim ahead | Curves need smoother overlap than straight runs | Wide, uncontrolled beams that spill into planting beds |
| Porch stoop | Small accent light or shielded sconces | At porch level or just above | Across the stoop or down to the landing | Avoid hot spots on steps and reflective tile | Unshielded fixtures pointed outward at eye level |
| House numbers | Dedicated accent light | Near number height | Across the numerals | Keep contrast high and shadows low | Light that washes the numbers flat or hides them in glare |
| Sidelights | Soft accent or shielded wall light | Near the frame, not at eye level | Across the frame or down the wall | Glass can reflect bright sources back toward the walk | Bright lamps facing directly into glass |
| Columns | Uplight or narrow accent | At base level | Up the column face with control | Too much brightness turns texture into glare | Open beams that flare into the entry path |
| Steps | Step lights or low side lighting | At tread or riser level | Across each tread | Every change in elevation needs a visible edge | One overhead light that leaves the risers dark |
| Adjacent planting beds | Downlight or restrained uplight | Higher mount or base of feature | Down onto plants or up onto a feature | Keep light off the walking surface unless needed | Fixture heads aimed toward the door or driveway |
How do you place path lights without glare?
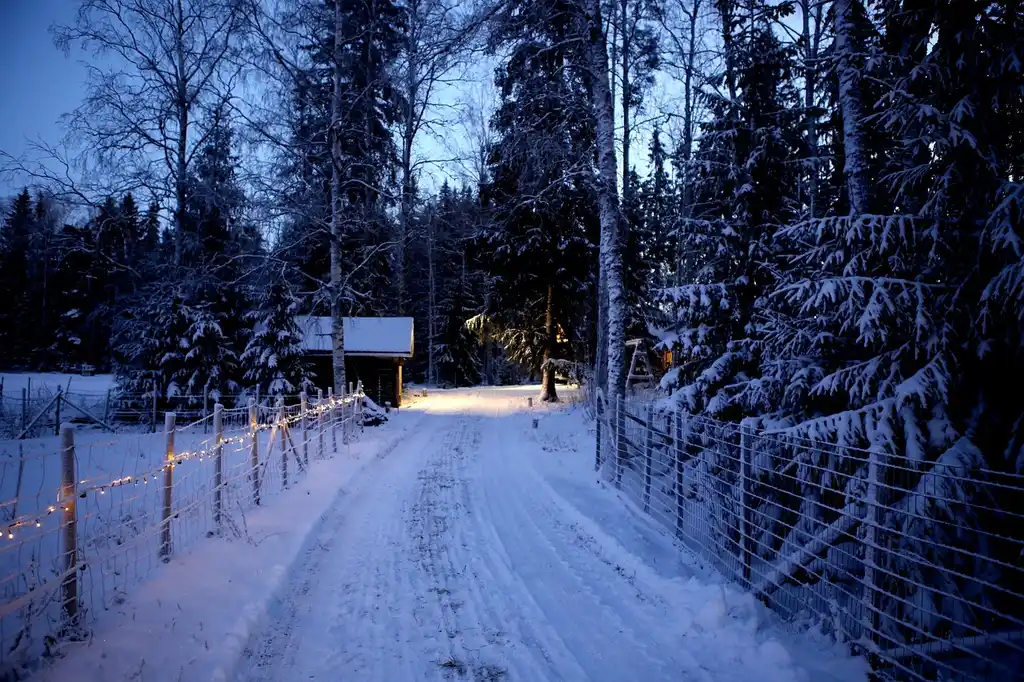
Place path lights low, aim them down the route, and keep the beam off eye level. The spacing should follow the walk shape, not a fixed decorative rhythm. Good placement gives continuous guidance without bright pools, dark breaks, or harsh spots on stone and concrete.
Set spacing by walk width and curve radius
How far apart should entryway lights be spaced? Use the width of the walk and the shape of the route as the main guide. A straight, narrow walk can use wider spacing than a curve, because the eye can read the route more easily. Curved paths usually need closer overlap so the bend does not disappear in shadow.
A common rule of thumb is to start with the walk edges clearly visible, then adjust until the overlap looks even from the direction of approach. If the light source is visible before the next pool appears, the spacing is too wide.
Keep sources low and aimed down the route
Low fixtures work best because they keep the source below the sightline and show the walking surface instead of the bulb. Kichler’s path and spread approach is useful here: let the beam spread across the walk, not outward across the yard.
Suppose a 4-foot-wide front walk bends toward the porch and catches light from a reflective paver. If the fixture sits too high, the paver throws a bright spot back toward the eye. Drop the height, narrow the spread, and the route reads without the flash.
Prevent hot spots on reflective hardscape
Reflective stone, polished concrete, and wet surfaces can turn a normal beam into a hot spot. That is where glare control matters most. Shielding, lower output, and better beam direction usually solve the problem before adding more fixtures.
Do not aim a path light straight at a glossy landing. Aim it across the walk, or place it so the beam lands on the surface at a shallow angle.
When should you use uplighting or downlighting?
Use uplighting when the goal is to read vertical features such as trees, columns, or facade texture. Use downlighting when you want soft ambient light over the entry or a nearby seating spot. Both can work at the front door, but each has a different job and a different glare risk.
Use uplighting for trees, columns, and facade texture
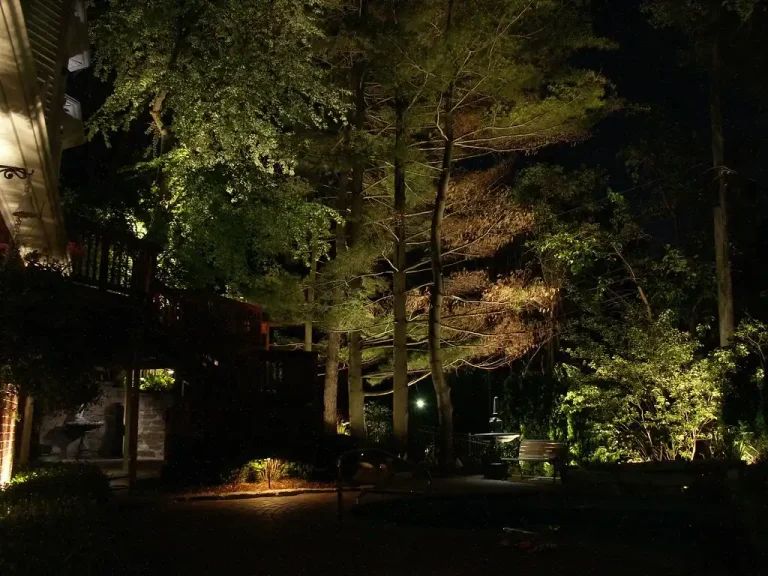
Uplighting places the fixture near the feature and sends the beam upward. It works well on columns, trunk flare, or textured stone when you want the front of the house to gain depth. Keep the source close to the object and control the angle so the beam does not cut into the walkway.
Too much uplighting at an entry can throw long shadows across the door zone. That can make the approach feel dramatic, but it can also hide a stair edge or make house numbers harder to read.
Use downlighting for soft ambient wash near the entry
Downlighting creates a moonlight effect from a higher mounting position. It can soften the entry and help the porch or seating area feel calm. Because the beam comes from above, it is often easier to keep glare out of the eye while still lighting the landing.
Place downlights so the beam lands on the ground plane, not directly on glass or glossy hardware. That keeps the threshold readable and reduces reflections.
Control shadowing around glass and door hardware
Glass sidelights, polished handles, and dark door surrounds can all change how the beam reads. Strong side light can turn hardware into a bright flare, while backlighting can throw the face of the door into shadow. Adjust the angle before adding wattage.
A common first-timer mistake is to light the door itself too hard. The result is a bright rectangle with a dark landing, which makes the approach feel less clear, not more.
Choose LEDs, color temperature, and controls
LED fixtures use less energy than traditional bulbs, need less maintenance, and give you more control over beam shape and color. For entryways, warm white is the better default. The system should be sized around the full fixture load, the wire run, and how the lights will be switched on each night.
Pick warm white between 2700K and 3000K
What color temperature is best for entryway lighting? Warm white in roughly the 2700K to 3000K range is commonly considered suitable for a residential front entry because it tends to feel softer on brick, stone, wood, and painted trim. It also avoids the harsh cast that cooler light can create on skin and facade materials.
Keep the same color temperature at the front door, path, and threshold whenever possible. Mixed temperatures can make the entry look pieced together.
Size the transformer for the full fixture load
A low-voltage transformer connects to an outdoor outlet and powers a 12V system. Choose a model with enough wattage capacity for the planned load, with room left for future fixtures if expansion is likely. Timers and photocells can automate the system without adding much complexity.
Do not size the transformer only for the first fixture group if the front approach may expand later. A little headroom can prevent a second transformer from being needed too soon.
Plan timers, photocells, and low-voltage wire runs
Wire planning matters as much as fixture choice. Common options include 12-gauge and 14-gauge wire, and the run length affects voltage drop. Longer runs and heavier loads usually call for careful wire sizing so the last fixture does not dim more than the first.
Buried installation keeps the route neat and protected. Plan the wire path before digging, and keep the layout simple enough that future changes at the entry do not force a full rewire.
How do you light steps, numbers, and columns safely?
Light every change in elevation, make the house numbers legible from the street, and avoid washing the door or sidelights too hard. Safety at the front entry depends on clear edges and readable landmarks, not on brightness alone.
Light every change in elevation
Steps and landings need their own light, because a single beam from above often leaves the risers in shadow. Put light where the foot needs to land and where the next edge begins. That reduces trip hazard risk on stair runs, stoops, and short transitions between walk and porch.
If the entry has a short flight and a turn, each landing should read as its own safe surface. One bright fixture at the top will not replace a visible tread line.
Keep house numbers legible from the street
House numbers should be easy to read before a visitor reaches the door. Aim a soft accent across the numbers instead of at the viewer. If the numbers sit near glass or glossy trim, shield the source so the light lands on the digits and not the reflection.
That small adjustment helps both visitors and delivery drivers, especially on a dark driveway approach where the numbers are the last cue before the turn.
Balance columns, sidelights, and driveway visibility
Columns can anchor the entry, but they should not block the walking light. Uplight the column face only when the beam stays off the path. Sidelights should frame the door, not throw bright reflections into the walk or driveway.
Driveway visibility also matters near the front entry, especially where cars and foot traffic cross. Keep the transition zone clear and readable so someone stepping out of a vehicle can see the curb, walkway edge, and first step at once.
- Mark the arrival route from curb to door.
- Choose the primary focal point at the threshold.
- Add low path lighting for the main walk.
- Place one restrained accent at the entry.
- Use uplighting or downlighting only where a feature needs it.
- Check steps, numbers, and reflective surfaces for glare.
- Size the transformer and wire for the full plan, not only phase one.
Budget and sequencing matter when the front approach is lit first. Start with the walk, steps, and house numbers, because those are the most useful safety layers. Then add the threshold accent, followed by columns or facade lighting if the budget allows. That order gives you usable light early and keeps the system easy to expand later.
Picture a narrow front walk that turns twice before reaching a porch with sidelights. A first phase might cover the walk and the steps only, using low fixtures and a small transformer with room to grow. A second phase can add the column accent or porch wash after the route already feels clear.
Frequently asked questions
How do I design lighting for an entryway without glare?
Design the entry in layers and keep the light source out of direct view. Use low path lights, shielded accents, and careful beam direction so the eye sees the route and the threshold, not the bulb. Warm white and soft output help, but placement matters more than brightness.
What lights work best for a front entryway and walkway?
Low path lights work best for the walk, because they guide foot traffic without shining into the eyes. At the door, use a restrained accent or shielded sconce to mark the threshold. If the facade has strong features, add uplighting or downlighting only where they solve a clear visual need.
How far apart should entryway lights be spaced?
There is no single spacing number that fits every walk. Start with the walk width, then close the spacing on curves and widen it on straighter runs if the route still reads clearly. The goal is even overlap, no dark gaps, and no bright pools that distract from safe footing.
Should I use uplighting or path lighting at the front entrance?
Use path lighting first if the goal is safe passage. Use uplighting only for a feature such as a column, tree, or textured facade that benefits from vertical emphasis. At most front entries, path lighting does the practical work while uplighting acts as a small accent, not the main plan.
What color temperature is best for entryway lighting?
Warm white between 2700K and 3000K is usually the best fit for a front entry. It flatters brick, stone, and painted trim, and it feels less harsh at night than cooler light. Keep the temperature consistent across the walk, threshold, and steps for a cleaner result.
How do I light steps and entry paths safely?
Light every change in elevation with a fixture that makes the edge easy to read. Steps need light on the tread or riser area, and paths need low fixtures that define the route. Keep the source shielded and the beam aimed across the surface, not into the eye.
Can lighting improve curb appeal around the front door?
Yes, but the improvement comes from order, not from more fixtures. A clear approach, a defined threshold, and a controlled reveal at the facade make the entry feel intentional. The best curb appeal at night is the one that helps people move toward the door with confidence.