
Transforming outdoor spaces with pebble landscaping creates a natural, visually striking environment that endures for years. Whether for decorative walkways, garden borders, or water features, securely bonding pebbles is essential for both aesthetics and longevity. Many homeowners and landscape professionals struggle with ensuring pebbles stay in place, especially under harsh weather conditions or heavy foot traffic. The secret lies in choosing the right adhesive and mastering the correct technique—skills that blend science with creativity.
Done right, glued pebble arrangements withstand rain, freeze-thaw cycles, and daily use, while preserving their beauty. This guide delves into proven methods, product comparisons, and actionable steps to help you achieve durable, lasting results. Backed by expert insights and real-world examples, you’ll discover everything needed to elevate your landscaping with pebble features that truly last.
Key Takeaways
- Proper adhesive selection is critical for outdoor durability and weather resistance.
- Surface preparation greatly influences bonding strength and longevity.
- Epoxy and polyurethane adhesives outperform traditional glues for landscaping pebbles.
- Technique matters: Layering, curing, and maintenance are essential for lasting results.
- Safety precautions and eco-friendly choices minimize environmental impact.
- Real-world examples illustrate how effective bonding transforms landscapes.
Understanding Pebble Bonding For Landscaping
A lasting pebble landscape starts with understanding how adhesives interact with stone and environmental factors. Choosing the right glue, prepping surfaces, and applying it with precision ensures your project holds up.
Types Of Pebbles Used In Landscaping
Pebbles come in various shapes, sizes, and materials, each with unique properties:
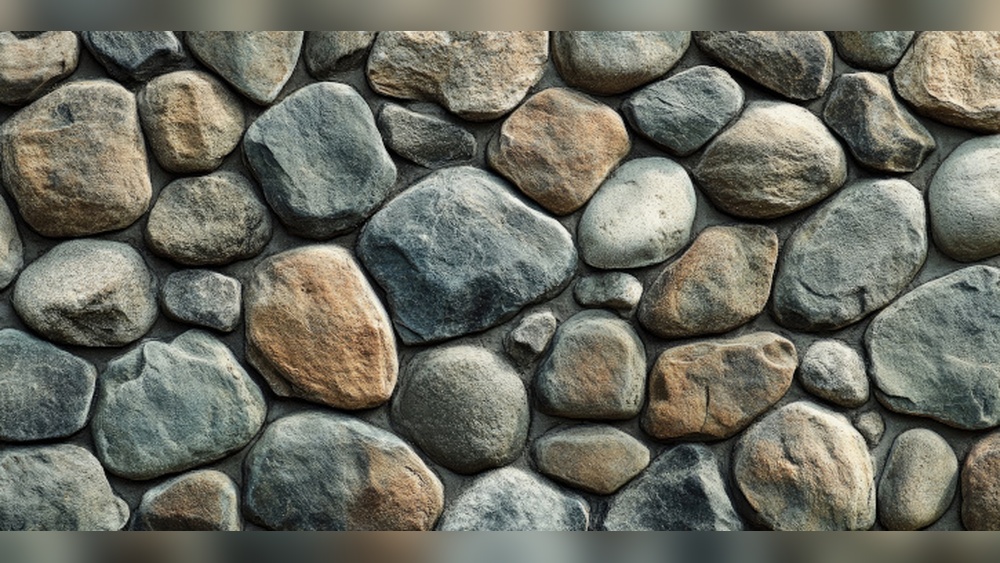
- River pebbles: Smooth, rounded, often used for pathways and water features. Their natural finish and pleasant feel underfoot make them a preferred choice for barefoot-friendly surfaces and Zen gardens.
- Crushed stone: Angular, offers better mechanical interlock but less aesthetic appeal. These are particularly suited for driveways or areas where grip and stability take precedence over visual harmony.
- Marble chips: Bright, decorative, ideal for accent areas. The reflective quality of marble chips can brighten shaded areas and contrast beautifully against greenery.
- Granite pebbles: Durable, withstand heavy loads and weather extremes. Their resilience makes them suitable for high-traffic areas, and their speckled appearance offers subtle visual interest.
Selecting the right pebble depends on the project’s function and desired appearance. For instance, river pebbles are common for decorative features, while crushed stone excels in structural applications. Granite is often recommended for driveways, while marble chips are popular in modern landscape designs for their visual pop.
Additional Pebble Options
- Polished pebbles: Used in luxury landscaping for a glossy, upscale finish.
- Mixed aggregates: Combining types adds texture and color variation.
- Glass pebbles: For contemporary water features or illuminated accents.
Why Gluing Pebbles Is Necessary
Traditional pebble installations rely on gravity or loose aggregates. However, glued pebbles:
- Resist displacement from weather, pets, or foot traffic.
- Prevent weed growth between stones, reducing the need for chemical weed killers or frequent maintenance.
- Enable intricate designs and mosaics that would be impossible with loose stones, such as detailed garden art, logos, or themed motifs.
- Reduce maintenance compared to loose stone, as glued surfaces are less prone to ruts, shifting, or scattering.
In high-traffic or exposed areas, glued pebbles dramatically improve longevity and aesthetics. Without adhesive, pebbles can migrate, creating safety hazards and uneven surfaces. Gluing also makes cleaning easier, as debris can be swept or hosed off without displacing the stones.
Environmental Considerations
Outdoor pebble features face rain, freeze-thaw cycles, UV exposure, and soil movement. Adhesives must withstand:
- Moisture and humidity, which can seep into and beneath the pebble layer.
- Temperature fluctuations, especially in regions with significant seasonal changes.
- Sunlight and UV rays, which can degrade certain adhesives over time, leading to brittleness or yellowing.
- Chemical exposure (fertilizers, de-icers), particularly in garden beds or near walkways.
Select adhesives formulated for exterior use to avoid premature failure. For example, construction-grade epoxies and polyurethanes are engineered to resist these environmental pressures.
Drainage And Soil Movement
Proper site grading and substrate selection are also vital. Poor drainage can compromise adhesive bonds by keeping the pebble bed perpetually wet, leading to eventual loosening or mold growth. Areas subject to frost heave or soil shifting require flexible adhesives, such as polyurethane, to accommodate minor movements without cracking.
Real-world Example: Pebble Mosaic Patio
A homeowner in Seattle created a pebble mosaic patio using river stones bonded with two-part epoxy. After five years of rain and freeze-thaw cycles, the patio remained intact, proving the durability of epoxy when properly applied. The project included a mix of small and medium river pebbles arranged in a mandala pattern.
The homeowner reported minimal maintenance—just occasional sweeping and resealing every three years—which kept the patio looking as vibrant as the day it was installed.
Choosing The Best Adhesive For Pebble Landscaping
Selecting the ideal adhesive is pivotal. The market offers several options, each with distinct advantages and drawbacks.
Comparison Of Common Adhesives
| Adhesive Type | Strength | Weather Resistance | Ease of Use | Typical Longevity | Price Range |
|---|---|---|---|---|---|
| Epoxy | Excellent | Excellent | Moderate | 10-15 years | $$$ |
| Polyurethane | Very Good | Very Good | Easy | 8-12 years | $$ |
| Cement-based | Good | Good | Easy | 7-10 years | $ |
| Silicone | Fair | Poor | Easy | 2-4 years | $ |
| Hot Glue | Poor | Poor | Easy | 1-2 years | $ |
Epoxy Adhesives
Epoxy is renowned for its superior bonding strength and weather resistance. It’s ideal for mosaics, patios, and high-traffic areas. Epoxy forms a rigid, waterproof bond that withstands temperature extremes and UV exposure. However, mixing and application require care.
- Mix ratio must be precise; improper mixing leads to weak spots or incomplete curing.
- Curing time varies (typically 24-48 hours), and temperature/humidity may affect it.
- Use gloves and masks for safety, as epoxies can cause skin and respiratory irritation.
Epoxy can be tinted to match the pebbles or surrounding materials, allowing for seamless integration. It is especially useful for artistic projects or where a crystal-clear finish is desired.
Recommended brands: Loctite Epoxy, Sikadur 32, and PebbleBond Epoxy (specifically formulated for pebble applications).
Polyurethane Construction Adhesives
Polyurethane adhesives offer flexibility and strong bonds. They are easy to use with caulking guns and suitable for garden borders, vertical surfaces, and irregular stones.
- Remain flexible after curing, accommodating minor expansion, contraction, and ground movement.
- Good for areas with soil movement or where freeze-thaw cycles are common.
- Cure faster (6-12 hours) than epoxy, making them suitable for projects requiring quicker turnaround.
Polyurethane adhesives tend to be more forgiving in application and can bond to a wide range of substrates, including wood, stone, and metal. This makes them ideal for mixed-material landscapes or areas where the substrate is less predictable.
Recommended brands: Gorilla Construction Adhesive, PL Premium, SikaBond.
Cement-based Mortars
For large-scale pebble installations (driveways, walkways), cement-based mortar works well. It’s affordable and reasonably durable but less resistant to cracking and weathering.
- Good for thick layers and structural support, such as in driveways or heavy-use garden paths.
- May require sealing to improve longevity and reduce porosity, as unsealed mortar can absorb moisture and degrade over time.
- Can be colored to match pebbles or the surrounding landscape.
Cement-based options are widely used in traditional landscaping and are familiar to most contractors, making them a practical choice for extensive installations.
Silicone And Hot Glue
Silicone and hot glue are not recommended for outdoor landscaping. Their bonds degrade quickly under moisture and sunlight. Silicone may work for small craft projects or temporary applications, but it lacks the strength and durability for outdoor environments.
Eco-friendly Adhesive Options
Some brands offer low-VOC adhesives and biodegradable binders, minimizing environmental impact. For example, EcoBond uses plant-based resins, reducing off-gassing and environmental toxicity. These are ideal for eco-conscious homeowners or projects near sensitive plantings, ponds, or wildlife habitats.
wikipedia: Epoxy
Surface Preparation: The Key To Strong Bonds
Proper preparation is essential for long-lasting pebble adhesion. Neglecting this step leads to weak bonds and premature failure.
Cleaning And Drying Pebbles
Dirt, dust, and oils interfere with adhesive performance. Follow these steps:
- Wash pebbles with water and mild detergent. For stubborn stains or residues, use a soft brush.
- Rinse thoroughly to remove residue, ensuring all soap is removed to prevent adhesive interference.
- Let pebbles dry completely (at least 24 hours). Spread them out in a single layer for even drying.
Moisture trapped under pebbles can cause adhesives to fail. In humid climates, consider using fans or a dehumidifier to accelerate drying, especially for dense or large pebbles.
Preparing The Substrate
The substrate (ground, concrete, wood, etc.) must be:
- Clean (remove debris, weeds, loose material). A pressure washer can help with concrete or stone bases.
- Dry (especially for epoxy and polyurethane). Moisture in the substrate can cause bubbling or weak adhesion.
- Level (to prevent pooling and uneven layers). Use a level or screed to achieve evenness, particularly important for patios or walkways.
- Primed (optional, for porous surfaces). Primers can enhance adhesion on concrete or wood.
For concrete bases, acid etching or pressure washing improves adhesion. Acid etching creates a roughened surface for better grip, but always neutralize and rinse thoroughly before proceeding.
Arranging Pebbles Before Gluing
Lay out pebbles in the desired pattern before applying adhesive. This allows you to:
- Test fit and adjust design, especially for mosaics or intricate borders.
- Ensure even coverage and spacing. Avoid clustering large stones together, as this can create weak points.
- Minimize adhesive waste by planning the placement.
For large installations, mark grids or outlines to guide placement. For mosaics, use templates or stencils to achieve precision.
Real-world Example: Driveway Border Installation
In Austin, Texas, a landscape contractor prepared a concrete base for pebble borders by pressure washing and priming. The result was a seamless, weather-resistant border that lasted over eight years, despite hot summers and occasional flooding. The project demonstrated that meticulous surface prep was as crucial as adhesive choice in ensuring lasting results.
epoxy.com: Surface Prep Guide
Step-by-step Guide: How To Glue Pebbles Together
Following best practices ensures a successful, durable pebble installation. Here’s a comprehensive step-by-step guide.
Materials Needed
- Pebbles (washed and dried)
- Adhesive (epoxy or polyurethane, selected based on project requirements)
- Caulking gun (for polyurethane)
- Mixing tools (for epoxy, such as mixing buckets and stir sticks)
- Brush or trowel (for spreading adhesive)
- Protective gear (gloves, mask, safety glasses)
- Substrate (concrete, wood, compacted soil, or existing surfaces)
- Sealer (optional, for enhanced durability)
- Edge restraints (to keep pebbles from shifting at borders)
- Painter’s tape or string (to mark boundaries)
Step 1: Layout And Design
- Arrange pebbles in the desired pattern.
- Mark boundaries and shapes with chalk, string, or painter’s tape.
- Adjust pebbles for best fit, considering both aesthetics and functional stability.
- Take a photo of the arrangement to use as a reference during installation.
Step 2: Mixing And Applying Adhesive
For epoxy:
- Mix resin and hardener as per manufacturer’s instructions, usually for 2-3 minutes.
- Apply a thin, even layer to the substrate using a trowel or brush.
- Place pebbles onto the adhesive, pressing gently to embed them.
For polyurethane:
- Load adhesive into caulking gun.
- Apply beads of adhesive to the substrate or backs of pebbles, depending on project size and pebble shape.
- Press pebbles firmly into place, twisting slightly for better bond.
Work in manageable sections—about 2-4 square feet at a time—to ensure adhesive remains workable before setting.
Step 3: Layering And Setting
- For installations more than one pebble thick, glue pebbles in layers, allowing each to cure before adding the next.
- Use a small roller or board to press pebbles evenly, ensuring a flat surface.
Step 4: Curing
- Allow adhesive to cure fully (24-48 hours for epoxy, 6-12 hours for polyurethane, or as specified by the manufacturer).
- Protect from rain, dew, and foot traffic during curing. Use tarps or barriers if rain is forecast.
- For larger surfaces, consider installing a temporary shelter to ensure consistent curing conditions.
Step 5: Sealing (optional)
- Apply a clear sealer to enhance weather resistance and color. Sealers also help resist stains from leaves, bird droppings, or accidental spills.
- Use products rated for outdoor use and compatible with the adhesive.
- Apply with a brush, roller, or sprayer according to manufacturer instructions.
- Reapply every 3-5 years, or as needed, to maintain protection.
Safety Tips
- Always wear gloves and masks when handling adhesives, especially in enclosed or poorly ventilated areas.
- Avoid direct skin contact with adhesives, and wash thoroughly if contact occurs.
- Keep adhesives out of reach of children and pets, and store unused products in their original containers.
- Dispose of empty adhesive containers and excess material following local hazardous waste guidelines.
Additional Pro Tips
- If working on a slope, start at the lowest point and work upwards to prevent pebbles from sliding.
- For mosaics, use fine-tipped trowels or spatulas to control adhesive placement between intricate patterns.
- If desired, sprinkle decorative sand or colored aggregates between pebbles before curing for added texture.
gorilla Construction Adhesive: How-to
Maintenance And Longevity Of Glued Pebble Features
Well-installed pebble features require minimal upkeep but regular checks prolong their life.
Routine Maintenance
- Sweep or rinse pebbles to remove debris. A leaf blower can be useful for larger areas.
- Inspect annually for loose stones or cracks, paying attention to high-traffic zones and edges.
- Reapply sealer every 3-5 years, or sooner if the surface shows dullness or water absorption.
Additionally, remove weeds or moss that may attempt to grow at edges. Promptly cleaning up spills—such as oil, grease, or plant matter—prevents stains and preserves appearance.
Repairing Damaged Areas
If pebbles loosen:
- Remove debris and old adhesive using a wire brush or scraper.
- Clean and dry the area thoroughly before reapplying adhesive.
- Reset pebbles, pressing them firmly into the new adhesive.
- Allow to cure fully before use, and consider resealing the area for added protection.
For larger repairs, assess the surrounding area for underlying problems, such as drainage issues or ground movement, and address these before making cosmetic fixes.
Preventing Common Issues
- Avoid harsh chemicals and pressure washers, which can erode adhesive or dislodge pebbles.
- Maintain proper drainage to prevent pooling water, which can weaken adhesives over time.
- Use edge restraints to prevent shifting and spreading, especially on sloped or curved installations.
- Place outdoor furniture or heavy planters on reinforced areas to avoid concentrated loads.
Longevity Data
Studies show epoxy-bonded pebble surfaces last up to 15 years with proper maintenance. Polyurethane installations average 8-12 years. Cement-based mortars may last 7-10 years, depending on climate and maintenance.
In regions with freeze-thaw cycles, installing a flexible substrate or expansion joints can further extend the lifespan by accommodating seasonal movement.
ncbi: Durability Of Outdoor Adhesives
Real-world Examples And Case Studies
Examining actual projects illustrates how proper pebble bonding yields lasting results.
Example 1: Garden Pathway, Portland, Or
A landscape designer constructed a winding garden path using river pebbles and Loctite Epoxy. After seven years of rain and foot traffic, the path remained intact, showing only minor wear. The designer attributed success to meticulous surface prep and regular resealing every four years.
Example 2: Water Feature Border, Miami, Fl
Pebbles bonded with polyurethane adhesive framed a pond. Despite high humidity and frequent storms, the border stayed secure, requiring only minor repairs after five years. The flexible adhesive absorbed minor shifting from saturated ground and made spot repairs straightforward.
Example 3: Patio Mosaic, San Diego, Ca
An artist created a pebble mosaic patio using marble chips and two-part epoxy. The surface withstood intense sunlight and heavy use, maintaining both adhesion and color after eight years. The homeowner reported the biggest challenge was protecting the installation during the initial cure, but the long-term rewards were significant.
Additional Case Study: Municipal Walkway, Minneapolis, Mn
A city park installed a decorative pebble walkway along a lakeshore using epoxy adhesive. Despite exposure to snow, ice, and salt, the surface held up for over a decade. The maintenance crew noted that annual inspections and prompt repairs to small sections were key to longevity.
Lessons Learned
- Epoxy is best for mosaics and patios exposed to heavy traffic or moisture.
- Polyurethane excels in borders, vertical applications, and regions with soil movement.
- Surface prep is non-negotiable for longevity—cutting corners here leads to premature failures.
- Regular maintenance and resealing dramatically extend the lifespan of any pebble installation.
landscaping Network: Pebble Paths Inspiration
Advanced Techniques And Design Ideas
Once you master basic pebble bonding, advanced techniques let you create standout features.
Mosaic Patterns
Arrange pebbles by color and size to create intricate mosaics. Use a template or grid for complex designs.
- Mix colors for contrast, such as using dark river stones against white marble chips.
- Use larger stones for outlines, smaller for fill or shading.
- Incorporate glass or colored stones for added interest.
Mosaics can depict natural scenes, geometric patterns, or personalized imagery. For best results, plan the design on paper first and transfer outlines to the substrate.
Layered Effects
Create depth by layering pebbles:
- Place larger stones on the bottom to provide a stable foundation.
- Add smaller pebbles for texture and visual variety.
- Use colored sand or resin between layers for a 3D effect.
This technique is especially effective in water features, where layered pebbles create a rippling effect.
Vertical Applications
Bond pebbles to vertical surfaces using polyurethane adhesives:
- Use mesh or wire backing for stability, especially for large mosaics or wall art.
- Apply adhesive generously for strong bonds and to fill gaps behind pebbles.
- For tall walls, work from the bottom up, supporting each layer as it cures.
Vertical pebble features can accent retaining walls, outdoor fireplaces, or water fountains.
Integrating Lighting
Embed low-voltage LED strips between pebble layers for nighttime ambiance. Waterproof LEDs can be installed in channels or beneath translucent pebbles to create glowing pathways or illuminated borders.
- Use solar-powered lighting for energy efficiency.
- Position lights to highlight mosaics or focal points.
Eco-friendly Designs
Utilize recycled pebbles or locally sourced materials. Pair with biodegradable adhesives for sustainability. Consider permeable substrates or rain gardens to enhance stormwater management.
- Incorporate native plantings around pebble features for habitat value.
- Use reclaimed materials, such as broken ceramics or glass, for unique mosaics.
houzz: Pebble Mosaics
Comparing Glued Pebbles To Other Landscaping Methods
How Does Glued Pebble Landscaping Stack Up Against Alternative Approaches?
| Method | Durability | Maintenance | Cost | Design Flexibility |
|---|---|---|---|---|
| Glued Pebbles | High | Low | $$ | Excellent |
| Loose Gravel | Medium | High | $ | Good |
| Paver Stones | Very High | Low | $$$ | Moderate |
| Concrete | Very High | Low | $$$ | Low |
Benefits Of Glued Pebbles
- Unique, natural look that blends seamlessly with surrounding plantings and landscape features.
- Customizable designs and color patterns, limited only by imagination.
- Lower maintenance than loose gravel, as pebbles stay put and resist weeds.
- Superior to concrete for organic shapes and flowing curves, avoiding the rigid lines of pavers.
Drawbacks
- Higher upfront labor, as careful placement and curing are required.
- Adhesive costs can add up, especially for large surfaces or intricate mosaics.
- Requires careful installation and periodic sealing for best results.
When To Use Each Method
- Use glued pebbles for decorative, organic designs, moderate traffic, and areas where customization is desired.
- Use paver stones for heavy-duty, formal applications such as driveways or patios requiring precise levelness.
- Use loose gravel for temporary, low-budget, or easily modified landscapes.
Frequently Asked Questions
How Long Do Glued Pebble Features Typically Last?
Quality installations using epoxy or polyurethane adhesives can last 8-15 years, depending on maintenance and environmental conditions. Epoxy mosaics often surpass a decade with minimal repairs, while polyurethane-bonded surfaces last 8-12 years with routine care.
Can Glued Pebble Surfaces Handle Heavy Foot Traffic?
Yes, provided the right adhesive and proper prep are used. Epoxy-bonded pebbles are particularly strong and suitable for patios and walkways. Avoid silicone or hot glue for load-bearing areas, as they lack the necessary strength and durability.
Is Pebble Glue Toxic Or Harmful To Plants?
Most commercial adhesives are safe once cured, but uncured products may contain VOCs or other chemicals. Opt for low-VOC adhesives and avoid direct contact with plant roots during installation. Always follow manufacturer safety guidelines and ventilate areas where adhesives are used.
Can I Glue Pebbles On Vertical Surfaces?
Yes, using polyurethane construction adhesives. For vertical applications, mesh backing and generous adhesive application improve stability. Epoxy can also be used for mosaics and art installations, especially on smaller or framed areas.
What’s The Best Way To Repair Loose Or Damaged Pebbles?
Remove the affected pebbles, clean the area, and reapply adhesive. Allow full curing before use. For larger repairs, consider resealing the entire section to restore uniform strength and appearance.
Enhancing your landscape with securely bonded pebbles not only adds beauty but also ensures lasting functionality. By following these expert-driven steps—from careful surface prep to selecting the right adhesive—you can confidently create features that stand the test of time. Whether crafting intricate mosaics or robust garden borders, mastering pebble bonding transforms outdoor spaces into enduring works of art.
With the right techniques, tools, and maintenance, your pebble landscaping will impress for years to come.