How to Get Better Germination in Poor Weather Conditions
For better germination in poor weather, sow only after the seedbed has stayed above each crop’s minimum germination temperature for about 3 days, and keep the mix evenly damp, not wet. Cold, soggy, or sharply changing conditions can rot seed, delay sprouting, or make emergence uneven for weeks. This guide shows how to identify the weather problem, then adjust timing, moisture, depth, and protection to fit the crop.
That caution matters because weather can change fast. Fog can cut visibility to less than 100 m, and airport spacing between landing planes may be increased by 50% in fog. Seed-starting needs the same margin when conditions shift. Sometimes the safest move is to wait.
Why poor weather stalls seeds


Cold, wet, cloudy, and windy weather can slow germination in different ways. Cold soil slows metabolism inside the seed. Saturated mix limits oxygen at the seed surface. Low light does not stop germination by itself, but it often creates the same problem later: weak seedlings that stretch as soon as they emerge.
Cold soil slows the clock
Seeds respond to soil temperature more than air temperature. Warm air over a cold bench can encourage sowing too early. That is why a soil thermometer matters more than a room thermometer for seed starting.
Wet media cuts oxygen
Water fills the pore spaces in a seed-starting mix and leaves less room for oxygen. The seed may swell, then sit. In that state, germination can stall or fail, especially if cool weather keeps the tray damp for days.
Variable weather adds risk after sowing
A warm day followed by a cold night, or rain followed by bright sun, can create uneven moisture and temperature around the tray. That pushes the seed from one stress to another. Cold rain also raises the chance of surface crusting, fungal rot, and patchy sprouting.
What temperature do seeds need?

The right germination temperature depends on the crop, so start by separating cool-season seeds from warm-season seeds. Soil temperature matters more than air temperature, and a soil thermometer gives you the number that actually controls sprouting. Do not guess from the forecast alone.
Use crop groups, not one number
Cool-season crops such as lettuce, spinach, and many brassicas germinate in cooler soil than warm-season crops such as tomatoes, peppers, cucumbers, and basil. Warm-season seeds usually need a warmer root zone to move quickly and evenly. If the packet lists a range, use that range first.
| Crop group | Soil temperature target | Weather cue |
|---|---|---|
| Cool-season seeds | Cool, but not cold enough to stall | Chilly spring days, cool trays, no heat mat needed for many crops |
| Warm-season seeds | Warm root zone | Cold room, damp bench, delayed sprouting without bottom heat |
| Any crop in unstable weather | Match the packet range before sowing | Wait if day-night swings are large or soil keeps cooling overnight |
Suppose tomato seed sits in a tray in a 60°F room, but the tray itself is on a cold basement floor. The room may feel fine. The soil can still lag far behind. A thermometer in the mix is usually the most reliable check.
How to read the soil thermometer
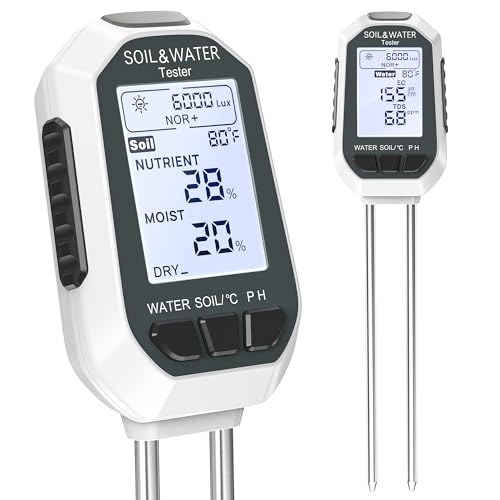
Push the probe into the seed-starting mix at seed depth or just beside the tray cell. Check it at the same time each day for a few days. If the reading stays below the crop’s target band, germination will usually slow before it fails outright.
- Measure the mix. Insert the probe into the seed-starting mix, not just the room air. Read it at the level where the seed sits, because that is the zone that controls germination.
- Compare it to the crop. Match the reading to the packet range for cool-season or warm-season seeds. If the soil is below range for several days, change the setup before assuming the seed is dead.
- Watch for a stable band. Aim for steady soil temperatures rather than sharp swings. Consistency is often more useful than a brief warm spell followed by a cold snap.
Cold soil and slow sprouting
If the seed is sound and the mix is not waterlogged, slow sprouting in cold weather usually points to low soil temperature. Bottom heat is often the least disruptive fix because it warms the root zone directly. A heat mat can help, but it should not be the default for every tray.
When to use bottom heat
Bottom heat speeds germination in cool rooms because it raises the temperature where the seed sits, not the whole house. That makes it more efficient than warming the room around the tray. It is most useful for warm-season crops and for benches that stay cold at night.
Should you use a heat mat?
A heat mat makes sense when the weather is cold, the room stays cool, and the crop wants warmth. Thermostat-controlled versions reduce overheating risk, which matters because too much heat can dry the cells or push the mix above the crop’s ideal range. Do not leave a mat under cool-season crops unless the packet or the setup calls for it.
- Check the crop first. Use bottom heat mainly for warm-season seeds or stubborn trays in cold rooms. If the crop is a cool-season seed, start by checking whether the mix is already within range.
- Set the thermostat. If the mat has a thermostat, set it to the crop’s germination range rather than running it full time. That lowers the risk of overheating the seed zone.
- Keep moisture even. Bottom heat dries trays faster, so check the cells more often. The goal is evenly moist mix, not a dry top and wet base.
When waiting is safer
Wait instead of forcing the issue if the soil keeps dipping below the crop’s minimum temperature and you do not have a stable indoor setup. Sowing later can be the safest fix. Seeds that sit too long in cold, wet mix often lose time rather than gaining it.
Wet weather and mold risk

Rainy, cloudy weather raises disease pressure because trays dry slowly and airflow is weaker. The main problem is not moisture itself but saturated, stagnant mix. Seed-starting mix should be fine-textured, well-draining, and low in nutrients, with a pre-moistened consistency that feels evenly damp without dripping.
Keep the mix evenly moist
Even moisture means the tray stays damp through the root zone, but water does not pool at the bottom or shine on the surface. If the mix is soggy, the seed can lose oxygen and fungal pressure rises. If it dries crusty, the seed may fail to touch the moist layer below.
Use a humidity dome with ventilation
A humidity dome helps hold moisture around seed trays, which is useful in dry indoor air or during windy weather. It must be vented, though, because sealed moisture can feed mold. Remove the dome after emergence or once the soil cracks, which is often the first sign the seed is breaking through.
How to prevent damping off
Damping off is a fungal seedling collapse risk that rises in wet, stagnant conditions. It is more likely when trays are crowded, airflow is poor, or the mix stays wet for too long. Clean trays and a sterile mix lower the starting load of pathogens and give seedlings a better chance.
- Start with clean containers. Wash trays before reuse and let them dry fully. Dirty cells can carry fungal spores from one sowing to the next.
- Use sterile mix. Fill trays with a fresh, sterile seed-starting mix instead of garden soil. That reduces disease pressure and improves drainage.
- Vent the cover early. Crack the dome as soon as the first seedlings show or the soil surface splits. Stale air and high humidity make damping off more likely.
A common first-timer mistake is to keep a dome sealed over a tray in a cool, rainy week because the surface looks dry. The top stays damp, but the air inside turns stagnant. A few days later, stems collapse at soil level even though the seed looked healthy at sprouting.
Poor weather germination table
This table helps you sort slow germination from failed germination. Start with the weather pattern, match the likely cause, then use the least-risk fix first.
| Weather condition | Likely germination failure cause | Symptom to look for | Best fix |
|---|---|---|---|
| Cold soil | Metabolism slows below the crop’s minimum range | Seed stays unchanged for days, then sprouts very late | Use bottom heat or wait for warmer soil |
| Cold rain and saturated mix | Low oxygen and rot risk | Seed softens, smells off, or never emerges | Improve drainage, reduce watering, and re-sow in fresher mix if needed |
| Cloudy, low-light weather | Seeds may sprout, then seedlings stretch | Pale, long stems after emergence | Add grow lights right away |
| Windy cold frame exposure | Rapid moisture loss or temperature swings | Crusted surface, uneven sprouting, or wilted seedlings | Vent less on cold days, shield from drafts, or move trays inside |
| Warm day, cold night cycle | Repeated stress slows emergence | Patchy germination across the tray | Stabilize with indoor sowing or delay until weather steadies |
How do you keep seedlings from going weak?
As soon as seedlings emerge, give them strong light if the weather is dim. Low light after germination does not usually stop sprouting, but it does make stems stretch and weaken quickly. Close light placement and a steady daily photoperiod matter more than window light alone.
Use grow lights after emergence
Grow lights are often needed once seedlings emerge in low-light weather. Place them close enough to prevent legginess, then keep them on a timed daily photoperiod. A steady schedule helps seedlings stay compact and reduces the scramble toward weak stems.
- Turn lights on fast. Move trays under lights as soon as the first seedlings break the surface. Do not wait for several leaves to appear, because stretching starts early in dim weather.
- Set the light close. Keep the fixture close enough to prevent leaning and long internodes. Raise it only as plants grow, so the light stays effective without scorching leaves.
- Use a timer daily. Give seedlings a consistent photoperiod each day. Consistency matters more than occasional bright windows through clouds.
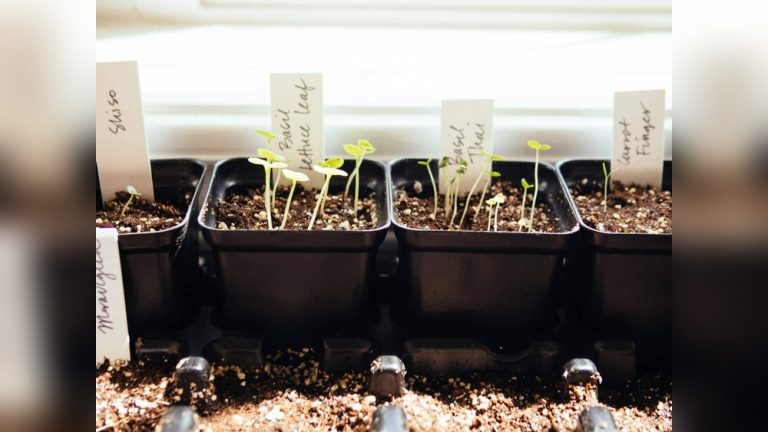
Picture a tray of basil seedlings in late spring under a bright window during a run of cloudy days. The seeds may sprout on time, but the stems can still stretch toward the glass within a few days. A light placed close overhead stops that problem better than a warmer room does.
Should you move trays outside?
A cold frame can help if you need protection from wind and rain but still want access to outdoor light and cooler air. It buffers temperature swings and shields trays from direct weather. It still needs ventilation on sunny days, because enclosed trays can overheat quickly even when the air outside feels cool.
When a cold frame helps
Use a cold frame when the issue is exposure, not just temperature. It protects trays from rain splash, drying wind, and abrupt shifts. That is useful for hardening off trays or for sowing crops that tolerate cool conditions but not soaking wet benches.
Vent on sunny days
Open or prop the frame on sunny days so heat can escape. The goal is not a sealed box. Stagnant, humid air can encourage fungal problems, and high midday temperatures can cook a tray faster than a cold night can cool it.
- Place trays under cover. Set trays where they get protection from direct rain and wind. The cover reduces moisture swings and helps keep the mix from crusting.
- Watch midday heat. Open the frame when sun or mild air starts to warm the enclosure. Venting prevents overheating and cuts the risk of mold.
- Move trays if needed. If nights are still very cold or swings are extreme, bring trays back indoors. A stable indoor setup is often safer than forcing outdoor sowing too early.
Frequently asked questions
What is the best temperature for germination?
The best temperature depends on the crop, which is why packet instructions matter. Cool-season seeds often germinate in cooler soil than warm-season seeds, and soil temperature matters more than air temperature. If the mix stays below the crop’s minimum for several days, germination slows or stalls.
How to speed up germination
Use the warmest safe soil temperature for the crop, keep the mix evenly moist, and avoid sowing into cold, saturated media. For warm-season seeds, bottom heat can speed sprouting more reliably than warming the whole room. Remove humidity covers as soon as emergence begins so the tray does not stay stagnant.
How to keep seeds warm for germination
The most direct way is a heat mat under the tray, preferably with a thermostat. That warms the root zone without heating the whole room. A cold frame can buffer outdoor conditions, but it still needs venting and works best when the weather is not swinging hard between day and night.
How does temperature affect germination?
Temperature controls how quickly a seed takes up water, activates enzymes, and pushes out the embryonic axis. Cold soil slows that process, while a crop-specific warm range speeds it up. Too much heat can also dry the mix or stress the seed, so more warmth is not always better.
How do I get seeds to germinate in cold weather?
Start by checking soil temperature, not just room temperature. If the soil is below the crop’s range, use bottom heat for warm-season seeds or wait for a steadier spell. Keep the mix evenly moist, not soaked, and protect trays from cold rain and wind if they are outside.
How do I prevent damping off in wet conditions?
Use clean trays, fresh sterile mix, and better airflow. Do not keep the medium soggy, and vent humidity domes as soon as seedlings appear. Damping off thrives in wet, stagnant trays, so the safest response is to cut moisture pressure and improve air movement at once.