What Drip System To Use For Vegetable Gardens? Top Picks
A thriving vegetable garden isn’t just the result of diligent planting and weeding—it’s also about delivering water efficiently to every root. In climates where rainfall is unpredictable or in urban settings with limited space, gardeners increasingly turn to drip irrigation systems for their vegetables. These systems save time, conserve water, and boost yields, making them a cornerstone of sustainable gardening. But with dozens of drip options on the market, choosing the right system for your vegetable patch can feel overwhelming.
Whether you’re cultivating a backyard plot or managing a larger urban farm, the right drip system ensures your plants receive optimal moisture without waste. This article dives deep into the best drip irrigation systems for vegetable gardens , evaluates top picks, and guides you through features, installation, maintenance, and cost comparisons. By the end, you’ll know precisely which system fits your garden’s needs—and how to maximize its benefits for healthier, more abundant harvests.
Key Takeaways
- Drip irrigation systems deliver water directly to plant roots, optimizing growth and reducing waste.
- Choosing the right system depends on garden size, crop type, budget, and ease of installation.
- Top picks include soaker hoses, emitter tubing, and micro-drip kits—each with unique strengths.
- Proper installation and maintenance are critical for maximizing efficiency and longevity.
- Data-driven comparisons help clarify cost, coverage, and performance across popular systems.
- Real-world examples show measurable improvements in yield and water savings.

Understanding Drip Irrigation For Vegetable Gardens
Drip irrigation is a technique that supplies water directly to the base of plants through a network of pipes, tubes, and emitters. Unlike overhead sprinklers, which can cause evaporation and leaf diseases, drip systems target the root zone, minimizing water loss and promoting healthy growth.
Why Drip Irrigation Matters
- Water efficiency: Drip systems use up to 50% less water than traditional methods, according to the EPA. In drought-prone regions or areas with water restrictions, this efficiency can mean the difference between a thriving garden and one that struggles to survive. Water is delivered slowly, encouraging deeper root growth and ensuring that plants access moisture even during dry spells.
- Yield improvement: Studies show vegetables irrigated via drip see yield increases of 20–30% compared to sprinkler irrigation. Consistent soil moisture prevents plant stress, leading to more uniform fruiting and higher quality produce. For example, research from the University of California Cooperative Extension demonstrated that tomatoes irrigated with drip systems produced significantly larger and more uniform fruit than those watered by overhead sprinklers.
- Disease reduction: Watering soil (not leaves) decreases fungal and bacterial diseases. Wet foliage is a breeding ground for blight and mildew, particularly in humid climates. By keeping leaves dry, drip irrigation cuts down on the occurrence of common diseases such as powdery mildew, early blight, and bacterial spot.
- Labor savings: Once installed, drip systems automate watering, reducing manual effort. This is especially valuable for busy gardeners or those managing community and school gardens. With automatic timers, watering can be scheduled even when you’re away, ensuring plants never go thirsty.
Components Of A Drip System
A typical drip irrigation setup includes:
- Mainline tubing (polyethylene pipe) for water distribution. This forms the backbone of your system, carrying water from the source to various beds and rows.
- Emitters or drip holes controlling water flow. Emitters can be pressure-compensating or adjustable, allowing you to tailor water output for different plant types.
- Filters to prevent clogging. Especially important if you use well water, rainwater, or greywater, as particles can easily clog tiny emitters.
- Pressure regulators to maintain optimal flow. Most drip systems operate best at lower pressures (10–30 psi), so regulators ensure consistent delivery.
- Timers for automated scheduling. Modern digital timers can be programmed for multiple zones and cycles, maximizing water savings.
Additional accessories may include backflow preventers (to protect your drinking water supply), goof plugs (to seal unused holes), and stakes or holders for tubing.
Types Of Drip Systems
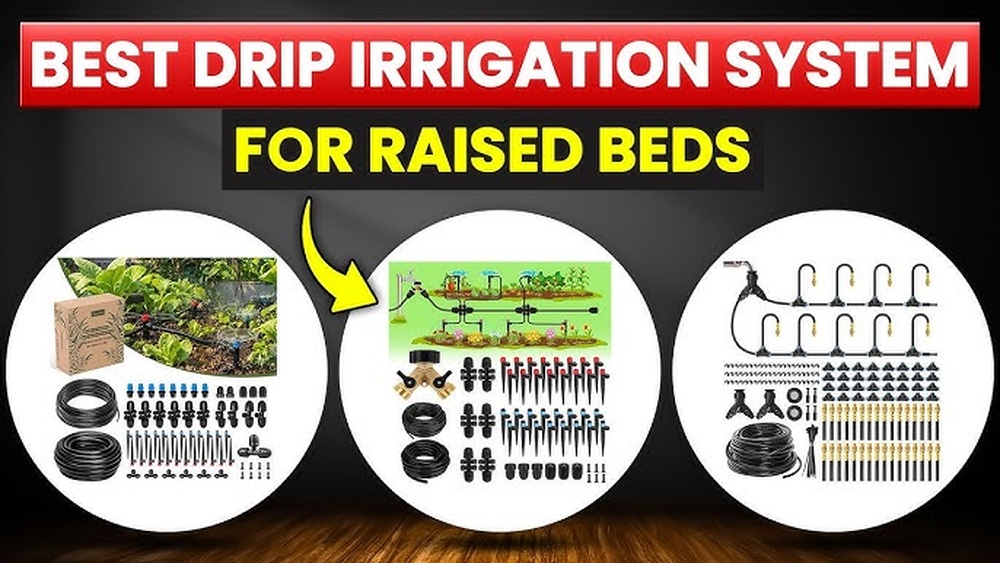
- Soaker hoses: Porous hoses releasing water along their length. Ideal for closely spaced plants in raised beds or rows, they’re simple to set up and move as needed.
- Emitter tubing: Tubes with built-in, spaced emitters. These are best for gardens with mixed plantings and variable spacing, as emitters can be placed or punched where needed.
- Micro-drip kits: Customizable kits with various emitters, stakes, and connectors. Micro-drip kits are suitable for both in-ground beds and container gardens, offering flexibility to adjust water output for different plant species.
- Drip tape: Flat tubing, ideal for row crops. This is favored by commercial growers for its ease of layout in straight, long beds.
- DIY kits: Custom assemblies using standard components, perfect for irregular plots or gardeners with specific needs.
Each type caters to different garden layouts, plant spacing, and budgets, allowing for flexibility and scalability as your garden evolves.
Top Drip Irrigation Systems For Vegetable Gardens
Selecting the ideal system requires understanding your garden’s size, layout, and crop diversity. Below are the top picks for vegetable gardens , each evaluated for performance, ease of use, and cost-effectiveness.
1. Soaker Hose Systems
Soaker hoses are flexible, porous tubes that release water evenly along their length. They’re ideal for raised beds and small plots, and their simplicity makes them a favorite among beginners.
- Pros: Easy to install, affordable, suitable for tight plant spacings. Soaker hoses require minimal tools—just lay them out, connect to a faucet, and cover lightly with mulch to prevent UV degradation.
- Cons: Limited control over water output, less efficient for large gardens. Because water is distributed evenly, some plants may receive more or less than they require, especially in uneven beds.
Example: The Gilmour Flat Soaker Hose is widely used in home gardens, offering reliable coverage for beds up to 50 feet. Its flat profile makes it easy to snake around plants and store during the off-season.
Additional Detail: For best results, run soaker hoses for 30–60 minutes, 2–3 times per week depending on weather and soil type. Periodically check for even soaking by digging a small hole next to your plants.
2. Emitter Tubing Systems
Emitter tubing features built-in emitters spaced every 12–24 inches, delivering precise water to each plant. These systems are more durable than basic soaker hoses and offer better control over water distribution.
- Pros: Customizable spacing, efficient for mixed crops, durable. Emitter tubing allows for extensions and branches, ideal for gardens with both closely and widely spaced plants.
- Cons: Slightly higher upfront cost, requires planning. Installation involves measuring, cutting, and connecting various lengths of tubing, which can be challenging for beginners.
Example: The Rain Bird Drip Irrigation Kit is popular in urban and suburban gardens, supporting both row and clustered plantings. It includes a range of emitters and connectors, suitable for expanding or reconfiguring as your garden grows.
Additional Detail: Emitter tubing is available with different flow rates (e.g., 0.5, 1, or 2 gallons per hour), so you can tailor water delivery to specific plants. This is especially beneficial for gardens with both thirsty crops (like tomatoes) and drought-tolerant varieties (like herbs).
3. Micro-drip Kits
Micro-drip kits include multiple components, allowing gardeners to tailor water delivery to different vegetables. Kits often come with drippers, micro-sprayers, and adjustable stakes.
- Pros: Maximum flexibility, supports containers and in-ground beds. Micro-drip kits are ideal for complex layouts, vertical gardens, or gardens with a mix of root crops, leafy greens, and fruiting vegetables.
- Cons: Installation can be complex, initial cost is higher. With many small parts, setup can be time-consuming and requires careful planning to avoid leaks or uneven watering.
Example: The Orbit Micro-Drip Kit provides adjustable drippers, stakes, and connectors for diverse plant needs. It’s favored by advanced gardeners and those managing container gardens, as each plant can receive precisely the amount of water it requires.
Additional Detail: Micro-drip kits are especially valuable for gardeners growing in greenhouses, on patios, or along fences. Adjustable emitters can be dialed up or down for different plant sizes, and micro-sprayers can provide a gentle mist for seedlings or delicate greens.
4. Drip Tape Systems
Drip tape is thin, flat tubing with closely spaced holes, perfect for long vegetable rows. It’s a staple in commercial agriculture and increasingly popular among home gardeners with large plots.
- Pros: Highly efficient for commercial and large gardens, easy to lay out. Drip tape is lightweight and can be rolled out quickly, making it ideal for seasonal gardens where beds are rotated.
- Cons: Not suitable for irregular beds or widely spaced crops. Drip tape works best in straight lines and can be less durable than emitter tubing if handled roughly.
Example: The Netafim Drip Tape is used extensively in farms, offering durability and uniform coverage. It’s designed to withstand high UV exposure and can be buried slightly to reduce wear.
Additional Detail: Drip tape is often used for crops like carrots, onions, and potatoes, where rows are tightly spaced. Proper filtration is essential, as the small holes can clog with particles more easily than in other systems.
5. Diy Drip Kits
DIY kits enable gardeners to build custom systems from scratch, ideal for unique layouts. By sourcing components individually, you can design a system that fits any garden shape or crop arrangement.
- Pros: Total customization, cost savings. DIY kits are perfect for gardeners with irregular beds, trellised crops, or unique challenges such as uneven terrain.
- Cons: Requires technical knowledge, variable quality. Selecting compatible parts and assembling them correctly can be daunting for beginners, and quality varies between suppliers.
Example: Many gardeners use DIY kits from Home Depot or Lowe’s, combining tubing, emitters, and connectors. Online resources and community forums offer guidance for planning and troubleshooting custom setups.
Additional Detail: DIY systems can incorporate rain barrels, solar-powered timers, and moisture sensors for a truly personalized and sustainable solution.
Comparison Table: Popular Drip Systems
| System Type | Best For | Coverage | Ease of Installation | Average Cost (USD) |
|---|---|---|---|---|
| Soaker Hose | Small beds, raised plots | Up to 50 ft | Easy | $20–$40 |
| Emitter Tubing | Mixed crops, medium gardens | Customizable | Moderate | $30–$60 |
| Micro-Drip Kit | Containers, diverse beds | Up to 100 ft | Challenging | $50–$100 |
| Drip Tape | Long rows, commercial plots | Up to 500 ft | Easy | $40–$80 |
| DIY Kit | Unique layouts | Customizable | Moderate | $25–$70 |
Factors To Consider When Choosing A Drip System
Selecting the right drip system is more than picking the cheapest or most popular option. Consider these critical factors to ensure your choice delivers optimal results.
Garden Size And Layout
- Small gardens: Soaker hoses and emitter tubing work well. For beds less than 100 square feet, these systems are cost-effective and easy to manage.
- Large gardens: Drip tape or emitter tubing offer scalable coverage. For gardens over 500 square feet or multiple long rows, choose systems that can expand with your needs.
- Irregular beds: Micro-drip kits or DIY setups provide flexibility. For L-shaped beds, terraces, or gardens with curves, customizable systems prevent wasted water and ensure every plant receives attention.
Example: A gardener with a 20’ x 20’ plot may use emitter tubing in straight beds and a micro-drip kit for containers at the plot’s edge.
Crop Type And Spacing
- Dense plantings: Soaker hoses and drip tape deliver even moisture. Crops like carrots, radishes, and lettuce benefit from consistent, shallow moisture.
- Mixed crops: Emitter tubing and micro-drip kits adapt to varied needs. Tomatoes, peppers, and eggplants (with deeper roots) require more water, while herbs and leafy greens need less.
Tip: Consider grouping crops with similar water needs together to simplify irrigation.
Water Pressure And Source
- Low-pressure sources: Soaker hoses and drip tape perform reliably. Rain barrels or gravity-fed tanks often provide lower pressure, so choose systems that function at 10–15 psi.
- High-pressure sources: Require pressure regulators to avoid damage. Municipal water lines often exceed 40 psi, which can cause emitters to pop off or hoses to burst without regulation.
Example: If you use well water or rainwater, always install a fine mesh filter before your system to prevent debris-related clogs.
Installation Complexity
- Beginner-friendly: Soaker hoses and basic emitter tubing. Minimal tools and experience required.
- Advanced: Micro-drip kits and DIY systems. Suitable for those comfortable with measuring, cutting, and assembling multiple components.
Consider: Some kits include color-coded parts and step-by-step guides, easing the learning curve.
Budget Constraints
- Entry-level: Soaker hoses, basic kits. These provide affordable, immediate solutions for most home gardeners.
- Premium: Micro-drip and commercial-grade systems. If you plan to expand your garden or automate multiple zones, investing in a higher-end kit pays off over time.
Long-term View: Spending more upfront on a durable system often saves money on repairs and replacements.
Maintenance Requirements
- Clog-resistance: Systems with filters and easy-to-clean emitters last longer. Some emitters are designed to be opened and flushed, extending their lifespan.
- Durability: UV-resistant tubing and sturdy connectors reduce replacement costs. Look for warranties and customer reviews to gauge product longevity.
Pro Tip: Cover tubing with mulch to shield from sunlight and physical damage.
Comparison Table: Drip System Features
| Feature | Soaker Hose | Emitter Tubing | Micro-Drip Kit | Drip Tape | DIY Kit |
|---|---|---|---|---|---|
| Flexibility | Low | Medium | High | Low | High |
| Water Efficiency | Medium | High | High | Very High | Variable |
| Ease of Maintenance | Easy | Moderate | Moderate | Easy | Variable |
| Installation Time | Short | Medium | Long | Short | Medium |
| Lifespan (years) | 3–5 | 5–10 | 5–7 | 3–5 | Variable |
Installation And Maintenance Of Drip Systems
A well-installed drip system operates seamlessly for years. Proper maintenance ensures consistent performance and prevents costly repairs.
Planning And Layout
- Map your garden: Sketch plant positions and bed shapes. This helps you determine where to run main lines and where branches or emitters are needed.
- Select tubing lengths: Match system capacity to garden size. Measure all beds and rows to avoid purchasing too much or too little tubing.
- Position emitters: Place near each plant’s root zone. For larger plants, use multiple emitters; for rows, space emitters according to recommended distances for each crop.
Tip: Use online garden planners or mobile apps to visualize your system before purchasing materials.
Installation Steps
- Prepare the water source: Attach filters and pressure regulators. This step is critical to prevent clogging and ensure consistent pressure throughout the system.
- Lay mainline tubing: Run along rows or beds. Stake tubing every 2–3 feet to keep it in place and prevent movement when working in the garden.
- Install emitters or hose: Space according to plant needs. For micro-drip systems, punch holes where needed and insert emitters directly.
- Connect fittings: Use tees, elbows, and connectors. Secure connections tightly to prevent leaks; use goof plugs to seal unused holes.
- Test the system: Run water to check for leaks and proper flow. Walk the garden and observe water output at each emitter, adjusting as necessary for even coverage.
Pro Tip: Cover mainline tubing and soaker hoses with mulch to improve water efficiency, protect from UV damage, and reduce weed growth.
Maintenance Tips
- Check for clogs: Inspect emitters monthly for debris. Remove and clean any emitters showing reduced flow.
- Flush the system: Run clean water through tubing each season. Open end caps to allow water to flush out accumulated sediment.
- Replace damaged parts: Swap out cracked hoses or broken emitters. Keep spare parts on hand for quick repairs.
- Winterize: Drain water before freezing temperatures. In cold climates, remove and store hoses, or blow out the system with compressed air to prevent cracking.
Seasonal Maintenance: In spring, inspect all lines for animal damage or UV degradation and replace as needed. In fall, drain and store removable components.
Real-world Example: Urban Garden Success
In Chicago, a community garden installed a micro-drip kit across 12 raised beds. Over two seasons, volunteers reported:
- Water savings: 45% reduction in municipal water use. This translated to lower utility bills and more funds available for garden expansion.
- Yield increase: Tomatoes and peppers produced 30% more fruit. Consistent moisture prevented blossom end rot and improved fruit set.
- Maintenance: Monthly emitter cleaning kept the system running smoothly. Regular checks prevented costly repairs and system downtime.
This demonstrates the tangible impact of proper installation and upkeep, especially in shared or community spaces where efficiency and reliability are paramount.
Cost Analysis: Drip Systems Vs. Traditional Watering
Budget is a central concern for gardeners. Comparing drip systems to traditional methods reveals both short-term and long-term savings.
Initial Investment
- Soaker hoses: $20–$40 per 50 feet. Affordable for small gardens, with minimal installation cost.
- Emitter tubing: $30–$60 for medium gardens. Slightly higher, but offers better water control and longevity.
- Micro-drip kits: $50–$100 for complete kits. Best for diversified plantings and container gardens.
- Drip tape: $40–$80 per 500 feet. Ideal for large or commercial gardens.
- DIY systems: $25–$70, depending on size and complexity.
Tip: Consider the cost of additional accessories such as filters, regulators, and timers, which can add $20–$40 to your initial investment.
Operating Costs
- Water use: Drip systems reduce water bills by 40–60%, according to the USGS. Lower water usage also benefits communities facing restrictions.
- Maintenance: Annual costs range from $10–$30 for cleaning and replacement parts. Regular maintenance extends the life of your system and prevents major repairs.
Example: A 200-square-foot garden using a drip system may use 5,000–7,000 gallons less water per season than a sprinkler system.
Long-term Savings
- Fewer replacements: Durable systems last up to 10 years. Investing in UV-resistant and high-quality components reduces the need for frequent replacements.
- Higher yields: Increased harvests offset initial investment. More produce means greater value from your garden, whether for home use or local markets.
Environmental Note: Reduced water and chemical use also lowers your garden’s ecological footprint.
Comparison Table: Cost And Water Savings
| Method | Initial Cost (USD) | Annual Water Use (gal) | Water Savings (%) |
|---|---|---|---|
| Drip System | $50–$100 | 10,000 | 50% |
| Sprinkler | $30–$80 | 18,000 | 0% |
| Hand Watering | $0–$20 | 15,000 | 10% |
Real-world Example: Suburban Vegetable Patch
A suburban gardener in California switched from sprinklers to an emitter tubing system. Over 18 months, they noted:
- Water bill reduction: Saved $120 per year. Over the system’s lifespan, savings covered the initial investment multiple times over.
- Vegetable quality: Improved flavor and size in carrots and greens. Consistent moisture and less disease led to higher-quality produce.
- System lifespan: Tubing lasted 7 years with minimal repairs. Proper winterization and maintenance extended system life.
Tip: Many municipalities offer rebates for installing water-efficient irrigation systems—check with your local water authority for savings opportunities.
Environmental Impact And Sustainability
Drip irrigation isn’t just about efficiency—it’s also about environmental stewardship. The system’s precise water delivery supports sustainable gardening practices.
Water Conservation
- Reduction in runoff: Drip systems minimize soil erosion and nutrient loss. Water is applied directly where needed, reducing puddling and runoff that can carry away valuable topsoil and fertilizers.
- Lower evaporation: Water reaches roots directly, avoiding sun exposure. This is especially crucial in hot, arid regions where evaporation rates are high.
Soil Health
- Moisture retention: Consistent watering maintains soil structure. Soils watered by drip retain more organic matter and resist compaction, supporting healthy root development.
- Microbial activity: Healthy soil microbes thrive in controlled moisture environments. This boosts nutrient cycling and supports plant immunity.
Carbon Footprint
- Energy savings: Less water pumping and fewer trips to refill hoses. Automated systems run on timers, reducing the need for fossil fuel-powered pumps or manual labor.
- Reduced chemical use: Lower disease rates decrease pesticide applications. Healthier plants require fewer interventions, making organic gardening more feasible.
Research Insights
A study published in the Journal of Agricultural Science (Cambridge University Press) found that drip irrigation reduced water use by 60% and chemical inputs by 35% compared to conventional watering. This makes drip irrigation a key practice for climate-resilient and regenerative agriculture.
Community Impact: Urban gardens using drip systems serve as models for sustainable food production, reducing strain on municipal water systems and educating the public about responsible resource use.
Troubleshooting Common Drip System Issues
Even the best drip systems occasionally face problems. Quick troubleshooting ensures your garden remains healthy and hydrated.
Low Water Pressure
- Cause: Clogged filters or too many emitters.
- Solution: Clean filters, reduce emitter count, check for leaks. If pressure remains low, consider dividing the system into smaller zones.
Uneven Water Distribution
- Cause: Incorrect emitter spacing or tubing layout.
- Solution: Adjust emitter positions, re-lay tubing for even coverage. Use pressure-compensating emitters for long rows to ensure uniform output.
Clogged Emitters
- Cause: Sediment or algae in water.
- Solution: Flush system, replace emitters, use filters. For persistent issues, switch to emitters with larger or self-cleaning openings.
Leaks And Breaks
- Cause: Animal damage, UV degradation, or poor installation.
- Solution: Inspect regularly, repair or replace damaged sections. Use repair couplers or goof plugs as needed.
Real-world Example: Community Garden Recovery
In a New York community garden, volunteers discovered uneven watering after a major rainstorm. Investigation revealed:
- Clogged emitters: Soil washed into the system.
- Resolution: Flushed tubing, installed improved filters, restored uniform irrigation.
Tip: Regularly check for animal activity and protect tubing with mulch or shallow burial to deter chewing.
Case Studies: Success Stories With Drip Systems
Real-world experiences highlight the value of drip irrigation systems in vegetable gardens.
Case Study 1: School Garden Transformation
A public school in Texas replaced hand watering with a drip tape system across their vegetable beds. Over one school year:
- Water use dropped by 52%.
- Student harvests increased by 28%.
- Maintenance hours decreased from 15 to 5 per week.
The success inspired the school district to expand drip irrigation to additional campuses, integrating sustainability lessons into the curriculum.
Case Study 2: Urban Rooftop Garden
An urban rooftop garden in San Francisco implemented a micro-drip kit to support tomatoes, lettuce, and herbs.
- Yield boost: 35% more produce, especially in drought conditions.
- Water savings: Annual reduction of 1,500 gallons.
- System longevity: Tubing lasted 6 years with only minor repairs.
This system allowed the rooftop garden to thrive despite strict city water regulations, providing fresh produce for local residents and restaurants.
Case Study 3: Organic Farm Expansion
A small organic farm in Oregon scaled up using emitter tubing across 2 acres of vegetables.
- Labor reduction: Automated watering freed 10 hours per week.
- Crop quality: Higher, more consistent yields, especially for root crops.
- Environmental benefit: Reduced pesticide use by 40%.
The farm leveraged these savings to expand CSA (Community Supported Agriculture) shares, increasing local food access and profitability.
Frequently Asked Questions
What Are The Main Benefits Of Drip Irrigation For Vegetable Gardens?
Drip irrigation provides direct water delivery to plant roots, dramatically reducing waste and boosting yields. It minimizes evaporation, prevents disease by keeping foliage dry, and saves labor through automated watering. Studies confirm water savings of up to 50% compared to traditional methods.
How Do I Determine The Right Drip System For My Garden?
Assess your garden size, plant spacing, water source, and budget. For small, raised beds, soaker hoses are ideal. For larger or mixed plots, emitter tubing or micro-drip kits offer flexibility. Consider ease of installation and maintenance needs before purchasing.
Can Drip Systems Be Used With Rainwater Or Greywater?
Yes, but it’s essential to filter rainwater or greywater to prevent emitter clogging. Use systems with built-in filters and check local regulations for greywater use. Rainwater harvesting is supported by many drip kits, but regular maintenance is crucial.
How Often Should I Maintain My Drip System?
Inspect your system monthly for clogs, leaks, and wear. Clean filters and flush tubing at the start and end of each growing season. Replace broken emitters or tubing promptly to maintain performance.
Is It Possible To Automate Drip Irrigation?
Absolutely. Install timers and smart controllers to automate watering schedules. Devices like Rain Bird and Orbit timers allow precise programming, conserving water and ensuring optimal plant health. Automation is especially useful for busy gardeners and larger plots.
Will Drip Irrigation Work For Container Or Vertical Gardens?
Yes, micro-drip kits are specifically designed for container and vertical gardens. Adjustable emitters and micro-sprayers can be directed into pots, hanging baskets, or wall planters, ensuring consistent moisture no matter the setting.
What Maintenance Is Required At The End Of The Season?
At the end of the growing season, flush the system thoroughly, drain all water, and remove any above-ground tubing if frost is expected. Store removable components indoors to prolong their life, and perform a full inspection before reinstallation in spring.
Resources And Further Reading
For more detailed guidance and technical specifications, consult these authoritative sources:
- EPA WaterSense: Irrigation Controllers
- USGS: Water Use in the Home
- Journal of Agricultural Science
- Wikipedia: Drip Irrigation
- Rain Bird: Drip Irrigation
- Orbit: Drip Irrigation
A well-chosen drip system is transformative for vegetable gardens—yielding healthier plants, conserving water, and simplifying maintenance. By matching the right system to your garden’s unique needs, you’ll enjoy bumper crops and sustainable success season after season. With the right preparation, ongoing care, and a commitment to sustainability, your vegetable garden can become a model of efficient, productive, and environmentally responsible food production for years to come.