How to Landscape to Keep Water Away From Your Foundation
Landscaping to keep water away from your foundation is crucial for protecting your home’s structural integrity and preventing costly damage. Properly designed landscapes can effectively redirect rainwater and groundwater, ensuring your foundation remains dry and stable. This guide will walk you through the essential techniques and considerations for creating a water-resistant landscape around your home.

Nixroork
Highly Reflective 3D Bird Scare Discs -Water…
- [360° Reflective Wind Spinner & Bird Deterrent]: Crafted with laser-cut stainless steel, these 3D bird reflectors harness sunlight…
- [Bird Scarer to Keep Birds Off]: Beyond bird scare devices, its mirror-polished surface and graceful motion transform into eye-cat…
- [Multi-Device Bird Scarer System]: Enhance effectiveness by pairing with owl decoys, scarecrows, or pigeon deterrent spikes. The w…
As an Amazon Associate I earn from qualifying purchases.
Simply put, effective landscaping involves creating positive grading away from your foundation, managing downspouts, and choosing appropriate plants to prevent water accumulation and saturation of the soil around your home, thereby safeguarding its structure.
Key Takeaways
- Landscaping to keep water away from your foundation starts with ensuring a proper slope away from your house.
- Strategic management of downspout extensions is vital for directing water far from the foundation.
- The right plant choices can help absorb excess moisture and stabilize soil.
- Understanding soil types and their drainage capabilities is fundamental to effective water management.
- Regular maintenance of your landscape is key to long-term foundation protection.
Grading: The First Line of Defense
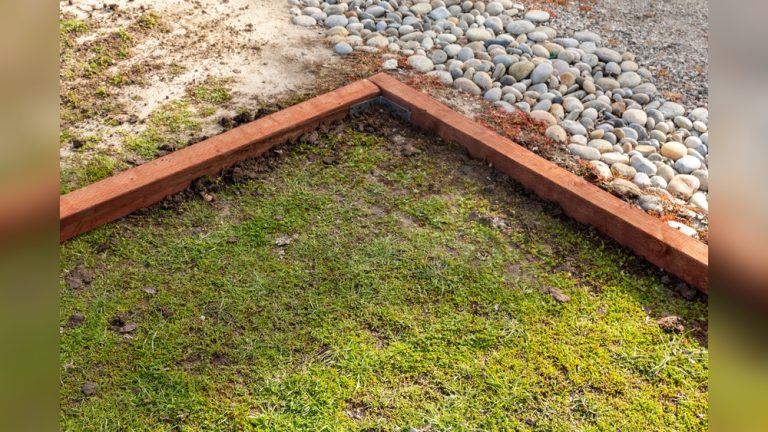
The most critical element in keeping water away from your foundation is the grading of your landscape. This refers to the slope of the ground surrounding your house. Ideally, the land should slope away from your foundation at a rate of at least 1 inch for every foot for the first 6 to 10 feet.
This ensures that rainwater and melting snow are naturally directed away from the building’s base.
Improper grading is a leading cause of foundation water problems. If your yard slopes towards your house, water will inevitably pool around the foundation walls, leading to hydrostatic pressure. This pressure can force water through concrete and mortar, causing cracks, leaks, and eventually, structural damage.
Even a slight dip or low spot near the foundation can become a persistent problem.
Assessing your current grading is the first step. You can do this by using a long, straight board and a level. Place the board against the foundation and extend it outwards.
Use the level to check the slope. If it’s not at least a 1:12 ratio (1 inch drop per foot), you will need to consider corrective measures such as adding soil to build up the grade.
- Check Existing Grade: Use a level and a long board to measure the slope.
- Ideal Slope: Aim for a 1-inch drop for every 1 foot of distance for at least 6-10 feet from the foundation.
- Low Spots: Identify and fill any depressions or low areas near the foundation.
- Compaction: Ensure any added soil is properly compacted to prevent future settling.
- Professional Assessment: For significant issues, consult a landscaping or drainage professional.
Adding Soil to Correct Grading
If your grading is insufficient, the most common solution is to add topsoil or a mixture of soil and compost. This process, known as regrading, involves carefully building up the soil level around your foundation. It’s important to use a good quality soil that compacts well and doesn’t erode easily.
When adding soil, start by loosening the existing soil at the foundation wall to ensure good contact and prevent a wall of soil that can trap moisture. Then, build up the new soil layer by layer, ensuring each layer is compacted to avoid future sinking. The goal is to create a continuous, gentle slope away from the house.
Avoid piling soil directly against the siding, as this can trap moisture and lead to rot.
| Grading Correction Method | Description | Best For |
|---|---|---|
| Adding Topsoil | Building up the ground with layers of soil to create a slope. | Minor to moderate grading issues. |
| Regrading with Excavation | Removing existing soil and replacing it with new, properly sloped soil. | More significant grading problems requiring more material. |
| French Drains | Installing underground perforated pipes to collect and divert water. | Persistent water issues or areas with high water tables. |
Choosing the right method depends on the severity of the grading issue and the soil conditions around your home.
Managing Downspouts and Gutters
Your gutters and downspouts are designed to capture rainwater from your roof and direct it away from your home. However, if they are not properly maintained or extended, they can become a major source of water problems. Clogged gutters can overflow, dumping large amounts of water directly at your foundation.
Similarly, short downspouts can discharge water just a few feet from the house, where it can easily seep into the soil and reach the foundation.
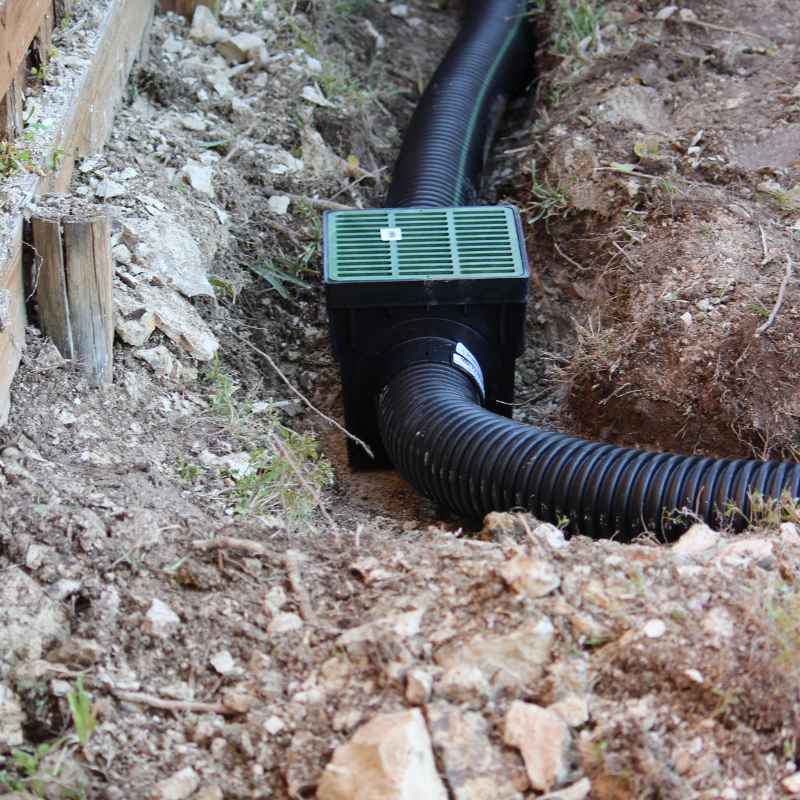
The primary goal is to ensure that water exiting your downspouts is carried at least 5 to 10 feet away from your foundation. This can be achieved through various methods, including installing downspout extensions. These can be flexible corrugated tubes, rigid PVC pipes, or even buried drain pipes that lead to a more distant drainage area or a splash block designed to diffuse the water flow.
Warning: Never allow downspouts to discharge water directly onto an unpaved area immediately adjacent to your foundation. This can saturate the soil and create a direct path for water to enter your basement or crawl space.
- Regular Cleaning: Clean gutters at least twice a year to prevent clogs.
- Inspect Downspouts: Ensure they are securely attached and free of obstructions.
- Install Extensions: Use extensions to carry water at least 5-10 feet away.
- Consider Buried Drains: For longer distances, buried pipes can be more aesthetically pleasing.
- Splash Blocks: Use them to diffuse water flow and prevent erosion at the end of downspouts.
Downspout Extension Options
There are several effective ways to extend your downspouts. Flexible downspout extenders are the simplest and most affordable option. They can be easily attached to existing downspouts and are usually made of plastic.
However, they can sometimes be tripped over or damaged by lawnmowers.
Rigid PVC piping offers a more permanent and visually appealing solution. These pipes can be buried underground or run along the surface, connecting to a larger drainage system. For a more sophisticated setup, consider installing underground drainage systems that connect multiple downspouts and carry water to a distant dry well or storm drain.
These systems are often the most effective for managing large volumes of water.
| Extension Type | Pros | Cons | Typical Cost |
|---|---|---|---|
| Flexible Tubing | Inexpensive, easy to install, flexible positioning. | Can be unsightly, easily damaged, may clog. | $10-$30 per extension. |
| Rigid PVC Pipe | Durable, permanent, can be buried, aesthetically pleasing. | Requires some installation effort, can be more expensive. | $30-$100 per extension. |
| Underground Drainage System | Highly effective, discreet, manages multiple downspouts, long-term solution. | Expensive, requires professional installation. | $500-$5000+ depending on scale. |
Choosing the right downspout extension method significantly impacts how effectively water is managed away from your home’s foundation.
Planting for Water Management
The plants you choose for your landscape play a role in managing moisture levels around your foundation. Certain types of plants, particularly those with deep root systems or a high water intake, can help absorb excess water from the soil, reducing the amount of moisture that can saturate the ground near your foundation walls. This is especially beneficial in areas prone to heavy rainfall or with clay-heavy soils that drain poorly.
Consider incorporating shrubs and trees that are known for their water-absorbing capabilities. Plants like hydrangeas, birches, and willows are excellent choices. Ground cover plants can also help stabilize the soil and prevent erosion, which is another factor that can contribute to water issues.
Using mulch around your plants is also important. A layer of mulch helps retain soil moisture during dry periods and can help buffer the soil temperature, but it should not be piled directly against the foundation itself.
Tip: When selecting plants, consider their mature size and root system. Deep-rooted trees and shrubs are generally more effective at absorbing significant amounts of water. Ensure they are planted far enough from the foundation to avoid root damage.
- Deep-Rooted Shrubs: Hydrangeas, Viburnums, Azaleas.
- Water-Loving Trees: Willows, Birches, Poplars.
- Ground Covers: Sedums, Periwinkle, Creeping Thyme.
- Native Plants: Often well-adapted to local soil and rainfall patterns.
- Avoid Overwatering: Even water-absorbing plants can contribute to saturation if overwatered themselves.
Soil Types and Plant Suitability
Understanding your soil type is fundamental to successful landscaping for water management. Clay soils tend to retain a lot of water and drain slowly, making them more susceptible to saturation around the foundation. Sandy soils, on the other hand, drain very quickly, which might be good for water removal but can lead to drought stress for plants if not managed properly.
For clay soils, you’ll want plants that can tolerate or help manage moisture. For sandy soils, focus on plants that can withstand drier conditions, and consider amending the soil with compost to improve its water-retention capacity. In both cases, encouraging healthy soil biology through organic matter will improve drainage and aeration, benefiting both your plants and your foundation.
| Soil Type | Drainage Characteristics | Recommended Plant Strategy |
|---|---|---|
| Clay Soil | Slow drainage, high water retention. Prone to saturation. | Choose moisture-tolerant plants, amend with compost to improve drainage, ensure good grading. |
| Sandy Soil | Fast drainage, low water retention. Prone to drying out. | Choose drought-tolerant plants, amend with compost to improve water retention, use mulch. |
| Loam Soil | Balanced drainage and retention. Ideal for most plants. | Most plants will thrive. Focus on grading and downspout management. |
Understanding your soil type is the first step in selecting the right plants and implementing effective landscaping strategies for water management.
Drainage Systems and Features
Beyond grading, several landscape features are specifically designed to manage water flow and prevent it from reaching your foundation. Swales, for instance, are shallow, wide ditches that can be incorporated into your landscape to collect and redirect surface water. They are typically planted with grass or other low-growing vegetation, making them aesthetically pleasing and functional.
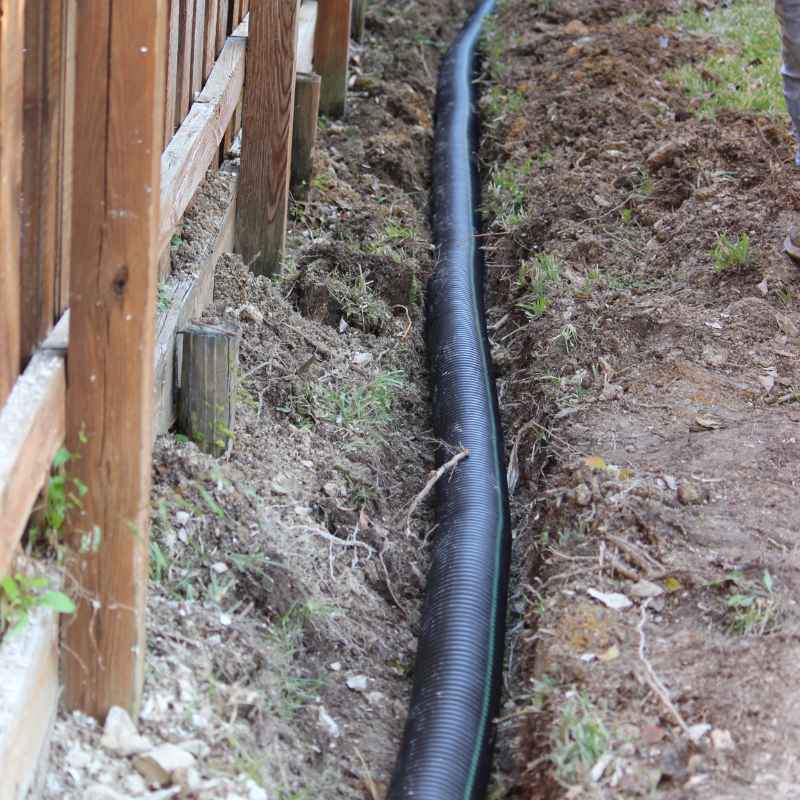
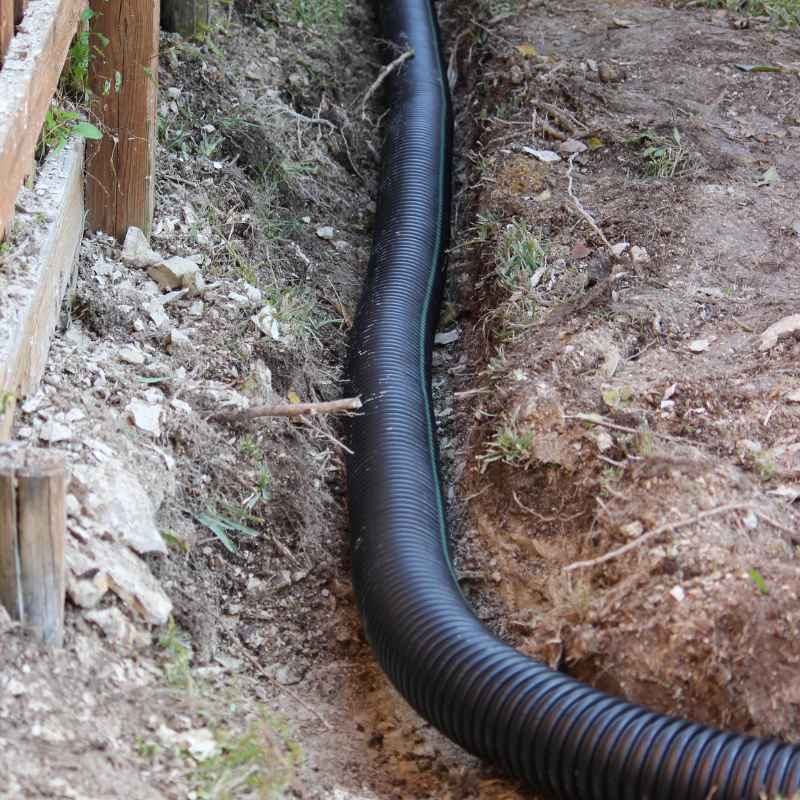
Another effective feature is the French drain. This is a trench filled with gravel that contains a perforated pipe, designed to collect and carry away underground water. French drains are particularly useful in areas with high water tables or where grading alone isn’t sufficient to manage subsurface water.
Dry wells are also an option, serving as underground reservoirs that collect excess water and allow it to slowly seep into the surrounding soil over time.
Important: The effectiveness of drainage systems depends on proper installation and regular maintenance. Ensure that any installed systems are regularly inspected for blockages or damage to maintain their functionality.
- Swales: Gentle depressions that guide surface water away.
- French Drains: Subsurface drainage systems for collecting and diverting groundwater.
- Dry Wells: Underground pits that store and slowly release collected water.
- Rain Gardens: Depressed areas planted with specific vegetation to absorb and filter stormwater runoff.
- Channel Drains: Linear drains often used in paved areas to collect surface water.
Designing Effective Swales
Swales are essentially shallow, vegetated channels that mimic natural drainage patterns. They are designed to slow down water flow, allowing it to be absorbed into the soil gradually, and then direct it towards a suitable outlet, such as a storm drain, a lower part of the yard, or a designated drainage area. The key to an effective swale is its gentle slope, which prevents erosion while still moving water efficiently.
When designing a swale, consider its width and depth, as well as the type of vegetation used. Grass is a common choice because it helps stabilize the soil. The placement of the swale is also crucial; it should be situated in a way that intercepts water before it reaches the foundation.
They can be strategically integrated into garden beds or lawns, becoming a seamless part of the landscape design.
- Locate the Water Source: Identify where excess water tends to collect.
- Determine Flow Path: Plan where the water needs to be directed.
- Excavate the Swale: Create a shallow, wide channel with a gentle slope.
- Install Filter Fabric (Optional): Place fabric in the trench to prevent soil from clogging the drainage system.
- Fill with Gravel: Add a layer of clean gravel to the trench.
- Add Perforated Pipe: Lay a perforated pipe within the gravel, ensuring it slopes towards the outlet.
- Cover with Soil and Vegetation: Backfill the trench and plant grass or other suitable ground cover.
Properly designed and installed swales can significantly reduce the risk of water accumulating around your foundation.
Soil Compaction and Permeability
The type of soil surrounding your foundation and its compaction level significantly influence water drainage. Compacted soil, often a result of construction or heavy foot traffic, has reduced porosity, making it difficult for water to penetrate and drain away. This can lead to water pooling on the surface or being forced into any available cracks in the foundation.
Conversely, loosely packed soil with good aeration allows water to permeate more easily. However, if it’s too loose, it might not offer enough support. The ideal situation is well-structured soil with a good balance of sand, silt, and clay, enriched with organic matter, which promotes healthy drainage and moisture retention.
Understanding your soil’s permeability helps in choosing appropriate landscaping strategies.
- Soil Testing: Understand your soil’s composition and drainage rate.
- Compaction Prevention: Avoid heavy machinery or traffic on areas near the foundation.
- Soil Amendments: Incorporate compost and organic matter to improve soil structure and permeability.
- Aeration: Regularly aerate compacted lawn areas near the house.
- Monitor Saturation: Pay attention to areas that remain waterlogged after rain.
Improving Soil Permeability
Improving soil permeability is often achieved by amending the soil with organic matter, such as compost or aged manure. This helps to break up dense clay soils and improve water infiltration. For sandy soils, organic matter helps to retain moisture.
The goal is to create a soil structure that allows water to drain adequately without becoming waterlogged.
Another method is aeration, particularly for lawn areas. Core aeration removes small plugs of soil, creating channels for water and air to penetrate. For more severe compaction issues, consider adding a layer of topsoil mixed with compost and then lightly tilling it into the existing soil surface.
This process should be done carefully to avoid disturbing the foundation itself.
| Soil Condition | Problem | Solution | Impact on Foundation |
|---|---|---|---|
| Highly Compacted Clay | Very slow drainage, water pooling. | Amend with compost, aerate, consider French drains. | Increased hydrostatic pressure, potential saturation. |
| Very Sandy Soil | Rapid drainage, can dry out quickly. Minimal hydrostatic pressure. | Amend with compost to retain moisture, use mulch, ensure good grading to direct flow. | Less direct water pressure risk, but dry soil can cause settlement. |
| Poorly Draining Soil | Water remains close to the surface for extended periods. | Improve soil structure with organic matter, install drainage systems. | Constant saturation can lead to efflorescence and material degradation. |
Addressing soil compaction and improving permeability are vital steps in preventing water damage to your foundation through effective landscaping.
Waterproofing and Sealing
While landscaping is the primary focus for diverting water, complementary waterproofing measures for the foundation itself can provide an extra layer of protection. This involves applying waterproof coatings or sealants to the exterior walls of the foundation. These barriers prevent water from seeping through the concrete or masonry, even if it comes into contact with the foundation walls.
For existing homes, this might involve excavation around the foundation to apply the sealant. For new construction, waterproofing is typically applied during the building process. Another aspect is sealing any cracks or joints in the foundation.
Small cracks can be widened slightly and filled with hydraulic cement or specialized epoxies, which expand to fill voids and create a watertight seal.
Warning: While sealing cracks is important, it’s crucial to address the source of the water. Sealing without proper grading or drainage can trap moisture against the foundation, potentially exacerbating problems or leading to freeze-thaw damage.
- Exterior Waterproofing Membranes: Applied to the outside of foundation walls.
- Dampproofing Coatings: Less robust than waterproofing, often asphalt-based.
- Crack Sealants: Polyurethane or epoxy fillers for cracks and joints.
- Hydraulic Cement: Fast-setting cement for active leaks.
- Interior Sealants: Can be applied to basement walls, but address water source first.
When to Consider Professional Help
While some minor landscaping adjustments can be done DIY, significant grading issues, complex drainage systems, or extensive foundation waterproofing often require professional expertise. A professional landscaper or a foundation specialist can accurately assess the scope of the problem, recommend the most effective solutions, and ensure they are implemented correctly.
For instance, installing a comprehensive drainage system like a French drain or a sump pump might involve specialized knowledge of grading, pipe sizing, and water flow dynamics. Similarly, applying exterior waterproofing membranes requires excavating around the foundation, which can be a major undertaking. Consulting with experts ensures that the solutions are durable, effective, and don’t inadvertently create new problems.
| Task | DIY Feasibility | Professional Scope | Typical Cost (Estimate) |
|---|---|---|---|
| Minor Grading Adjustment | High (Adding soil for slight slope) | Major regrading, excavation. | DIY: $50-$300 | Pro: $500-$3000+ |
| Downspout Extension | High (Flexible/Rigid) | Complex underground systems. | DIY: $20-$100 | Pro: $300-$1500+ |
| French Drain Installation | Medium (Small, simple drains) | Extensive systems, difficult terrain. | DIY: $200-$500 | Pro: $1000-$5000+ |
| Exterior Waterproofing | Low (Requires significant excavation) | Full excavation and application. | Pro Only: $5000-$15000+ |
Knowing when to call in professionals for landscaping and foundation water management can save time, money, and prevent larger issues down the line.
Frequently Asked Questions
What is the ideal slope for landscaping away from a foundation?
The ideal slope for landscaping away from a foundation is a drop of at least 1 inch for every foot of ground for the first 6 to 10 feet. This gradual slope ensures that surface water is effectively directed away from the house, preventing saturation of the soil around the foundation.
How far should downspouts extend from the foundation?
Downspouts should extend at least 5 to 10 feet away from the foundation. This ensures that the water discharged from the roof is carried far enough to prevent it from pooling near the foundation walls and potentially entering the basement or crawl space.
Can planting trees too close to the foundation cause water issues?
Yes, trees planted too close can cause both water issues and structural problems. Their roots can penetrate foundation cracks, and their canopy can block sunlight and airflow, keeping the soil consistently damp. Large trees also absorb significant amounts of water, which can lead to soil shrinkage and settlement, potentially impacting the foundation.
What is a rain garden and how does it help with foundation water?
A rain garden is a depressed area planted with native vegetation designed to capture and absorb stormwater runoff from roofs, driveways, and other impervious surfaces. By allowing water to soak into the ground slowly, it reduces the volume of water flowing towards the foundation and filters out pollutants.
How often should I inspect my foundation landscaping for water issues?
It’s advisable to inspect your foundation landscaping at least twice a year, ideally in the spring and fall. Check for proper grading, ensure downspouts are clear and extended, and look for any signs of soil erosion or water pooling. Also, monitor conditions after heavy rainfall events.
Final Thoughts
Implementing effective landscaping strategies to keep water away from your foundation is a proactive approach to protecting your home. By focusing on proper grading, diligent downspout management, strategic plant selection, and understanding your soil, you can significantly reduce the risk of water-related foundation damage. Regular maintenance and periodic inspections are key to ensuring these measures remain effective over time.
For related guidance, see our article on Is Landscaping Harder Than Construction. For related guidance, see our article on Is Landscaping A Capital Improvement. For related guidance, see our article on Can Landscapers Get Loans For Equipment. For related guidance, see our article on Does Home Insurance Cover Landscaping.
Related pick: Check today's price on Amazon