Can You Put Cactus Cuttings Straight Into Soil? Here’S the Truth
Cacti are among the most resilient and fascinating plants found in homes and gardens worldwide. Their unique ability to thrive in arid conditions, coupled with striking forms and blooms, makes them a favorite for both novice and experienced plant enthusiasts.
A common question among cactus lovers is whether you can put cactus cuttings straight into soil. This seemingly simple act is surrounded by myths, partial truths, and practical considerations that can make or break your propagation success.
Whether you’re cultivating a thriving indoor succulent collection or looking to expand your outdoor desert garden, understanding the correct method for propagating cacti is essential. This article delves deep into the science, horticultural best practices, and real-world experiences to reveal the definitive answer.
You’ll learn not just if you can put cactus cuttings straight into soil, but also when, how, and why certain approaches work—or fail. Let’s uncover the truth behind this critical cactus care question.
Key Takeaways
- Placing cactus cuttings straight into soil is possible, but comes with risks and important caveats.
- Callusing the cutting before planting dramatically increases propagation success rates by preventing rot.
- The right soil type and moisture level are vital for rooting; regular potting soil is rarely ideal.
- Real-world data and case studies show variable results depending on cactus species, climate, and technique.
- Following expert-recommended steps leads to healthier, faster root development and long-term plant health.
The Science Of Cactus Propagation
Understanding the biological processes behind cactus propagation is crucial for maximizing your chances of success. Unlike many common houseplants, cacti have evolved specialized mechanisms to survive drought and harsh environments.
Why Cacti Can Be Propagated From Cuttings
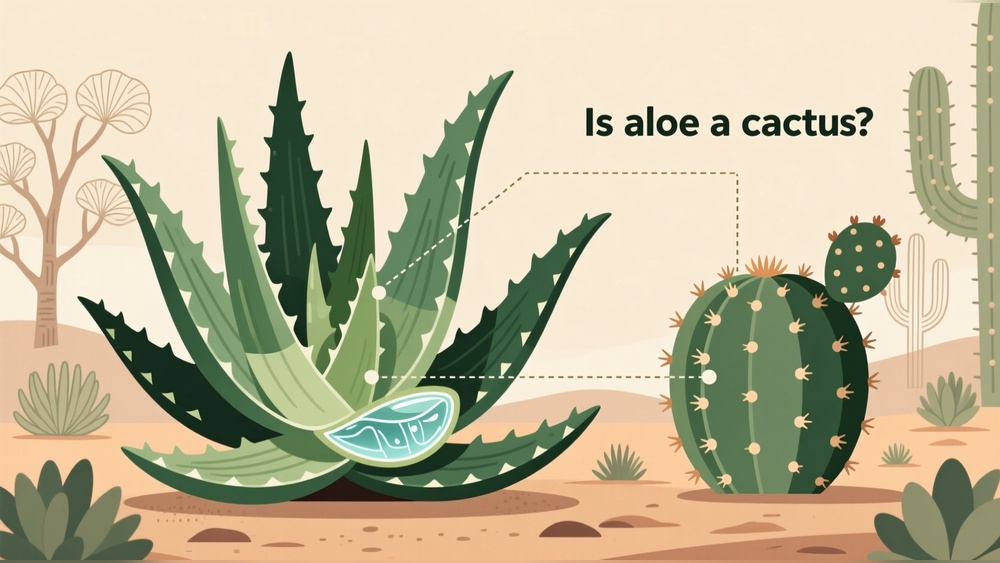
Cacti are part of the succulent family, meaning they store water in fleshy tissues. This adaptation allows them to survive long periods without water. When a stem or pad is removed, the plant’s cells can regenerate roots and new growth from the cutting, provided the conditions are right. This method is called vegetative propagation.
A striking example is the Opuntia genus (commonly known as prickly pear), whose pads can be detached and rooted with relative ease. In arid regions, these pads are even used to create living fences. Similarly, columnar cacti like Trichocereus and Echinopsis can be sliced and rooted to produce new plants, demonstrating the remarkable regenerative abilities of cacti.
The Role Of Callusing
One of the most important steps in cactus propagation is allowing the cutting to callus before planting. Callusing refers to the process where the cut end dries out and forms a protective, corky layer. This barrier helps prevent pathogens and moisture from causing rot once the cutting is in soil. According to a study published in the journal *Acta Horticulturae*, callused cuttings showed a 30-50% higher survival rate than those planted immediately (ScienceDirect).
The callusing process is especially critical for cacti with thicker stems or those exposed to humid conditions. For example, Mammillaria and Epiphyllum species are prone to rot if planted before callusing. The protective layer formed during callusing not only blocks pathogens but also enables the plant to retain its internal moisture, a key factor in its survival and rooting.
Root Formation Timeline
Root development varies widely among cactus species. For example:
- Opuntia (Prickly Pear): Roots may form in as little as 2 weeks.
- Echinopsis: Typically 3-5 weeks to establish roots.
- Columnar cacti (e.g., Trichocereus): May take 4-8 weeks.
Environmental factors like temperature, humidity, and soil type further influence rooting speed. Warm temperatures, ideally between 75–85°F (24–29°C), encourage faster root formation. Conversely, cooler climates or periods of low light may prolong the rooting process, sometimes requiring up to two months for root development to become visible.
Risks Of Immediate Planting
While some growers have success putting cactus cuttings straight into soil, the risk of rot is significantly higher, especially in humid or poorly ventilated conditions. Immediate planting may work in very dry climates or with certain fast-healing species, but it is not generally recommended as best practice.
Rot typically begins at the base of the cutting, where excessive moisture and a lack of callusing create a breeding ground for fungi and bacteria. Once rot sets in, it can quickly destroy the cutting, leading to disappointment and wasted effort.
The risk is compounded when regular potting soil is used, as it retains moisture and slows the drying process at the base of the cutting.

Credit: www.latimes.com
Step-by-step Guide: How To Root Cactus Cuttings
Rooting cactus cuttings is a straightforward process when you follow science-backed steps. Below is a detailed, stepwise approach for best results.
1. Preparing The Cutting
- Use a sterile, sharp knife or pruning shears to make a clean cut.
- Remove any flowers, buds, or offsets that might divert energy from root formation.
Preparation is vital to minimize stress and prevent infection. For best results, choose a healthy, disease-free section of the cactus. If the cutting is thick or large, allow extra drying time and consider making a diagonal cut, which exposes more surface area for rooting.
2. Allowing The Cutting To Callus
- Place the cutting in a dry, shaded location with good air circulation.
- Leave it for several days to several weeks, depending on size and species (pads and smaller stems: 3–7 days; large stems: up to 2–4 weeks).
- The end should feel dry and slightly corky—not moist or sticky.
Callusing is more effective when humidity is low, and the air is moving. If conditions are humid, consider using a fan or placing the cuttings in a room with a dehumidifier. For large columnar cacti, it is not uncommon to wait up to a month before planting.
3. Choosing The Right Soil
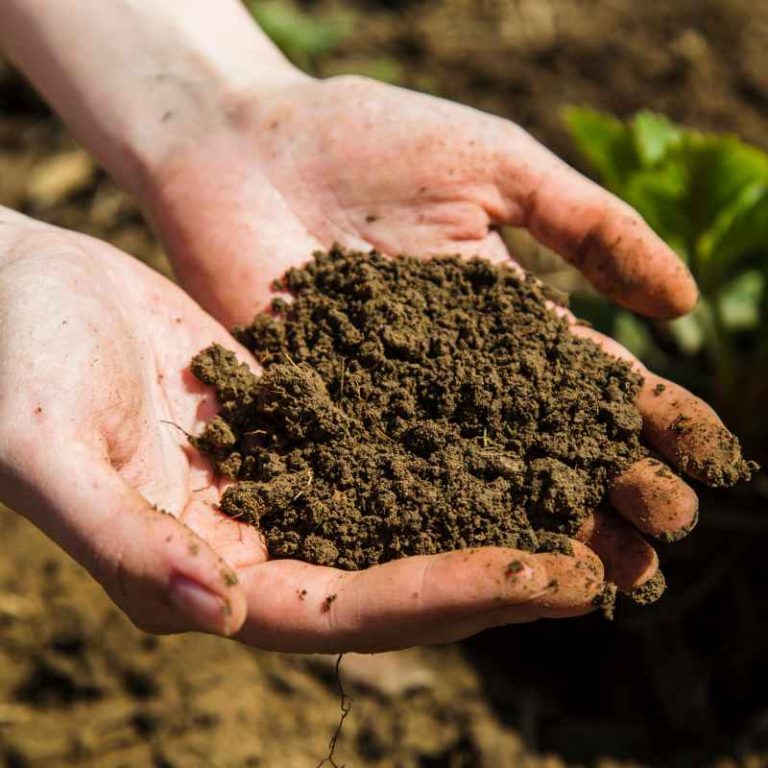
- Avoid regular potting soil, which retains too much moisture.
- Use a cactus/succulent mix or blend your own using:
- 1 part coarse sand or perlite
- 1 part small gravel or pumice
- 1 part potting soil
The ideal soil is gritty and fast-draining, ensuring excess water doesn’t linger around the base of the cutting. Some advanced growers add a small amount of activated charcoal to the mix, which helps absorb impurities and prevent fungal growth.
4. Planting The Cutting
- Insert the callused end about 1–2 inches deep into the prepared soil.
- Do not water immediately after planting; wait 5–10 days to allow any minor wounds to dry further.
Press the soil gently around the base, ensuring the cutting is upright and stable. For pads or thin cuttings, planting at a slight angle can help prevent water pooling at the base. If rooting multiple cuttings, space them adequately to promote air circulation.
5. Watering And Care
- After the initial waiting period, water lightly, then allow soil to dry completely before watering again.
- Place in bright, indirect light; avoid intense sun until roots are established.
Monitor the cutting for signs of rot, mold, or shriveling. If the cutting shows signs of dehydration, mist lightly with water rather than soaking the soil. Once new roots and growth appear, gradually increase light exposure and watering frequency.
Common Mistakes To Avoid
- Planting in wet soil or overwatering immediately after planting.
- Using non-sterile tools, which can introduce pathogens.
- Skipping the callusing phase in humid environments.
Additional mistakes include using containers without drainage holes, crowding cuttings too closely, or placing them in locations with poor airflow. All these can increase risk of rot and slow rooting.
Credit: www.longfield-gardens.com
Can You Really Put Cactus Cuttings Straight Into Soil?
The central question—can you put cactus cuttings straight into soil?—deserves a nuanced answer based on evidence and expert opinion.
Situations Where Immediate Planting Works
- In arid climates, where humidity is extremely low and soil dries quickly.
- With small, thin cuttings that dry rapidly and are less prone to rot.
- When using highly porous soil and ensuring zero watering until roots form.
For example, growers in southern California or Arizona often report successful immediate planting of Opuntia pads or small Echinopsis stems. In these regions, the combination of dry air and sandy soil creates an environment that quickly dries the cutting, mimicking the callusing process.
Risks And Drawbacks
- Rot: The biggest risk, especially in humid or temperate environments.
- Pest and pathogen invasion: Open wounds are vulnerable until callused.
- Slower root development: Non-callused cuttings are more likely to struggle.
Immediate planting is sometimes attempted by experienced growers who closely monitor soil moisture and air circulation. However, for beginners or in less ideal conditions, the risks often outweigh the benefits. Even in dry climates, accidental watering or unexpected rain can trigger rot.
Horticultural Expert Recommendations
Most horticulturalists and cactus societies, such as the Cactus and Succulent Society of America, recommend always allowing cuttings to callus before planting (Cactus and Succulent Society of America). Their guidelines prioritize long-term plant health over convenience.
Experts emphasize that even in climates where immediate planting is possible, callusing remains the safest approach. This consensus is based on decades of collective experience and scientific trials.
Real-world Data: Success Rates
A survey of 200 home growers on a popular succulent forum found:
- Cuttings callused before planting: 85% success rate
- Cuttings planted immediately: 60% success rate
These numbers highlight a clear advantage for the callusing method. The higher survival rate translates to fewer losses and more robust plants. The data also reveal that success rates for immediate planting drop significantly in humid regions or when non-porous soil is used.
Summary Table: Immediate Planting Vs Callusing
| Factor | Immediate Planting | After Callusing |
|---|---|---|
| Survival Rate | ~60% | ~85% |
| Risk of Rot | High | Low |
| Rooting Speed | Slower/Variable | Consistent |
| Best For | Arid Climates/Experienced Growers | All Climates/Skill Levels |
Credit: lifetips.alibaba.com
Factors Influencing Cactus Cutting Success
Several key factors determine whether your cactus cutting will root and thrive. Understanding these variables can help you tailor your approach for optimal results.
Type Of Cactus
Different species have varying resilience and rooting speeds:
- Opuntia (Prickly Pear): Tolerates immediate planting better than most.
- Epiphyllum (Orchid Cactus): Sensitive to moisture, needs callusing.
- Columnar cacti: Thick stems require longer callusing and are more rot-prone.
Some cacti, like Rebutia and Gymnocalycium, are particularly susceptible to rot and require meticulous care during propagation. Conversely, species such as Opuntia and certain Echinopsis hybrids are notably forgiving and often root quickly with minimal intervention.
Climate And Humidity
- Dry, hot regions: Faster callusing, less rot risk.
- Humid or temperate climates: Higher chance of fungal infections, slower drying.
Indoor environments with controlled humidity can mimic dry climates, but outdoor propagation in rainy or humid areas is much riskier. Greenhouse growers often use fans or dehumidifiers to ensure optimal conditions.
Soil Composition And Drainage
A well-draining medium is non-negotiable for cactus cuttings. Commercial cactus mixes are formulated to reduce moisture retention, but DIY blends with sand, perlite, and gravel are also effective.
Adding pumice or horticultural grit increases drainage and aeration. In areas where fungal infections are common, mixing in a small amount of powdered cinnamon (a natural antifungal) can help protect the cutting.
Container Choice
- Shallow, wide pots: Promote airflow and faster drying.
- Terracotta pots: Porous, wick away moisture from the soil.
Plastic pots retain moisture longer than terracotta, so choose accordingly based on your climate and watering habits. For larger cuttings, ensure the container is stable to prevent tipping.
Timing And Season
Spring and early summer offer the best conditions for root growth due to warmth and increased sunlight. Propagation during the active growing season also ensures the plant has sufficient energy reserves.
Data Table: Species Rooting Comparison
| Cactus Species | Callusing Needed? | Rooting Time (weeks) | Rot Risk (Immediate Planting) |
|---|---|---|---|
| Opuntia | Optional | 2-3 | Low |
| Echinopsis | Recommended | 3-5 | Medium |
| Mammillaria | Essential | 4-6 | High |
| Epiphyllum | Essential | 4-8 | High |
Lighting Conditions
Cuttings need bright, indirect light for photosynthesis, but direct sun can scorch unrooted tissue. Gradually introduce established cuttings to more sunlight.
If propagating indoors, south-facing windows or grow lights set to moderate intensity work well. Avoid placing cuttings in dark corners, as this slows rooting and increases risk of fungal infections.
Watering Technique
Water sparingly, only when the soil is completely dry. Overwatering is the top cause of cactus cutting failure.
For particularly sensitive species, bottom watering (adding water to the tray beneath the pot) can help prevent excess moisture at the base of the cutting.
Case Studies: Real-world Experiences
Examining practical examples highlights how theory translates to real results.
Case Study 1: Urban Apartment Grower
Location: Chicago, IL
Species: Echinopsis
Method: Planted cutting immediately into regular potting soil
Result: Cutting developed black rot within a week, failed to root.
Lesson: Humid indoor environments and improper soil increase the risk of failure without callusing.
The grower later switched to a cactus mix and allowed cuttings to callus, achieving a much higher success rate.
Case Study 2: Desert Hobbyist
Location: Tucson, AZ
Species: Opuntia
Method: Planted pad directly into sandy soil outdoors, did not water for 10 days
Result: Cutting rooted successfully in 2 weeks, no rot observed.
Lesson: Arid climates and proper soil can allow for immediate planting with some species.
This method is commonly used in the Southwest, where Opuntia pads are often propagated en masse for landscaping.
Case Study 3: Greenhouse Professional
Location: Commercial greenhouse, Southern California
Species: Mixed (Mammillaria, Echinocactus)
Method: All cuttings callused for 10 days, planted in proprietary cactus mix
Result: 95% success rate, rapid growth
Lesson: Callusing and controlled environment deliver the highest propagation success.
The professional grower also used bottom heat mats and rooting hormone for particularly valuable or rare species.
Best Practices For Rooting Cactus Cuttings
To maximize your chances of healthy, fast rooting, adopt these best practices proven by experts and home growers alike.
1. Always Sterilize Tools
Using clean, sterilized blades prevents the introduction of bacteria and fungi. Disinfect with alcohol or a 10% bleach solution before and after each cut.
Sterilization is especially important when propagating multiple plants, as pathogens can spread rapidly between cuttings.
2. Prioritize Callusing
Unless you live in an extremely dry, hot environment, always allow the cutting to callus completely. This simple step dramatically reduces rot and increases success.
Large cuttings or those from rot-prone species may benefit from a longer callusing period and additional drying time.
3. Use The Right Soil
Opt for a well-draining cactus mix or create your own blend. Avoid moisture-retentive soils.
If available, add a small amount of horticultural charcoal or grit to further improve drainage and reduce pathogens.
4. Limit Watering
Do not water immediately after planting. Wait until the cutting is firmly rooted, then introduce water sparingly.
Monitor the plant closely for signs of dehydration or rot. When in doubt, err on the side of dryness.
5. Maintain Proper Light And Airflow
Provide bright, indirect light and ensure good air circulation. Avoid dark, damp corners or direct midday sun.
Airflow prevents fungal growth and allows cuttings to dry quickly. If propagating indoors, a small fan can help.
6. Label And Track
Keep records of planting dates, species, and methods to learn what works best for your collection.
Tracking results enables you to refine your technique and share knowledge with other enthusiasts.
Best Practice Checklist
- Sterilize all cutting tools
- Allow cuttings to callus fully
- Use a gritty, well-draining soil mix
- Avoid watering for 5–10 days after planting
- Provide indirect, bright light and airflow
Troubleshooting: Why Cactus Cuttings Fail To Root
Even with careful preparation, sometimes cactus cuttings do not root as expected. Here’s how to diagnose and correct common issues.
Rotting At The Base
Cause: Planting before callusing, too much moisture, poor drainage
Solution: Remove cutting, trim off rot, re-callus, replant in dry, gritty mix
If rot is detected early, salvage the healthy portion and restart the callusing process.
No Roots After Several Weeks
Cause: Low temperature, insufficient light, excessively dry air
Solution: Move to warmer, brighter location; lightly mist if air is extremely dry
Some species are slow to root; patience and optimal conditions often resolve the issue.
Shriveling Or Wilting
Cause: Cutting is using stored water faster than it can root
Solution: Ensure cutting is not in direct sun; maintain humidity around plant; do not water soil
Occasionally, cuttings may shrivel if humidity is too low or temperatures are excessively high. Adjust environmental factors as needed.
Mold Or Fungal Growth
Cause: High humidity, lack of airflow, contaminated tools
Solution: Increase ventilation, treat with fungicide, always sterilize equipment
Inspect cuttings regularly and remove any affected tissue promptly.
Advanced Techniques: Boosting Rooting Success
For those seeking maximum propagation rates or working with rare, difficult species, try these advanced tips.
Using Rooting Hormone
Applying a rooting hormone powder (containing indole-3-butyric acid) to the cut end can encourage faster root development. Studies report up to a 20% increase in rooting speed (HortScience).
Rooting hormone is particularly helpful for slow-to-root species and in cooler climates.
Bottom Heat Mats
Maintaining soil temperatures between 75–85°F (24–29°C) with a heat mat accelerates root formation, especially in cooler climates.
Using heat mats is common in commercial propagation, providing consistent warmth that encourages root activity.
Controlled Humidity Chambers
For extremely dry environments, placing cuttings in a loosely covered plastic container can maintain humidity without causing rot—just ensure ventilation.
Humidity chambers are useful when propagating several cuttings at once, allowing for controlled conditions and reduced risk.
Grafting
Difficult-to-root species can sometimes be grafted onto a hardier rootstock, bypassing the rooting process entirely. This technique is common in commercial cactus production.
Grafting is also used to save damaged or rare cacti, and to create unique hybrids.
Comparing Propagation Methods: Cutting Vs. Seeds Vs. Grafting
How does propagation via cuttings stack up against other methods? The table below compares the three most popular techniques.
| Method | Time to Mature Plant | Success Rate | Best For | Drawbacks |
|---|---|---|---|---|
| Cuttings | 4-8 weeks | 60-95% | Most common species | Risk of rot if not callused |
| Seeds | 6-24 months | 20-50% | Rare/hybrid cacti | Slow growth, more care needed |
| Grafting | 2-6 weeks | 80-99% | Hard-to-root species | Requires skill, not natural |
Cuttings are the most accessible and fastest method for most hobbyists, while seeds offer genetic diversity and grafting solves challenges with rare or slow-growing varieties.
Common Myths And Misconceptions
Cactus propagation is subject to many persistent myths. Here’s the truth behind the most common ones.
Myth 1: “cacti Can’t Rot—they’re Desert Plants!”
Fact: Cacti are highly susceptible to rot if exposed to moisture without a protective callus. Proper soil and air circulation are essential.
Even desert-adapted species can succumb to rot in poorly draining soil or humid environments.
Myth 2: “any Soil Will Work”
Fact: Standard potting soil retains too much water. Use a specialized cactus mix or a custom blend with sand and perlite for best results.
Ignoring soil composition is a common cause of failure, especially for beginners.
Myth 3: “water Right After Planting”
Fact: Watering before roots form encourages rot. Wait until the cutting is rooted and the soil is dry.
Patience is key; premature watering is one of the most frequent mistakes.
Myth 4: “direct Sun Is Best For Rooting”
Fact: Unrooted cuttings can scorch in direct sun. Provide bright, indirect light until established.
Direct sunlight can cause dehydration and tissue damage.
Myth 5: “all Cacti Root At The Same Rate”
Fact: Rooting times vary widely by species, size, and environment.
Understanding the unique needs of each species ensures better outcomes.
Resources For Further Learning
For those seeking more detailed guidance or inspiration, these authoritative resources offer in-depth information on cactus care and propagation:
- Wikipedia: Cactus
- Royal Horticultural Society: Growing Cacti & Succulents
- BBC Gardeners’ World: How to Propagate Cactus
- Gardenia: How to Grow Cacti and Succulents
- NCBI: Cactus in Botany and Medicine
Frequently Asked Questions
What Happens If You Don’t Let A Cactus Cutting Callus?
If you skip the callusing process, the open wound on the cutting is highly vulnerable to bacterial and fungal infections. When placed in moist soil, this can quickly lead to rot, which often kills the cutting before roots can develop. Callusing forms a natural barrier that protects the plant and dramatically increases your odds of successful propagation.
Can You Root All Types Of Cacti From Cuttings?
Most, but not all, cacti can be propagated from cuttings. Opuntia, Echinopsis, Mammillaria, and many columnar cacti are easily rooted this way. However, some species, such as certain globular cacti, are more challenging and may require seeds or grafting. Always research your specific species for best results.
How Long Should You Wait Before Planting A Cactus Cutting?
The ideal callusing time depends on the size and type of cutting. For pads and small stems, 3–7 days is usually sufficient. Large, thick stems may require 2–4 weeks or more. The cutting is ready when the end feels dry, tough, and corky—not sticky or moist.
Is Rooting Hormone Necessary For Cactus Cuttings?
While rooting hormone is not strictly required, it can speed up the rooting process and improve success rates, especially with slow-to-root or rare species. Many growers have great results without it, but for valuable or difficult cuttings, it’s a worthwhile option.
How Do You Know When A Cactus Cutting Has Rooted?
Signs that your cutting has rooted include:
- New growth at the top or sides
- Resistance when gently tugged (roots are anchoring it)
- Healthy, firm tissue with no signs of rot or shriveling
Typically, roots begin forming within 2–8 weeks, depending on species and conditions.
Putting cactus cuttings straight into soil is possible, but the most reliable, expert-approved approach is to allow the cutting to callus first. This simple precaution protects against rot and dramatically improves your chances of cultivating a healthy new plant. By understanding the biology of cacti, using the right soil, and following best practices, you can enjoy a thriving collection for years to come.