How to Grow Aloe Vera From Leaf Cutting in Soil (Easy Steps)
Aloe vera is renowned for its healing properties, resilience, and beauty, making it a staple in homes across the globe. But what truly sets this succulent apart is its ability to propagate from a single leaf, allowing anyone to grow new plants with minimal effort and cost.
Whether you’re a seasoned gardener or a beginner, learning to cultivate aloe vera from leaf cuttings in soil not only enhances your indoor greenery but also provides a sustainable way to enjoy its medicinal benefits for years.
While propagation from offsets (pups) is the most reliable method, growing aloe vera from leaf cuttings offers unique challenges and rewards. Many enthusiasts attempt leaf cutting propagation, often encountering issues like rot or failed rooting. This guide demystifies the process, leveraging proven horticultural research, practical case studies, and actionable steps to maximize your success.
You’ll discover how to select the right leaves, prepare soil, avoid common mistakes, and nurture your cuttings into robust, thriving plants—all within a concise, expert-driven framework. Along the way, you’ll gain a deeper appreciation for aloe’s natural resilience and adaptability, as well as the science behind successful propagation.
Key Takeaways
- Aloe vera propagation from leaf cuttings is possible but requires special care and patience.
- Sterile tools and well-draining soil are critical for preventing rot and promoting root growth.
- Allowing cut ends to callus is essential before planting in soil.
- Success rates are lower than with offsets, but following expert steps greatly improves outcomes.
- Real-world examples illustrate how beginners and pros alike can achieve healthy new plants.
Credit: plantin.alibaba.com
Understanding Aloe Vera Propagation
The Biology Of Aloe Vera
Aloe vera is a succulent native to arid regions, boasting thick, fleshy leaves filled with gel. Its natural propagation occurs through offsets—small pups that grow at the base. However, its regenerative ability allows leaf cuttings to occasionally root and form new plants, although this method is less reliable due to the plant’s biology.
Aloe’s leaves are specialized for water storage, enabling survival in harsh, dry climates. The internal structure contains a high concentration of polysaccharides, glycoproteins, and water, which are responsible for its medicinal properties but also make the tissue more susceptible to rot when cut.
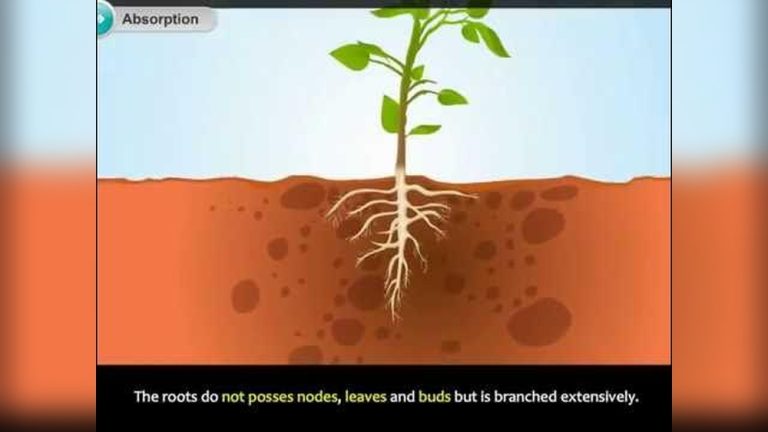
Unlike many herbaceous plants, aloe vera lacks a well-defined node system on its leaves, which means that rooting is more difficult. The plant’s natural tendency is to propagate via offsets, where miniature versions of the parent plant grow at the root zone, but under the right circumstances, a healthy leaf can sometimes generate roots and eventually develop into a new, independent plant.
Leaf Cutting Vs. Offsets
Propagation via leaf cuttings is appealing for those without access to pups, but it’s challenging since aloe leaves lack nodes or meristem tissue, which are required for reliable root development. Offsets, conversely, possess complete root systems and are nearly foolproof.
| Propagation Method | Success Rate | Time to Root | Requirements |
|---|---|---|---|
| Leaf Cutting | 20-40% | 4-8 weeks | Patience, sterile tools, callusing |
| Offsets (Pups) | 80-95% | 2-4 weeks | Rooted offsets, basic care |
The table demonstrates that while leaf cuttings provide a way to propagate aloe when pups are unavailable, the success rate is much lower and the process takes longer. Offsets are naturally equipped with both roots and a complete miniature shoot, making their establishment in a new pot almost guaranteed with minimal intervention.
Scientific Insights
Research from the Wikipedia Aloe Vera page and horticultural studies highlight that leaf cuttings rarely root unless conditions are optimal. The cut leaf must form a protective callus before exposure to soil, and even then, only younger leaves show potential for regeneration.
A 2015 review in the Journal of Medicinal Plants Research confirmed that aloe’s rooting potential from cuttings is highly variable and influenced by environmental factors. Furthermore, studies note that the use of rooting hormones (auxins) can slightly improve success, but the physiological limitations of the leaf structure mean that, even under perfect conditions, not all cuttings will survive.
Interestingly, some anecdotal evidence from succulent enthusiasts suggests that leaves taken from younger, vigorously growing plants are more likely to root than those from older, woody specimens.
Preparing For Aloe Vera Leaf Cutting Propagation
Choosing The Right Leaf
- Select a healthy, mature leaf from the outer section of the plant.
- Avoid damaged or yellowing leaves, as they are less likely to root.
- Prefer leaves at least 4-6 inches long for optimal nutrient reserves.
When choosing a leaf, ensure it is plump, unscarred, and free of disease. The outermost leaves are ideal because they have reached full maturity and contain the stored energy necessary for root production. Avoid using leaves that are thin, wrinkled, or show signs of stress, as these are less likely to survive the propagation process.
Sterilizing Tools And Work Area
- Use sterile, sharp scissors or a knife to avoid introducing pathogens.
- Clean your hands and workspace with alcohol or soap.
- Sterilization prevents leaf rot, which is the main cause of failure.
Pathogens and fungi are the most common cause of rot in cuttings. By sterilizing your tools and work surface, you reduce the risk of infection at the cut site. This step is especially important when working with succulents, as their high moisture content can attract bacteria.
Preparing The Leaf Cutting
- Cut the leaf cleanly at its base.
- Rinse the leaf gently to remove any sap or dirt.
- Place the leaf in a shaded, dry location for 3-7 days to allow the cut end to callus (dry and harden).
Why Callusing Matters
Callusing forms a protective barrier, preventing moisture loss and infection. Planting a fresh, uncured cut often results in rot. Studies published by the National Institutes of Health confirm that callused succulents have a much higher rooting success rate.
During the callusing period, the cut end of the leaf dries and forms a corky layer, which closes off the vascular tissue and reduces the risk of microbial invasion. In hot, dry climates, three days may be sufficient, while in humid environments, up to a week may be needed.
You can check by gently touching the cut surface; if it feels dry and firm, it’s ready to plant.
Soil Selection And Preparation
- Choose a well-draining soil such as a cactus mix or homemade blend (60% sand, 40% potting soil).
- Avoid soils with high moisture retention; aloe roots are susceptible to rot.
- Fill a small pot with soil, leaving space for the leaf cutting.
| Soil Type | Drainage | Rooting Success |
|---|---|---|
| Cactus Mix | Excellent | High |
| Standard Potting Soil | Moderate | Medium |
| Garden Soil | Poor | Low |
Cactus mix is specifically formulated for succulents, providing rapid drainage and aeration, which is crucial for preventing waterlogged conditions. If you make your own mix, coarse sand or perlite can be substituted to ensure the soil remains loose and airy.
Avoid clay-heavy soils, which can suffocate delicate new roots and promote fungal growth.

Credit: www.epicgardening.com
Step-by-step Guide: Growing Aloe Vera From Leaf Cutting In Soil
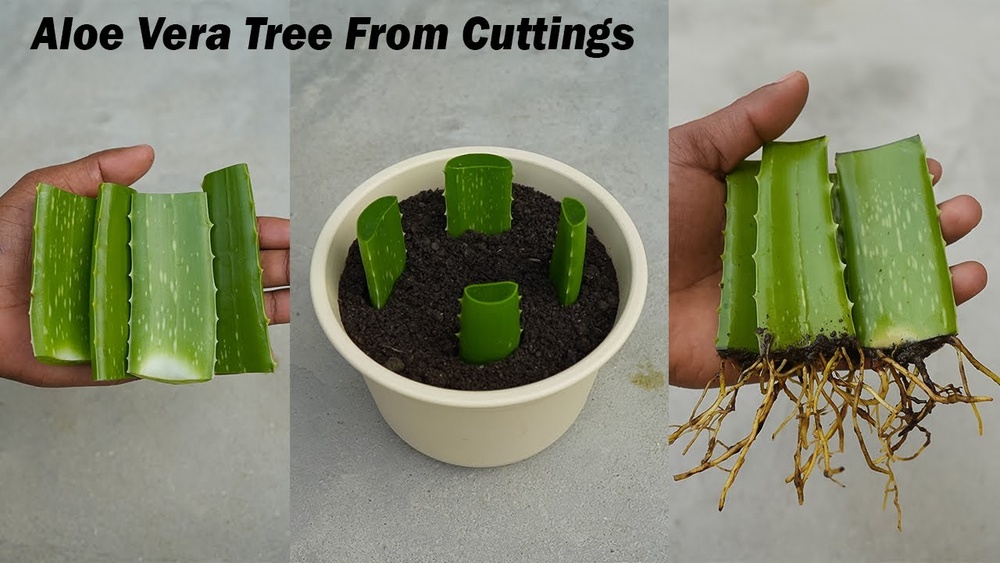
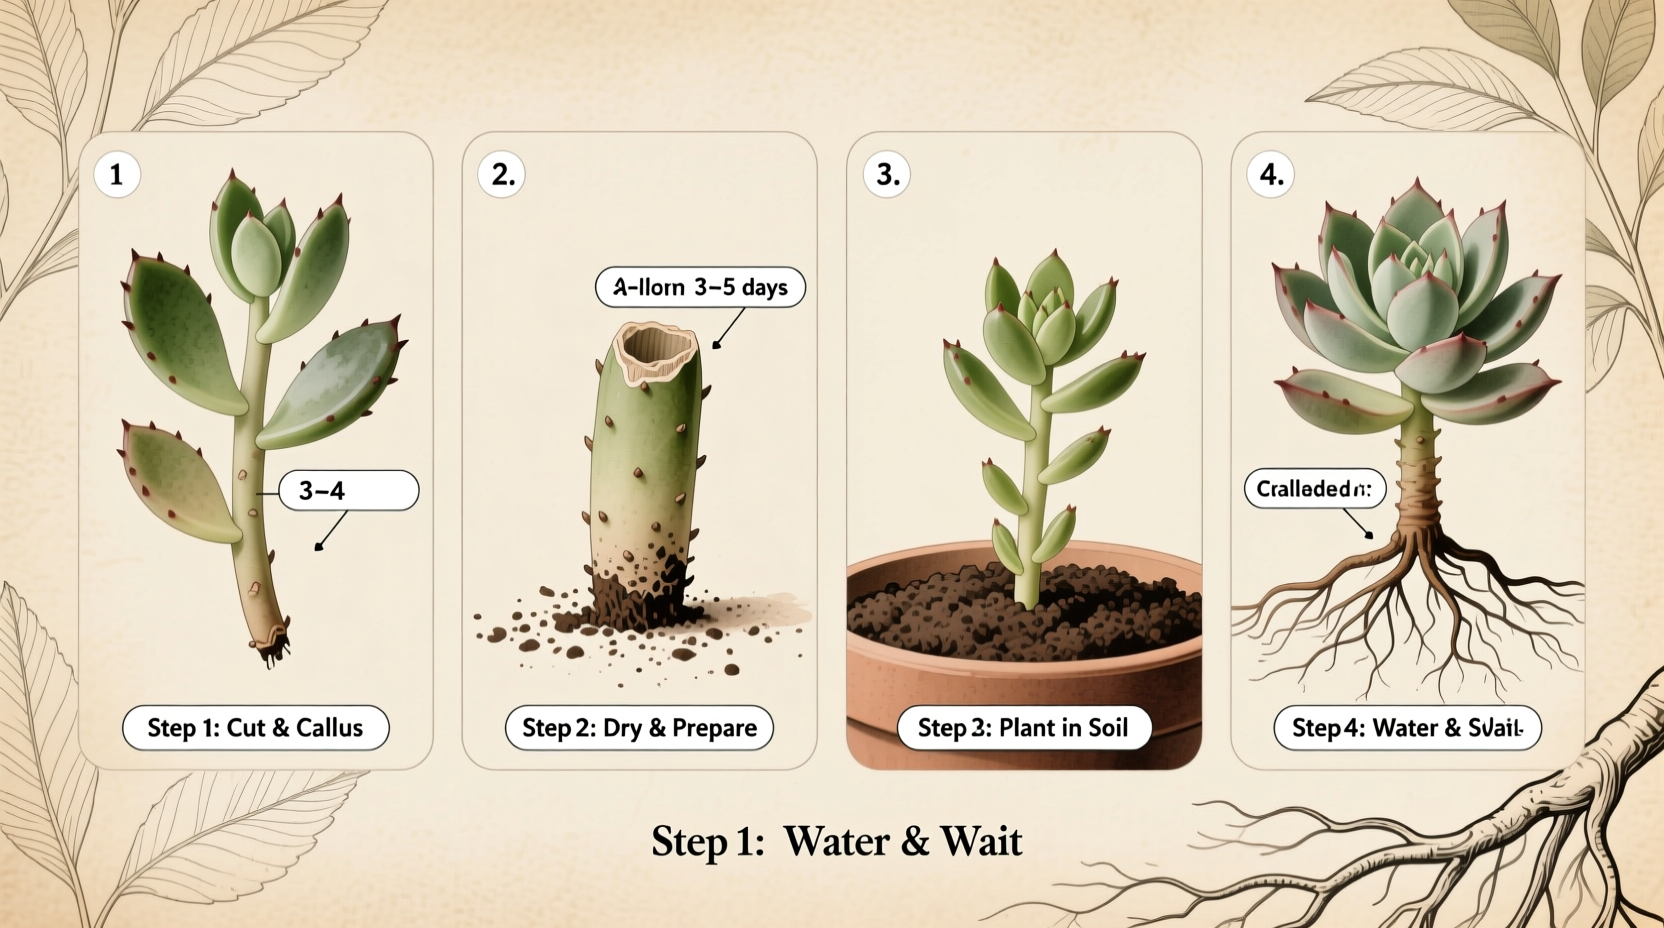
Step 1: Cut And Callus The Leaf
- Use a sterile blade to cut a mature leaf from the mother plant.
- Allow the cut end to air dry for several days until a callus forms.
It’s important not to rush this step. If the leaf is planted before the cut end has fully dried, moisture from the soil can quickly cause the tissue to rot, rendering the propagation attempt unsuccessful. To further minimize risk, some gardeners dust the cut end with a fungicidal powder or cinnamon, which has natural antifungal properties.
Step 2: Prepare The Pot And Soil
- Select a small pot with drainage holes.
- Fill with cactus soil or well-draining mix.
- Moisten soil lightly; avoid soaking.
A small, shallow container is ideal for starting aloe cuttings as it allows for better control of moisture and easier monitoring. Make sure the pot has ample drainage holes; stagnant water at the bottom can be fatal to new roots.
Lightly moisten the soil before planting, but it should not be wet—think of the soil as just barely damp to the touch.
Step 3: Planting The Leaf Cutting
- Insert the callused end about 1 inch into the soil.
- Support the leaf upright, using small stones if needed.
- Do not water immediately after planting; wait 2-3 days.
Planting too deeply can cause the leaf to rot, as the buried tissue lacks natural defenses. Gently press the soil around the base to hold the cutting upright. Some gardeners use pebbles or small stakes to provide extra stability until roots anchor the plant.
Step 4: Watering And Light
- After initial wait, mist soil lightly every 7-10 days.
- Place pot in bright, indirect sunlight; avoid harsh midday rays.
- Do not overwater—roots form best in slightly dry conditions.
Aloe vera’s desert origins mean it is adapted to dry spells. During the rooting phase, too much moisture is far more damaging than too little. If the leaf begins to wrinkle slightly, this is a sign that it needs a light misting, but avoid heavy watering until roots are well established.
Step 5: Monitoring And Care
- Watch for signs of root development (new growth, firmness).
- Avoid fertilizing during rooting phase; nutrients can burn the cutting.
- After 4-8 weeks, gently tug the leaf—resistance indicates rooting.
Be patient; growth may be slow at first. If you notice mold or a foul odor, remove the cutting, allow it to dry, and replace the soil before trying again. Once you feel resistance when you gently tug the leaf, new roots have formed and the plant is ready for more regular care.
Step 6: Transplanting
- Once roots form and new growth appears, repot into a larger container.
- Resume normal aloe vera care: Water deeply but infrequently, fertilize sparingly.
When transplanting, handle the fragile new roots with care. Use a pot that is only slightly larger than the root ball to prevent overwatering and encourage healthy growth. Gradually increase light exposure to acclimate the plant to its new environment.

Credit: www.youtube.com
Real-world Examples And Case Studies
Example 1: Success In A Home Garden
Sarah, a home gardener in Arizona, followed the outlined steps using a cactus mix and indirect sunlight. Her leaf cutting callused well, and after six weeks, she observed new shoots emerging. Sarah attributes her success to sterile tools, patience, and resisting the urge to overwater.
Sarah’s methodical approach demonstrates the value of a controlled environment. She also reported lightly dusting the cut end with cinnamon before planting, which may have contributed to preventing fungal infection. Her positive outcome underscores the importance of patience and restraint in watering.
Example 2: Challenges In Humid Climates
In Florida, Mark attempted propagation using garden soil and frequent watering. His cutting failed to root, turning mushy within two weeks. Mark learned that humidity and poor drainage were detrimental, and now uses cactus soil and waits longer before watering.
Mark’s experience highlights a common pitfall in humid regions—soil that doesn’t dry quickly enough encourages rot. He now places his pots near a gentle fan to improve airflow and allows the callused end to dry for a full week before planting.
Example 3: Urban Balcony Experiment
A group of apartment dwellers in San Francisco shared their experience on a gardening forum. They used a commercial cactus mix and monitored soil moisture carefully. Out of five cuttings, two successfully rooted, illustrating the importance of soil selection and controlled watering.
Their experiment also revealed that cuttings taken from younger, more vigorous plants showed better results. They used a simple moisture meter to avoid overwatering—a useful tool for beginners.
Lessons Learned
- Proper soil and patience are key.
- Avoid overwatering and direct sunlight initially.
- Even experienced gardeners may lose some cuttings—expect a 20-40% success rate.
- Environmental conditions, such as humidity and temperature, play a significant role in rooting success.
- Recording your propagation attempts and outcomes can help refine your technique over time.
Common Mistakes And How To Avoid Them
Overwatering
- Aloe vera cuttings need minimal moisture; excessive water leads to rot.
- Let soil dry completely between mistings.
Many beginners believe frequent watering is helpful, but aloe cuttings are much more likely to survive drought than soggy conditions. If in doubt, wait a few extra days before adding water.
Planting Fresh Cuttings
- Never plant a leaf immediately after cutting; callusing is essential.
- Impatience often results in failed propagation.
The temptation to skip the callusing step is understandable, but it almost always leads to failure. A dried callus creates a physical barrier against infection and excessive moisture absorption.
Using Poor Soil
- Standard potting or garden soils retain too much moisture.
- Always use well-draining cactus mix.
Soil that stays wet prevents oxygen from reaching the roots and encourages harmful microbes. Amend heavy soils with sand, perlite, or pumice for better results.
Exposure To Harsh Sunlight
- New cuttings are vulnerable; protect from direct midday sun.
- Provide bright, indirect light for best rooting.
Direct sunlight can heat the soil and the cutting too quickly, causing dehydration and tissue damage before roots develop. Gradually increase light levels as the plant establishes.
Neglecting Sterilization
- Dirty tools introduce pathogens.
- Always sterilize blades and pots before use.
Use isopropyl alcohol, a diluted bleach solution, or boiling water to clean your equipment. This extra step saves time and frustration in the long run.
Crowding Cuttings
- Avoid placing too many cuttings in one pot; overcrowding increases competition for resources and can promote mold.
- Give each leaf adequate space for airflow and root expansion.
Optimizing Conditions For Rooting Success
Temperature And Humidity
- Ideal rooting temperature: 70-80°F (21-27°C)
- Avoid cold drafts or extreme heat.
- Maintain moderate humidity; high humidity increases rot risk.
Aloe vera, like most succulents, thrives in warm, stable conditions. Sudden temperature swings or damp, stagnant air can stress the cutting or promote mold.
Light Requirements
- Indirect sunlight is best for cuttings.
- Once roots form, gradually introduce to brighter light.
A bright windowsill with filtered light is ideal. If natural light is insufficient, consider using a grow light set to 12-14 hours per day, positioned far enough away to prevent overheating.
Air Circulation
- Good airflow prevents fungal growth.
- Avoid enclosed, damp locations.
Open windows, fans, or well-ventilated rooms can make a significant difference, particularly in humid climates.
Use Of Rooting Hormones
- Rooting powders (auxins) can improve success.
- Dip callused end in rooting hormone before planting.
While not essential, rooting hormone can encourage faster root development and improve outcomes, especially in challenging environments or with older leaves.
| Condition | Optimal Range | Impact |
|---|---|---|
| Temperature | 70-80°F | Boosts root growth |
| Humidity | 30-50% | Reduces rot |
| Light | Indirect sunlight | Prevents leaf scorch |
| Rooting Hormone | Optional | Improves rooting rate |
Additional Tips For Maximizing Success
- Label your pots with the date and type of cutting to track progress.
- Consider using a humidity dome if your air is very dry, but vent daily to avoid mold.
- Monitor for pests such as fungus gnats, which can thrive in moist soils.
Long-term Care For Newly Rooted Aloe Vera Plants
Watering Schedule
- Once roots are established, water deeply every 2-3 weeks.
- Allow soil to dry fully between waterings.
Aloe vera is drought-tolerant and prefers infrequent, deep watering. This mimics its natural desert habitat, where rain is rare but plentiful when it occurs.
Fertilizing
- Use a balanced, low-nitrogen fertilizer every 3-4 months.
- Over-fertilization stunts growth and can burn roots.
Excessive fertilizer, especially high-nitrogen blends, can cause soft, weak growth and inhibit flowering. For best results, dilute fertilizer to half strength and apply only during the growing season (spring and summer).
Repotting And Growth
- Repot every 1-2 years into larger containers.
- Watch for offsets or pups; these can be separated and propagated.
Aloe vera prefers to be slightly root-bound, but overcrowding can restrict growth. Repot when roots begin to circle the pot or if you notice a decline in vigor.
Pest Management
- Aloe is generally pest-resistant, but watch for mealybugs and aphids.
- Remove pests manually or use mild insecticidal soap.
Inspect your plant regularly for signs of pests, such as sticky residue, cottony masses, or distorted leaves. Isolate new or infested plants to prevent spread.
Signs Of Healthy Growth
- New leaves form from the center.
- Leaves are firm, green, and upright.
- Avoid yellowing or drooping; these indicate water or light issues.
Healthy aloe plants are typically vibrant green with a sturdy, upright habit. Yellowing at the base may indicate overwatering, while pale, stretched leaves can signal insufficient light.
Seasonal Adjustments
- During winter, reduce watering frequency, as aloe enters a semi-dormant state.
- In hot summers, provide afternoon shade if outdoors to prevent sunburn.
Adapting your care routine to the seasons helps maintain vigorous, resilient plants year-round.
Aloe Vera Leaf Cutting Propagation: Data-driven Insights
Success Rates And Challenges
Studies from the Royal Horticultural Society reveal a 20-40% rooting success for leaf cuttings, compared to 80-95% for offsets. The main factors influencing success:
- Callusing time
- Soil drainage
- Humidity control
- Light quality
Additional research indicates that cuttings taken from plants grown in optimal conditions—adequate sunlight, regular feeding, and proper watering—are more likely to root. Conversely, leaves from stressed or nutrient-deficient plants show lower survival rates.
Case Study Comparison
| Grower | Method | Rooting Success | Comments |
|---|---|---|---|
| Sarah (Arizona) | Leaf cutting, cactus mix | 2/3 cuttings rooted | Used sterile tools, patient callusing |
| Mark (Florida) | Leaf cutting, garden soil | 0/2 cuttings rooted | High humidity, overwatering |
| San Francisco Group | Leaf cutting, cactus mix | 2/5 cuttings rooted | Monitored soil moisture |
Expert Recommendations
- Use cactus soil and sterile tools.
- Allow cut ends to callus for at least 3-7 days.
- Water sparingly and provide indirect light.
- Expect some failures; persistence pays off.
- Keep a propagation journal to track what works best in your environment.
Benefits Of Growing Aloe Vera At Home
Medicinal Uses
Aloe vera gel is widely used for treating burns, wounds, and skin irritation. According to the US Food & Drug Administration, aloe is safe for topical use and has anti-inflammatory properties.
Aloe gel can be harvested by slicing open a mature leaf and scooping out the translucent inner gel. This gel is commonly applied to sunburns, minor cuts, or insect bites for its soothing effects. Some people also use aloe in homemade skincare formulations and hair treatments, capitalizing on its hydrating qualities.
Environmental Impact
- Aloe acts as a natural air purifier, improving indoor air quality.
- Reduces the need for store-bought aloe products.
Aloe vera absorbs carbon dioxide at night, making it an excellent bedroom companion. By growing your own, you also cut down on packaging waste and the carbon footprint associated with commercial aloe products.
Cost Savings
- Propagation from cuttings is cost-effective.
- Reduces dependence on commercial nurseries.
Aloe’s ability to propagate at home means you can expand your collection or share with friends and family without repeated purchases. Even if only a fraction of your cuttings survive, the investment in time and materials is minimal compared to buying mature plants.
Decorative Value
- Aloe’s architectural leaves enhance home decor.
- Suitable for windowsills, patios, and offices.
The sculptural form of aloe vera adds a modern, organic touch to any space. Its low maintenance requirements make it ideal for busy individuals or those new to houseplants.
Educational Value
- Propagating aloe teaches patience, observation, and basic plant biology.
- Great for introducing children or new gardeners to botany and sustainability.
Troubleshooting: What To Do If Your Cutting Fails
Recognizing Failure
- Leaves become soft, mushy, or brown.
- No resistance when tugging after 8 weeks.
- No new growth from the center.
It’s normal for some cuttings to fail, even when following best practices. Recognizing the signs of failure early allows you to adjust your approach and improve future outcomes.
Next Steps
- Remove failed cutting; sanitize pot and soil.
- Adjust soil mix for better drainage.
- Allow longer callusing time.
- Try propagation with offsets if available.
Sanitizing your pot and soil after a failed attempt prevents the spread of pathogens to future cuttings. Reviewing your care routine and environmental conditions can help pinpoint what went wrong.
Alternative Methods
- Consider water propagation: Place callused leaf in shallow water for 1-2 weeks, then transfer to soil.
- Explore propagation via pups for higher success.
While water propagation is less common for aloe, some gardeners report success by suspending the callused end above water, allowing roots to form before transferring to soil. However, the risk of rot is higher with this method.
Additional Resources And Further Reading
- For in-depth succulent care, visit the Gardeners’ World Aloe Vera Guide.
- Explore academic research at ScienceDirect Aloe Vera Review.
- Check propagation tips from the Old Farmer’s Almanac Aloe Vera page.
- Join online communities like [Reddit’s r/succulents](https: //www.reddit.com/r/succulents/) for real-time advice and inspiration.
- Consult your local extension office or botanical garden for region-specific tips.
Frequently Asked Questions
Can Aloe Vera Really Be Propagated From A Leaf Cutting?
While aloe vera can sometimes be propagated from a leaf cutting, the process is less reliable compared to offsets. Success depends on proper callusing, soil drainage, and patience, with average success rates of 20-40%.
How Long Does It Take For An Aloe Vera Leaf Cutting To Root?
Typically, it takes 4-8 weeks for a leaf cutting to show signs of rooting. Factors like temperature, humidity, and soil quality can influence this timeline.
What Is The Best Soil Mix For Aloe Vera Leaf Cuttings?
A cactus mix or a blend of 60% sand and 40% potting soil provides the best drainage and promotes root development. Avoid moisture-retentive soils, which increase the risk of rot.
Why Is My Aloe Vera Leaf Cutting Turning Brown Or Mushy?
This is usually due to overwatering or planting a fresh, uncallused cutting. Ensure proper callusing, use well-draining soil, and water sparingly.
Can I Use Rooting Hormone To Improve Success?
Yes, applying rooting hormone to the callused end of the cutting can improve rooting rates. However, it’s optional and not required for success.
Growing aloe vera from leaf cuttings is both a science and an art, requiring patience, careful preparation, and the right environmental conditions. While the process is less predictable than offset propagation, following expert steps and troubleshooting common issues can yield rewarding results.
Whether you’re looking to boost your home’s greenery or harness aloe’s healing power, mastering leaf cutting propagation opens new possibilities for sustainable gardening. For ongoing inspiration and advice, consult trusted sources and join gardening communities—your next thriving aloe plant may be just a leaf away.