How to Prepare Tap Water for Vegetable Gardens the Right Way
Preparing tap water for vegetable gardens is a simple but crucial step that many home gardeners overlook. This guide walks you through exactly how to test, treat, and condition your tap water so your vegetables thrive instead of struggle.
You will learn practical, proven methods to remove chlorine, balance pH, handle hard water, and avoid common mistakes that harm your plants.
Simply put, tap water often contains chlorine, chloramines, high pH, or dissolved minerals that can stress vegetable plants and damage soil microbes. Proper treatment — dechlorination, pH adjustment, and aeration — makes it safe and healthy for your garden.
Key Takeaways
- Preparing tap water for vegetable gardens starts with testing for chlorine, pH, and hardness levels using a simple home kit.
- Letting tap water sit for 24 hours removes chlorine but not chloramines — you need a dechlorinator or filtration for that.
- Most vegetables prefer a pH range of 6.0 to 7.0, so adjust your tap water accordingly before watering.
- Hard water with high calcium or magnesium can be softened or diluted with rainwater for sensitive crops like lettuce and tomatoes.
- Aerating stored water before use boosts oxygen levels and keeps beneficial soil bacteria active.
What You Need to Prepare Tap Water for Vegetable Gardens
Before you start treating your tap water, gather the right tools and supplies. Having everything ready makes the process quick and consistent.
Most items are inexpensive and available online or at garden centers. You probably already own some of them.
Essential Equipment and Supplies
- Water test kit — measures chlorine, pH, total dissolved solids (TDS), and hardness. Use a liquid drop kit or digital meter for accuracy.
- Large food-grade containers — 5-gallon buckets or BPA-free jugs for storing and aging water.
- Dechlorinator drops or tablets — specifically designed for gardening or aquarium use. These neutralize chlorine and chloramines instantly.
- Activated carbon filter — a faucet-mounted filter or pitcher filter that removes chlorine, chloramines, and some heavy metals.
- pH adjusters — garden-grade pH up (potassium hydroxide) and pH down (phosphoric acid) solutions.
- Aeration pump or simple stirring tool — adds oxygen to stored water and helps off-gas volatile compounds.
- Rainwater collection barrel — optional but excellent for diluting hard tap water or providing untreated water for sensitive plants.
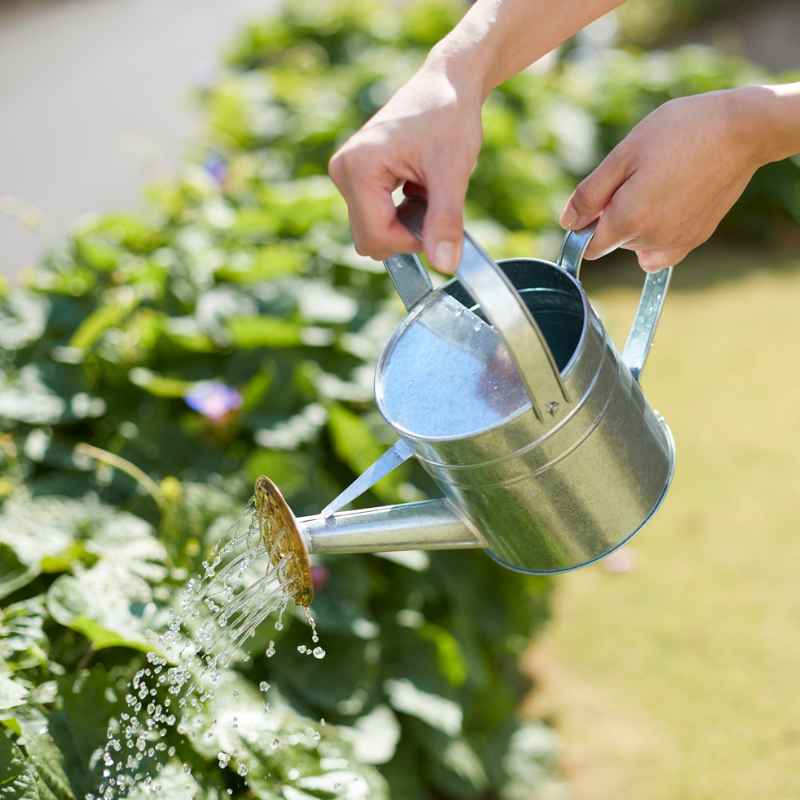
Tip: Keep a dedicated watering can or bucket just for treated water. This prevents accidental use of untreated tap water straight from the hose.
Step 1: Test Your Tap Water Quality First
You cannot fix what you do not measure. Testing your tap water gives you a clear baseline so you know exactly what adjustments are needed.
Municipal water supplies vary widely by location. According to the EPA, over 85% of US households receive water treated with chlorine or chloramines. pH levels can range from 6.5 to 8.5 depending on the source and treatment process.
What to Test For
- Chlorine and chloramines — total chlorine level in ppm. Levels above 0.5 ppm can harm soil microbes.
- pH level — ideal range for vegetables is 6.0–7.0. Most tap water falls between 7.0 and 8.5.
- Total Dissolved Solids (TDS) — measures minerals, salts, and metals. Values above 300 ppm may indicate hard water.
- Hardness (calcium and magnesium) — expressed as grains per gallon (gpg) or ppm. Hard water has 7+ gpg or 120+ ppm.
- Heavy metals — lead, copper, zinc. Less common but important if you have old pipes or well water.
| Parameter | Safe Range for Vegetables | Testing Method |
|---|---|---|
| Chlorine / Chloramines | 0–0.5 ppm | DPD test drops or test strips |
| pH | 6.0–7.0 | Liquid pH test kit or digital meter |
| TDS | 0–300 ppm | TDS meter |
| Hardness | 0–7 gpg (0–120 ppm) | Hardness test strips |
Test your water three times over two weeks to get an average reading. Seasonal changes can affect water chemistry, so re-test every few months during the growing season.
Step 2: Remove Chlorine and Chloramines from Tap Water
Chlorine and chloramines are added to municipal water to kill bacteria, but they also kill beneficial soil microbes your vegetables depend on. The Journal of Agricultural and Food Chemistry notes that chlorine levels above 5 ppm can significantly reduce microbial activity in soil.
The method you choose depends on whether your water contains chlorine alone or the more stable chloramine compound.
Method A: Letting Water Sit (Chlorine Only)
If your water contains only chlorine (not chloramines), simply fill open containers and let them sit for 24 hours. Chlorine naturally evaporates as a gas. Stirring once or twice speeds up the process.
- Use wide-mouth buckets to increase surface area.
- Place containers in a well-ventilated area out of direct sun.
- After 24 hours, test chlorine levels to confirm they are below 0.5 ppm.
Method B: Dechlorinator Drops or Tablets (Chlorine and Chloramines)
Chloramines do not evaporate easily. You need a chemical dechlorinator. These drops neutralize both chlorine and chloramines instantly.
Use drops formulated for gardening or aquarium use.
- Fill your container with tap water.
- Add the recommended dose (usually 1 drop per gallon).
- Stir well and let it sit for 5 minutes.
- Test chlorine levels to confirm removal.
Method C: Activated Carbon Filtration
Faucet-mounted or pitcher-style activated carbon filters remove chlorine, chloramines, heavy metals, and some organic compounds. This is the most convenient option for regular watering.
- Replace filter cartridges every 2–3 months or as recommended.
- Flow rate matters — slower filtration gives better removal.
- Test filtered water periodically to ensure the filter is still effective.
Warning: Boiling tap water to remove chlorine is not recommended for large volumes. It concentrates dissolved minerals and can raise TDS levels, which harms sensitive vegetable roots.
Step 3: Adjust pH Levels for Optimal Plant Growth
Most vegetables grow best in slightly acidic soil with a pH between 6.0 and 7.0. When your tap water pH is above 7.5, repeated watering gradually raises soil pH, locking up essential nutrients like iron and zinc.
The University of California Extension reports that over 60% of home garden soil pH issues are caused by consistently alkaline irrigation water rather than the soil itself.
How to Lower Tap Water pH (Make It More Acidic)
- Garden-grade pH Down — use a phosphoric or citric acid solution. Add 1 ml per gallon and retest until you reach 6.5.
- White vinegar — add 1 tablespoon per gallon to lower pH by approximately 1 point. Test before watering.
- Lemon juice — similar to vinegar. About 2 teaspoons per gallon drops pH by 0.5–1 point.
- Peat moss steeping — place a handful of sphagnum peat moss in a mesh bag and steep in water for 12 hours. This gently lowers pH without chemicals.
How to Raise Tap Water pH (Make It More Alkaline)
This is less common since most tap water is already alkaline. If your water is acidic (below 6.0), use garden-grade pH Up or a small amount of baking soda.
- pH Up solution — add 1 ml per gallon and retest.
- Baking soda — 1/4 teaspoon per gallon raises pH by about 0.5 points. Use sparingly.
Adjusting pH in Bulk
For large gardens, adjust pH in a 5-gallon bucket or rain barrel. Use a digital pH meter for accuracy. Mix thoroughly after adding any adjuster and wait 5 minutes before retesting.
Important: Always test pH after adjusting for chlorine or dechlorinating. Some dechlorinators can shift pH by 0.2–0.5 points. Adjust pH last, right before watering.
Step 4: Address Hard Water Issues for Sensitive Vegetables
Hard water contains high levels of calcium and magnesium. While both are plant nutrients, too much can cause mineral buildup in soil, block other nutrients, and damage sensitive seedlings.
The World Health Organization defines hard water as having 120–180 mg/L of calcium carbonate. Many municipal supplies in the Midwest and Southwest exceed 200 mg/L.
Which Vegetables Are Most Sensitive to Hard Water?
| Sensitivity Level | Vegetables Affected | Common Symptoms |
|---|---|---|
| High sensitivity | Lettuce, spinach, strawberries, tomatoes, peppers | Leaf tip burn, stunted growth, yellowing |
| Moderate sensitivity | Beans, cucumbers, squash, carrots | Slow growth, reduced fruit size |
| Low sensitivity | Kale, cabbage, beets, Swiss chard | Minimal visible effects |
How to Reduce Hard Water Effects
- Dilute with rainwater — mix 50% hard tap water with 50% collected rainwater. This cuts mineral concentration in half.
- Use a water softener — install a whole-house or garden-hose softener. Note that softened water contains sodium, which can be harmful over time. Use it sparingly.
- Let water settle — allow hard water to sit for 24–48 hours. Some calcium carbonate will precipitate out as sediment at the bottom. Pour off the top water carefully.
- Apply gypsum to soil — if you must use hard water, add gypsum (calcium sulfate) to your soil annually. It helps displace excess sodium and improves soil structure.
Step 5: Store and Aerate Water Properly Before Use
Storing tap water after treatment improves its quality further. Aeration and settling allow any remaining volatile compounds to escape and let the water reach room temperature, which is gentler on plant roots.
Cold tap water straight from the hose can shock plant roots, especially in warm weather. The Royal Horticultural Society recommends watering with water at ambient temperature for best results.
Best Practices for Water Storage
- Use opaque or dark-colored containers to prevent algae growth. Clear containers promote algae in sunlight.
- Store water in a shaded, cool area. Direct sunlight heats water and encourages bacterial growth.
- Keep containers covered with a mesh lid to prevent mosquitoes and debris from getting in.
- Use water within 3–5 days of treatment. Stagnant water loses oxygen and can develop odors.
- Aerate stored water by stirring vigorously for 30 seconds before watering, or use an aquarium air stone for 15 minutes.
- Fill watering cans only as needed. Do not store water in metal containers — they can leach copper or zinc into the water.
Why Aeration Matters
Oxygen-rich water supports beneficial aerobic bacteria in your soil. These bacteria break down organic matter, fix nitrogen, and protect roots from pathogens. According to a study in the Journal of Environmental Quality, aerated irrigation water increased soil microbial activity by up to 25% compared to stagnant water.
Simple aeration methods include pouring water back and forth between two buckets, using a hand pump sprayer, or installing a small aquarium air stone in your storage container for 30 minutes before watering.
Common Mistakes When Using Tap Water for Vegetable Gardens
Even experienced gardeners make errors when preparing tap water. Avoiding these pitfalls saves you time, money, and plant stress.
Mistake 1: Using Hot Water from the Tap
Hot water dissolves more lead and copper from pipes than cold water. Always use cold tap water for your garden. If you need warm water, let cold water sit in the sun for a few hours.
Mistake 2: Not Testing After Treatment
Assuming a dechlorinator or filter worked perfectly is risky. Always test chlorine and pH after treatment. Filters lose effectiveness over time, and chemical dosages are not always precise.
Mistake 3: Watering at the Wrong Time of Day
Even properly prepared tap water can harm plants if applied midday. Water evaporates quickly in direct sun, and droplets can magnify sunlight and burn leaves. Water early morning or late afternoon.
Mistake 4: Ignoring Seasonal Water Changes
Municipal water treatment changes by season. Many utilities add more chlorine during summer. Test your tap water at the start of each growing season and after heavy rain events that may affect water sourcing.
Mistake 5: Over-softening Water
Water softeners that use salt exchange replace calcium and magnesium with sodium. High sodium levels can damage soil structure and harm vegetable roots. If you use softened water, alternate with rainwater or distilled water.
Tip: Keep a simple log of your water test results and treatment methods. Note the date, test readings, and what you added. This helps you spot trends and adjust quickly if plant health declines.
When to Avoid Tap Water for Certain Vegetable Plants
Some vegetables are especially sensitive to tap water components. For these plants, consider using alternative water sources or extra treatment.
Seedlings and Young Transplants
Seedlings have tiny root systems and are easily damaged by chlorine, chloramines, and high TDS. Use filtered or dechlorinated water for the first 4 weeks after germination. If possible, use distilled or rainwater for the first two weeks.
Leafy Greens and Herbs
Lettuce, spinach, arugula, basil, and cilantro absorb water directly into their leaves. Chlorine and minerals can cause leaf tip burn and bitter flavors. According to the USDA, leafy greens watered with high-chlorine water showed 15–20% more tip burn than those watered with dechlorinated water.
Acid-Loving Vegetables
Tomatoes, peppers, potatoes, and sweet corn prefer slightly acidic soil. Alkaline tap water (pH above 7.5) can raise soil pH over time, leading to nutrient deficiencies. Monitor soil pH monthly if you grow these crops and use acidic water adjustments as needed.
Container and Raised Bed Gardens
Plants in containers and raised beds have limited soil volume, so mineral buildup happens faster. Use treated tap water or mix with rainwater every third watering to prevent salt accumulation in the root zone.
Frequently Asked Questions
Is tap water safe for vegetable gardens?
Yes, but only after treatment. Untreated tap water contains chlorine, chloramines, and sometimes high pH or minerals that can stress plants and harm soil microbes. Testing and adjusting your tap water makes it safe for vegetables.
How long should tap water sit before watering plants?
Tap water with chlorine only should sit for 24 hours to allow chlorine to evaporate. If your water contains chloramines, sitting alone will not work — you need a dechlorinator or carbon filter. Always test after any treatment method.
Can I use water from a water softener for my vegetable garden?
It is not recommended for regular use. Salt-based softeners replace calcium and magnesium with sodium, which can build up in soil and harm vegetable roots. If you must use softened water, alternate with rainwater or distilled water every other watering.
What is the best pH for vegetable garden water?
The ideal pH range for watering vegetables is 6.0 to 7.0. This matches the optimal soil pH for most crops and ensures nutrients remain available. Test your tap water pH and adjust with pH Up or Down solutions if needed.
Does boiling tap water remove chlorine for plants?
Boiling removes chlorine but is impractical for large volumes and concentrates dissolved minerals. For a small amount of water for seedlings, boiling and cooling is acceptable. For garden-scale watering, use dechlorinator drops or a carbon filter instead.
Final Thoughts
Preparing your tap water correctly is one of the most impactful steps you can take for a healthier vegetable garden. Test your water, remove chlorine and chloramines, adjust pH, and aerate before use. Consistent treatment leads to stronger plants, better yields, and more productive soil over time.
Start with a simple test kit and build your routine from there — your vegetables will thank you.