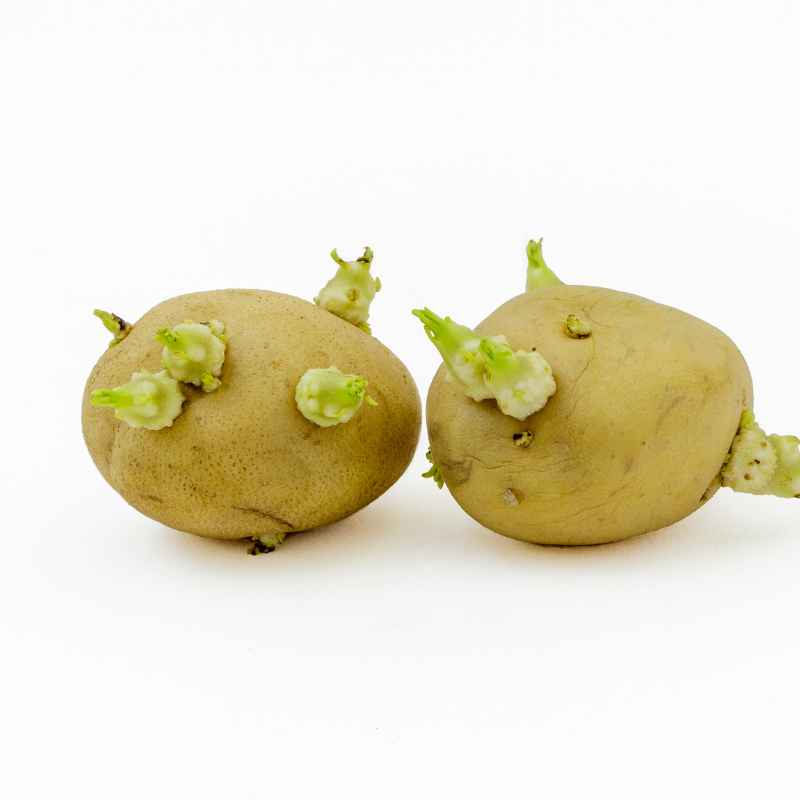

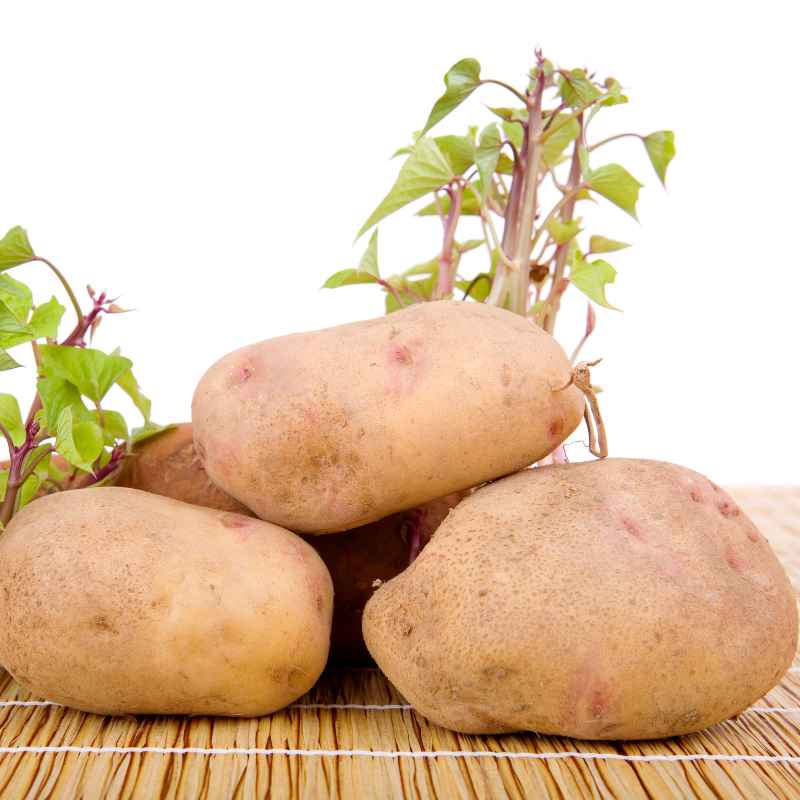
Can I plant sprouted potatoes from my cupboard is a question many home gardeners ask when they spot green shoots poking out of their stored spuds. The answer is a resounding yes — those sprouted potatoes are not garbage, they are free seed potatoes waiting to grow a new crop. This guide walks you through every step, from selecting the best sprouted tubers to harvesting a successful yield.

TPS NUTRIENTS
Potato Fertilizer – Liquid Plant Food for…
- Supports Root Development & Yield – Helps encourage strong roots and productive harvests.
- Balanced Nutrition for Garden Crops – Provides nutrients suited for steady growth and tuber development.
- Ideal for Garden Beds & Rows – Suitable for backyard gardens, raised beds, and field planting.
As an Amazon Associate I earn from qualifying purchases.
For a related plant or gardening question, Can You Plant Different Fruit Trees Next to Each Other? Answered gives readers a focused next step.
For another seed or bulb question, Plant Pepper Seeds From a Fresh Pepper? Yes, Here's How helps compare the next planting choice.
For another seed or bulb question, Can You Plant Apple Seeds From Grocery Store Apples? Yes, But… helps compare the next planting choice.
Simply put, yes you can plant sprouted potatoes from your cupboard, and it is one of the easiest and most cost-effective ways to start a vegetable garden. With proper preparation, the right soil, and basic care, those neglected spuds can produce a generous harvest of fresh potatoes in about 10 to 20 weeks.
Key Takeaways
- Sprouted potatoes from your cupboard are viable seed potatoes that can produce a full crop when planted correctly.
- Cut larger tubers into pieces with at least two healthy sprouts each and let them cure before planting to prevent rot.
- Planting sprouted potatoes requires loose, well-draining soil, full sun, and consistent watering for the best results.
- Choose firm potatoes with short, sturdy sprouts — avoid any that are shriveled, moldy, or have a foul odor.
- Hilling soil around the plants as they grow boosts yields and prevents green patches on the developing tubers.
How to Prepare Sprouted Potatoes for Planting
Preparation is the most critical step when you decide to plant sprouted potatoes from your cupboard. Not all sprouts are equal, and how you handle the tuber before it goes into the ground directly affects germination speed and final yield.
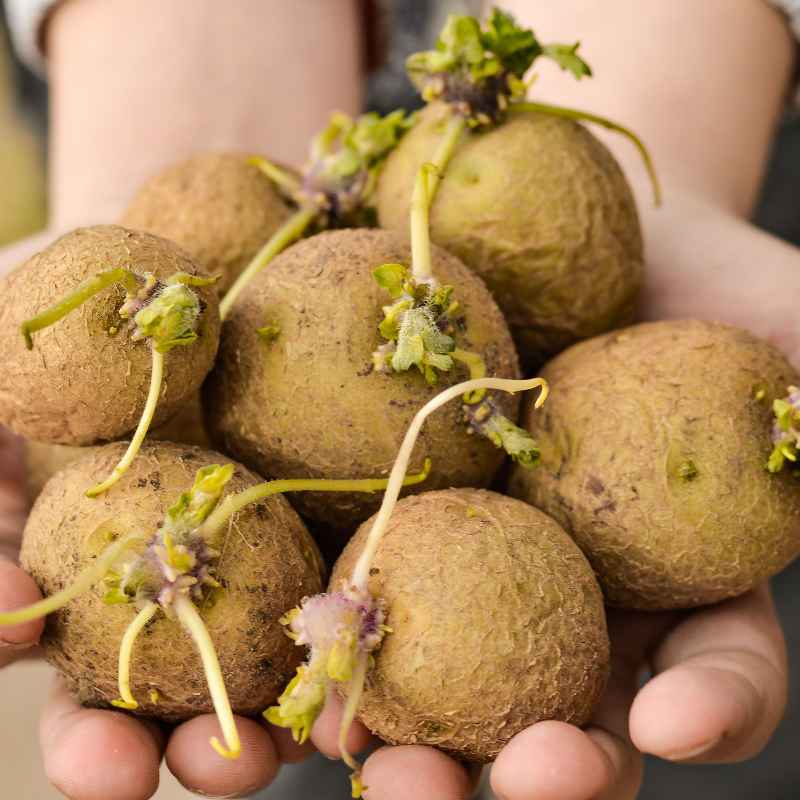
Start by examining each potato carefully. Firm potatoes with short, thick sprouts around 1 to 5 cm long are ideal. Remove any potatoes that are soft, mushy, or have a bad smell — these are likely rotting and will not grow.
If the sprouts are long and pale (etiolated), they have been in darkness too long and may struggle to establish.
Cutting Large Potatoes
Potatoes larger than a medium-sized egg should be cut into pieces. Each piece must contain at least two strong sprouts. The standard practice is to cut the potato into chunks roughly 5 cm in diameter, leaving a day or two for the cut surfaces to dry and form a protective callus.
This curing step drastically reduces the risk of rot after planting.
- Use a clean, sharp knife to prevent introducing diseases.
- Cut 24 to 48 hours before planting to allow callusing.
- Discard any piece that shows discoloration or rot after cutting.
- Keep the sprouts intact — they are the growth points.
- Small potatoes (egg-sized or smaller) can be planted whole.
- Dust cut surfaces with sulfur powder or cinnamon as a natural fungicide.
- Store cut pieces in a cool, dry place out of direct sunlight while curing.
Tip: If your sprouted potatoes have only one or two tiny sprouts, place them in a bright windowsill for a week. Light encourages the sprouts to green up and strengthen before planting.
According to the Royal Horticultural Society, cutting and curing seed potatoes reduces storage rot by up to 60% compared to planting uncut tubers. This small step makes a massive difference in overall success rates.
What Kind of Sprouted Potatoes Work Best for Planting
Not every sprouted potato from your cupboard is worth planting. The variety matters, and the condition of the tuber matters even more. Potatoes sold for eating are often treated with sprout inhibitors to extend shelf life.
These chemicals can reduce vigor, but most home-stored potatoes will still grow if the sprouts are healthy.
Organic potatoes are the best candidates because they are not treated with growth inhibitors. Conventional potatoes still work, but they may take longer to sprout strongly. If your cupboard potatoes are already sprouting, the inhibitor has worn off, and they are ready to plant.
Best Potato Varieties for Re-Growing
| Variety | Best Use | Days to Harvest |
|---|---|---|
| Russet | Baking, mashed | 95-110 |
| Yukon Gold | Boiling, roasting | 90-100 |
| Red Bliss | Salads, steaming | 85-95 |
| Fingerling | Roasting, gourmet | 100-120 |
| Purple | Baking, chips | 90-110 |
Any of these common grocery store varieties will perform well when planted from your cupboard. The key is freshness — potatoes purchased within the last month will have more energy stored for growth than those sitting for three months.
How to Plant Sprouted Potatoes Step by Step
Planting sprouted potatoes from your cupboard follows the same basic process as planting certified seed potatoes. Timing and depth are the two variables that matter most. Aim to plant after the last frost date in your area when the soil temperature has reached at least 7°C at a depth of 10 cm.
Step 1: Choose the Right Location
Potatoes require full sun — at least six to eight hours of direct light daily. The soil should be loose, slightly acidic (pH 5.5 to 6.5), and well-draining. Avoid spots where tomatoes, peppers, or eggplants grew in the previous year to reduce disease risk.
Step 2: Prepare the Soil
Loosen the soil to a depth of 25 to 30 cm. Mix in a 5 cm layer of well-rotted compost or aged manure. Potatoes are heavy feeders and benefit from nutrient-rich soil.
If your soil is heavy clay, consider raised beds or containers.
Step 3: Dig Trenches or Holes
Dig a trench about 10 to 15 cm deep. Place the prepared potato pieces (cut side down if cut) with the sprouts pointing upward. Space each piece 25 to 30 cm apart in rows that are 60 to 75 cm apart.
This spacing gives the tubers room to develop underground.
Step 4: Cover and Water
Cover the potato pieces with 5 to 8 cm of soil. Do not fill the trench completely at this stage — you will hill soil up around the stems later. Water gently to settle the soil.
The soil should stay moist but not waterlogged during the germination period.
- Wait for shoots to emerge — this takes 2 to 4 weeks depending on soil temperature.
- When shoots are 15 cm tall, hill soil up around the stems, leaving only the top 5 cm exposed.
- Repeat hilling every 2 to 3 weeks until the plants flower or the trench is full.
- Water consistently with 2 to 3 cm of water per week if rainfall is insufficient.
- Mulch with straw or grass clippings to retain moisture and suppress weeds.
Warning: Never let the developing tubers get exposed to sunlight. Green potatoes contain solanine, a toxic compound. Hilling prevents greening and keeps your harvest safe to eat.
The RHS notes that consistent moisture during tuber formation can increase yields by 30% or more. Potato plants are surprisingly drought-sensitive during this critical phase.
What Are Common Mistakes When Planting Sprouted Potatoes
Even experienced gardeners make errors when planting sprouted potatoes from their cupboard. Recognizing these pitfalls early can save you from a disappointing harvest. The most frequent mistake is planting the tuber too deep or too shallow, which either delays emergence or exposes the crop to light.
Another common error is skipping the curing step after cutting. Freshly cut potato pieces have an open wound that invites fungal and bacterial pathogens. Without a 24 to 48 hour drying period, rot sets in before the sprouts can establish roots.
The USDA estimates that uncured cut seed potatoes suffer a 40 to 50% higher rot rate in the first two weeks after planting.
- Planting too early: Cold, wet soil causes seed pieces to rot before sprouting.
- Overwatering: Soggy soil suffocates roots and promotes fungal diseases.
- Skipping the hilling leads to green, toxic tubers at the surface.
- Planting diseased potatoes: Soft, smelly, or moldy tubers introduce pathogens to your soil.
- Ignoring crop rotation: Repeated planting in the same spot increases pest and disease pressure.
- Not hardening off: If you start indoors, gradually expose plants to outdoor conditions over 7 to 10 days.
- Harvesting too early: Small tubers may be tempting, but waiting until plants yellow and die back maximizes size and storage life.
Important: If your sprouted potatoes have long, tangled, pale sprouts, do not plant them directly. Instead, place the potato in a warm, bright spot for 7 to 10 days. The sprouts will thicken and turn green, giving the plant a much better start.
How Long Do Sprouted Potatoes Take to Grow
The timeline from planting sprouted potatoes from your cupboard to harvest depends on the variety, weather, and how advanced the sprouts were at planting time. In general, early or new potatoes can be harvested about 10 weeks after planting, while full-sized maincrop potatoes take 15 to 20 weeks.
Growth Timeline Overview
| Stage | Time After Planting | What to Expect |
|---|---|---|
| Sprout emergence | 2 to 4 weeks | Green shoots break through the soil surface |
| Vegetative growth | 4 to 8 weeks | Leaves and stems expand rapidly |
| Tuber initiation | 8 to 10 weeks | Small tubers begin forming underground |
| Flowering | 10 to 12 weeks | Plants produce flowers (variety dependent) |
| Tuber bulking | 12 to 18 weeks | Tubers swell and accumulate starch |
| Senescence | 18 to 24 weeks | Leaves yellow, die back, harvest time |
Potato plants grown from cupboard sprouts often emerge slightly faster than those from dormant seed potatoes because the sprouting process has already begun. However, they also need careful attention to watering and hilling to reach full potential.
What Does a Healthy Potato Plant Look Like
Knowing what a thriving potato plant looks like helps you catch problems early. Healthy plants have deep green, slightly crinkled leaves with a bushy, upright growth habit. Stems are thick and steady, not leggy or sprawling.
About two months after planting, many varieties produce small white, pink, or purple flowers — this is a sign that tubers are forming below.
If the leaves turn yellow, curl at the edges, or develop brown spots, the plant may be stressed by drought, disease, or nutrient deficiency. The soil should feel moist 5 cm below the surface. If it is dry, increase watering.
If the leaves are pale green or yellowish, the plant likely needs nitrogen — a side dressing of compost or a balanced organic fertilizer can correct this.
- Dark green leaves without spots or curling
- Sturdy, upright stems that do not flop over
- Flowers appearing around 8 to 10 weeks after planting
- Consistent new growth from the center of the plant
- No yellowing or browning on lower leaves until late in the season
- Soil that stays moist but not muddy around the root zone
Best Container Size and Soil for Sprouted Potatoes
If you lack garden space, growing sprouted potatoes from your cupboard in containers is an excellent alternative. Potatoes adapt well to pots, grow bags, and even large buckets. The minimum container depth for decent yields is 30 cm, but 45 cm or deeper gives the tubers room to develop fully.
Container Recommendations
| Container Type | Minimum Size | Yield Potential |
|---|---|---|
| Fabric grow bag | 10 to 15 gallons | 5 to 8 lbs |
| Plastic pot | 40 to 60 cm diameter | 3 to 6 lbs |
| 5-gallon bucket | 19 litres | 2 to 4 lbs |
| Raised bed | Any size, 30 cm deep | 2 to 5 lbs per plant |
For container planting, use a high-quality potting mix blended with compost at a 3:1 ratio. Do not use garden soil in pots — it compresses, drains poorly, and may contain pathogens. Add a slow-release organic fertilizer formulated for vegetables at planting time.
The Oregon State University Extension recommends a balanced 5-10-10 fertilizer for container potatoes to support both foliage growth and tuber development.
Common Pests and Diseases to Watch For
Growing sprouted potatoes from your cupboard does not exempt them from pests and diseases. In fact, grocery store potatoes may carry latent pathogens that only show up after planting. The most common pest is the Colorado potato beetle, recognizable by its yellow-and-black-striped body.
These beetles and their orange egg masses on leaf undersides can defoliate plants in days if left unchecked.
Fungal diseases such as late blight (the cause of the Irish Potato Famine) and early blight are also risks. Late blight appears as dark, water-soaked lesions on leaves with a white fungal ring under humid conditions. Early blight shows as target-like brown spots on older leaves.
Both can reduce yield significantly.
- Handpick Colorado potato beetles and drop them into soapy water.
- Apply neem oil or insecticidal soap for aphid and beetle control.
- Use copper fungicide at the first sign of blight on leaves.
- Rotate crops — do not plant potatoes in the same spot for 3 to 4 years.
- Remove and destroy infected plant debris at the end of the season.
- Water at soil level, not on the foliage, to reduce fungal spread.
According to the American Phytopathological Society, crop rotation reduces soilborne potato diseases by up to 70% over three seasons. This single practice is one of the most effective ways to protect your cupboard-grown crop.
Frequently Asked Questions
Can I plant sprouted potatoes from my cupboard if they are soft?
Soft or mushy potatoes are likely rotting and should be discarded. Only firm potatoes with healthy sprouts are worth planting. If the potato is only slightly soft but still firm in parts, you can cut away the soft section and use the remaining healthy portion.
Do I need to remove the sprouts before planting?
No, never remove the sprouts. The sprouts are the new growth points that will develop into stems and leaves. Removing them forces the potato to waste energy producing new sprouts, delaying growth by weeks.
Can I plant a whole sprouted potato without cutting it?
Yes, small potatoes (about the size of an egg or smaller) can be planted whole. Larger potatoes should be cut into pieces with at least two sprouts each to maximize yield and prevent overcrowding underground.
How deep should I plant sprouted potatoes from my cupboard?
Plant them 10 to 15 cm deep, with the sprouts facing upward. Cover with 5 to 8 cm of soil initially, then hill additional soil around the stems as the plant grows. This depth protects the developing tubers from light and allows room for root expansion.
Will grocery store potatoes grow in containers?
Absolutely. Sprouted potatoes from your cupboard grow very well in containers, grow bags, and pots. Use a container at least 30 cm deep with drainage holes, fill with loose potting mix, and follow the same planting and hilling steps used in garden beds.
Final Thoughts
Planting sprouted potatoes from your cupboard is a smart, satisfying way to turn kitchen waste into homegrown food. With proper preparation, consistent watering, and regular hilling, you can enjoy a generous harvest from what would have been thrown away. Give those sprouted spuds a second life — your garden and your plate will thank you.
Related pick: Check today's price on Amazon