How to Repair a Cut Landscape Lighting Cable
Repair a cut low-voltage lighting cable by splicing it only if the damage is local and the cable still has enough slack; replace the run if the cut is crushed, corroded, buried at multiple weak points, or too short to make a weatherproof splice. Bad repairs cause voltage drop, repeated outages, and buried failures that are hard to find. This guide shows how to diagnose the cable, choose splice versus replacement, and make a durable waterproof repair.
What you’ll need


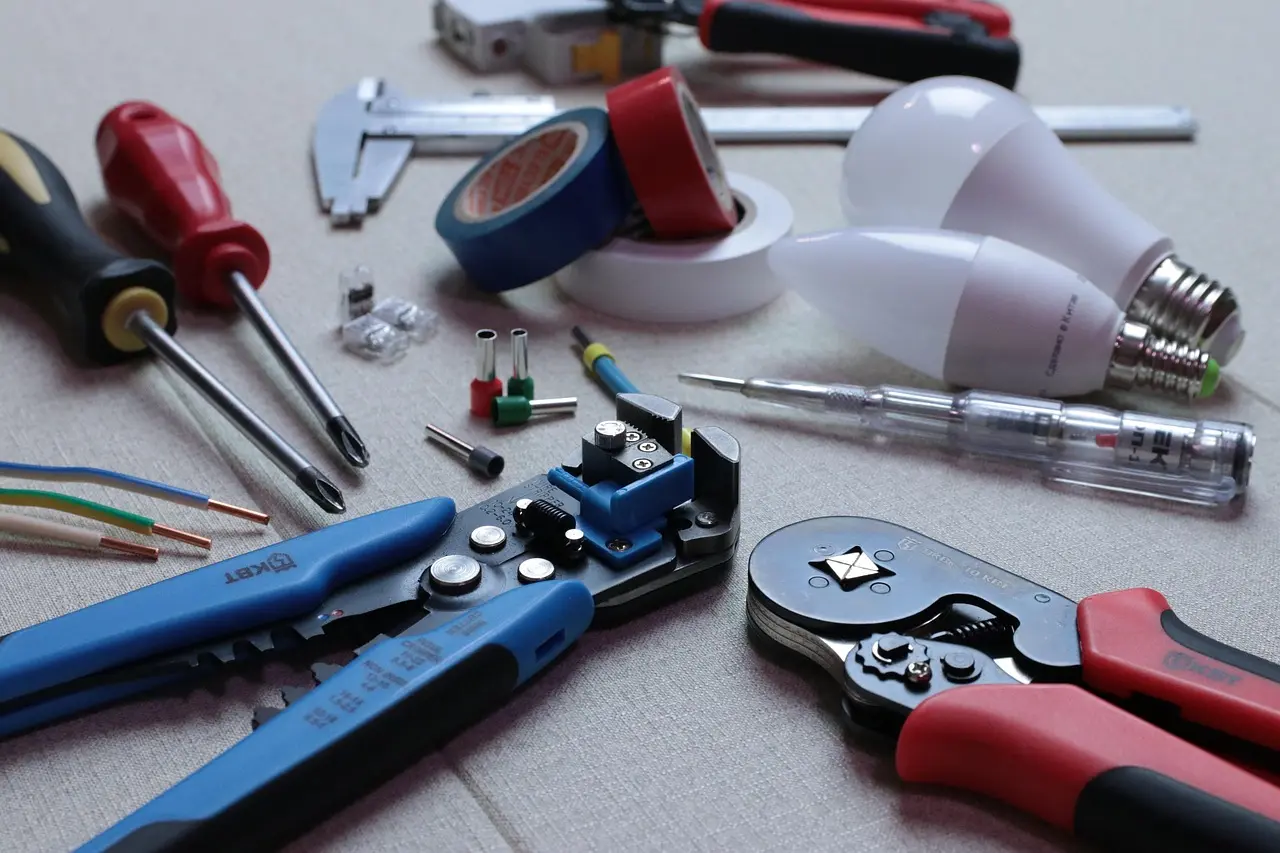
- Multimeter with AC voltage and continuity modes
- Use a wire stripper sized to 12, 14, or 16 AWG cable.
- Crimper matched to the splice terminals you choose
- Direct-burial rated wire splice connector or gel-filled outdoor connector
- Heat-shrink butt splice kit with adhesive-lined tubing
- Waterproof electrical tape or self-fusing tape for secondary sealing only
- Shovel or hand trowel to expose the damaged section
- Replacement cable if the run needs to be rebuilt
How do you decide between splice and replacement?
Choose a splice only when the damage is limited to one spot, the copper is still bright and intact, and you have enough cable length to make a sealed repair without tension. Replace the run if the insulation is brittle, the cut is long, or the cable has multiple damaged sections.
- Turn off the transformer at the outlet or switch, then confirm the lights go dark.
- Trace the cable to find the damaged section, then expose enough wire on both sides for straight cuts and clean access.
- Inspect the cut for crushed insulation, green copper, water inside the jacket, or a partial break that opens when bent.
- Check the cable gauge marking, often 12/2, 14/2, or 16/2, and match the connector to that size and conductor count.
- If the wire is brittle, wet, or damaged in more than one place, plan on replacement instead of a patch.
A common first-timer mistake is to splice a cable that already failed in two places. That repair often works for a day, then fails again when the jacket flexes or the second weak point opens under load.
Cable repair decision table
| Damage type | Visible signs | Replace or splice | Recommended connector | Test step | When to call an electrician |
|---|---|---|---|---|---|
| Clean cut | Square break, bright copper, dry jacket, no crushed section | Splice | Heat-shrink butt splice or gel-filled direct-burial connector sized to the gauge | Check continuity through both conductors, then verify transformer output | If the run is tied into line-voltage wiring or the transformer wiring is damaged |
| Nicked insulation | Outer jacket sliced, copper not exposed or only lightly marked | Splice if the nick is shallow; replace if copper is cut or insulation is brittle | Adhesive-lined heat-shrink splice or sealed outdoor connector | Flex the repaired area gently and retest continuity | If several nicked spots appear along the same run |
| Crushed cable | Flattened jacket, darkened insulation, distorted conductors | Replace | None for the crushed section; replace the damaged length | Measure voltage at the far fixture after replacement | If the damage is under hardscape, decking, or a buried obstruction |
| Wet or corroded wire | Green copper, white crust, damp insulation, blackened strands | Replace unless clean copper can be cut back on both sides | Heat-shrink butt splice only after cutting back to clean metal | Continuity test first, then load test with the fixtures on | If corrosion reaches inside the jacket for a long stretch |
| Intermittent outage | Lights fail when the cable moves, bends, or gets wet | Usually replace the weak section; splice only after finding the exact fault | Waterproof connector with strain relief, or new cable if the fault cannot be isolated | Wiggle test the exposed section while watching the meter | If the issue appears in multiple branches or at the transformer |
How do you repair the cut cable?

Turn off the transformer before touching the cable, then make the repair with a connector rated for low-voltage outdoor use. Strip clean conductors, join them without twisting bare wire together, seal the splice, and keep the repaired section supported so tension does not pull on the joint.
- Switch off the transformer and unplug it if the setup allows.
- Expose enough cable on both sides of the damage to make straight cuts and comfortable hand access.
- Cut out the damaged section if the copper is nicked, corroded, or crushed.
- Strip only the insulation needed for the connector, usually a short, even length that matches the splice instructions.
- Crimp the conductors into a heat-shrink butt splice, or install a gel-filled connector that matches the gauge and conductor count.
- Heat the adhesive-lined tubing with a heat gun until it shrinks tightly and adhesive appears at the ends. Do not use an open flame.
- Wrap the finished repair with waterproof electrical tape or self-fusing tape as a secondary seal only.
- Support the cable so the splice is not hanging in the air, then retest before backfilling.
Suppose a 14/2 cable has a clean cut beside a mulch bed. A direct-burial heat-shrink butt splice is usually a better fit than bare twists because the joint stays sealed if rain soaks the bed and the cable shifts after watering.
Can I splice a cut low-voltage lighting cable underground?
Yes, if the connector is rated for direct burial and the splice is sealed before it goes back under soil. Keep the joint accessible if future service is likely, and avoid placing it where edging blades, shovels, or mower wheels will hit it again.
How do you test the repair?
Check continuity and voltage with a multimeter before you bury the splice again. A good repair should restore a stable low-voltage AC reading at the transformer and allow the fixtures to operate without flicker. If the system still fails, the splice may not be the only fault.

- Set the multimeter to continuity and check each conductor across the splice.
- Switch to AC voltage and confirm the transformer is putting out its normal low-voltage reading, often about 12V AC in these systems.
- Measure voltage at the repaired run with the lights on, not only at no load.
- Move the cable gently near the splice while watching the meter for a drop or open circuit.
- If the fixtures still do not light, inspect upstream connectors, fixture leads, and the transformer terminals.
If that did not work, replace the repaired section with new cable when continuity changes as the line moves or when voltage disappears under load. That points to a hidden break, not just a bad splice.
What if the cut wire is wet or corroded?
Cut back to clean, bright copper on both sides before joining anything. If green corrosion or blackened strands extend far into the jacket, replacement is safer because corrosion can travel under the insulation and keep spreading after the splice is made.
- Open the damaged section and dry it as much as possible.
- Trim back the wire until the copper is clean and shiny.
- If clean copper cannot be reached within a short section, replacing the run or the affected length is usually the practical fix.
- Seal the new splice with an adhesive-lined connector and retest after the repair cools.
How deep should a repaired low-voltage lighting cable be buried?
After testing, re-cover the repair so it is protected from foot traffic, edging, and mower contact, but keep the joint in a place you can reach if future service is likely. Do not bury a splice where repeated digging or soil movement will stress it.
- Place the repaired section back in the trench without sharp bends or tension.
- Cover it with soil or mulch after the repair passes the test.
- Mark the spot mentally or with a nonmetal marker if the area is likely to be disturbed again.
- If the location sits under a walkway edge or a planting bed that gets dug often, reroute the cable or extend the repair to a safer spot.
Say your 12/2 cable runs under a bed edge where a shovel already nicked it once. A splice can work there, but moving the joint a foot or two away from the edge usually lowers the chance of a second cut.
Common mistakes
Most repeat failures come from a bad connector match, a weak seal, or a repair placed where the cable will be damaged again. Slow down at the splice, then test before covering the joint.
- Using the wrong connector size: Match the splice to the cable gauge and conductor count, such as 12/2 or 14/2.
- Twisting bare conductors together: Use a crimped or gel-filled outdoor connector instead.
- Skipping the seal: Waterproof tape is a secondary layer, not the only barrier.
- Burying an untested repair: Check continuity and transformer output before backfilling.
- Leaving the splice under stress: Support the cable so the joint is not pulled tight.
- Ignoring corrosion: Green or black conductors usually mean more damaged cable than is visible.
Frequently asked questions
How to repair cut low-voltage lighting wire
Turn off the transformer, cut out the damaged section, strip both ends, and install a direct-burial rated splice that matches the cable gauge. Test continuity and voltage before burying the repair again. If the copper is corroded or the jacket is brittle, replace the damaged length instead.
Should I replace the whole cable or just splice the damaged section?
Splice only when the damage is local and the cable still has enough slack for a sealed joint. Replace the run if you find crushed insulation, multiple weak spots, wet corrosion, or a break so close to another fitting that the repair would be under tension.
What wire connector should I use for low voltage outdoor cable?
Use a direct-burial rated, waterproof connector sized to the cable gauge and conductor count. For a permanent repair, a heat-shrink butt splice with adhesive-lined tubing is often the most durable choice, especially where the joint will stay underground after testing.
Do I need to turn off the transformer before repairing the wire?
Yes. Switch off and unplug the transformer before touching the cable so there is no live low-voltage output at the splice point. After the repair, restore power and check the transformer’s AC output and the fixtures with a multimeter.
How do I test the lights after repairing the cable?
First check continuity across the splice, then measure the transformer output in AC volts. After that, turn the lights on and confirm the farthest fixture still gets enough voltage to operate. If the system flickers or drops out when moved, the fault is still in the line.