How to Train a Nursery Tree Into Bonsai Style
Choose nursery stock with a trunk that already has movement, a low first branch, and healthy roots; prune for the final silhouette first, and keep at least about one-third of the foliage until the tree recovers. If you chase small size before structure, you usually lose trunk movement, branch placement, and root health, then spend years correcting avoidable flaws. This guide shows you how to pick stock, read the front, set the tree’s future line, and train it in stages.
What to know before you start


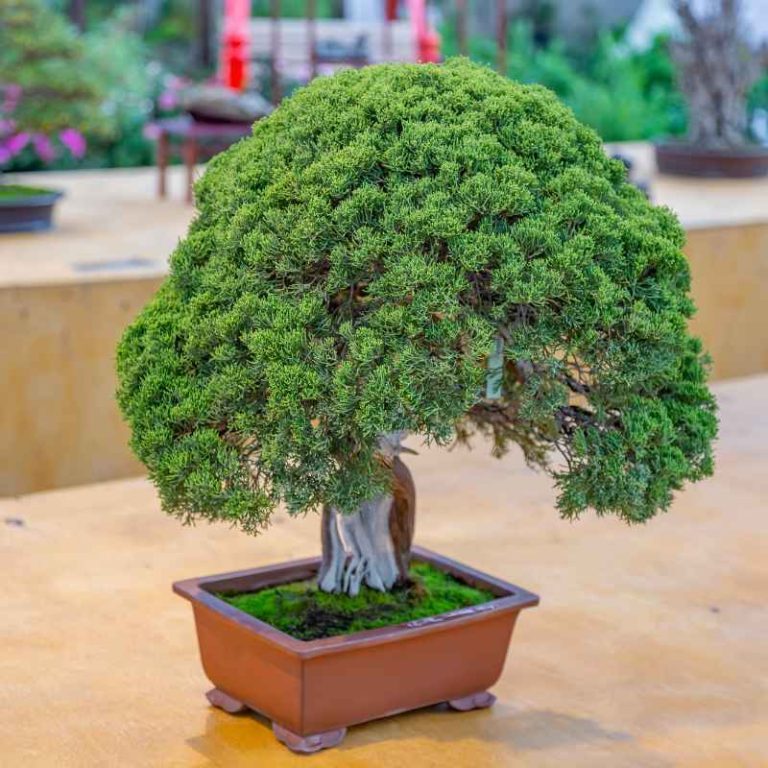
Bonsai is a tree grown in a shallow container, with size shaped through years of pruning, wiring, and root work, not by shrinking it on day one. Nursery stock is often the quickest beginner path because it already has trunk thickness, buds, and roots that can handle training.
Think in pre-bonsai terms. That means choosing the trunk line, front, and primary branch framework first, then refining over several seasons. Final display potting comes late, after the tree has regained vigor and the branch structure is set.
What you’ll need
- Healthy nursery stock, field-grown or container-grown, with a usable trunk line
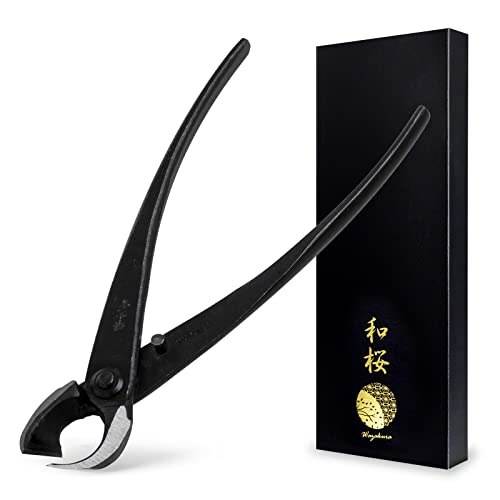
- Concave branch cutter
- Aluminum wire or copper wire
- Guy wire, anchoring points, and soft tie material
- Root rake or chopstick
- Training pot or shallow container with drainage holes
- Particle-based training soil mix: akadama or substitute, pumice, and lava rock
- Mesh for drainage holes and tie-down wire
- Watering can with a fine rose
- Bypass pruners for small shoots
How do you choose nursery stock for bonsai?
Choose stock with a trunk that already moves, a root base that is balanced, and branches that can be rearranged without stripping the tree bare. The best candidate has a healthy root system, visible taper, and internodes short enough that you can build a compact structure over time.
Check trunk movement and taper
- Study the trunk line. Look for natural bends, taper from base to apex, and no long straight section that dominates the tree. Trunks with movement give you a better starting line than stiff, pole-like stock.
- Confirm usable taper. A wide base that narrows gradually is easier to style than a trunk that stays the same thickness until the top. Reverse taper near a junction usually becomes a permanent flaw.
- Check the first branch. A low first branch often helps establish scale and direction. High, crowded branching can still work, but it may need several seasons of correction.
Inspect the nebari and root condition
- Examine the nebari. Look for surface roots that spread evenly from the trunk base. A radial root flare is better than roots that all leave from one side or plunge downward in a visible clump.
- Assess root health. Healthy roots are firm and fibrous, not black, brittle, or sour-smelling. Container-grown stock can be easier to inspect, while field-grown stock may hide heavier root work under the surface.
- Reject severe circling roots. If roots spiral hard around the pot wall, the tree may need staged correction before any styling. Heavy root flaws can make the tree unsuitable for immediate bonsai work.
Spot reverse taper, bar branches, and poor branch spacing
- Find structural faults. Bar branches, which emerge directly opposite each other, often flatten the trunk visually. Reverse taper, a swelling above a cut or branch junction, also weakens the design.
- Judge spacing. Branches should step around the trunk, not stack in one plane. Short internodes near the trunk are easier to work with than long bare gaps between leaves.
- Decide fast. If the stock has poor trunk movement, weak roots, and no usable branches, it is not a good beginner candidate. Pick another tree rather than forcing a rescue project.
How do you decide the front and trunk line?
Choose the front by following the tree’s best trunk movement, best nebari, and clearest branch arrangement. The trunk line should lead the eye upward without fighting itself, and the front should hide flaws while showing the strongest base and the most believable depth.
Follow the trunk’s natural movement
- Rotate the tree slowly. Look for the angle where the trunk feels widest, the flare looks strongest, and the movement reads cleanly. The best front usually is not the side that first catches the eye.
- Pick the viewing line. Choose the angle that shows depth between branches and keeps the trunk from appearing flat. A slight twist toward the viewer often adds movement.
- Mark the apex path. Decide where the top should eventually sit before you cut anything major. The apex should complete the movement, not fight it.
Choose what to keep, remove, or defer
- Keep one future branch set. Save branches that can become primary structure, including one low branch and one upper branch if they fit the line. Keep sacrifice branches only if they help thicken a section you want to develop later.
- Remove obvious defects. Cut dead, crossing, inward-growing, and competing leaders that distort the trunk line. Use a concave branch cutter for cleaner wounds that heal flatter than a flush cut.
- Defer uncertain wood. Leave borderline branches for one season if they help the tree recover or if you are not sure they are needed. Pre-bonsai training often takes several seasons, not one session.
How do you prune nursery stock for a bonsai structure?
Prune to build a framework, not to force the tree tiny on day one. The first cut plan should establish the trunk line, primary branches, and future apex; the rest of the work comes after the tree pushes strong new growth.
Use a keep-remove-defer approach
- Set the skeleton first. Keep the branches that can become the main structure and remove the ones that block the design. Long internodes can stay if they support recovery or thickening, but they usually need later shortening.
- Make clean cuts. Remove large branches with a concave cutter and avoid flush cuts, which can leave a larger wound and ugly swelling. Cut just outside the branch collar when possible.
- Shorten, do not strip. Reduce long shoots to a node that can backbud if the species responds well. On weak stock, leave more foliage than you think you need.
Respect species timing and root limits
- Prune in the growth window. Deciduous trees are often worked at bud swell or just after leaf drop, while many evergreens do better when root stress is lower and growth is active enough to recover. Species timing matters more than calendar dates.
- Limit root reduction. A common rule of thumb is to remove only what the species and vigor can handle, often much less than half on first work. Full bare-rooting is not a safe default for every tree.
- Plan nebari work separately. Root spread improvement takes time. If the base is weak, stage the correction over more than one repot rather than tearing away too much at once.
Say your maple has a strong trunk but three crowded branches near the same height. Keep one branch for the main line, remove one competing branch, and defer the third if it still feeds the tree’s recovery. That choice preserves options without freezing the design.
How do you wire and bend a nursery tree?
Wire when the branch can move without splitting and after you know which shoots belong in the final framework. Aluminum works well for most beginners; copper is stronger and is often used on smaller or harder wood, but it requires more control.
Choose wire gauge and metal type
- Match gauge to thickness. Use a wire about one-third to one-half the branch thickness for aluminum as a starting point, with adjustments for species and stiffness. If the wire cannot hold the bend, it is too thin.
- Wrap at an angle. Apply wire at about a 45-degree angle with even spacing so the branch is supported along its length. Uneven coils can slip or bite faster.
- Bend gradually. Move the branch a little at a time rather than forcing a sharp curve. Sudden movement can crack bark or split the cambium.
Use guy wire for heavy branches
- Anchor securely. Attach guy wire to a pot hole, trunk anchor, or stout lower branch. Use padding where the wire touches bark to prevent abrasion.
- Pull in stages. Tighten the guy wire a little, then stop and recheck the line. It is useful for strong movement on heavy branches that would need oversized wrap wire.
- Watch the bend. Make sure the branch moves without twisting the bark. Guy wire is often the safer option when the branch is too stiff for full wrapping alone.
Watch for bite-in and adjust early
- Inspect every week. Check wired growth during active seasons because bark can swell quickly. Wire that starts to cut in should be removed or replaced before it scars.
- Rewire only if needed. Remove wire if it is doing more harm than good, then let the branch stabilize before rewiring. A branch that has set should not stay wired just for appearance.
- Expect species differences. Pines, junipers, maples, elms, and ficus all react differently to wiring and pruning. Back budding and healing speed are not the same across species.
Nursery stock bonsai decision checklist
Use this checklist before any major cut, wire, or repot. Keep, remove, and defer should point to a clear next move, not a vague maybe. A recovery-readiness score of 1 means the tree is too weak for major work, while 5 suggests it may be ready for a staged styling pass.
| Check item | Keep | Remove | Defer |
|---|---|---|---|
| Trunk movement | Strong natural curves with a clear apex path | Rigid, straight trunk with no usable line | Minor flaws if the base is excellent |
| Nebari quality | Radial surface roots with even flare | Severe circling roots or one-sided flare | Weak flare that can improve in a later repot |
| Reverse taper | None, or only slight swelling that can be hidden | Obvious bulge above a cut or branch junction | Minor swelling if the rest of the trunk is strong |
| Branch spacing | Clear spacing with usable primary branch positions | Bar branches, crowded whorls, or long bare gaps | Extra shoots that may become sacrifice growth |
| Root condition | Firm, fibrous roots with no sour smell | Black, rotten, or tightly girdling roots | Dense roots that need staged reduction |
| Recovery-readiness score | 4-5: ready for staged pruning and wiring | 1-2: too weak for heavy work | 3: light work only, then reassess |
Aftercare and recovery
After heavy styling, stop and let the tree regain vigor. Shade or shelter, careful watering, and no more major work are the priorities until new growth shows the tree has handled the stress well.
Move the tree to bright shade for a recovery period if the species and weather warrant it. Water the training mix thoroughly, then let excess drain out; do not keep the root ball soggy. A shallow container with drainage holes only works if the soil drains fast.
Development pots are usually better than final bonsai pots at this stage. A training pot is often a little deeper and roomier, which helps the roots rebuild after pruning. Final display pots are shallow and should wait until the framework and root pad are stable.
Say a juniper is wired hard, trimmed, and repotted in the same week. If it slows down or pale tips appear, stop further styling and let roots and shoots recover before any additional cuts. That pause often saves the tree.
Common mistakes
- Choosing for size only. Small stock can be tempting, but weak roots, reverse taper, or poor branch placement create more work later.
- Repotting into a final pot too soon. A final display pot is for refinement, not first-stage development.
- Removing too much foliage. Heavy defoliation or hard pruning without a recovery plan can stall growth and weaken back budding.
- Ignoring species timing. Deciduous and evergreen trees do not recover on the same schedule.
- Letting wire bite in. Swelling branches can scar quickly, so inspect wiring often during active growth.
- Hiding root problems. Severe circling roots and poor nebari do not improve by waiting alone; they need staged correction.
Frequently asked questions
How do you train a nursery tree into bonsai style?
Start by choosing the front, trunk line, and future branch structure before pruning. Then move the tree into a free-draining training mix, correct only the roots it can handle, and wire or prune in stages. That sequence builds long-term structure instead of forcing a tiny pot too early.
How do you make a bonsai tree from a nursery plant?
Pick a healthy nursery plant with taper, movement, and usable roots, then turn it into pre-bonsai by shaping the framework first. Use a training pot with drainage holes, a particle-based mix, and staged pruning. The tree becomes bonsai through repeated refinement, not one transplant.
How do you start a bonsai tree from nursery stock?
Begin with inspection: trunk movement, nebari, branch spacing, and root health. After that, decide what to keep, remove, and defer. Only then should you prune, wire, and repot into a container that matches the root mass and development stage.
What kind of nursery tree is best for bonsai training?
The best candidate has a thick trunk, a healthy root system, and branch placement that can be rearranged without major scars. Field-grown stock often gives you stronger trunk potential, while container-grown stock can be easier to evaluate. Either can work if the structure is sound.
How hard can you prune a nursery tree for bonsai?
Prune hard only if the species, timing, and vigor allow it. A common first pass keeps enough foliage for recovery and removes only obvious faults. On weaker trees, reduce less and wait for a strong flush of growth before making deeper cuts.
How long does it take to turn a nursery tree into bonsai?
It usually takes years, rather than weeks. The first year often focuses on front selection, trunk line, and recovery; later seasons refine branch placement, back budding, and ramification. Final potting comes last, after the tree has built a stable structure.