How To Plant Moringa Oleifera Seeds
Moringa oleifera, often called the “drumstick tree” or “miracle tree,” has captivated gardeners, farmers, and health enthusiasts worldwide for its fast growth, resilience, and highly nutritious leaves. Originating from the foothills of the Himalayas, this drought-tolerant tree is now cultivated across Africa, Asia, and the Americas, prized for its edible leaves, pods, flowers, and seeds. Planting Moringa oleifera seeds is not just an agricultural act, it’s an investment in sustainable nutrition, soil improvement, and even economic empowerment for smallholder farmers.
Whether you’re an urban gardener hoping to add a superfood to your backyard, a permaculturist seeking a resilient shade provider, or a commercial grower aiming to supply the health food market, understanding the best practices for planting moringa seeds is essential.
This comprehensive guide demystifies each step of the planting process, integrating practical experience, scientific research, and real-world examples. You’ll discover actionable advice, from seed selection to post-planting care, and data-driven comparisons to help you maximize germination rates and ensure healthy, robust moringa trees.
Key Takeaways
- Moringa oleifera is a fast-growing, drought-resistant tree valued for its nutritional and ecological benefits.
- Seed selection and preparation are critical for high germination rates and healthy seedlings.
- Soil, climate, and location significantly impact moringa’s growth; choose well-drained soil and full sun exposure.
- Planting methods include direct sowing and nursery propagation, each with specific advantages.
- Care and maintenance in the first year determine tree health and productivity.
- Pest management and disease prevention are essential, but moringa is relatively hardy.

Credit: www.amazon.com
Understanding Moringa Oleifera: The Miracle Tree
Moringa oleifera’s popularity is rooted in its versatility and resilience. This section explores why it’s called the “miracle tree” and how its unique attributes influence planting strategies.
Nutritional And Economic Significance
Moringa leaves contain significant amounts of vitamins A, C, and E, along with calcium, potassium, and protein. According to the National Institutes of Health, moringa leaves have seven times more vitamin C than oranges and four times more calcium than milk per gram. These nutritional values have made moringa a focus of global health initiatives to combat malnutrition.
Beyond nutrition, the tree’s rapid growth (up to 3 meters in the first year under optimal conditions) and ability to thrive in poor soils make it a valuable crop for income generation and ecological restoration.
Growth Habits And Environmental Adaptability
Moringa tolerates a wide range of conditions, including drought, poor soil, and high temperatures (up to 48°C/118°F). However, it grows best in tropical and subtropical regions with annual rainfall between 250 mm and 1500 mm.
Key attributes:
- Deciduous: Loses leaves in dry seasons to conserve water.
- Deep-rooted: Accesses groundwater, ideal for arid zones.
- Nitrogen-fixing: Improves soil fertility for companion crops.
Real-world Example: Moringa In Smallholder Farms
For smallholder farmers in Kenya, integrating moringa into mixed cropping systems increases overall farm resilience. The trees provided shade, improved soil structure, and offered an additional source of nutrition and income within the first two years.
Moringa’s Role In Sustainable Agriculture
As a fast-growing perennial, moringa can be used for:
- Erosion control on degraded hillsides
- Windbreaks and living fences
- Organic green manure and compost
By understanding these characteristics, growers can tailor their planting strategy to local conditions and goals.
Credit: www.youtube.com
Seed Selection And Preparation
Selecting high-quality seeds and preparing them correctly are foundational to successful moringa cultivation. This section details best practices and common pitfalls.
Choosing The Right Seeds
Seed quality is the single most important factor affecting germination and seedling vigor.
Pro Tip: Always purchase seeds from reputable sources or harvest from healthy, mature moringa trees. Avoid seeds from trees with visible disease or poor growth.
Key criteria for seed selection:
- Freshness: Seeds less than one year old have higher viability.
- Color: Healthy seeds are light brown to grey, with no black spots or mold.
- Size: Plump, uniform seeds outperform smaller or shriveled ones.
How To Test Seed Viability
A simple float test can help assess viability:
- Place seeds in a container of water.
- Discard any that float, these are likely hollow or dead.
- Sow only the seeds that sink.
Seed Storage Guidelines
If not planting immediately, store seeds in a cool, dry place in an airtight container. High humidity or heat reduces germination rates.
| Storage Condition | Expected Viability After 6 Months | Notes |
|---|---|---|
| Room temperature (20-25°C, low humidity) | 70-80% | Best for short-term storage |
| Refrigeration (4-8°C, sealed) | 85-90% | Ideal for long-term storage |
| High humidity (>60%) | 40-50% | Rapid loss of viability |
Pre-planting Seed Treatments
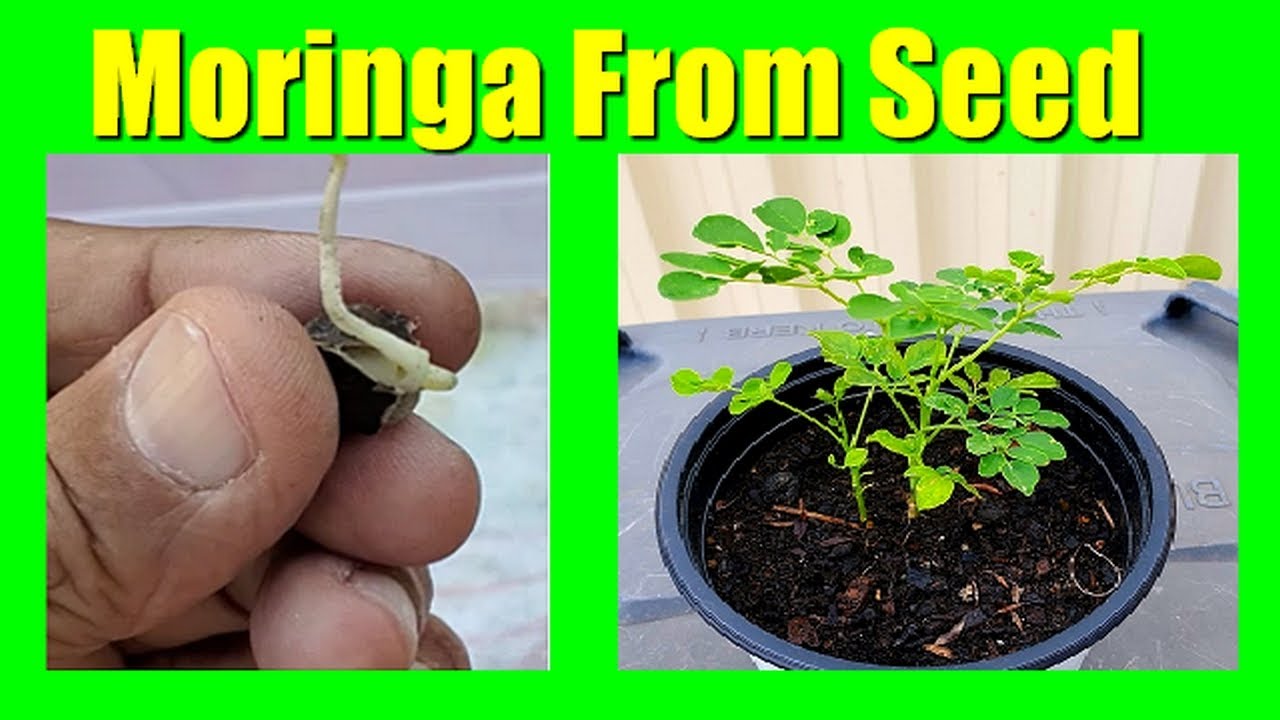
Some growers soak seeds in water for 24 hours before planting to speed up germination. Alternatively, scarifying (gently nicking) the seed coat can improve water uptake.
Warning: Over-soaking seeds can lead to rot. Limit soaking to 24 hours and use only clean, room-temperature water.

Credit: www.amazon.com
Site Selection And Soil Preparation
Moringa’s adaptability does not mean all sites are equal. Proper site selection and soil preparation maximize growth and minimize future problems.
Ideal Climate And Sunlight
- Temperature: Optimal range is 25, 35°C (77, 95°F).
- Rainfall: 250, 1500 mm annually; supplemental irrigation may be needed in arid climates.
- Sunlight: Minimum 6 hours of full sun daily.
Shaded or waterlogged areas result in slow growth and disease.
Soil Requirements
Moringa grows in a variety of soils, but thrives in:
- Well-drained sandy loam
- PH 6.0, 7.5
- Low salinity
Heavy clay or compacted soils lead to root rot and stunted growth.
Soil Preparation Steps
- Clear weeds and debris from the planting site.
- Loosen soil to a depth of at least 30 cm for good root penetration.
- Incorporate organic matter (compost or well-rotted manure) to improve fertility.
- If soil is acidic, add agricultural lime to adjust pH.
Example: Urban Garden Bed Preparation
When planting moringa in raised beds on compacted urban soils, mix one part compost with two parts native soil to improve both drainage and seedling growth rates.
Comparing Site Suitability Factors
| Factor | Optimal | Acceptable | Poor |
|---|---|---|---|
| Sunlight | 6-10 hrs/day | 4-6 hrs/day | <4 hrs/day |
| Drainage | Well-drained | Moderate | Waterlogged |
| Soil pH | 6.0, 7.5 | 5.5, 8.0 | <5.5 or >8.0 |
| Soil Type | Sandy loam | Loam, sandy clay | Heavy clay |
Step-by-step Planting Methods
There are two main ways to plant moringa seeds: direct sowing in the ground and starting in a nursery (containers or seedbeds). Each has distinct advantages depending on scale and context.
Direct Sowing In The Field
Best for large-scale planting or sites with ideal conditions.
Steps:
- Mark planting holes 2, 3 meters apart (for tree production) or 1 meter apart (for hedges or intensive leaf harvest).
- Dig holes 30 cm wide and 30 cm deep.
- Fill holes with a mix of native soil and compost.
- Plant 2-3 seeds per hole, 2, 3 cm deep.
- Water lightly but thoroughly after sowing.
Once seedlings reach 20 cm, thin to the strongest plant per hole.
Advantages:
- Simpler, less labor-intensive for large plots.
- Taproot develops undisturbed, resulting in stronger trees.
Drawbacks:
- Lower germination rates due to soil pests, inconsistent moisture.
Nursery Or Container Propagation
Recommended for urban gardeners, small plots, or challenging soils.
Steps:
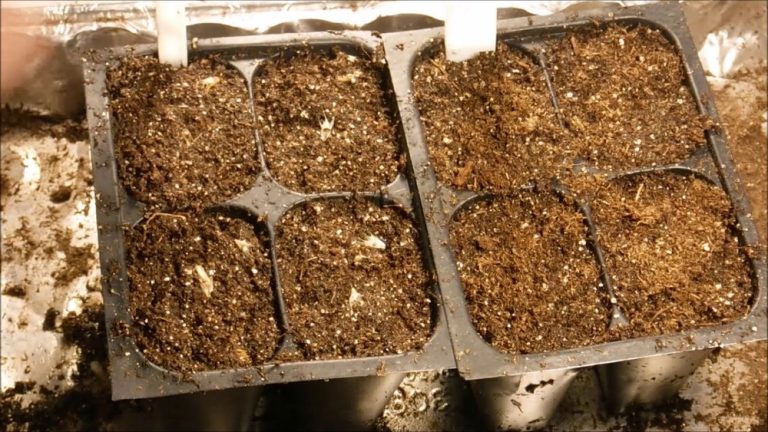
- Fill seed trays or polybags (15×20 cm) with a sterile mix: 1 part compost, 1 part sand, 1 part loam.
- Sow 1 seed per container, 2 cm deep.
- Keep trays in partial shade, water daily but avoid saturation.
- Transplant seedlings to the field when 20-30 cm tall (4, 8 weeks).
Advantages:
- Higher germination rates.
- Easier protection from pests and adverse weather.
Drawbacks:
- Requires extra labor for transplanting.
- Seedlings may experience transplant shock if roots are disturbed.
Example: Comparing Germination Rates
A field trial at the University of the Philippines Los Baños showed direct-sown seeds had a 65% emergence rate, while nursery-raised seeds achieved 85% survival after transplanting.
Pro Tip: Companion Planting With Moringa
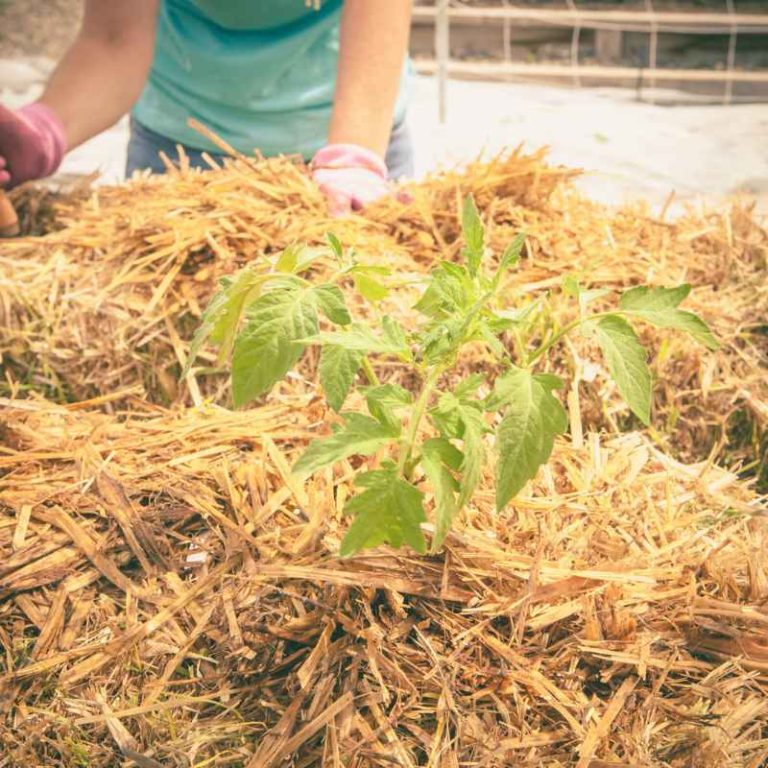
Planting moringa alongside legumes or vegetables can maximize land use and soil fertility. In small gardens, use moringa as a living trellis for beans or cucumbers.
Table: Direct Sowing Vs. Nursery Propagation
| Method | Germination Rate | Labor Intensity | Best For |
|---|---|---|---|
| Direct Sowing | Moderate (60, 70%) | Low | Large fields, resilient soils |
| Nursery Propagation | High (80, 90%) | High | Small plots, poor soils |
Early Care And Maintenance
The first 3, 12 months are critical for establishing healthy moringa trees. Proper care minimizes losses and promotes vigorous growth.
Watering Strategies
Moringa is drought-tolerant but requires consistent moisture during germination and early growth.
Guidelines:
- Germination phase (first 2 weeks): Keep soil consistently moist, not waterlogged.
- Seedlings (2, 12 weeks): Water every 2, 3 days or when topsoil is dry.
- After establishment (3+ months): Water weekly during dry periods; reduce frequency in rainy season.
Warning: Overwatering is a common cause of seedling death. Ensure containers and planting sites drain well.
Fertilization Practices
Moringa grows well in low-fertility soils, but organic matter boosts early development.
- At planting: Mix compost or well-rotted manure into the planting hole.
- Side-dress seedlings with compost every 6, 8 weeks.
- Avoid chemical fertilizers in the first year; these may burn roots.
Weed And Pest Management
Young moringa seedlings compete poorly with aggressive weeds.
- Mulch around seedlings to suppress weeds and retain moisture.
- Hand-weed regularly, especially in the first 2 months.
Pests are rare, but watch for:
- Aphids: Spray with water or neem oil if infestations occur.
- Cutworms: Use physical barriers or diatomaceous earth.
Pruning And Training
Early pruning encourages bushy growth and maximizes leaf yield.
How to prune:
- When seedlings reach 50, 60 cm, cut the tip 10 cm above ground.
- Allow side branches to develop, then prune again to desired height.
Pruned moringa trees are easier to harvest and more resistant to wind damage.
Example: Recovering From Transplant Shock
When transplanting nursery-grown seedlings, shade the plants for the first week and keep the soil moist to reduce shock and improve survival by 20%.
Maximizing Growth And Productivity
To achieve robust, productive moringa trees, optimize spacing, nutrition, and ongoing care. This section draws on field research and practical experience.
Optimal Spacing And Plant Density
- For leaf production: 10, 20 cm between plants for dense hedges, pruned monthly.
- For pod/seed production: 2, 3 meters between trees for full canopy development.
Densely planted moringa (for leaves) can yield up to 78 tons of fresh leaves per hectare per year under ideal management, according to the World Vegetable Center.
Managing Common Growth Issues
- Yellowing leaves: Often a sign of water stress or nutrient deficiency.
- Stunted growth: Check for root-bound seedlings (in containers) or compacted soil.
- Branch dieback: Prune dead wood and ensure good airflow.
Real-world Example: Commercial Moringa Farm
A farm in Tamil Nadu, India, increased leaf yields by 35% after switching from random to systematic row planting, combined with monthly organic compost applications.
Harvesting Leaves And Pods
- Leaves: Harvest by cutting branches, leaving at least one-third of foliage for regrowth.
- Pods: Mature 6, 9 months after planting; harvest when still green and tender.
Regular harvesting stimulates new growth and delays woody stem development.
Table: Growth Milestones In Year One
| Month | Expected Growth | Key Actions |
|---|---|---|
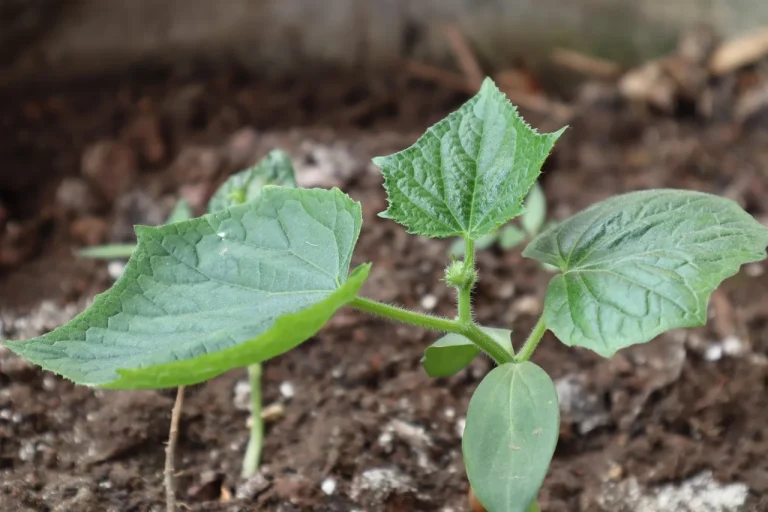
| 1 | Seedlings 15, 30 cm tall | Weed, water, thin seedlings |
| 3 | Plants 50, 100 cm tall | First pruning, side-dress compost |
| 6 | Branches forming, leaf harvest possible | Regular pruning/harvesting |
| 9, 12 | Tree form established, first pods may appear | Continue care, prepare for pod harvest |
Preventing And Managing Diseases
While moringa is relatively pest- and disease-resistant, some issues can arise, especially in humid climates or poorly drained soils.
Common Diseases
- Root rot (caused by waterlogged soil)
- Powdery mildew (white leaf coating in humid conditions)
- Leaf spot (brown or black patches on leaves)
Prevention Strategies
- Plant in well-drained soil to avoid root diseases.
- Prune for airflow to reduce humidity around foliage.
- Rotate crops if growing in mixed gardens.
Organic Disease Management
- Neem oil sprays help control fungal diseases.
- Remove affected leaves and dispose of them, do not compost diseased material.
- Apply compost tea as a foliar spray to boost plant immunity.
Pro Tip: Monitoring For Early Signs
Check seedlings and young trees weekly for changes in leaf color, spots, or wilting. Early intervention reduces long-term losses.
Example: Leaf Spot Outbreak
In the 2026 rainy season, a moringa demonstration plot in Ghana experienced a leaf spot outbreak. Prompt removal of infected foliage and improved spacing reduced disease spread by 60%.
Resources For Disease Identification
For up-to-date pest and disease management guidelines, consult the Tamil Nadu Agricultural University.
Scaling Up: From Home Gardens To Small Farms
Whether planting a single tree or establishing a commercial moringa plantation, scaling up requires careful adaptation of techniques discussed above.
Home Gardeners
- Use containers or raised beds for flexibility.
- Prune aggressively for compact growth and ease of harvest.
- Integrate moringa with vegetables and herbs.
Community Projects
- Organize group seed purchases and nursery operations.
- Use moringa as part of school feeding or nutrition programs.
- Monitor for pests and diseases collectively.
Smallholder And Commercial Farms
- Prepare land with mechanized tilling if available.
- Implement systematic row planting for ease of management.
- Track yields and costs for continuous improvement.
Real-world Example: School Nutrition Initiative
A school in Senegal added moringa leaf powder to student meals after planting a 0. 5-hectare moringa orchard. Within one year, child anemia rates dropped by 30% (per school health records), demonstrating both nutritional and community impact.
Frequently Asked Questions
What Is The Best Time Of Year To Plant Moringa Seeds?
The optimal time to plant moringa seeds is at the onset of the rainy season in your region. This timing ensures consistent soil moisture during germination and early growth, reducing reliance on supplemental irrigation. In tropical climates, planting can occur year-round if irrigation is available. In subtropical or temperate zones, plant after the danger of frost has passed, as moringa seedlings are sensitive to cold.
Can I Grow Moringa Indoors Or In Containers?
Yes, moringa can be grown indoors in containers, especially in regions with cold winters. Choose a pot at least 30 cm deep to accommodate the tree’s taproot. Place the container in a sunny location (south-facing window or under grow lights), and rotate the plant regularly for even growth.
Keep in mind that container-grown moringa will remain smaller and may require more frequent watering and fertilization.
How Long Does It Take For Moringa Seeds To Germinate?
Under optimal conditions, moringa seeds germinate in 5, 12 days. Factors affecting germination speed include seed freshness, temperature (ideal: 25, 35°C), and moisture. If seeds do not sprout within two weeks, check for rot or dryness and adjust your planting method accordingly.
Is It Necessary To Soak Moringa Seeds Before Planting?
Soaking moringa seeds for 24 hours before planting can enhance germination rates by softening the seed coat and accelerating water absorption. However, this step is not strictly required. If you are planting in moist, well-prepared soil, direct sowing without soaking can still yield good results.
Avoid soaking seeds for longer than 24 hours to prevent rot.
What Are The Main Challenges When Planting Moringa Seeds, And How Can I Overcome Them?
Common challenges include poor seed viability, overwatering, and pest damage to seedlings. To address these:
- Use fresh, high-quality seeds and perform a float test for viability.
- Plant in well-drained soil and water carefully to avoid root rot.
- Protect young seedlings from pests with netting or organic sprays.
- Monitor for diseases and remove affected foliage promptly.
By following best practices in seed selection, soil preparation, and early care, these issues can be minimized, ensuring successful moringa cultivation.
Planting Moringa oleifera seeds offers an accessible, rewarding path to nutritious homegrown food, ecological restoration, or even commercial agriculture. By following the evidence-based strategies and practical tips outlined here, you can optimize each stage, from seed selection to early tree care, tailoring your approach to your unique environment and goals. Whether you are nurturing a single tree or managing a field, moringa’s resilience and productivity make it a valuable addition to any landscape.