How to Collect a Soil Sample for Testing
A common rule of thumb is to take 10 to 15 small subsamples from one uniform area, mix them in a clean bucket, and send about 1 pint of the blended soil to the lab. University extension guides commonly recommend that range because it better represents the area than a single scoop. Bad sampling can make pH and nutrient results misleading, which can send you toward the wrong fertilizer rate or correction. This guide shows how to choose sampling zones, collect the cores, and package the sample for the exact test you need.
Tailoring sampling to your specific soil test

Sampling depth, timing, and handling are not the same for every soil test. Nutrient analysis, pH testing, and microbial analysis can call for different depths, containers, and shipping rules. Extension publications also advise waiting after liming or fertilizing before sampling, drying only when the lab allows it, and shipping microbial samples cold and promptly. Follow the lab sheet exactly, because a good sample starts with the right area and ends with the right package.
What you’ll need
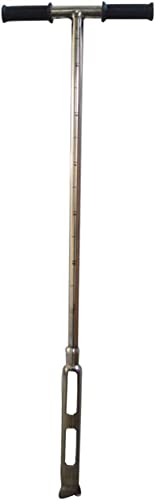
- A clean trowel, soil probe, or auger
- A clean bucket for mixing subsamples
- A paper bag or lab-supplied sample bag
- A marker and label
- The lab submission form
- A plastic scoop or clean glove if the lab allows it
Where should you take the sample?
Choose one uniform management zone, bed, lawn area, or field section. Sample the same soil type and the same treatment history together, so the lab result reflects one area rather than a blend of different conditions.
Use a zigzag or grid pattern across that zone. Avoid edges, compost piles, fertilizer bands, wet spots, animal urine spots, and other abnormal places, because they can distort the result.
Suppose a 20-by-40-foot vegetable bed has one end that gets extra compost and the other end that does not. Treat those as separate sampling zones. Mixing them into one sample can hide a real nutrient difference.
How do you collect a composite soil sample?
A composite soil sample is made from multiple small subsamples taken from the same depth, then mixed together before a representative portion is sent to the lab. That gives the lab a better picture of the area than one scoop from one spot. Most extension guides say 10 to 15 subsamples is the practical default for gardens and yards.
- Clear away mulch, leaves, or surface debris.
- Set your sampling depth for the test you need and keep that depth the same for every subsample.
- A common rule of thumb is to take about 10 to 15 subsamples across the zone in a zigzag or grid pattern.
- Place all subsamples in the clean bucket.
- Mix the soil thoroughly, break apart clumps, and remove stones or roots.
- Send a representative portion to the lab in the container the lab requests.
A common first-timer mistake is taking one deep scoop near the garden edge and calling it done. That sample may reflect edge conditions, not the root zone you want to test.
How should you handle different test types?
Nutrient analysis, pH testing, and microbial analysis do not always use the same handling rules. The lab may want different depths, different drying rules, or faster shipping for one test than for another.
Nutrient analysis
For nutrient analysis, sample the root zone for the crop or plant you are growing and use the depth the lab specifies. Keep the sample free of fertilizer residue, compost chunks, and dirty tools. If the lab asks for air-dried soil, spread it thinly on clean paper and dry it at room temperature only.
pH testing
For pH testing, sample from the same root-zone depth across all subsamples. Keep the sample in a paper or lab-supplied bag, label it clearly, and follow the lab’s drying instructions. Sampling after liming or fertilizing can give a number that reflects the amendment, not the soil trend you need.
Microbial analysis
For microbial analysis, follow the lab’s handling rules exactly. Some labs want cool, prompt shipment and no drying, because drying can change the microbial signal. If the lab gives special packaging steps, use them without improvising.
Soil sampling checklist
| Test type | Default depth range by scenario | Target sample amount | Number of subsamples | Timing notes | Container | Drying or packing instructions | Do not sample if… | Common mistakes to avoid |
|---|---|---|---|---|---|---|---|---|
| pH test | Lawn: 2 to 4 inches; vegetable bed: 6 to 8 inches; tree/shrub: 6 to 8 inches under the drip line; raised bed: full rooting depth, often 6 to 8 inches | About 1 pint of mixed soil | 10 to 15 from one uniform area | Sample at the same time of year when possible; wait after liming or fertilizing until the lab’s recommended interval has passed | Paper or lab-supplied bag | Label clearly; keep dry and cool until shipping; follow any lab drying rule | Recent lime or fertilizer application, saturated soil, obvious problem spots | Sampling after liming, using mixed-depth scoops, taking soil from edges or piles |
| Nutrient analysis | Lawn: 2 to 4 inches; vegetable bed: 6 to 8 inches; tree/shrub: 6 to 8 inches in the active root zone; raised bed: full bed depth unless the lab says otherwise | About 1 pint of mixed soil | 10 to 15 from the same management zone | Sample before a planned fertilizer change or after the lab’s wait period following amendments | Clean bucket for mixing, then lab bag | Mix thoroughly and send a representative portion; air-dry only if the lab says to | Fresh compost, recent fertilizer banding, saturated soil, burnt, dead, or otherwise abnormal areas | Cross-contamination from fertilizer residue, sampling recently amended soil, mixing different zones |
| Microbial analysis | Use the lab’s requested depth; keep it consistent within the same zone | Follow the lab’s form, often a small chilled subsample rather than a full composite | Follow the lab’s count for the specific test | Collect and ship quickly; keep the sample cool from collection to delivery | Lab-supplied container if available | Keep cool, ship promptly, and do not dry unless instructed | Delaying shipment, heating the sample in a car, drying when the lab forbids it | Delaying shipment, heating the sample in a car, drying when the lab forbids it |
Common mistakes
Sampling too soon after fertilizing or adding compost can distort the result. Wait until the lab’s recommended interval has passed, and sample at the same time of year whenever possible so you can compare results fairly over time. University extension guidance commonly stresses this because fresh amendments can temporarily skew nutrient and pH readings.
Using a dirty tool or container can add fertilizer residue or other contamination. Clean a trowel, probe, or auger before you start, and use a clean bucket for mixing.
Mixing soil from different management zones is another frequent error. Keep lawns, raised beds, orchard strips, and problem spots separate unless the lab tells you to combine them.
Suppose one corner of a lawn is yellow because it stays wet after rain. Do not combine that corner with the rest of the lawn if you want a result that helps you diagnose the problem area. Sample the trouble spot on its own, then sample the healthier area separately.
How to gather a soil sample for mixed beds, lawns, and problem spots
For mixed beds, sample each bed or section with similar plants and care separately. For lawns, divide the yard by mowing pattern, irrigation, or visible differences in growth. For problem spots, sample the affected area on its own and keep it separate from the surrounding soil.
If you need one number for a whole uniform area, take all subsamples from that same zone. If the area is not uniform, one composite sample can blur the difference you are trying to see.
Where can I get a soil sample tested?

You can send soil to a university extension lab, a private soil lab, or a specialty lab that matches the test you need. Extension labs are a strong choice for standard pH and fertility questions, while private labs may offer broader menus, faster turnaround, or more specialized microbial panels. The best option depends on your goal and budget.
Start with the submission form. It usually asks for the crop or plant type, the test package you want, the sampling depth, the number of acres or square feet, and recent management history. If you only need a basic acidity check, choose pH-only. If you are planning fertilizer or lime, request nutrient analysis. If you are tracking biology or disease concerns, ask whether the lab offers a microbial panel and how it should be shipped.
Choose the right package before you collect the sample, because some labs separate pH, nutrient, and microbial services into different forms or containers. A good submission form should also tell you whether the lab wants one composite sample, a chilled sample, or a dried sample. If the instructions are unclear, call the lab before you mail anything.