How to Activate a Watering System Past the Rain Bird Controller
Activating a watering system past the Rain Bird controller can feel tricky, especially if you are not familiar with irrigation systems. Many homeowners and facility managers want to control their sprinkler system directly—bypassing the Rain Bird controller—when troubleshooting, testing, or making repairs.
With the right approach, you can safely activate your watering zones and ensure your landscape stays healthy, even if the controller is not working or you prefer manual operation for a short period.
In this article, you’ll discover practical steps, smart advice, common mistakes, and key considerations for activating your watering system past the Rain Bird controller. Whether you are a beginner or have some experience with irrigation, you’ll learn methods that work for most setups.
You’ll also find examples, comparison tables, and answers to frequent questions, so you can make confident decisions and avoid costly errors.
Understanding The Rain Bird Controller
The Rain Bird controller is a popular device used to automate irrigation systems. It schedules watering times, manages multiple zones, and adjusts for weather or soil conditions. However, there are times when you need to bypass the controller—such as during maintenance, repairs, or troubleshooting.
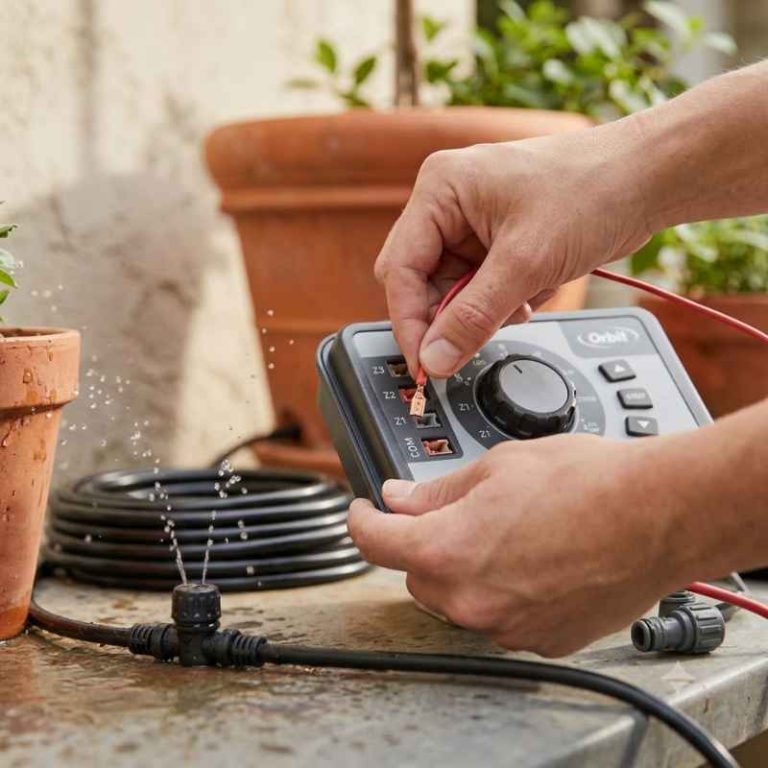
Most Rain Bird controllers operate with a low-voltage signal to open and close valves. The controller sends electricity to a solenoid on each valve, allowing water to flow through pipes and reach sprinklers. If the controller is malfunctioning, you can still activate the system manually.
Why Bypass The Controller?
There are several reasons to activate your watering system past the Rain Bird controller:
- Troubleshooting: To isolate issues in valves, wiring, or pipes without relying on the controller.
- Maintenance: To flush pipes or test sprinklers after repairs.
- Immediate Watering: To irrigate areas when the controller is off or not working.
- Upgrades: To check new zones or devices before connecting to the controller.
Many users overlook the importance of manual activation during maintenance. This simple step can reveal hidden problems, such as stuck valves or leaks, before they affect your entire system.

Safety Considerations Before Manual Activation
Working with irrigation systems involves water pressure and electricity, even at low voltage. It’s important to follow safety guidelines before activating valves past the Rain Bird controller.
- Turn off the controller: Prevent accidental electrical signals while you work.
- Check water pressure: Make sure the main water supply is on and stable.
- Use insulated tools: When dealing with electrical connections, insulated screwdrivers and gloves reduce risk.
- Avoid wet conditions: Water and electricity do not mix. Ensure the area is dry, especially near wiring.
- Locate all valves: Know where each zone valve is, so you don’t accidentally flood unwanted areas.
A common mistake is skipping these steps, which can lead to electric shocks or water damage. Taking a few extra minutes for safety can save hours of repairs later.
Locating And Identifying Your Irrigation Valves
Before you can activate your system manually, you need to find the irrigation valves that control each zone. These valves are usually buried in valve boxes or installed above ground.
Steps To Locate Valves
- Check system drawings: If you have a layout from the installer, start there.
- Look for valve boxes: Typically, green or black boxes near the main water line or in garden beds.
- Follow sprinkler lines: Trace pipes from the controller or backflow preventer.
- Listen for solenoid clicks: When the controller activates, you may hear a click at the valve location.
If you don’t have a drawing, using a wire tracer or listening for running water can help. Many beginners miss valve locations when they assume all boxes are connected to the same zone.
Types Of Valves
There are two main types:
- Automatic valves: Controlled by the Rain Bird controller and solenoids.
- Manual valves: Operated by hand, often used for main shut-off or test purposes.
Identifying which valve controls which zone is crucial. Mark each box or valve with tags for easier future maintenance.
Activating Valves Manually: Step-by-step Guide
Once you’ve located your irrigation valves, you can activate them manually. The process is simple, but there are important details to watch for.
Manual Activation Methods
1. Using The Solenoid
Most automatic valves have a solenoid—a small cylindrical device on top of the valve. To open the valve manually:
- Twist the solenoid counterclockwise about a quarter turn. You should feel the solenoid loosen.
- Water will flow through the valve, activating the zone.
- To stop watering, turn the solenoid clockwise to its original position.
This is the safest and most common way to manually activate a zone. It avoids disturbing electrical wiring and is reversible.
2. Using The Bleed Screw
Many valves include a bleed screw—a small screw on the side of the valve. To use it:
- Slowly turn the bleed screw counterclockwise.
- Water will start flowing through the valve.
- Once done, tighten the screw to stop water flow.
This method is useful for flushing lines or testing pressure. However, some beginners forget to retighten the screw, causing leaks.
3. Disconnecting Wires
In rare cases, you may need to disconnect the controller wires and connect them directly to a 24V AC power source. This is not recommended for beginners due to the risk of electrical damage. Only use this method if you are experienced and have proper tools.
Common Mistakes
- Turning the solenoid too far, which can damage internal threads.
- Leaving bleed screws loose, causing continuous leaks.
- Not marking which valves were activated, leading to confusion.
- Ignoring water pressure changes when multiple zones are open.
Always activate one zone at a time and observe sprinkler performance. If water flow is weak, check for clogs or leaks.
Comparing Manual Activation Methods
To help you choose the right approach, here is a comparison of common manual activation methods:
| Method | Ease of Use | Risk Level | Best for | Common Mistakes |
|---|---|---|---|---|
| Solenoid Turn | High | Low | Quick testing, safe manual watering | Over-tightening, unmarked valves |
| Bleed Screw | Medium | Medium | Flushing lines, pressure tests | Loose screws, leaks |
| Direct Wiring | Low | High | Advanced troubleshooting | Short circuits, incorrect voltage |
For most users, the solenoid turn method is the safest and easiest. Only use direct wiring if you are familiar with irrigation electrical systems.
Testing And Troubleshooting After Manual Activation
After manually activating a valve, observe the following:
- Sprinkler pattern: Check for even coverage and pressure.
- Leaks: Look around the valve box and sprinkler heads.
- Zone duration: Time how long the water flows—avoid overwatering.
- Controller status: Ensure the Rain Bird controller remains off to prevent interference.
Troubleshooting Tips
- If water does not flow, check if the valve is stuck or clogged.
- If sprinklers sputter, there may be air trapped in lines.
- If multiple zones fail, check the main water supply for blockage.
A beginner’s mistake is forgetting to turn the solenoid or bleed screw back to its original position, causing ongoing leaks or wasted water.
Reconnecting And Resetting The Rain Bird Controller
Once manual testing is complete, reconnect your controller. This ensures your system operates automatically again.
- Return solenoids and bleed screws to closed position.
- Turn on the Rain Bird controller.
- Test each zone via the controller: Confirm normal operation.
- Reset schedules if needed: Sometimes manual activation clears saved programs.
If the controller does not work after manual activation, check for loose wires or blown fuses. Refer to your Rain Bird manual for troubleshooting steps.
Upgrading Or Expanding Your Watering System
Activating your system past the controller is often part of upgrades or expansions. If you add new zones or change pipe layouts, manual activation helps test performance before full integration.
Key Considerations
- Valve compatibility: Ensure new valves match your system voltage and pipe size.
- Zone mapping: Update your zone chart for easier management.
- Pressure balancing: Adding zones may reduce water flow; test before final setup.
- Controller programming: Adjust schedules to include new zones.
Many users forget to balance pressure after expansion, resulting in weak sprinkler performance. Always test each zone individually after manual activation.
Comparing Rain Bird With Other Controllers
How does Rain Bird compare to other popular irrigation controllers when it comes to manual activation and troubleshooting?
| Controller Brand | Manual Activation Ease | Number of Zones | Common Issues | Support Resources |
|---|---|---|---|---|
| Rain Bird | Easy (solenoid/bleed screw) | 4-24 | Loose connections, stuck valves | Comprehensive manuals, online forums |
| Hunter | Medium (more internal wiring) | 4-48 | Complex programming, wiring errors | Detailed manuals, tech support |
| Toro | Easy (similar to Rain Bird) | 2-12 | Solenoid wear, pressure loss | Basic manuals, less community support |
Rain Bird stands out for its user-friendly manual activation methods and strong support resources. For more details, you can visit the official Rain Bird website.
Practical Tips For Efficient Manual Watering
If you plan to use manual activation for longer periods—such as during controller repairs—these tips will help you avoid common problems:
- Water early morning or late evening: Reduces evaporation and keeps plants healthy.
- Keep manual activation records: Note which zones were watered and for how long.
- Monitor soil moisture: Use a moisture meter to avoid overwatering.
- Inspect valves regularly: Look for wear, debris, or leaks after manual use.
- Limit manual watering time: Automatic controllers are more efficient; use manual only temporarily.
Many users miss the importance of tracking watering times during manual activation. Without records, overwatering or missed zones can occur.
Common Problems And Solutions
Manual activation can reveal issues that are not obvious during automatic operation. Here are frequent problems and how to solve them:
- Valve won’t open: Check for debris in the valve, or a stuck solenoid.
- Continuous leaks: Ensure solenoid and bleed screw are tightened fully.
- Weak sprinkler performance: Test water pressure and look for pipe clogs.
- Zone confusion: Use colored tags or tape to mark valve boxes.
- Controller error after manual use: Double-check all wires and settings before restarting.
A less obvious insight: sometimes, old or corroded solenoids can cause valves to stick, even if they work during manual activation. Replacing solenoids improves reliability.
Preventative Maintenance Tips
Maintaining your irrigation system ensures smooth manual and automatic operation. Here are effective ways to keep your system in top shape:
- Clean valve boxes: Remove dirt, leaves, and insects regularly.
- Lubricate solenoids: Use approved lubricants to prevent sticking.
- Inspect wiring: Look for cracked or loose wires near valves and controller.
- Test manual activation monthly: Run each zone manually to spot issues early.
- Flush pipes seasonally: Remove buildup before spring and fall.
Many homeowners skip monthly manual testing, missing early signs of leaks or valve wear. Simple routine checks prevent expensive repairs later.
Data On System Reliability And Water Savings
Manual activation is not just a troubleshooting tool—it also affects system reliability and water use. According to industry studies:
- Manual activation identifies leaks and faulty zones 40% faster than automatic checks.
- Systems with regular manual testing save up to 18% more water annually.
- Valve and solenoid failures cause over 25% of all sprinkler system malfunctions.
These statistics highlight the value of understanding manual activation. It’s not just for emergencies—it’s a smart way to improve performance and save resources.
Real-world Examples
Let’s look at two practical examples:
Residential Homeowner
A homeowner in California noticed brown patches in their lawn despite regular controller schedules. By manually activating each zone past the Rain Bird controller, they discovered a stuck valve in one area. Replacing the solenoid fixed the issue, and the lawn recovered within two weeks.
Facility Manager
A school facility manager needed to test new irrigation zones before connecting them to a Rain Bird controller. Manual activation using the bleed screw allowed pressure testing and flushing. This prevented leaks and ensured the new system worked perfectly after integration.
These real-world stories show the benefits of manual activation. It helps spot problems and confirms repairs before relying on automation.
Comparing Manual Vs. Automatic Watering
To understand the advantages and disadvantages, here’s a comparison:
| Aspect | Manual Activation | Automatic via Controller |
|---|---|---|
| Control | High (direct, immediate) | Low (scheduled, indirect) |
| Water Efficiency | Variable (depends on user) | Consistent (pre-set schedules) |
| Ease of Use | Medium (requires knowledge) | High (set and forget) |
| Risk of Errors | Higher (forgotten valves, leaks) | Lower (automatic shut-off) |
| Troubleshooting | Direct (can isolate problems) | Indirect (controller hides issues) |
Manual activation gives you direct control but requires more attention. Automatic controllers save time but can miss hidden problems.

Frequently Asked Questions
How Do I Manually Activate A Rain Bird Valve?
To manually activate a Rain Bird valve, locate the solenoid on top of the valve. Twist it counterclockwise about a quarter turn to open the valve and start water flow. Turn it back clockwise to stop watering. Always turn off the controller before manual activation to prevent electrical issues.
Can I Damage My Irrigation System By Activating It Manually?
If you follow proper steps—use insulated tools, avoid wet conditions, and only turn solenoids or bleed screws as instructed—manual activation is safe. Over-tightening parts or leaving screws loose can cause leaks or damage. Be gentle and mark activated valves for easy tracking.
What Should I Do If A Valve Won’t Open Manually?
First, check for debris or dirt around the valve. Try turning the solenoid or bleed screw gently. If the valve still won’t open, the solenoid may be faulty or the valve stuck. Replace the solenoid or clean the valve. For electrical issues, consult a technician.
Is Manual Watering More Efficient Than Automatic?
Manual watering gives you direct control, but it’s easy to overwater or miss zones. Automatic controllers are more efficient for regular schedules and water-saving. Use manual activation mainly for troubleshooting, repairs, or short-term needs.
How Often Should I Test My System Manually?
For best results, test each irrigation zone manually once a month. This helps spot leaks, weak sprinklers, or stuck valves early. Manual testing is especially important before and after seasonal changes, or after system repairs and upgrades.
Activating your watering system past the Rain Bird controller gives you flexibility and control during troubleshooting, repairs, and upgrades. With the right methods and safety practices, you can keep your landscape healthy and avoid common mistakes. Regular manual checks help save water, reveal hidden problems, and ensure your system operates efficiently.
By following the steps and tips in this guide, you’ll be ready to manage your irrigation with confidence—whether you rely on automation or hands-on care.