This guide is here to help. We’ll walk through how to create your very own automatic watering system for plants using Arduino. It’s not as complicated as it sounds, and the results can be incredibly rewarding.
You’ll learn about the parts you need, how to put them together, and even a bit about the simple code that makes it all work. Get ready to give your plants the consistent care they deserve, and give yourself some peace of mind.
The core idea is to use an Arduino microcontroller to sense when your plants need water and then activate a pump to deliver it. This system helps keep soil moisture at an ideal level, preventing common watering mistakes and promoting healthier plant growth. It’s a practical project for plant lovers and tech enthusiasts alike.
Understanding Your Arduino Automatic Watering System
At its heart, an automatic watering system for plants is all about smart sensing and simple action. Your plants have needs, and this system aims to meet them without you having to do much. It’s like having a tiny garden helper who’s always on duty.
This helper uses a special sensor to check the soil. When the soil gets too dry, it signals the brain of the system. That brain is a small computer called an Arduino.
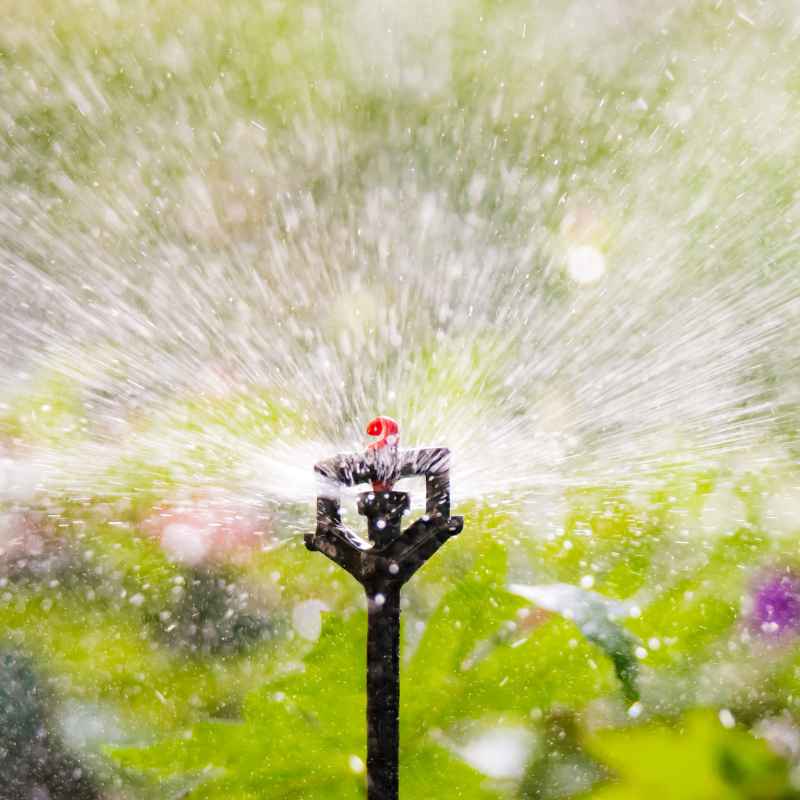
The Arduino then tells a small pump to turn on. This pump draws water from a reservoir and gives your plant just the right amount. It stops when the soil is moist enough again.
This cycle repeats, keeping your plants happy. It’s a clever way to manage watering, especially when you’re busy or away from home. You can even adjust how much water it gives or how often it checks, making it perfect for different kinds of plants.
Think of it this way: your plants can’t tell you in words when they’re thirsty. They show you. Leaves might droop, or the soil might look pale.
This system reads those silent signals. It uses a soil moisture sensor. This sensor is like a tiny probe you stick into the dirt.
It measures how much water is in the soil. The Arduino board reads the information from this sensor. It compares this reading to a level you set.
If the moisture level is below your set point, the Arduino activates a relay. A relay is like a switch. This switch turns on a small water pump.
The pump then delivers water to the plant. Once the soil is wet enough, the sensor tells the Arduino. The Arduino then turns off the pump.
This is a basic but very effective way to automate plant care. It saves water too, because it only waters when needed. It also helps prevent overwatering, which can lead to root rot.
The beauty of using an Arduino is its flexibility. You can start with a very simple system. Then, you can add more features later.
For example, you could add a light sensor to see how much sun the plant gets. Or maybe a temperature sensor to monitor the air. You could even connect it to the internet to check on your plants remotely.
But for now, let’s focus on the core task: automated watering. This system is ideal for anyone who travels often. It’s also great for people who have a lot of plants.
It’s a fantastic learning project too. You get to play with electronics and coding. And at the end, you get healthier plants.
My Own Brush with the Wilting Dilemma
I remember a time, not too long ago, when I was really excited about a new collection of succulents. They were so cute and small, perfect for my little apartment desk. I’d heard they were easy to care for, needing only a bit of sun and infrequent watering.
So, I set them up by the window and felt like a proud plant parent. A few weeks went by, and I was traveling for a short work trip. I thought, ‘No problem, succulents are tough.’ Oh, how wrong I was.
When I returned, I was greeted by a sad sight. The vibrant green had turned a dull, sickly yellow. The plump leaves were shriveled and soft.
My heart sank. I had completely misjudged their needs. In my absence, the sun had been strong, and the air in my apartment had been dry.
They needed just a tiny bit of water, but I wasn’t there to give it. I felt a pang of guilt. It was a simple oversight, but it led to a real loss.
That experience really stuck with me. It made me realize that even ‘easy’ plants need consistent attention. It also planted the seed for finding a better way.
I didn’t want to rely on guesswork or luck anymore. I wanted something reliable, something automated. That’s when I started looking into DIY solutions, and the Arduino project became my mission.
Gathering Your Essential Components
To build your automatic watering system for plants, you’ll need a few key parts. Don’t worry; they’re not super expensive or hard to find. Most of these you can get online or at an electronics store.
Having these items ready is the first big step.
The Must-Have Parts
- Arduino Uno or Nano: This is the brain of your system. It’s a small, programmable computer board.
- Soil Moisture Sensor: This is what checks how wet or dry the soil is. Look for ones with probes that go into the soil.
- Small Submersible Water Pump: This little pump will move water from a container to your plant. Make sure it’s designed to be underwater.
- 5V Relay Module: This acts as an electronic switch. It lets the Arduino control the pump, which needs more power.
- Jumper Wires: These are wires with connectors on the ends. They connect all your parts together.
- Small Water Reservoir: This can be any container – a small bucket, a plastic bottle, or a jug – to hold your water.
- Power Supply: You’ll need a way to power the Arduino and the pump. A USB cable for the Arduino is common. The pump might need its own adapter or a battery pack.
You might also want a small piece of tubing. This connects the pump to where you want the water to go. It’s good to have a breadboard too.
It makes testing connections much easier before you make them permanent. And of course, your plant! The one you want to keep perfectly watered.
When you’re picking out your sensor, some have both analog and digital outputs. For this project, the analog output is often easier to use. It gives you a range of values that represent the moisture level.
The relay module is important because the Arduino can’t directly power the pump. The relay acts as an intermediary. It uses a small signal from the Arduino to switch on a higher-power circuit for the pump.
This protects the Arduino. For the reservoir, anything that holds water will do. Just make sure it’s clean.
And for power, an old phone charger can work for the Arduino if it’s 5V. The pump might need its own power source, so check its specifications.
Optional but Helpful Additions
- Waterproof Enclosure: To keep your electronics safe from spills.
- Small LED: To show when the pump is on.
- Another Sensor: Like a DHT11 for temperature and humidity.
- DC-DC Converter: If your pump needs a different voltage than your power supply.
Having these extra bits can make your system more robust or give you more data. But you can absolutely get a basic system working with just the essentials. The goal is to get the core function working first.
Then you can expand. It’s all about building it step by step. This approach makes the project less daunting.
Setting Up the Connections: The Wiring Diagram
Now comes the fun part: putting it all together. Wiring might seem intimidating, but we’ll break it down into simple steps. It’s like following a recipe for electronics.
Most Arduino projects use a similar wiring pattern. We’ll connect the sensor, the relay, and the pump to the Arduino. Safety first: always unplug power sources when you’re making or changing connections.
Double-check your wires before you plug everything in. A misplaced wire can cause problems.
Step-by-Step Wiring Guide
1. Connect the Soil Moisture Sensor:
- Sensor VCC (power) pin to Arduino 5V pin.
- Sensor GND (ground) pin to Arduino GND pin.
- Sensor Analog Output (A0) pin to Arduino Analog Input pin A0.
2. Connect the Relay Module:
- Relay VCC pin to Arduino 5V pin.
- Relay GND pin to Arduino GND pin.
- Relay IN (signal) pin to Arduino Digital pin D7.
3. Connect the Water Pump:
This part needs a bit more care because of the pump’s power. The relay has terminals for this.
- Connect the positive (+) wire from your pump’s power supply to the relay’s COM (Common) terminal.
- Connect the negative (-) wire from your pump’s power supply to the pump itself.
- Connect the other wire from the pump to the relay’s NO (Normally Open) terminal.
When the relay is activated by the Arduino, it connects the COM terminal to the NO terminal, completing the circuit for the pump. If your pump has its own power adapter, you’ll be interrupting its power cable using the relay. For example, if the adapter has a positive and negative wire, you would connect one of those wires (usually the positive) to the COM and the other wire (usually the negative) to the NO terminal on the relay.
The other wire from the pump would then connect directly to the other wire of the adapter (e.g., the negative wire if you used the positive wire with the relay).
It might look like a lot of wires, but take it one step at a time. Use different colored jumper wires to keep things organized. For instance, use red for power (5V), black for ground (GND), and other colors for signal pins.
This makes troubleshooting much easier if something doesn’t work right away. Make sure all your connections are snug and secure. Loose wires are a common cause of problems in electronics projects.
The soil moisture sensor needs to be placed in the soil. The probes should be the plant’s roots are. Don’t put them too close to the edge of the pot.
The water reservoir needs to be filled with water. The submersible pump sits at the bottom of this reservoir. The tubing then runs from the pump to the plant’s pot.
You can secure the tubing with a small clip or just let gravity help position it. The Arduino board and relay module can be placed outside the pot, perhaps in a small box or enclosure, to protect them from moisture.
Quick Wiring Tips
- Color Coding: Use red for 5V, black for GND, and other colors for data.
- Secure Connections: Ensure all pins are firmly plugged in.
- Double Check: Review your wiring against the diagram before powering up.
- Pump Power: Be careful when wiring the pump, as it has its own power requirements.
If you’re using an Arduino Nano, its pins are closer together, so be extra careful not to short any connections. For the pump power, make sure the power supply you use is compatible with the pump’s voltage and current needs. An underpowered pump won’t work well, and an overpowered one could damage it or the relay.
Writing the Code: The Arduino Sketch
The code, often called a “sketch” in Arduino terms, tells your Arduino what to do. It’s the set of instructions that makes your automatic watering system for plants intelligent. You’ll need the Arduino IDE (Integrated Development Environment) software installed on your computer.
This is where you’ll write and upload the code to your Arduino board. Don’t worry if you’re new to coding; this is a fairly simple program. We’ll focus on the basics: reading the sensor and controlling the pump.
Here’s a look at a basic sketch. You can copy and paste this into your Arduino IDE. Remember to save it!
// Define the pins we are using
const int soilMoisturePin = A0; // Soil moisture sensor analog pin
const int relayPin = 7; // Relay module digital pin

// Define thresholds for watering
// Lower values mean drier soil, higher values mean wetter soil
// You'll need to calibrate this for your specific sensor and soil!
int dryThreshold = 500; // Example value, adjust this!
int wetThreshold = 700; // Example value, adjust this!

void setup()

void loop() else

 // Wait before the next reading to save power and avoid
 // overwhelming the sensor or Arduino.
 delay(5000); // Wait for 5 seconds before next reading
}
In this code:
- We set up pins for the sensor and relay.
- We define `dryThreshold` and `wetThreshold`. These are super important! You’ll need to figure out what numbers work best for your setup.
- The `setup()` function runs once when the Arduino starts. It starts the communication with your computer and sets the relay pin as an output.
- The `loop()` function runs over and over. It reads the sensor, checks the moisture level, and decides whether to water.
- If it’s too dry (`moistureValue < dryThreshold`), it turns the pump ON for 5 seconds, then OFF.
- A `delay()` after watering is vital. It stops the system from immediately watering again. It lets the water spread in the soil.
- Another `delay()` at the end of the loop makes sure it doesn’t read the sensor too often.
To use this code:
- Open the Arduino IDE.
- Copy and paste the code into a new sketch.
- Connect your Arduino to your computer via USB.
- Select the correct board and port from the “Tools” menu.
- Click the “Upload” button.
Once uploaded, disconnect the USB cable and connect your power supply for the pump and Arduino. The system should start working!
Calibrating Your Sensor (Crucial Step!)
The `dryThreshold` and `wetThreshold` values are critical. They tell your Arduino what ‘dry’ and ‘wet’ mean for your specific soil and sensor. Here’s how to calibrate:
- Start with dry soil: Stick the sensor in completely dry soil (or even just in the air). Upload the code. Open the Serial Monitor (Tools > Serial Monitor). Note the `moistureValue` it reads. This is your ‘dryest’ reading. Set `dryThreshold` to be a bit higher than this (e.g., if it reads 300, set `dryThreshold = 400`).
- Make soil very wet: Water your plant thoroughly until the soil is saturated. Stick the sensor in. Note the `moistureValue`. This is your ‘wettest’ reading. Set `wetThreshold` to be a bit lower than this (e.g., if it reads 900, set `wetThreshold = 800`).
- Adjust and test: The ideal `dryThreshold` will be the point where your plant starts to look thirsty. The system will water when the reading drops below this. You might want to experiment with the watering duration (`delay(5000);`). Too short, and it won’t water enough. Too long, and you’ll overwater.
Remember that different soils (potting mix, sand, clay) will give different readings. The type of sensor also matters. Some sensors are more sensitive than others.
It’s all about finding that sweet spot for your plant’s needs. This calibration is what makes your automatic watering system for plants truly effective and tailored to your garden.
Real-World Context: Where and When This System Shines
This kind of automatic watering system for plants isn’t just a fun gadget; it solves real problems in common situations. Think about the typical home environment. We have plants in living rooms, kitchens, bedrooms, and sometimes even on balconies or in small yards.
In a busy household, daily watering often gets forgotten. Kids, work, and general life can get in the way. This system takes that burden off your shoulders.
For people who travel, even short trips can be stressful. Will the neighbor remember to water? Did they give it enough?
An Arduino system provides peace of mind. It ensures your plants get watered consistently, regardless of your schedule.
Consider different types of plants. Cacti and succulents need very little water and are easily killed by overwatering. Other plants, like ferns or herbs, need more consistent moisture.
The `dryThreshold` and watering duration can be adjusted for each plant or type of plant. You can even have multiple systems, each tuned for a specific plant.
Usage Scenarios
- Frequent Travelers: Ensures plants are watered while you’re away.
- Busy Professionals: Automates watering to fit hectic schedules.
- Plant Enthusiasts: Manages watering for a larger plant collection.
- Specific Plant Needs: Tailors watering for plants sensitive to over/under-watering.
- Small Apartments: Keeps plants healthy with minimal daily effort.
The design of your system can also be adapted. You can use a single pump to water multiple plants from one reservoir. This might require some clever plumbing with splitters or multiple tubes.
Or, you can build smaller, individual systems for each plant. The choice depends on your setup and how many plants you want to manage.
User behavior plays a role too. You might find yourself checking the water level in the reservoir more often than you water the plants manually. It’s a different kind of attention, but it’s still necessary.
You also need to keep the soil moisture sensor clean. Over time, soil particles can build up on the probes, affecting its readings. A simple wipe-down now and then will keep it accurate.
What This Means For You: Normal vs. Concerning Signs
Knowing when your automatic watering system for plants is working well is important. There are some signs that indicate everything is great, and others that might mean you need to tweak things.
Normal Signs of a Working System:
- Consistent Soil Moisture: The soil in your plant’s pot stays evenly moist. It doesn’t become waterlogged or bone dry for extended periods.
- Healthy Plant Growth: Your plants look vibrant, with good leaf color and no signs of drooping or wilting. New growth appears regularly.
- Sensor Readings Stable (within range): When you check the Serial Monitor, the moisture readings fluctuate within a reasonable range you’ve established during calibration.
- Pump Activates as Expected: The pump turns on when the soil is dry and turns off after the set duration.
Concerning Signs (When to Check Your System):
- Overwatered Plants: Yellowing leaves, mushy stems, or mold on the soil surface. This might mean the `dryThreshold` is set too low, or the watering duration is too long. The system might be watering too frequently.
- Underwatered Plants: Drooping leaves, dry and brittle soil, even if the sensor indicates moisture. This could mean the `dryThreshold` is too high, or the sensor isn’t calibrated correctly for that soil type. The sensor might not be making good contact with the soil.
- Sensor Readings Erratic or Stuck: If the `moistureValue` jumps wildly or stays the same regardless of how wet or dry the soil is, the sensor might be faulty, have loose connections, or be corroded.
- Pump Not Working: If the soil is dry, but the pump doesn’t turn on, check the pump’s power supply, the relay connections, and the `relayPin` setting in the code. Make sure the relay module is receiving a HIGH signal from the Arduino.
- Pump Running Constantly: If the pump never turns off, it means the `moistureValue` is always below the `dryThreshold`. This indicates a calibration issue or a faulty sensor reading. Ensure the `wetThreshold` is properly set and that the pump turns off after its delay.
Troubleshooting Quick Checks
When you notice concerning signs:
- Check Wiring: Re-verify all connections, especially those to the relay and pump.
- Review Code: Ensure your `dryThreshold`, `wetThreshold`, and watering `delay()` times are set appropriately.
- Inspect Sensor: Clean the probes and ensure good contact with the soil.
- Test Components: If possible, test the pump and sensor independently to rule out hardware failure.
- Monitor Serial Output: Use the Serial Monitor to see the live readings from your sensor and observe the Arduino’s actions.
It’s normal to need to make adjustments. The first time you set up an automatic watering system for plants, it’s a learning process. Each plant and environment is different.
Your goal is to find the balance that keeps your plant thriving without your constant intervention. The system is a tool, and like any tool, it works best when you understand how to use and maintain it.
Simple Tips for Optimizing Your System
While the system is automated, a few simple adjustments can make it even better. These tips focus on efficiency and plant health.
- Adjust Watering Duration: The `delay(5000);` (5 seconds) is a starting point. Some plants might need longer, some shorter. Observe how much water is delivered and how quickly the soil becomes saturated. Adjust this value in the code accordingly.
- Refine Thresholds: Recalibrate your `dryThreshold` and `wetThreshold` values periodically, especially if you change soil types or notice changes in your plant’s behavior.
- Watering Schedule: The `delay(60000);` (1 minute) after watering prevents immediate re-watering. You might want to increase this delay, especially for plants that don’t like constantly wet soil. A longer wait ensures the water has time to distribute and for the Arduino to accurately assess the moisture level again.
- Pump Placement: Ensure the pump is fully submerged in the water reservoir. If it’s not, it can get damaged and won’t pump water effectively.
- Water Reservoir Level: Keep an eye on the water level in your reservoir. Running the pump dry can damage it. Consider adding a water level sensor if you want to be alerted when the reservoir is low.
- Sensor Location: Place the soil moisture sensor in the root zone of the plant, but avoid directly touching major roots. About halfway between the plant stem and the edge of the pot is usually a good spot.
Key Optimization Points
For Healthier Plants:
- Water Less Often, But Enough: Aim for deep watering cycles rather than frequent light sprinkles.
- Allow Soil to Dry Slightly: Many plants prefer their soil to dry out a bit between waterings.
- Observe Your Plant: The plant is your best guide. If it looks happy, your system is likely working well.
These small adjustments can make a big difference in how well your automatic watering system for plants performs. It’s about fine-tuning the system to mimic natural watering cycles as closely as possible, given the technology.
Frequently Asked Questions About Arduino Watering Systems
Can I use this system for outdoor plants?
Yes, but you’ll need to protect the Arduino and electronics from the elements. A waterproof enclosure is essential. You’ll also need a more robust power setup, and you should consider how to secure the system against wind and weather.
The sensor itself is usually water-resistant, but the control board needs protection.
How accurate is the soil moisture sensor?
Accuracy can vary based on the sensor quality, calibration, and soil type. They provide a relative reading (e.g., ‘more wet’ or ‘less wet’) rather than an exact percentage of water content. Regular calibration is key to ensuring they give you useful data for your specific setup.
What if my pump stops working?
First, check the power supply to the pump. Then, inspect the wiring to the relay and the pump itself. If the relay is clicking but the pump isn’t running, the pump might be faulty.
You can also test the pump by connecting it directly to its power source (if safe to do so) to see if it works independently.
How much water does the pump deliver in 5 seconds?
This depends entirely on the pump’s flow rate and the head pressure (how high it has to push the water). A small submersible pump might deliver anywhere from a few milliliters to a liter or more in that time. You’ll need to observe and adjust the watering duration based on your plant’s needs and the amount of water you want to deliver.
Can I water multiple plants with one system?
Yes, you can. You would need to either use a pump with enough capacity and a distribution system (like tubing splitters) to reach multiple plants, or run multiple tubing lines from the single pump. The sensor would ideally be placed in one of the plants, and you’d need to ensure this sensor reading is representative of the moisture needs of all plants being watered by that system.
What happens if the power goes out?
If the power goes out, the system will simply stop working. When power is restored, the Arduino will restart, and the system will resume its operation based on the last sensor readings and programmed logic. If the power outage was extended and the plants needed water, they might become dry during that period.
Bringing It All Together: Your Smart Garden Starts Here
Building an automatic watering system for plants with Arduino is a fantastic way to combine your love for greenery with a bit of tech fun. It’s a project that offers real benefits, reducing the guesswork and worry often associated with plant care. You’ve learned about the essential components, how to wire them up, and the basic code that brings it to life.
Remember, the calibration and fine-tuning are key steps to success. This system can bring peace of mind and healthier plants to your home. Happy growing!