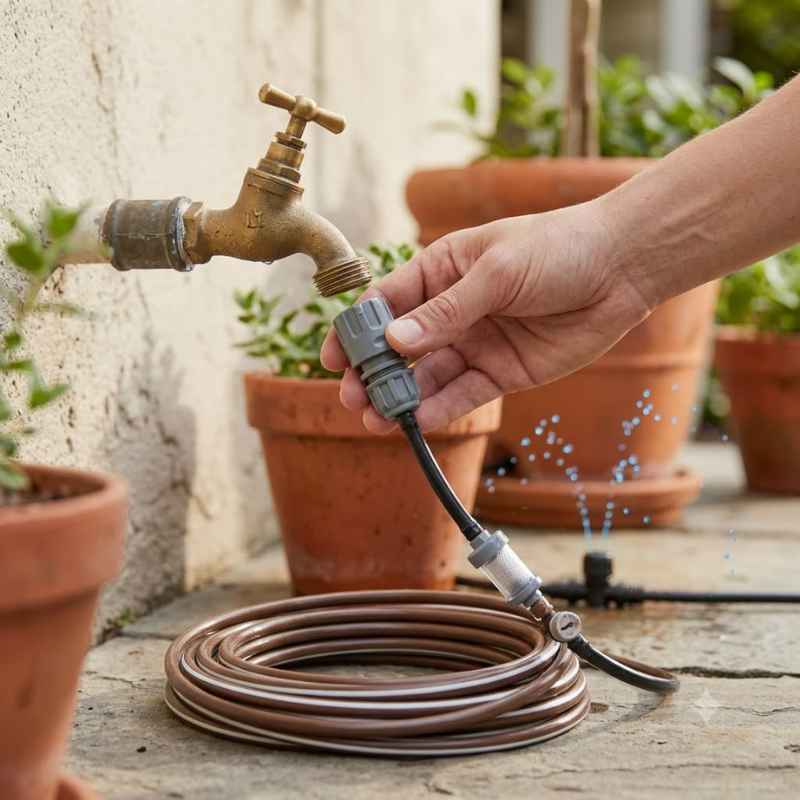
How to Hook Blumat Tropf Watering System to a Regular Spigot
Hooking a Blumat Tropf watering system to a regular spigot is straightforward once you know the right parts and steps. This guide will show you exactly what you need and how to connect everything for a drip-free, efficient setup.
Simply put, you’ll need a hose thread adapter (usually 3/4″ GHT to 1/2″ or 8mm), a pressure reducer, and a few connector pieces. Follow the steps below, and you’ll have your Blumat Tropf running off a garden spigot in under 30 minutes.
Key Takeaways
- Blumat Tropf systems require a pressure regulator to reduce spigot pressure down to 0.5-1.0 bar for proper drip operation.
- Using the correct hose thread adapter (3/4″ garden hose thread to 8mm or 12mm) is essential to avoid leaks.
- Installing a Y-splitter with shut-off valves lets you control the system independently from other hose uses.
- Always flush the system with clean water after connecting to a regular spigot to remove debris.
- Testing for leaks at each connection before full operation saves time and prevents water damage.

What You Need to Hook Up Blumat Tropf to a Spigot
Before you begin, gather the correct components. The Blumat Tropf system uses low-pressure drip technology, so a standard spigot’s high pressure (40-60 psi) must be reduced. Here’s a checklist of all necessary parts.
- Blumat Tropf kit – includes drippers, distribution tubing (8mm or 12mm), and connectors.
- Pressure reducer – Blumat recommends a 0.5-1.0 bar reducer designed for drip irrigation.
- Hose thread adapter – 3/4″ male garden hose thread (GHT) to 8mm or 12mm barb, depending on your main line.
- Y-splitter with shut-off valves – allows you to turn off the system without removing the adapter.
- Backflow preventer – required by many local codes to keep irrigation water from entering the home supply.
- Teflon tape – for sealing all threaded connections to prevent leaks.
- Scissors or tubing cutter – for cutting distribution tubing cleanly.
| Component | Purpose | Typical Price |
|---|---|---|
| Blumat Tropf Kit | Complete dripper system with tubing | $40–$80 |
| Pressure Reducer | Reduces spigot pressure to drip-safe levels | $10–$25 |
| Hose Thread Adapter | Connects spigot to 8mm tubing | $3–$8 |
| Y-Splitter with Valve | Independent control of the system | $5–$12 |
Most hardware stores carry these items in the irrigation section. You can also buy a dedicated Blumat spigot connection kit that includes the adapter and pressure reducer together.
Important: Do not use a standard hose timer or automatic sprinkler timer with Blumat Tropf unless it is specifically designed for low-flow drip systems. The pressure reducer must be the first component after the spigot.
Step 1: Attach the Backflow Preventer and Y-Splitter to the Spigot
Start by threading a brass backflow preventer onto your regular spigot. Use two wraps of Teflon tape on the male threads to ensure a watertight seal. Tighten by hand, then a quarter-turn with pliers—do not overtighten.
Next, screw your Y-splitter with shut-off valves onto the backflow preventer. This gives you the ability to turn off water to the Blumat system without impacting other hose uses. Leave the valve for the Blumat line closed until you’re ready to test.
- Wrap Teflon tape clockwise on the spigot threads (3–4 wraps).
- Hand-thread the backflow preventer onto the spigot.
- Tighten with pliers just until snug.
- Attach the Y-splitter to the backflow preventer in the same way.
- Close the Blumat-side valve and open the other valve (if connected to a hose).
Warning: If you skip the backflow preventer, contaminated water could flow back into your home’s drinking water. This is illegal in many areas and a serious health risk.
Step 2: Install the Pressure Reducer onto the Y-Splitter
Now attach the pressure reducer to the open port of the Y-splitter. Most Blumat-compatible reducers have 3/4″ female garden hose threads on the inlet and a barbed outlet for 8mm or 12mm tubing. Use Teflon tape on the male threads of the Y-splitter before threading the reducer.
Blumat systems operate at very low pressure—typically 0.5 bar (about 7 psi). A standard spigot delivers 40–60 psi, which would blow out the drippers. The reducer is the most critical component for reliable operation.
- Confirm pressure reducer is rated for 0.5–1.0 bar.
- Wrap Teflon tape on the Y-splitter outlet.
- Screw the pressure reducer on by hand, then snug with a wrench.
- Do not use any sealant or pipe dope on threads—Teflon tape is enough.
| Pressure Reducer Type | Output | Best for Blumat Tropf? |
|---|---|---|
| Blumat brand reducer | 0.5 bar | Yes – designed specifically |
| Generic 1.0 bar drip reducer | 1.0 bar | Yes – works with most kits |
| Standard hose timer with regulator | Variable | Only if low-flow drip rated |
If your pressure reducer has a built-in filter, clean it monthly. Debris from a regular spigot can clog the small orifices in Blumat drippers.
Step 3: Connect the 8mm Distribution Tubing to the Pressure Reducer
Push the end of your Blumat distribution tubing (usually 8mm OD) firmly onto the barb of the pressure reducer. If the fit feels tight, dip the tubing end in hot water for 10 seconds to soften it. Slide it on until it covers the entire barb (about 1–1.5 cm).
Use a hose clamp or a locking ring if your reducer provides one. Blumat standard barb fittings usually hold without clamps at low pressure, but a clamp adds security if the tubing will move or be tugged.
- Cut the tubing end square with a sharp scissor or tubing cutter.
- Heat the tubing end in hot water (not boiling) if needed.
- Push onto the barb with a twisting motion.
- Tug gently to confirm it does not slip off.
- If using a clamp, position it over the barb and tighten with a screwdriver.
Tip: Run the distribution tubing along a planned path before cutting it. Leave extra length for adjustments—you can always trim later, but you cannot add back.
Step 4: Install the Blumat T-Joins and Drip Lines
Now that the main line is connected, add T-joins wherever you need a dripper. Blumat Tropf uses barbed T-connectors that fit into the 8mm tubing. Plan your layout so each plant has its own dripper within 6–8 feet of the main line.
Insert each dripper (the carrot-shaped sensor) into the soil near the plant’s root zone. The dripper end should be buried about 2–3 inches deep, with the sensor portion above ground. Connect the 4mm supply tube from the T-join to the dripper’s inlet.
- Space T-joins every 12–24 inches, depending on plant density.
- Use 4mm barb connectors to attach supply tubes to drippers.
- Position drippers at a slight angle (45°) for best water distribution.
- Ensure all T-joins are pushed fully onto the tubing to prevent leaks.
Step 5: Flush the System and Test for Leaks
Before letting the system run unsupervised, you must flush out any debris that entered during assembly. Open the Y-splitter valve fully for 30–60 seconds, letting water flow through all drippers. This dislodges plastic shavings or dirt from the tubing.
After flushing, close the main valve and inspect every connection: spigot, backflow preventer, Y-splitter, pressure reducer, and each T-join. Tighten any threaded connections that weep. Drippers that do not leak at the tubing joint are fine; small drips at the barb are normal during the first 5 minutes.
- Open the valve halfway first to avoid water hammer.
- Let water run for 30 seconds with the dripper ends open.
- Turn off water and check all threaded points with a dry paper towel.
- Re-tighten any loose fittings (a quarter-turn each).
- Open fully again and confirm steady drip flow (1–2 drips per second).
Warning: Do not leave the system connected at full spigot pressure without a pressure reducer. Even a few seconds at 60 psi can permanently damage the Blumat Tropf drippers.
Common Mistakes When Hooking Blumat Tropf to a Spigot
Even experienced gardeners make errors that cause leaks or uneven watering. Here are the most frequent issues, along with how to avoid them.
- Using a hose timer without a pressure reducer – Timers designed for sprinklers often pass full pressure. Add a separate reducer before the timer.
- Skipping the backflow preventer – This violates plumbing codes in most regions and risks contamination.
- Overtightening threaded connections – Brass threads can crack. Tighten by hand plus a quarter-turn only.
- Cutting tubing at an angle – An angled cut leaves a gap around the barb, causing leaks. Use a sharp cutter for a square cut.
- Placing drippers too close to the stem – Roots near the soil surface may rot. Keep drippers 4–6 inches from the plant base.
| Mistake | Symptom | Fix |
|---|---|---|
| No pressure reducer | Drippers spray or burst | Install 0.5 bar reducer immediately |
| Tubing not fully on barb | Water leaks at connector | Push tubing further onto barb |
| Dripper placed too deep | Soil stays dry on surface | Adjust dripper to 2–3 inches deep |
If you notice uneven dripping (some drippers faster than others), your pressure reducer may be clogged or the main line has an air bubble. Flush the system again and check the filter screen.
Additional Tips for a Reliable Spigot Connection
To ensure your Blumat Tropf system runs smoothly for years, consider these best practices. They address the most common concerns among users.
- Use a hose bib cover – Insulate outdoor spigots in freezing weather to prevent damage to the backflow preventer.
- Add a filter between the spigot and pressure reducer – A 150-mesh inline filter catches sediment that can bypass the reducer’s built-in screen.
- Label your Y-splitter valves – A small tag reading “Blumat” prevents accidental shutoff by someone using the other hose.
- Test the system every two weeks – Look for leaks, clogged drippers, and even flow rates. Adjust dripper adjustments as plants grow.
- Store the pressure reducer indoors during winter – Freezing water can crack the diaphragm and ruin the regulator.
Tip: If you plan to connect multiple Blumat Tropf systems to one spigot, use a manifold with individual shut-off valves. This lets you control different zones without disconnecting anything.

Frequently Asked Questions
Can I connect Blumat Tropf directly to a garden hose?
Yes, but you must use a pressure reducer and a backflow preventer. A standard garden hose delivers full spigot pressure, which is too high. The same adapter steps apply: attach the backflow preventer, then the Y-splitter, then the pressure reducer.
Do I need a special adapter for a regular spigot?
You need a 3/4″ female garden hose to 8mm barb adapter. Many Blumat kits include one. If not, you can buy a universal drip irrigation adapter at any home center for a few dollars.
How tight should I make the connections?
Hand-tighten all threaded connections, then use a wrench for another quarter-turn. Overtightening can crack brass or plastic fittings. Teflon tape does the sealing—force is not needed.
What if my spigot is corroded or has damaged threads?
Use a thread repair kit (available at hardware stores) to clean and recut the threads. Alternatively, install a replacement spigot head. A damaged thread will cause persistent leaks even with Teflon tape.
Can I leave the Blumat Tropf connected to the spigot all year?
Only if you live in a frost-free climate. In freezing conditions, disconnect the system completely, drain all water, and store the pressure reducer and drippers indoors. The spigot itself should be protected with a freeze-proof cover.
Final Thoughts
Hooking a Blumat Tropf watering system to a regular spigot is a simple DIY project that saves you hours of manual watering. The key steps are adding a backflow preventer, installing a pressure reducer, and making secure tubing connections. With the right parts and a few minutes of setup, you’ll have an automatic drip system that keeps your plants happy.
Now go turn that spigot into a smart watering station.