How To Seed Potatoes For Planting
Potatoes are one of the most rewarding crops for both beginner and experienced gardeners. Their resilience, productivity, and storied history make them a favorite in vegetable plots around the world. Yet, the secret to a bountiful harvest starts well before the potato vines break through the soil. It all begins with properly seeding potatoes, a step that can determine the difference between a healthy crop and a disappointing yield.
Seeding potatoes isn’t simply a matter of dropping a few tubers in the ground. It involves selecting the right seed potatoes, cutting and curing them properly, and understanding the nuances that influence their successful sprouting and growth. This process, refined through generations of gardeners and backed by agricultural science, is both an art and a science. Whether you are cultivating a backyard patch or operating on a larger scale, following best practices for seeding potatoes ensures vigorous plants and a rich, flavorful harvest.
Key Takeaways
- Seed potatoes should be certified disease-free and selected based on size, variety, and intended use.
- Proper cutting and curing of seed potatoes maximizes sprouting and minimizes disease risks.
- Soil temperature, moisture, and preparation are crucial factors for planting success.
- Pre-sprouting (chitting) can accelerate growth, especially in cooler climates.
- Different planting methods (trench, raised bed, container) have unique benefits and challenges.
- Data-driven choices in variety and seeding technique lead to higher yields and healthier plants.
Credit: www.cultivariable.com
Understanding Seed Potatoes
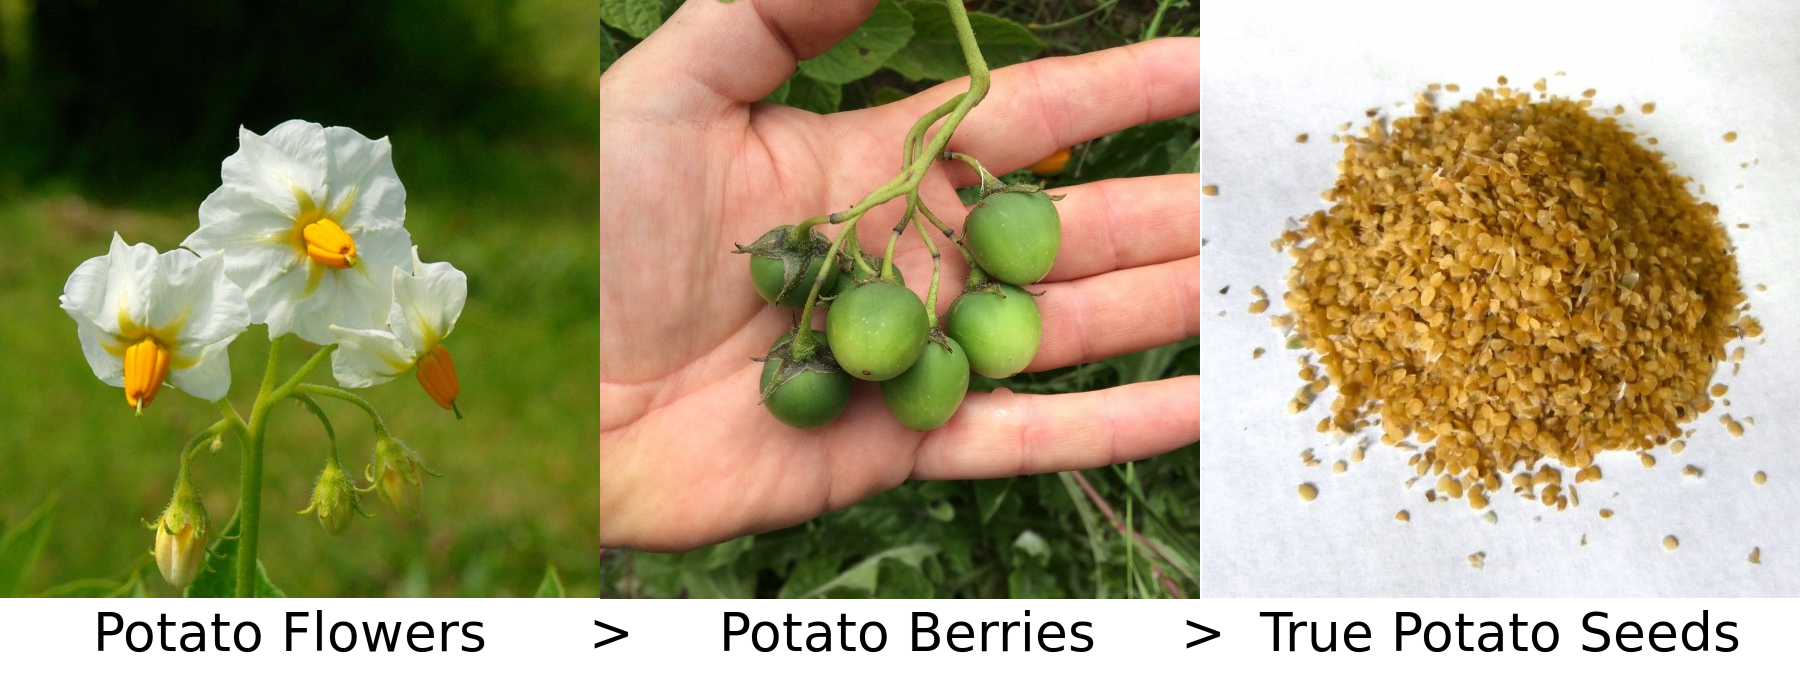
Potato seeding begins with choosing and preparing the right tubers. Unlike other crops grown from botanical seeds, potatoes are typically propagated from “seed potatoes”, small tubers or pieces of tuber that are clones of the parent plant.
What Are Seed Potatoes?
Seed potatoes are not true seeds, but rather tubers specifically grown for planting. These tubers are free from diseases and viruses, which is essential for a healthy crop. Certified seed potatoes are produced under strict conditions and regularly inspected, making them a safer choice than using store-bought potatoes, which may carry pathogens or have been treated to prevent sprouting.
Why Not Use Supermarket Potatoes?
Supermarket potatoes are often treated with sprout inhibitors and are not guaranteed to be disease-free. Planting these can introduce blight, scab, or viruses into your soil, potentially compromising your garden for years. According to the University of Maine Cooperative Extension, using certified seed potatoes can reduce the risk of disease transmission by over 70% compared to supermarket tubers.
Choosing The Right Variety
Selecting the right potato variety is crucial for your climate, soil, and culinary needs. Common types include:
- Russet (excellent for baking and frying)
- Yukon Gold (good for boiling and roasting)
- Red Pontiac (great for salads and boiling)
- Fingerling (unique shape, gourmet uses)
Consider maturity time (early, mid, late-season), yield, and disease resistance. Local extension offices or agricultural websites can provide regional recommendations.
Sizing Seed Potatoes For Planting
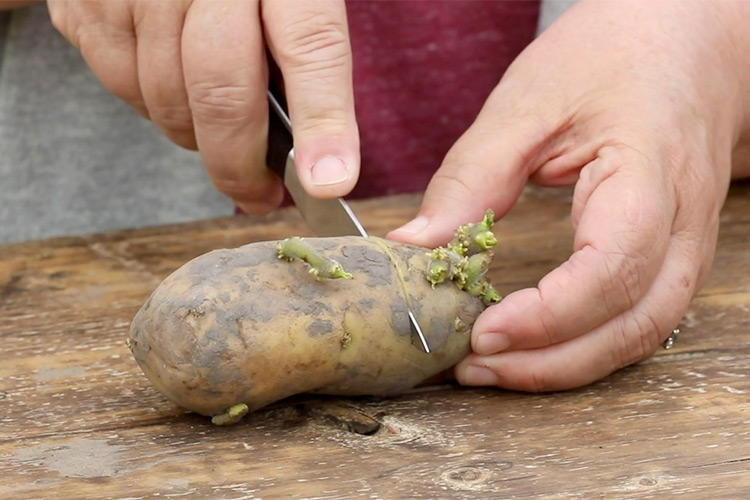
Seed potatoes come in various sizes. While small tubers (1.5, 2 ounces) can be planted whole, larger ones should be cut into pieces, each with at least one or two “eyes”, the growth nodes from which sprouts emerge.
| Seed Potato Size | Preparation | Typical Usage |
|---|---|---|
| Small (1, 2 oz) | Plant whole | Home gardens |
| Medium (2, 4 oz) | Cut into halves | Most commercial |
| Large (>4 oz) | Cut into several pieces | Large-scale operations |
Credit: www.gardengatemagazine.com
Preparing Seed Potatoes For Planting
Proper preparation of seed potatoes significantly impacts emergence, root development, and disease resistance.
Cutting Seed Potatoes
To maximize your crop, cut larger seed potatoes into pieces, each with at least one or two strong eyes. Use a clean, sharp knife to make clean cuts, reducing tissue damage and risk of infection.
- Aim for pieces weighing 1.5 to 2 ounces.
- Avoid cutting into mushy or rotten sections.
- Discard any pieces with signs of disease or rot.
Pro Tip: Sterilize your knife between cuts with a diluted bleach solution to prevent the spread of pathogens.
Curing Cut Seed Potatoes
After cutting, allow pieces to cure for 2, 3 days in a cool, well-ventilated area out of direct sunlight. This process forms a protective callus over the cut surfaces, reducing moisture loss and minimizing the risk of infection once planted.
Curing is particularly important in regions with damp soil or high disease pressure. According to the University of Minnesota Extension, curing can decrease the incidence of seed-piece rot by 30, 40%.
Pre-sprouting (chitting)
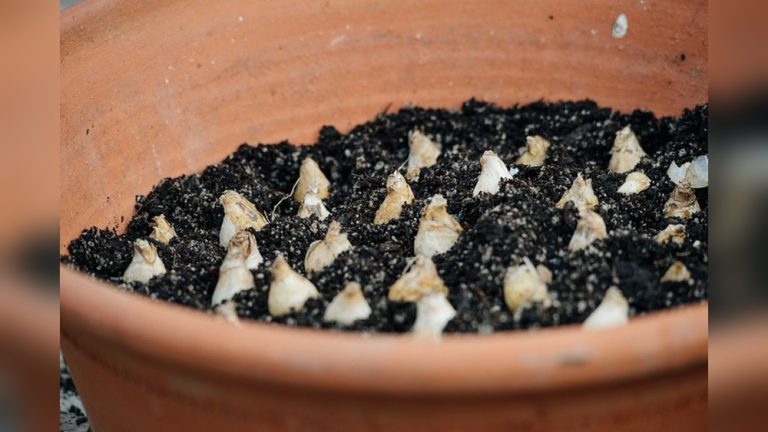
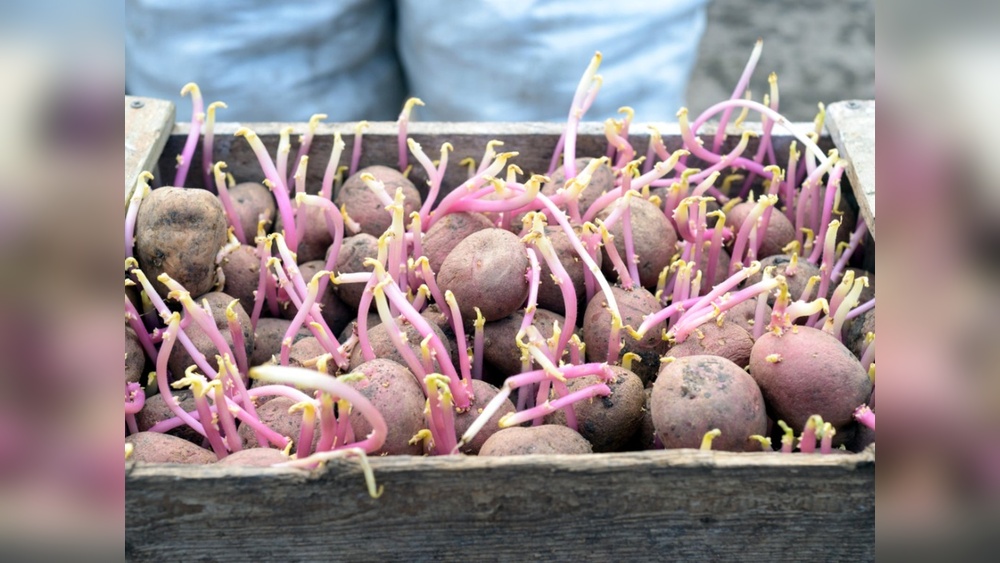
Chitting, or pre-sprouting, involves placing seed potatoes in a bright, cool area for 2, 4 weeks before planting . This encourages sturdy sprout growth and results in faster emergence after planting , especially useful in colder climates with short growing seasons.
- Place tubers in a single layer, eyes facing up.
- Keep at 50, 60°F in indirect light.
- Sprouts should be 0.5, 1 inch long at planting.
Chitting is optional but highly recommended for early varieties and regions with a late spring.
Disease Prevention And Handling
Handle seed potatoes gently to avoid bruising. If you notice any black, slimy, or foul-smelling spots, discard those pieces. For additional protection, some growers dust cut surfaces with sulfur powder to inhibit fungal pathogens, though this is less common in small home gardens.

Credit: www.thespruce.com
Soil Preparation And Planting Conditions
The success of your potato crop depends not just on the seed pieces, but also on soil health and planting environment.
Soil Type And Preparation
Potatoes prefer loose, well-drained, sandy loam soil with plenty of organic matter. Heavy clay soils can restrict tuber development and increase the risk of disease. Prepare your planting area by:
- Removing weeds and debris.
- Working in compost or well-rotted manure to a depth of 8, 10 inches.
- Avoiding fresh manure, which can cause scab.
Ideal soil pH is 5.0, 5.5; higher pH increases risk of common scab. Test your soil and amend as needed.
Soil Temperature And Moisture
Potatoes sprout best when soil temperatures are 45, 55°F. Planting in cold, waterlogged soil increases risk of rot, while hot soil can inhibit sprouting.
- Wait until danger of frost has passed.
- Soil should be moist but not soggy.
- Use a soil thermometer to check temperature at planting depth.
Fertilization And Nutrient Needs
Potatoes are heavy feeders and benefit from balanced fertilization. Incorporate a 5-10-10 (N-P-K) fertilizer at planting, following label rates. Excess nitrogen can lead to lush vines but fewer tubers, so avoid over-fertilizing.
| Nutrient | Role in Growth | Deficiency Symptoms |
|---|---|---|
| Nitrogen (N) | Leaf/vine growth | Pale, stunted plants |
| Phosphorus (P) | Root/tuber development | Poor tuber set |
| Potassium (K) | Disease resistance, tuber quality | Leaf spotting, weak plants |
Crop Rotation And Disease Suppression
Never plant potatoes in the same spot two years in a row. Rotating with non-solanaceous crops (not tomatoes, peppers, eggplant) breaks disease cycles and improves soil health. A 3-year rotation is ideal for disease suppression.
Seeding And Planting Methods
How you plant your potatoes can influence yield, ease of harvest, and disease management. Several methods are commonly used, each with pros and cons.
Trench Planting
This traditional method involves digging a trench 4, 6 inches deep.
- Place seed pieces 12 inches apart (rows 24, 36 inches apart).
- Cover with 2, 3 inches of soil, adding more as plants grow (“hilling”).
- Hilling protects developing tubers from sunlight and increases yield.
Trench planting works well in most garden soils and is easy to scale.
Raised Bed And Container Planting
Raised beds and containers provide excellent drainage and are ideal for small spaces or heavy soils.
- Fill beds or containers with loose, fertile soil mix.
- Plant seed pieces 8, 10 inches apart.
- Hill up with additional soil or mulch as plants grow.
This method allows for easy harvesting and soil control, reducing the risk of soil-borne diseases.
No-dig/straw Mulch Method
Some gardeners have success with the no-dig method, placing seed potatoes on the soil surface and covering with straw or mulch.
- Add more mulch as plants grow.
- Tubers form under the mulch, making harvest easy and minimizing soil disturbance.
This method can reduce weed pressure and is suitable for gardeners with physical limitations.
Spacing And Depth Considerations
Proper spacing ensures each plant has enough room to develop a full crop of tubers.
- Shallow planting (2, 4 inches) in heavy soils to prevent rot.
- Deeper planting (4, 6 inches) in sandy soils to reduce water loss.
Denser planting increases yield per square foot but may yield smaller tubers.
Real-world Example: Raised Bed Success
The raised bed method using cured, chitted seed potatoes often produces plants that emerge a full week earlier than those in a traditional trench. The improved drainage and looser soil resulted in a higher proportion of marketable, uniform tubers, particularly in a wet spring.
Managing Sprouting And Early Growth
The critical period after planting sets the stage for strong, healthy plants. Managing temperature, moisture, and hilling is essential.
Monitoring Sprout Emergence
Potato sprouts typically appear 2, 4 weeks after planting, depending on soil temperature and variety. If conditions are cool, emergence may be delayed.
Pro Tip: Mark your rows at planting to avoid disturbing emerging shoots during weeding or cultivation.
Hilling And Mulching
As vines reach 6, 8 inches, gently mound soil or mulch around the base of each plant. This:
- Prevents tuber exposure to sunlight (which causes greening and toxicity)
- Supports root development
- Suppresses weeds
Repeat hilling every 2, 3 weeks until soil is 8, 10 inches above the original seed piece.
Irrigation Management
Consistent moisture is crucial, especially during tuber formation (weeks 5, 10 after planting). Too little water reduces yield; too much increases disease.
- Water deeply, providing 1, 1.5 inches per week (including rainfall).
- Avoid wetting foliage to reduce risk of blight.
Early Pest And Disease Monitoring
Check plants regularly for signs of:
- Colorado potato beetle
- Aphids
- Early/late blight lesions
Early intervention can prevent widespread problems. Use integrated pest management (IPM) strategies and consult local extension guidelines for control options.
Case Study: Chitting For Early Harvest
In a cool climate trial, potatoes that were pre-sprouted (chitted) yielded 15% more marketable tubers than those planted without chitting (source: University of Minnesota Extension). The pre-sprouted potatoes also matured 10 days earlier, reducing exposure to late blight.
Troubleshooting Common Seeding Problems
Even with the best planning, issues can arise. Recognizing and addressing problems early can save your crop.
Poor Sprouting Or Rot
If seed potatoes fail to sprout or rot in the ground:
- Check for overly wet or cold soil.
- Ensure seed pieces were cured before planting.
- Avoid planting in areas with poor drainage.
Weak Or Spindly Growth
This may result from:
- Planting too shallow or too deep.
- Seed pieces with too few eyes or poor vigor.
- Excessive nitrogen fertilizer.
Disease Outbreaks
Common diseases include:
- Blackleg (soft rot at base of stem)
- Scab (rough, corky patches on tubers)
- Late blight (dark leaf lesions and tuber rot)
Rotate crops, use certified seed, and avoid overhead irrigation to reduce risk.
Pest Infestations
Early detection is key. Hand-pick beetles, use row covers, and encourage beneficial insects. For severe infestations, organic or conventional pesticides may be warranted, always follow local guidelines.
Example: Diagnosing Patchy Emergence
A gardener in New York noticed patchy emergence in a section of their field. Soil testing revealed a pH of 6. 5 (above optimal), leading to increased scab. Adjusting pH with elemental sulfur and using scab-resistant varieties restored good emergence in subsequent years.
Maximizing Yield And Quality
Seeding potatoes well is only the first step. To achieve maximum yield and quality, ongoing management is crucial.
Timing Your Planting
Planting at the optimal time for your region ensures the best results. Early varieties can be planted as soon as soil warms, while late varieties provide storage potatoes for winter use.
- In most of the US, plant 2, 4 weeks before the last frost date.
- In warmer climates, a second fall crop is possible.
Matching Variety To Market Or Table
Choose varieties suited to your market or kitchen. For example, fingerling potatoes command premium prices at farmers’ markets, while russets are staples for home fries.
| Variety | Best Use | Maturity (Days) | Yield Potential |
|---|---|---|---|
| Yukon Gold | Boiling, roasting | 70, 90 | High |
| Russet Burbank | Baking, frying | 90, 120 | Very high |
| Red Norland | Salads | 70, 90 | Moderate |
| French Fingerling | Gourmet | 90, 110 | Low |
Harvest Timing And Methods
Harvest “new potatoes” as soon as plants flower. For storage, wait until vines die back. Use a fork or hands to gently lift tubers, minimizing bruising.
- Cure harvested potatoes in a cool, dark place for 1, 2 weeks before storage.
- Store at 40, 50°F with high humidity to prolong shelf life.
Sustainable Practices
Incorporate sustainable practices:
- Mulch to conserve moisture and suppress weeds.
- Rotate with cover crops to build soil health.
- Use organic amendments when possible.
These practices improve yield, quality, and long-term soil fertility.
Case Study: High-yield, Low-input Gardening
A home gardener in Oregon switched from chemical fertilizers to compost and cover cropping. Potato yields remained steady, but tuber quality improved, with fewer blemishes and better storage. Over three seasons, soil organic matter increased, reducing irrigation needs.
Frequently Asked Questions
How Can I Tell If My Seed Potatoes Are Healthy?
Healthy seed potatoes are firm, free of soft spots or mold, and have visible eyes. Certified seed potatoes come with documentation of disease testing. Avoid any tubers with black, sunken, or foul-smelling areas, as these indicate rot or infection. If unsure, consult your local extension office for identification help.
Can I Plant Potatoes From Last Year’s Garden?
While you can technically plant potatoes saved from the previous year, this carries risk. Over time, viruses and diseases can build up in home-saved tubers, potentially reducing yield and introducing pathogens to your soil. If you want to save potatoes, select only the healthiest tubers and rotate planting locations. However, certified seed potatoes are safer for consistent results.
What Should I Do With Leftover Seed Potatoes?
Unused seed potatoes can be stored in a cool, dark place (40, 50°F) with moderate humidity for several weeks. Check regularly for signs of sprouting or rot. If you have extras, consider sharing with neighbors, using them for a fall crop (where climate allows), or composting if they show disease.
Is It Necessary To Chit (pre-sprout) Seed Potatoes?
Chitting is not strictly necessary, but it can speed up emergence and result in earlier, larger harvests, particularly in regions with cool springs or short growing seasons. If you’re planting late or in warm soil, chitting may be less critical. Some growers skip this step entirely, especially for large plantings.
Why Do My Potatoes Turn Green, And Are They Safe To Eat?
Potatoes turn green when exposed to sunlight, which triggers the production of solanine, a bitter and potentially toxic compound. To prevent greening, always hill soil or mulch around plants as they grow. Green potatoes should be discarded or have green portions thoroughly trimmed before use. Eating large amounts of green potatoes can cause digestive distress.
Growing potatoes successfully starts with attention to detail in seeding. By selecting certified seed potatoes, preparing them carefully, and providing the right soil and growing conditions, you lay the foundation for a productive and satisfying harvest. Whether you’re a home gardener or a small-scale farmer, these best practices will help you avoid common pitfalls and enjoy the fruits of your labor. For more resources, visit your local extension office or consult reputable guides such as the Royal Horticultural Society. Happy planting! For more on this, see our guide on Seeds & Bulbs .