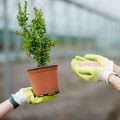
So, you’re looking at those tiny Hemerocallis lily seeds and dreaming of miniature bonsai? It’s a really cool idea! But getting those little guys to sprout can feel like a puzzle.
Don’t worry, many folks find this part a bit tricky. We’ll walk through it together, step-by-step.
Understanding how to germinate Hemerocallis lily seeds is key to growing them for bonsai. This guide breaks down the process with simple steps. You’ll learn about timing, seed preparation, and the right conditions to help your tiny lily seeds sprout. We focus on getting you started easily.
What is Hemerocallis Lily Seed Germination?
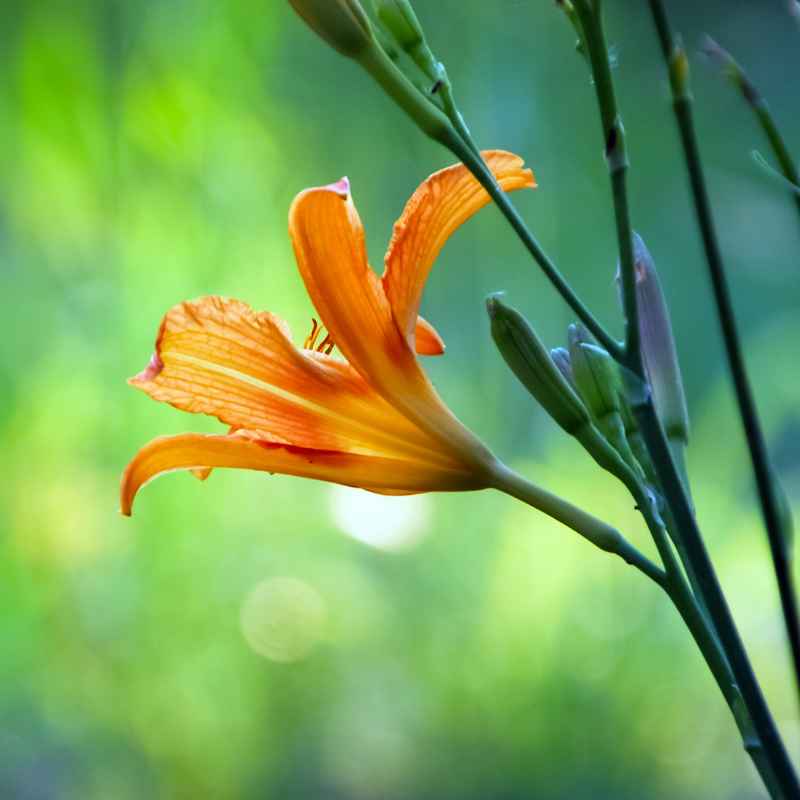
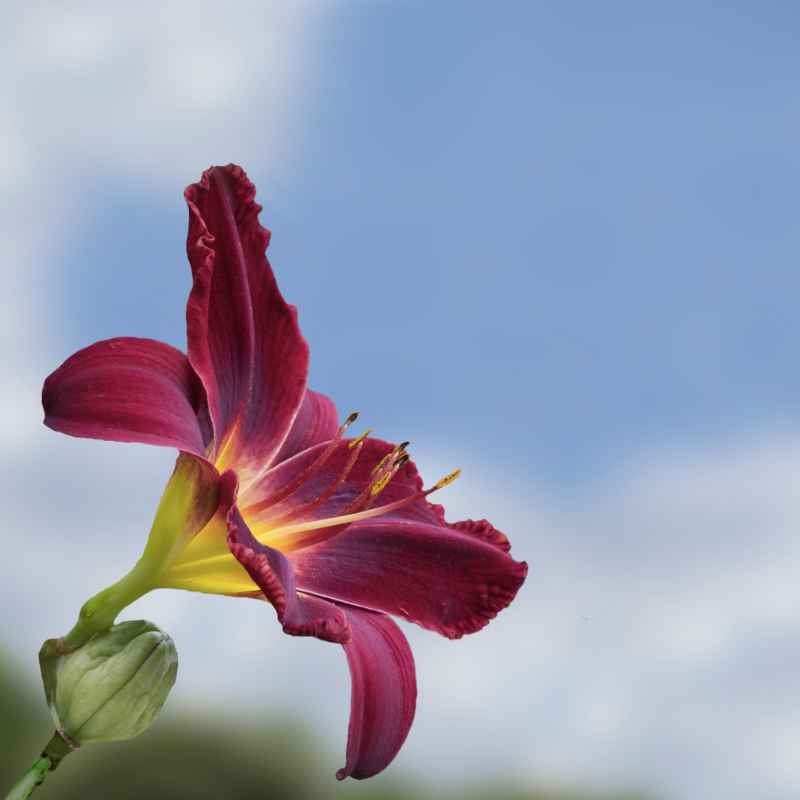
Hemerocallis, often called daylilies, are popular garden flowers. They come in many colors. But did you know you can grow them from seed?
Germination is the first step. It’s when a seed starts to grow. A small root and then a shoot appear.
This happens under the right conditions.
For bonsai, growing from seed is a special journey. It lets you shape the plant from the very start. You can guide its growth.
This is different from buying a mature plant. Growing from seed takes patience. It also requires a bit of know-how.
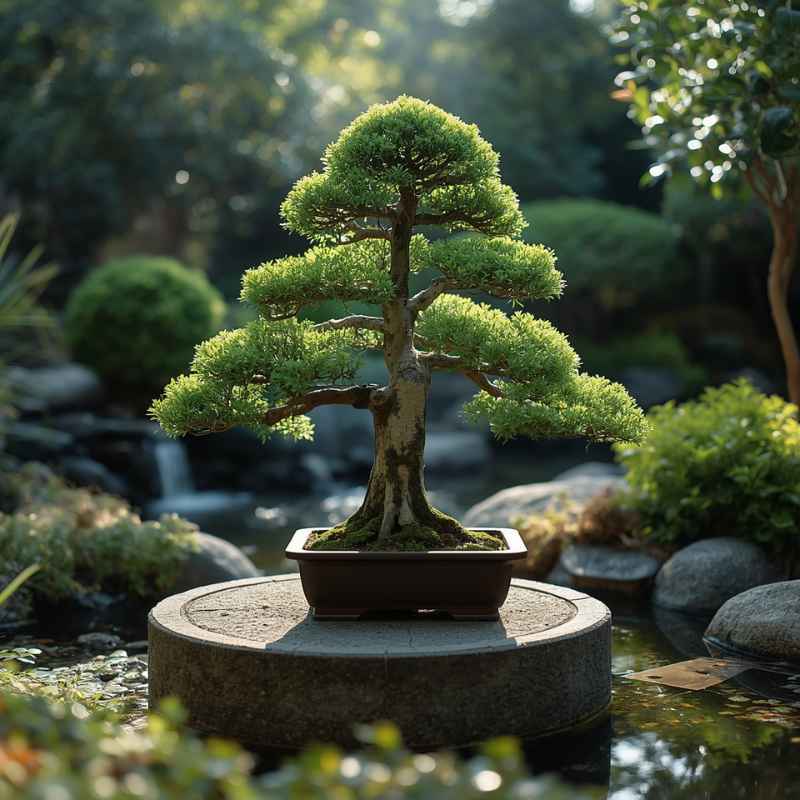
Why is this important for bonsai? Daylilies can grow quite large. But from seed, you can aim for smaller, more controlled forms.
You get to pick the traits you like. This means you can create a truly unique miniature tree-like plant.
My First Daylily Seed Adventure
I remember trying to grow Hemerocallis from seed for the first time. I had just gotten a packet of seeds from a special cross. I was so excited!
I thought I’d just toss them in some dirt and watch them grow. Oh, how wrong I was.
I planted them in a pot in my sunroom. I watered them. And I waited.
And waited. Days turned into weeks. Nothing happened.
I started to get a little worried. Were the seeds old? Was my soil bad?
I felt a bit defeated. It was like talking to a silent wall.
Then, I did some research. I learned that daylily seeds can be a bit stubborn. They often need a little help.
They need specific conditions to wake up. This was a big lesson for me. It taught me that even simple things like seeds have their own needs.
Understanding those needs is the secret.
Daylily Seed Needs: A Quick Look
Light: Most seeds don’t need light to sprout. They get energy from the seed itself.
Water: Seeds need moisture to soften their outer shell. This helps them sprout. But too much water can cause rot.
Temperature: Certain temperatures signal to the seed that it’s time to grow. Daylilies often like cooler spells first.
Oxygen: Seeds need air to breathe as they start to grow. Loose soil helps with this.
Getting Your Hemerocallis Seeds Ready
Before you even think about planting, the seeds themselves might need some prep. This helps them break dormancy. Dormancy is like a deep sleep for the seed.
We need to wake it up gently.
Some daylily seeds have a hard outer coat. This coat can block water from getting in. Water is needed for the sprout to grow.
So, we can help by scarifying them. Scarifying just means scratching the seed coat. You can use a bit of sandpaper.
Rub the seed gently. Just try to make a tiny nick in the coat. Be careful not to hurt the inside of the seed.
Another common method is stratification. This mimics nature. It gives the seeds a cold, damp period.
Think of winter. Most people do this in a refrigerator. Put your seeds in a moist paper towel or some damp peat moss.
Then, place them in a sealed bag. Put this bag in your fridge for about 4 to 8 weeks.
This cold treatment tells the seed that winter has passed. It’s time to think about spring and growing. Make sure the paper towel or moss stays damp.
But it shouldn’t be soaking wet. You don’t want the seeds to mold.
Seed Prep Step-by-Step
Method 1: Scarification
- Get fine-grit sandpaper.
- Gently rub one side of the seed.
- Aim for a small nick, not damage.
Method 2: Stratification
- Moisten a paper towel.
- Place seeds on the damp towel.
- Fold the towel over the seeds.
- Put in a plastic bag and seal.
- Refrigerate for 4-8 weeks.
- Check moisture every week.
Choosing the Right Soil and Pot
For tiny seeds, the soil mix is important. You want something that drains well. This stops the seeds from getting too wet and rotting.
A good mix is often half potting soil and half perlite or vermiculite.
Perlite and vermiculite are light materials. They help keep the soil airy. They also help water drain away fast.
You can find these at garden stores. Avoid heavy garden soil. It can get too compacted for delicate sprouts.
For pots, small ones work best. Seed trays are great. Or small plastic pots with drainage holes.
Drainage holes are a must! They let extra water escape. This is super important for preventing root rot.
Make sure your pots and trays are clean. Wash them well. This removes any old soil or germs.
This helps give your new seeds a clean start.
Planting Your Hemerocallis Seeds
Once your seeds are prepped, it’s time to plant. Fill your clean pots or trays with your soil mix. Don’t pack it down too tight.
Leave a little space at the top.
You can plant seeds individually in small pots. Or plant several in a seed tray. Space them out a bit.
This gives them room to grow. About an inch apart is usually good.
Now, gently press each seed onto the soil surface. You don’t want to push them in. Then, lightly cover them with more soil.
About a quarter-inch of soil is enough. Too deep and they may not sprout.
After covering, water very gently. A spray bottle is ideal. You want to moisten the soil.
But you don’t want to wash the seeds away. Mist the surface until it is damp. It should not be soggy.
Planting Quick Tips
Soil: Well-draining mix. (e.g., 50% potting soil, 50% perlite)
Pots: Clean, with drainage holes. Small size is fine.
Spacing: About 1 inch apart.
Depth: Cover seeds with about 1/4 inch of soil.
Watering: Mist gently with a spray bottle.
The Waiting Game: Germination Conditions
This is where patience really pays off. Daylily seeds can take a while to sprout. Some might appear in a week or two.
Others might take a month or even longer. Don’t get discouraged if you don’t see anything right away.
Keep the soil consistently moist. Not wet, but not dry either. If the surface starts to look pale, mist it again.
Covering the pots or trays can help. You can use clear plastic wrap or a plastic dome. This traps humidity.
It keeps the soil from drying out too fast.
Place the pots in a warm spot. Most seeds like temperatures between 70-75°F (21-24°C). A warm windowsill or a heat mat can work well.
Avoid direct, hot sunlight at this stage. It can cook the tiny seeds.
Once you see the first sprouts appear, remove the plastic cover. This is important. It lets fresh air reach the seedlings.
It also stops them from getting too damp. This is when they need more air circulation.
Ideal Sprouting Environment
Temperature: 70-75°F (21-24°C)
Humidity: High, but with ventilation once sprouts appear.
Light: Indirect light is best while sprouting.
Moisture: Consistently damp soil surface.
Time: Expect sprouts from 1 week to 2 months.
Caring for Your New Seedlings
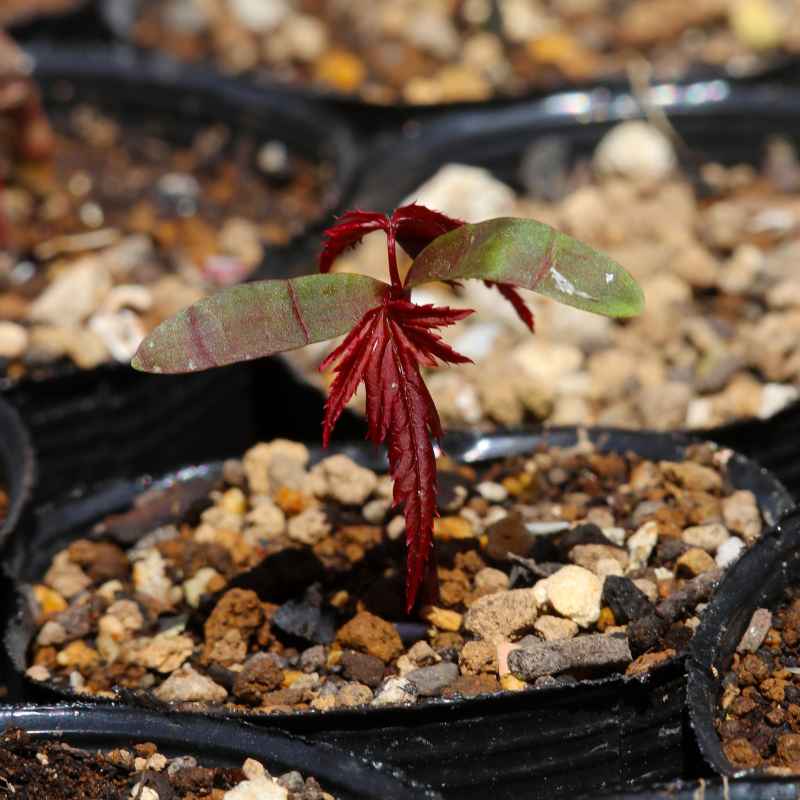
When those first tiny green shoots push through the soil, it’s a victory! But the work isn’t done. These little seedlings are delicate.
They need gentle care.
First, light is now important. They need bright, indirect light. A south-facing window is often good.
If you don’t have enough natural light, consider a grow light. Keep it a few inches above the seedlings. Run it for about 12-16 hours a day.
Watering still needs to be careful. Water from the bottom if you can. Place the pots in a tray of water.
Let the soil soak up water from the drainage holes. This keeps the delicate leaves dry. It also avoids disturbing the roots.
As the seedlings grow, they’ll develop their first true leaves. These look different from the first seed leaves. This is a sign they are getting stronger.
You might start to see them grow more. They may start to look more like mini daylilies.
For bonsai, you want to encourage a strong root system. You also want a sturdy stem. Good light and consistent, but not excessive, watering are key here.
Seedling Care Essentials
Light: Bright, indirect light. Use grow lights if needed.
Watering: Water from the bottom. Keep soil moist but not soggy.
Airflow: Ensure good air circulation to prevent fungal issues.
Growth: Wait for true leaves to appear before handling too much.
Transplanting for Bonsai Training
Your seedlings will eventually outgrow their seed trays or small pots. This is a good sign! It means they are ready for the next step.
For bonsai, this is usually their first training pot.
Choose a pot that is a bit larger than their current one. It doesn’t need to be a fancy bonsai pot yet. A small nursery pot or a shallow, wider pot will do.
Again, drainage is vital.
Gently remove the seedling from its current pot. Try to keep as much of the soil around its roots as possible. Be very careful with the roots.
They are fragile when young.
Place the seedling in its new pot. Fill in around the roots with a good bonsai soil mix. A common mix is akadama, lava rock, and pumice.
This mix provides excellent drainage and aeration. You can often find pre-mixed bonsai soil.
Water thoroughly after transplanting. This helps settle the soil. It also reduces transplant shock.
Keep the newly potted seedling in a slightly shaded spot for a few days. This lets it recover before returning to brighter light.
This is where the real bonsai journey begins. You can start to think about pruning roots. You can also begin to shape the trunk.
All this comes after the seedling is well-established.
Transplanting Stages
When: Seedlings have several true leaves and are filling their pot.
Pot Size: Slightly larger than the current one.
Soil: Use a well-draining bonsai mix.
Root Care: Handle gently to avoid damage.
Aftercare: Water well and provide shade for a few days.
Potential Issues and How to Handle Them
Even with the best care, things can sometimes go wrong. It’s good to know what to look for. This helps you fix problems quickly.
Damping off: This is a common problem for seedlings. It’s a fungal disease. It makes the stem of the seedling rot at the soil line.
It often happens when it’s too wet and there’s not enough airflow. Good drainage and ventilation are the best preventatives. If you see it, remove affected seedlings immediately.
Try to improve airflow and reduce watering.
Lack of Germination: If no seeds sprout, it could be a few things. The seeds might not have been viable. They might not have had enough stratification.
Or the conditions weren’t right. Sometimes, just trying again with new seeds and a different approach is the answer.
Slow Growth: Some daylily varieties are naturally slower growers. Also, if conditions aren’t quite right (light, temperature, water), growth will be slow. Ensure you are meeting their needs.
But remember, bonsai is a long game. Slow growth can sometimes be a good thing for developing finer branching.
Pests: Tiny seedlings can be attractive to pests like fungus gnats. These little flies like moist soil. Their larvae can eat roots.
Keeping the soil surface a bit drier between waterings can help. Sticky traps can catch the adult flies.
Common Seedling Problems
Damping Off: Rotting stem at soil line. Cause: Too wet, poor airflow. Fix: Improve drainage & ventilation, remove sick plants.
No Germination: Seeds won’t sprout. Cause: Non-viable seeds, poor stratification, wrong conditions. Fix: Try again with new seeds, adjust methods.
Slow Growth: Seedlings grow very slowly. Cause: Natural habit, poor conditions. Fix: Optimize light, water, and temperature.
Pests: Fungus gnats, etc. Cause: Moist soil, poor airflow. Fix: Let soil dry slightly, use traps.
When Is It a Good Time to Start?
The best time to start germinating your Hemerocallis seeds depends on your climate. But generally, starting them indoors in late winter or early spring is ideal.
This gives them time to grow strong. It also means they’ll be ready to go outside after the last frost. If you stratify your seeds in the fridge, you can start this process in January or February.
Then plant them in March or April.
This timing allows the seedlings to grow throughout the spring and summer. They will build up strength. This is crucial for them to survive their first winter.
It also gives you plenty of time to start early bonsai training.
If you live in a very warm climate, you might have more flexibility. But starting them indoors still offers a controlled environment. It protects them from harsh weather and pests.
What This Means for Your Bonsai Dreams
Growing Hemerocallis lilies from seed for bonsai is a rewarding path. It’s not the fastest way to get a bonsai. But it offers unique advantages.
You have complete control from the start.
You can select seeds from parents with desirable traits. Maybe you want a specific flower color. Or perhaps you want a naturally smaller leaf structure.
Growing from seed lets you aim for that.
It also teaches you a lot about plant development. You see the whole life cycle. This deepens your connection to your plants.
It makes the final bonsai even more special.
Remember, each seed is unique. Even from the same parent plant, the offspring can vary. This is part of the excitement.
You might get a truly one-of-a-kind plant.
Quick Fixes and Tips for Success
Here are some final tips to help you along the way:
Use fresh seeds: Older seeds have lower germination rates. Buy from reputable sources if possible.
Sterilize tools: Clean pots, tools, and your hands. This prevents diseases.
Label everything: If you’re planting different varieties, label your pots clearly. Include the date planted.
Don’t overwater: This is the most common mistake. When in doubt, wait a little longer to water.
Be patient: Daylily seeds can be slow. Give them time. Some might surprise you.
Observe closely: Watch your seedlings daily. You’ll spot problems sooner.
Frequently Asked Questions
Can I grow Hemerocallis lilies from any seed?
Yes, you can grow most Hemerocallis (daylily) seeds from any cross-pollinated flower. However, if you save seeds from a hybrid variety, the resulting plants may not be true to the parent. They might have different colors or characteristics.
For bonsai, this variation can be interesting!
How long does it take for Hemerocallis seeds to sprout?
It varies a lot. Some seeds may sprout in as little as 1-2 weeks. Others can take 1-2 months.
Factors like temperature, moisture, and seed treatment play a big role. Patience is key with daylily seeds.
Do Hemerocallis seeds need cold stratification?
Many experts recommend cold stratification for Hemerocallis seeds. This process mimics winter conditions. It helps break seed dormancy.
Placing seeds in a moist medium in the refrigerator for 4-8 weeks is a common method. It significantly improves germination rates for many seeds.
What is the best soil mix for germinating Hemerocallis seeds?
A good soil mix for germination is well-draining. A common recipe is equal parts of potting soil and a material like perlite or vermiculite. This mix provides aeration and prevents the soil from becoming waterlogged, which can lead to rot.
How much light do Hemerocallis seedlings need?
After sprouting, Hemerocallis seedlings need bright, indirect light. A south-facing window is often ideal. If natural light is insufficient, use a grow light.
Keep the light a few inches above the seedlings and run it for 12-16 hours daily.
When can I transplant Hemerocallis seedlings into bonsai pots?
You should wait until the seedlings have developed several sets of true leaves and are growing well. This usually takes a few months. The seedling should be strong enough to handle being moved.
Always use a well-draining bonsai soil mix for transplanting.
Conclusion
Growing Hemerocallis lily seeds for bonsai is a wonderful project. It requires patience and attention. But by following these steps, you give your seeds the best chance.
You’ll learn so much along the way. Enjoy the journey of shaping your own miniature daylily!